One evening, I was pulling out of my driveway when I heard that sudden, sharp clicking sound every time I turned my steering wheel—like dice tumbling inside a tin can. At first, I brushed it off as a weird noise from my old car, but as days went by, the clicks grew louder, more persistent, and I knew I had a problem.
That was my lightbulb moment: the clicking during turns was a clear sign my CV axle was on its way out. It’s a scenario many car owners face but often ignore—a subtle warning that can spiral into a much bigger repair if left unchecked.
The Unmistakable Sign of a Failing CV Axle
When I first heard the click, I thought it was just a minor issue, something I could fix during the next oil change. But ignoring these noises is a risk. Your CV axle transmits power from the transmission to the wheels, allowing your vehicle to turn smoothly. When it starts failing, the sounds are usually your first warning, especially during tight turns or when accelerating.
So, how do you really know if that clicking isn’t normal? And should you dive into replacing it yourself or call in the pros? That’s what we’ll cover today—armed with real-world experience and practical tips to diagnose and fix the problem before it wrecks your day (or your wallet).
Is Replacing a CV Axle Actually Worth the Hype?
Early on, I made the mistake of ignoring the signs, thinking the noise was just a quirk. I wish I had recognized the warning signs sooner. Trust me, when your CV axle finally fails completely, you’ll be stranded or risking further damage to your suspension and drivetrain. The good news is, with a bit of know-how, you can often identify the problem early and decide whether a DIY fix or professional service is best. For more in-depth repair tips, check out my guide on [how to stop your brake pedal from pulsing without a full replacement](https://repairmycarpro.com/how-to-stop-your-brake-pedal-from-pulsing-without-a-full-replacement).
Stay with me as we explore the key signs, common mistakes, and step-by-step solutions for keeping those clicks from turning into costly repairs. Let’s get started!
.
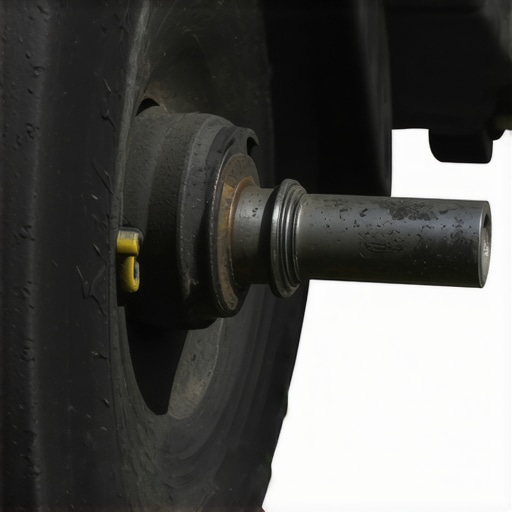
Conduct a Visual Inspection of the CV Axle
Begin by safely lifting your vehicle using a jack and secure it with jack stands. Remove the wheel on the side where you suspect the problem. Examine the CV axle for obvious signs of damage such as torn boots, grease leaks, or rust buildup. I once spotted a cracked boot on my friend’s car, which was causing the clicking noise. Replacing a cracked boot early can prevent dirt ingress and extend the axle’s lifespan.
Listen for Specific Noises During Maneuvers
With the vehicle on the ground, turn the steering wheel fully to one side and gently accelerate. A clicking sound during this test often indicates a failing CV joint. I remember a time when I noticed clicking only during tight turns at low speeds; it pointed me directly to the CV joint issue, saving me from costly repairs later.
Test the Axle for Play and Stiffness
Secure the vehicle and manually grasp the axle near the wheel hub. Attempt to move it back and forth; excessive play suggests internal wear or damage. A stiff or overly loose axle can cause vibrations and unsafe handling.
Perform a Road Test to Confirm Symptoms
Drive slowly and make tight turns in an open space. Listen for clicking or popping sounds and feel for vibrations. This real-world test helps verify the diagnosis. During my experience, a simple test drive revealed noise that was absent during static inspection, highlighting the importance of combining methods.
Decide Between DIY Replacement or Professional Service
If you’re comfortable with basic tools, replacing a CV axle yourself is feasible. Follow a step-by-step guide: remove the axle nut, disconnect the suspension components if necessary, slide out the damaged axle, and install the new one. For detailed procedures, check out this comprehensive guide on CV axle replacement. However, if you encounter stubborn parts or feel uncertain, it’s wiser to seek a professional. Remember, a proper fix ensures safety and longevity.
Gather the Right Tools and Parts
Ensure you have a good set of jack stands, a socket wrench, the correct size of axle nut socket, and replacement CV axle compatible with your vehicle. Using quality parts prevents frequent failures; cheap replacements often lead to quicker wear and noise. When I replaced my axle, I invested in a reputable brand, ensuring a durable fix and peace of mind.
Follow Proper Safety Protocols
Always work on a stable surface, wear safety goggles, and disconnect the battery if working near electronic components. Support the vehicle securely before jacking it up. Remember, safety is paramount—avoid shortcuts.
Confirm the Repair Effectiveness
After installation, perform a short test drive, listen for any noises, and double-check for tightness of all fasteners. If noises persist, re-inspect the installation or consider consulting a professional. Regularly review your vehicle’s maintenance schedule to prevent future issues and maintain optimal performance.
 Many car enthusiasts and even seasoned mechanics often fall into misconceptions about vehicle diagnostics and repair procedures, which can lead to costly mistakes. One common myth is that simply relying on OBD-II scanners guarantees an accurate diagnosis. While these tools are essential, they often miss subtle issues like vacuum leaks or electrical gremlins, which require a deeper understanding of your vehicle’s systems. In my experience, overdependence on generic scans can distract from the more nuanced, real-world checks necessary for proper diagnostics. Additionally, there’s a misconception that regular oil changes can endlessly prolong engine life; however, applying the wrong type of oil or ignoring manufacturer-recommended oil change intervals—such as the 4,000-mile rule for synthetic oils—can accelerate engine wear and cause leaks. An often-overlooked mistake involves brake servicing: replacing pads without inspecting calipers or brake lines thoroughly might seem sufficient, but hidden issues like caliper sticking or fluid contamination can persist unnoticed, leading to hissing noises or uneven brake wear.
Consider the advanced question: How does the complexity of electronic control systems in modern vehicles demand a different diagnostic approach than traditional mechanical checks? Experts argue that with the increasing integration of sensors and modules—especially in hybrid and electric vehicles—diagnostic procedures must evolve, incorporating techniques like active testing and software calibration. According to a study by automotive tech analysis firm SAE International, diagnostic accuracy improves significantly when technicians combine scan data with experience in electrical troubleshooting, rather than solely relying on code readings.
So, what’s the real trap here? It’s the misconception that modern vehicles are simpler because they use computers. In reality, their complexity demands a more sophisticated, holistic approach. Relying solely on quick scans or generic advice can leave you blind to underlying issues—potentially costing you more in the long run. To master these nuances, stay informed with comprehensive guides like this one on preventing carbon buildup and regularly review your vehicle’s maintenance schedule.
Have you ever fallen into this trap? Let me know in the comments.
Investing in the Right Equipment for Longevity
Maintaining a vehicle effectively over time requires more than just basic tools; it demands precision instruments designed for specific diagnostics and repairs. I personally rely on a high-quality OBD-II scanner that syncs effortlessly with 2026 systems. This tool not only reads generic engine codes but also dives deep into advanced module data, helping me identify issues like GDI carbon buildup or electrical problems early. Investing in a professional-grade scanner with bi-directional capabilities has saved me hours and money, especially when diagnosing intermittent sensor errors or complex ECU faults.
Alongside my scanner, I utilize a precision digital multimeter with automotive adaptors. Unlike standard multimeters, this model provides accurate readings on sensitive electronic modules without risking damage. For example, when troubleshooting electrical gremlins or checking sensor outputs, this device ensures I get real-time, reliable data that guides my repairs.
Tools That Make Repairs Safer and Faster
When tackling brake service or axle replacements, I turn to tools like impact drivers and torque wrenches. An impact driver helps me loosen stubborn bolts without stripping them, especially on rusted components. The torque wrench, set accurately per manufacturer specifications, guarantees I don’t under-tighten crucial fasteners—preventing future failures or safety issues. I always keep a torque wrench with reproductive accuracy nearby for critical tasks.
Another game-changer is a slip-joint plier set that allows quick gripping and pulling, particularly useful when dealing with worn CV boots or stubborn clips. My personal favorite is the chain nose plier which offers precision control, minimizing risk of damage to delicate components.
How do I maintain my diagnostic tools over the years?
Keeping your tools calibrated and clean is essential to ensure ongoing accuracy. For digital scanners, I regularly update their firmware via manufacturer software, which unlocks new features and bug fixes. Mechanical tools like torque wrenches benefit from recalibration by authorized centers, or simple calibration checks at home using certified torque testers. Proper storage—preferably in padded cases—prevents damage from dust and impacts, extending their lifespan and maintaining reliability.
Looking ahead, the trend points toward integrated, wireless diagnostics combining AI-driven analysis with real-time data. Such advancements will make troubleshooting faster and more accessible, even for DIY enthusiasts. To get practical tips on keeping your tools performing optimally, I recommend trying the simple calibration tip outlined in this detailed guide on brake-by-wire calibration.

Remember, well-maintained tools are the backbone of effective vehicle diagnostics and repair. Whether you’re tackling an oil change or diagnosing complex sensor issues, the right equipment guarantees safety, accuracy, and long-term savings. So, invest thoughtfully and keep your tools in top shape—that’s the secret to reliable vehicle maintenance that lasts.
The Hardest Lesson I Learned About Vehicle Diagnostics, Oil Change, Auto Repair, and Brake Service
One of the most profound realizations in my repair journey was how crucial attention to detail truly is. Early on, I over-relied on scan tools, believing they could catch every issue—but I soon discovered that many subtle problems like vacuum leaks or a torn CV boot required hands-on inspections and personal intuition. Mistakes like ignoring the importance of regular, manufacturer-recommended oil intervals often led to costly repairs or engine damage, especially with modern turbo and GDI engines. Additionally, I learned that quick fixes and superficial repairs might seem sufficient initially but often result in recurring issues, emphasizing the value of thorough diagnostics and quality parts.
My Toolbox for Lifelong Vehicle Knowledge
Over the years, I’ve come to trust tools that provide precision and depth. An advanced OBD-II scanner capable of syncing with 2026 systems is invaluable for catching nuanced electrical faults. A high-quality digital multimeter with automotive specific adaptors helps me troubleshoot sensors and circuits without guessing. For physical repairs, impact drivers and calibrated torque wrenches ensure fast, safe, and reliable work. These tools have saved me countless hours and headaches, proving that investing in reliable equipment is a smart move for any enthusiast or professional.
Take Action: Your Vehicle Deserves Your Care
Don’t let misconceptions about modern vehicle complexity discourage you from being hands-on. With the right knowledge, tools, and cautious approach, you can diagnose and fix issues like a pro—whether it’s a clicking CV axle or a mysterious check engine light. The thrill of understanding your car at a deeper level is empowering, and the rewards extend beyond savings, building confidence and a sense of accomplishment. Remember, every repair is a step toward mastery, and your vehicle will thank you for it.
What’s the biggest challenge you’ve faced when diagnosing or repairing your vehicle? Share your story below—I’d love to hear about your experiences!