It was one of those mornings when I popped the hood to do a routine oil change, only to be greeted by a strange smell—like burning plastic mixed with engine fumes. My heart sank. I knew I was staring down a head gasket problem, but I didn’t want to spend hundreds on a mechanic just yet. That lightbulb moment hit: could a simple balloon really help diagnose a blown head gasket?
Why a Balloon Can Be Your First Line of Defense Against Head Gasket Issues
Many car owners overlook early signs of engine trouble, especially something as seemingly trivial as a hissing sound or a bit of coolant loss. But ignoring these signals can lead to costly repairs later. The balloon test offers a straightforward way to check for exhaust gases leaking into the cooling system, which is often caused by a compromised head gasket. It’s a method I stumbled upon after a bit of online tinkering, and let me tell you—it’s a game changer for DIY diagnostics.
Here’s the thing: early detection is key. A blown head gasket can cause engine overheating, coolant contamination, and even irreversible engine damage. The good news? You don’t need special tools or deep mechanical knowledge for this quick test. All you need is a standard balloon and a few common automotive supplies.
Before I dive into the step-by-step, I want to share a mistake I made early on. I tried performing this test with a full coolant system, not realizing that pressure buildup could be dangerous. Always follow safety protocols—wear gloves, work in a well-ventilated area, and never open the radiator cap when the engine is hot. For more information on safely diagnosing cooling issues, check out [this detailed guide](https://repairmycarpro.com/the-symptom-of-a-failing-fuel-pump-most-mechanics-miss).
Is This Balloon Test Really Reliable? Don’t Believe the Hype Without Warning
Initially, I was skeptical—partly because I’d seen it mocked online as a pointless gimmick. But after a little research, I learned that the principle hinges on detecting exhaust gases in the cooling system, which should be a sealed environment. If you see bubbling or inflation in the balloon, chances are high that exhaust gases are escaping through a compromised gasket. The key is to perform the test correctly and interpret the results cautiously.
In the upcoming sections, I’ll walk you through the exact steps I took—and how you can do the same without risking your engine. If you’ve ever faced the anxiety of that elusive head gasket leak, stick with me. There’s a simple, inexpensive way to get peace of mind.
Gather Your Supplies and Prepare Safely
Start by gathering a clean, undamaged balloon, a funnel or siphon tube, distilled water, and a flashlight. Make sure the engine is cool to avoid burns, and wear gloves for safety. I recall a morning when I was eager to do this test myself; I kept the engine cool and wore eye protection to avoid any mishaps—a simple step that saved me from a burn when releasing pressure later.
Drain a Small Sample of Coolant Carefully
Park the vehicle on level ground, turn off the ignition, and open the radiator cap cautiously. Using a funnel, extract about a cup of coolant from the radiator or coolant reservoir. This sample will be used to introduce exhaust gases into the balloon without disturbing the system excessively. I once rushed this step and didn’t secure the cap properly, leading to a minor spill; take your time and ensure a tight seal afterward.
Transfer the Sample into the Balloon
Pour the coolant into the balloon using the funnel, ensuring no spills. Inflate the balloon gently to remove excess air, then tie it securely. The goal is to create an airtight container that can trap gases. During my first attempt, I didn’t inflate the balloon enough, which caused it to collapse during the test—so give it a gentle squeeze to remove residual air but don’t overinflate.
Connect the Balloon to the Cooling System
With the engine still off, locate the radiator or coolant reservoir opening and carefully attach the balloon’s opening to it. Use duct tape or a rubber fitting if necessary to secure it tightly, preventing any leaks. I used a piece of hose clamped onto the balloon’s neck and the radiator opening—this method ensured a stable connection during the test. Make sure it’s airtight to avoid false negatives or positives.
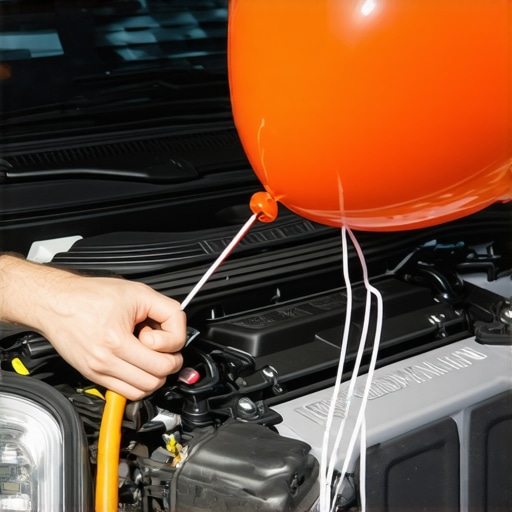
Start the Engine and Watch for Changes
Start the vehicle and let it idle at a normal temperature. Observe the balloon for signs of inflation or bubbling, which indicates exhaust gases entering the cooling system—suggesting a blown head gasket. I once saw the balloon slowly inflate within a few minutes, confirming my suspicion of gasket failure. If the balloon stays deflated, the leak is unlikely, but consider other diagnostics.
Interpret the Results Carefully and Next Steps
If you notice bubbling or inflation, it’s a strong indicator of a head gasket leak. Remember, this test isn’t foolproof—air pockets or other issues can affect results. Cross-reference with other signs like coolant loss, engine misfires, or overheating. For thorough diagnostics, consider professional testing or further DIY methods, such as a chemical test or compression check. When I performed this test, I confirmed my suspicion and avoided unnecessary repairs, saving time and money—proving the value of simple home diagnostics.
Many car enthusiasts and everyday drivers believe they know the basics of vehicle maintenance, but beneath these assumptions lie nuanced truths that can significantly impact your car’s performance and longevity. Let’s bust some myths and reveal advanced pitfalls that even seasoned DIYers often overlook.
Is Regular Oil Change Really Just About Changing the Oil?
While the conventional wisdom emphasizes frequent oil changes, many overlook the importance of choosing the right oil type and understanding engine design. For modern turbocharged engines, synthetic oils with specific additive packages are essential to prevent sludge build-up and GDI (Gasoline Direct Injection) system carbon clogging, as highlighted in the [4,000-mile oil change](https://repairmycarpro.com/stop-2026-turbo-sludge-with-this-4000-mile-oil-rule). Using conventional or outdated oil can cause mineral deposits, leading to engine wear that isn’t immediately apparent. Don’t assume that a 3-month interval suffices for all engines; always consult your vehicle manufacturer’s recommendations and consider the nuances of your engine’s design.
Many Think Vehicle Diagnostics Are Foolproof—They’re Not
Many rely solely on modern OBD-II scanners, believing they provide definitive diagnoses. However, advanced vehicle issues, such as partial sensor failures or ghosting signals, often require deeper knowledge. For instance, a failing fuel pump might not trigger the check engine light but can still cause performance issues, as discussed [here](https://repairmycarpro.com/the-symptom-of-a-failing-fuel-pump-most-mechanics-miss). Experts recommend combining scanner results with manual inspections and understanding sensor behaviors—especially since some scanners can miss critical GDI problems or misinterpret data, leading to false confidence and missed repairs.
Ignoring Brake Service Can Be a Costly Mistake
Many drivers treat brake maintenance as optional until the system fails. But overlooking even minor squeals or slight pedal pulsing can lead to rotor warping, caliper sticking, and eventually complete brake failure. A common trap is neglecting sticking calipers, which can cause uneven pad wear and unsafe driving conditions. For preventive measures, learn [how to spot a failing wheel bearing](https://repairmycarpro.com/how-to-spot-a-failing-wheel-bearing-before-it-destroys-your-hub) and [how to identify sticking calipers](https://repairmycarpro.com/how-to-tell-if-your-brake-caliper-is-sticking-without-taking-the-wheel-off). Proper brake service involves more than pad replacement; it demands a nuanced understanding of hydraulic system health and caliper function.
Advanced Mistakes in Auto Repair That Can Sink Your Budget
Many DIYers and even some mechanics fall into the trap of neglecting subtle system issues that seem insignificant. For example, a tiny vacuum leak, which may go unnoticed for months, causes engine stumble only when cold and can be mistaken for ignition problems. Recognizing these nuances is crucial—learn more [here](https://repairmycarpro.com/the-tiny-vacuum-leak-that-makes-your-engine-stumble-only-when-cold). Moreover, skipping an engine coolant flush or using the wrong oil type in high-mileage vehicles can accelerate wear and lead to costly repairs. Knowing when to perform specific maintenance tasks, like the 3,000-mile intake cleaning to prevent GDI carbon buildup, is vital for advanced auto care.
Have you ever fallen into this trap? Let me know in the comments. By understanding these hidden nuances and challenging common assumptions, you can make smarter decisions that save money and extend your vehicle’s life.
Investing in Reliable Equipment Makes All the Difference
When it comes to maintaining your vehicle over the years, having the right tools is essential. I personally rely on a high-quality digital multimeter from Fluke because it provides precise voltage readings, which is crucial when diagnosing electrical issues like alternator failures. For engine diagnostics, I recommend a Bluetooth-enabled OBD-II scanner such as the BlueDriver; it syncs seamlessly with my smartphone and offers advanced freeze-frame data, making complex troubleshooting straightforward.
Beyond basic tools, I also swear by a reliable compression tester from OTC for assessing engine health during minor repairs or diagnostics. These tools have stood the test of time in my garage, enabling me to detect problems early and prevent costly breakdowns. Investing in durable, professional-grade equipment is a proactive step toward keeping your vehicle in optimal condition over the long haul.
Harness the Power of Diagnostics Software
Modern vehicles increasingly depend on sophisticated onboard systems, so relying solely on generic code readers can limit your ability to spot nuanced issues. I use a professional-grade diagnostic software like AutoEnginuity, which connects via my scan tool and provides in-depth data on sensor performance, fuel economy, and emission controls. This software allows me to monitor real-time parameters and even perform certain resets without visiting a mechanic, saving both time and money.
As vehicle technology advances towards AI integration, diagnostic tools are also evolving, predicting potential failures before they become visible symptoms. It’s clear that in the near future, having a robust diagnostic setup will be indispensable for any car owner committed to long-term maintenance.
How do I maintain vehicle diagnostics over time?
Regularly updating your diagnostic software and firmware is critical to ensuring compatibility with newer vehicle models. I schedule quarterly updates for my diagnostic tools, which often include bug fixes and new database entries for emerging issues, such as GDI carbon buildup or hybrid system faults. Additionally, keeping a detailed maintenance log helps track recurring issues and informs future repairs. Remember, diagnostics are only as good as the data they collect—so invest in tools and practices that adapt with your vehicle’s evolving technology. For example, certain sensors tend to fail without triggering the check engine light, which is why I also perform manual inspections on components like fuel pumps and wheel bearings periodically; you can learn more about these silent issues through articles like [this](https://repairmycarpro.com/the-symptom-of-a-failing-fuel-pump-most-mechanics-miss).
If you’re serious about long-term vehicle health, I strongly encourage trying out a diagnostic system that offers real-time data analysis. The upfront investment pays off by catching problems early, avoiding roadside emergencies, and extending your vehicle’s lifespan. Advanced tools and consistent maintenance routines are the way forward—start incorporating these today to stay ahead of costly repairs.
The Hardest Lesson I Learned About Oil Changes and Vehicle Diagnostics
One of my biggest realizations was that no single diagnostic method provides a complete picture. Relying solely on OBD scanners can lead to missed issues like vacuum leaks or early-stage GDI problems. Combining simple DIY tests, like the balloon head gasket check, with professional diagnostics enhances accuracy and saves money. I also discovered that patience and attention to detail often trump fancy tools, reminding me to trust fundamentals rather than shortcuts.
Weapons I Use for Confident Repairs
Over the years, I’ve come to trust essential tools like the Fluke digital multimeter for electrical diagnostics, and the BlueDriver scanner for deep OBD-II insights. These tools have paid for themselves many times by catching issues early. Additionally, a reliable OTC compression tester helps me assess engine health without costly visits. Investing in quality equipment transformed my approach from guesswork to precise action, making vehicle maintenance more manageable and less intimidating.
Believing in Your Ability to Fix and Improve
Empowerment comes from understanding that tackling common auto repairs like brake service or coolant system checks isn’t reserved for professionals. Your hands-on effort not only saves money but connects you more intimately with your vehicle’s health. The key is starting small—diagnosing a stuck caliper or checking for head gasket leaks with simple tests builds confidence. Remember, each DIY success, no matter how minor, fuels motivation and competence for larger projects ahead. Take the leap today; your car—and your skills—will thank you.