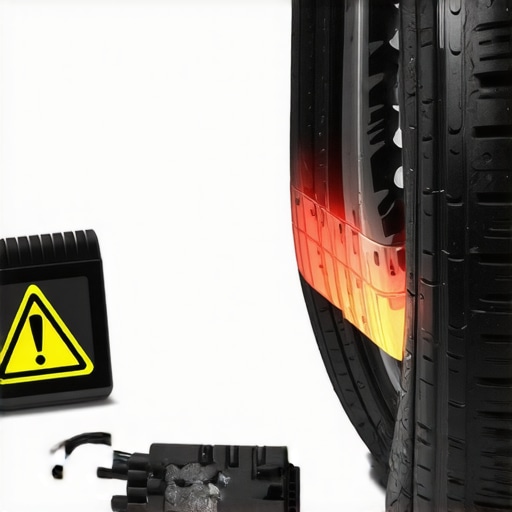
Ever been stranded on the side of the road, frantically trying to coax your flat tire back to life using that familiar can of fix-a-flat? I sure have. Years ago, I thought spraying that foamy miracle into my tire was the quick fix. But what I didn’t realize then was that it could silently sabotage something more valuable—my tire sensors. That light on your dashboard? It might be a warning sign, or it could be just the start of a bigger, more expensive problem.
The Hidden Cost of Relying on Fix-A-Flat
Using fix-a-flat might seem like a lifesaver in a pinch, but it can cause real issues with your vehicle’s tire sensors. These sensors play a crucial role in your tire pressure monitoring system (TPMS), which is designed to alert you to dangerous under-inflation. When you use fix-a-flat, the foam often coats the sensor and valve stem, contaminating the delicate electronic components. Over time, this can lead to sensor failure, leaving you vulnerable to unnoticed tire pressure issues.
I’ve learned this lesson the hard way. Early in my driving days, I used fix-a-flat religiously after every minor puncture. I figured, “Why not? It’s quick and easy.” Until one day, my tire pressure light refused to go off, despite multiple resets. Diagnostics revealed the sensors were fried—costing me hundreds in replacements. That experience was a wake-up call that saving a few minutes could cost a lot more.
Could Your Quick Fix Be Costing You?
One common misconception is that fix-a-flat is harmless or even recommended by some auto manufacturers. Not so. In fact, many experts warn against it. According to a report from the Tires Plus blog, introducing foam into your tires can damage sensors and cause imbalance issues, which might lead to uneven tire wear or vibration.
Here’s a mistake I made early on: I ignored the warnings about foam residue and didn’t bother to check my sensors after using fix-a-flat. That oversight cost me time, money, and the hassle of dealing with sensor replacements.
If you’ve ever relied on fix-a-flat in a pinch, I’d love to hear—did you face similar issues? Or are you wondering if there’s a better way to handle flat tires without risking your tire sensors? Well, stick around. The next sections will walk you through practical steps to repair your tires safely and preserve your sensor system. For a quick check before your next road trip, don’t forget to visit [vehicle diagnostics](https://repairmycarpro.com/vehicle-diagnostics-explained-easy-checks-before-your-road-trip). Ready to keep your sensors happy and your tires healthy? Let’s dive in.
Remove and Inspect the Tire Carefully
Start by parking your vehicle on a flat surface and engaging the parking brake. Loosen the lug nuts slightly with a wrench while the tire is on the ground, then lift the vehicle with a jack and fully remove the lug nuts and tire. Examine the tire for visible damage or punctures; if the tire has a nail or object embedded, remove it carefully using pliers, ensuring not to cause further damage. Remember, handling the tire’s interior requires caution—wear gloves to avoid injury.
Check for Damage and Determine the Repair Method
Inspect the tire’s tread, sidewalls, and bead for cuts, bulges, or tears. If the tire sealant is visible or if the puncture is in the tread area and small (less than ¼ inch), you can attempt a repair patch or plug. For larger damage or sidewall issues, replacing the tire is safer to prevent blowouts. When in doubt, consult a professional or visit a trusted auto shop.
Prepare the Tire for Repair
Remove any debris, nails, or objects lodged in the tire. If the puncture is in the tread, mark its location. Use a tire plug kit: insert the rubber plug into the tool, then push it into the hole firmly. Twist and pull out the tool, leaving the plug embedded. For best results, apply a sealant or rubber cement from the kit around the plug to ensure a watertight seal. This step prevents air leaks and future flatting, mimicking the effectiveness of specialized tools used by pros.
Reinstall the Tire with Proper Torque
Place the tire back onto the hub, aligning the holes with the lug studs. Hand-tighten the lug nuts gradually in a crisscross pattern to ensure even pressure. Use a torque wrench to tighten nuts to your vehicle manufacturer’s specifications—usually between 80-100 ft-lbs for most cars. Proper torque prevents wheel imbalance and sensor misreads, similar to how a precise brake service ensures safety and longevity.
Reinflate and Check for Leaks
Connect a portable air compressor or visit the nearest gas station to inflate the tire to the recommended pressure, typically found on your driver’s door sticker or in the user manual. After inflation, listen for hissing sounds indicating leaks, or optionally, spray soapy water onto the repaired area. Bubbles will form if air is escaping, so reapply the plug or patch if necessary. This proactive step mirrors diagnostics checks—making sure everything functions before your next drive.
Test Drive and Final Sensor Check
Lower the vehicle fully and tighten all lug nuts to specified torque. Before heading out, inspect the tire visually and confirm the sensor area is free of foam or sealant residue. Take a short drive to see if the tire pressure alert triggers or if the sensor signals normal operation. If the warning persists, consider visiting a professional for vehicle diagnostics to ensure your TPMS sensors are functioning correctly—preventing unexpected breakdowns akin to routine brake service.
By following these detailed steps, you’ll effectively repair your tire while safeguarding your sensitive sensors, saving you time and money in the long run. Always remember, if you’re uncertain at any stage, consulting a professional or visiting [vehicle diagnostics](https://repairmycarpro.com/vehicle-diagnostics-explained-easy-checks-before-your-road-trip) can provide peace of mind and optimal results.
When it comes to vehicle care, many drivers rely on common beliefs that aren’t quite accurate, leading to costly mistakes. One pervasive myth is that sticking to the manufacturer’s recommended oil change intervals is unnecessary or excessive. In reality, advances in oil technology and engine design suggest that adhering to these recommendations—especially with synthetic oils—can significantly prolong your engine’s lifespan. As discussed in our article on [oil change innovations](https://repairmycarpro.com/oil-change-innovations-technologies-that-save-your-engine), modern oils often outperform older formulations, making interval adjustments a nuanced decision rather than a fixed rule.
Similarly, many believe that vehicle diagnostics are only necessary when the check engine light appears. Yet, sophisticated diagnostics can catch emerging issues before they evolve into costly repairs. Sometimes, subtle symptoms like fluctuating idle or slight vibrations are early indicators of underlying problems—undetectable without advanced error codes. As highlighted in [decoding vehicle diagnostics](https://repairmycarpro.com/decoding-vehicle-diagnostics-what-your-car-is-trying-to-tell-you), proactive diagnostics help prevent breakdowns, saving money and enhancing safety.
In the realm of auto repair, there’s a misconception that all repairs are equal—some are just a quick fix, while others require comprehensive work. This oversimplification can lead to neglecting critical components, especially in brake service. For instance, replacing brake pads without inspecting rotors or calipers can cause uneven wear or premature failure. Our piece on [brake service myths](https://repairmycarpro.com/brake-service-myths-busted-what-really-matters-for-safety) emphasizes that a holistic approach ensures optimal safety and performance.
Now, the nuances grow deeper when considering common pitfalls that even seasoned DIY enthusiasts might overlook. One such trap is neglecting the importance of proper torque specs during repairs. Over-tightening or under-tightening lug nuts or bolts can compromise safety, cause damage, or sensor misreadings. Many overlook the manufacturer’s torque specifications, risking uneven wheel wear or sensor errors, which can be costly. To avoid such issues, always use a torque wrench and consult your vehicle’s manual or trusted resources.
A particularly interesting question that advanced enthusiasts often ask: “Why do certain sensors fail prematurely despite proper maintenance?” The answer often lies in wiring issues or ground faults that aren’t immediately apparent. A study by automotive electrical specialists reveals that ground wiring problems are among the leading causes of sensor failures, often due to corrosion or vibration-induced disconnections. Regular inspections of wiring harnesses and grounding points, especially in high-vibration areas, can extend sensor life and improve diagnostic accuracy. You can learn more about this in [advanced vehicle diagnostics](https://repairmycarpro.com/how-advanced-vehicle-diagnostics-prevent-costly-breakdowns).
Have you ever fallen into this trap? Let me know in the comments. Understanding these nuances helps keep your vehicle running smoothly, avoiding costly repairs, and ensuring your safety on the road. Remember, informed maintenance isn’t just about following routine procedures; it’s about digging deeper to catch issues early and avoid expensive surprises.Maintaining your vehicle’s performance requires more than just routine checks; it demands the right tools and methods that ensure longevity and safety. As someone who’s spent years diagnosing and repairing cars, I’ve honed a set of equipment that makes the process efficient and effective. First, a high-quality digital multimeter is indispensable for diagnosing electrical issues, such as faulty ground wires or sensor failures. I personally prefer the Fluke 115, thanks to its durability, accuracy, and user-friendly interface, which helps me quickly pinpoint wiring problems that could otherwise cause sensor failures or warning lights to flash unexpectedly. For tire and wheel work, a torque wrench set to your vehicle’s specifications is vital. Over-tightening or under-tightening lug nuts can lead to uneven wear, sensor damage, or even wheel detachment. I recommend a click-type torque wrench, like the Tekton 1/2 inch Drive, because it provides precise control—an essential for safe, long-lasting repairs. When it comes to reading diagnostic trouble codes, a professional-grade OBD-II scanner like the BlueDriver Bluetooth Scan Tool is my go-to. It offers comprehensive reports, live data, and even proprietary repair suggestions. This capability saves time and can preempt costly repairs by alerting me to issues early, such as worn spark plugs or sensor disconnections that might cause initial misfires or engine hesitation. Investing in quality tools also extends to maintenance supplies. For oil changes, I rely on synthetic oils that outperform conventional formulations—these can last longer and protect engines more effectively. See our article on [oil change innovations](https://repairmycarpro.com/oil-change-innovations-technologies-that-save-your-engine) to understand how choosing the right oil plays into your long-term maintenance strategy. Predicting future trends, I believe that vehicle diagnostic technology will become increasingly integrated with AI and cloud computing, allowing for real-time monitoring and predictive maintenance. This will shifts the paradigm from reactive to proactive repairs, saving drivers money and reducing downtime. How do I maintain these tools over time? Regular calibration of meters and keeping software updated is crucial for accuracy. Storing equipment in protective cases and following manufacturer maintenance advice ensures longevity. For instance, periodically updating your OBD scanner firmware guarantees compatibility with the latest vehicle models and diagnostics protocols. To get the most out of your tools, I recommend trying the simple yet effective trick of using a multimeter to verify your sensor wiring before replacing anything major; this step can save you time and money. Remember, proactive maintenance and investing in quality equipment are keys to keeping your vehicle running smoothly for years to come. To learn more about advanced diagnostics, visit [vehicle diagnostics explained](https://repairmycarpro.com/vehicle-diagnostics-explained-easy-checks-before-your-road-trip) and start empowering your repair process today.
The Hardest Lesson I Learned About Tire Repairs and Sensor Care
One of the most eye-opening experiences I had was realizing how a quick fix might lead to long-term issues. I used fix-a-flat without proper cleaning or inspection, which eventually caused my tire sensors to fail prematurely. The lesson? “Quick fixes” can disguise bigger problems if we’re not cautious—especially with sensitive components like TPMS sensors.
3 Mistakes That Cost Me More Than I Expected
- Ignoring sensor contamination after using sealants: I thought it was just a temporary inconvenience, but it led to costly replacements.
- Neglecting proper tire inspection before repair: Missing embedded debris or damage meant redoing the work and facing sensor issues later.
- Overlooking the importance of correct torque and re-calibration: Improper lug nut tightening compromised sensor connections, affecting readings.
The Unexpected Power of Proper Tool Selection
Using the right tools, like a reliable torque wrench and diagnostic scanner, transformed my approach. These tools didn’t just make repairs easier—they protected my sensors and extended their lifespan. Trustworthy gear, like the BlueDriver OBD-II scanner, provided insights that saved me from guesswork and unnecessary replacements.
Where to Go from Here for Better Tire and Sensor Care
If you want to avoid similar pitfalls, I recommend checking out [vehicle diagnostics explained](https://repairmycarpro.com/vehicle-diagnostics-explained-easy-checks-before-your-road-trip) for practical tips and professional insights. Embracing proactive maintenance, using quality tools, and understanding your vehicle’s systems optimize your DIY efforts and keep your sensors in top shape. Remember, a little knowledge and the right equipment can turn routine repairs into long-term savings. Have you ever faced sensor issues after a quick fix? Share your experience below—your story might just help someone else stay on the road longer.