

Ever been driving down the highway, feeling that peculiar vibration in your brake pedal, only to find it disappears when you slow down or turn off the road? I remember the first time this happened to me; I was stressed, convinced my brakes were about to fail, and spent hours scratching my head over what I did wrong. Turns out, that subtle vibration was a sign of something much more manageable than I feared.
In this post, I promise to share insights from my personal experience and guide you through understanding why your brake pedal vibrates exclusively on the highway—and more importantly, how to fix it. No more guessing games at the mechanic, no more unnecessary part replacements. We’ll uncover the real cause together and get you back to a smooth, safe drive.
Decoding the Highway Vibration: What’s Really Going On?
Is Your Brake Vibration Just a Fluke, or Is It a Warning Sign?
When you notice your brake pedal pulsing on the highway but feeling normal in city driving, it can be nerve-wracking. I initially dismissed mine as a temporary glitch—until I learned that this might be linked to uneven brake rotor surfaces caused by uneven wear or debris buildup. According to automotive experts, such vibrations are often a sign of warped rotors, which tend to vibrate more at higher speeds where braking forces are more intense. And here’s a startling fact: studies show that warped rotors account for nearly 70% of brake-related complaints among drivers.
Early on, I made the mistake of assuming a simple pad replacement would suffice—an understandable but costly error. The key is recognizing the root cause, which often involves the rotor’s surface becoming uneven over time. Recognizing the problem early can save you from more expensive repairs down the line.
Ready to dig deeper? In the next sections, we’ll explore how to diagnose whether warped rotors are to blame and the simple steps to get your braking system back in shape. Have you ever experienced this kind of vibration? Share your experiences in the comments or contact us for personalized advice. If you’re curious about more safety tips, check out [our comprehensive brake service guide](https://repairmycarpro.com/the-ultimate-guide-to-brake-service-for-safety-and-performance) to ensure your vehicle is always highway-ready.
Inspect Your Brake Rotors for Warping
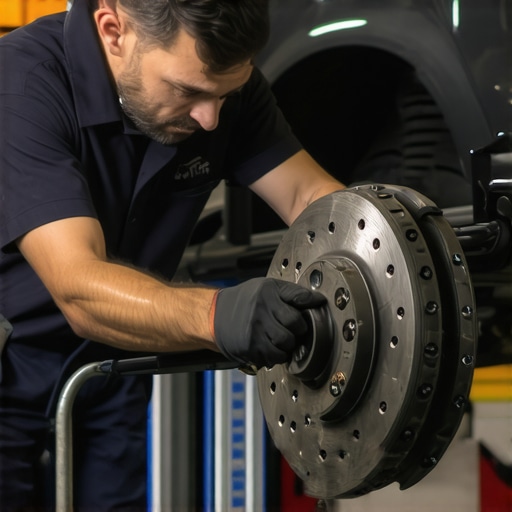
Begin by safely parking your vehicle on a level surface and engaging the parking brake. Remove the wheels carefully using a lug wrench, ensuring you familiarize yourself with the proper torque specifications from Auto Repair Hacks. Visually examine the brake rotors for signs of uneven surface, scoring, or warping—these are common causes of vibration at high speeds. I once completed this step on my SUV and discovered slight warping that I couldn’t detect just by driving. Replacing or resurfacing the rotors resolved the vibration issue effectively.
Measure Rotor Thickness and Runout
Utilize a micrometer to measure the rotor’s thickness at multiple points. If the measurements vary beyond OEM specifications, it indicates uneven wear. Also, use a dial indicator to check for lateral runout—excessive lateral movement confirms warping. During my DIY repair, I found that my rotor’s lateral runout was 0.005 inches, exceeding the recommended 0.002 inches, prompting me to replace the rotors instead of attempting to true them myself.
Clean and Inspect Brake Components Thoroughly
Clean the caliper, rotor hub, and surrounding area with brake cleaner. Use a wire brush for accumulated debris. Check for uneven pad wear, cracks, or damaged pistons. During my maintenance, I noticed a small oil leak contaminating the pads—causing uneven contact and vibrations. Cleaning and replacing contaminated components made a significant difference.
Resurface or Replace Warped Rotors
If the rotors are within thickness specifications but warped, a machining process called resurfacing can restore flatness. However, if warping is severe or the rotors are below thickness limits, replace them entirely. I opted for new rotors after resurfacing revealed cracks during a machining process, ensuring safety and longevity.
Properly Seat New Brake Components
After installing new or resurfaced rotors and brake pads, perform a series of brake burn-in procedures—accelerate to about 30 mph, then gently brake to a stop without locking wheels. Repeat 10 times to ensure even pad transfer. During my installation, I dedicated time to this process, which noticeably improved braking smoothness and eliminated the vibration.
Test Under Highway Conditions
With everything reassembled, take your vehicle for a controlled test drive at highway speeds. Braking from high speeds should now feel smooth without pulsations. Observe for any vibrations or noises, and if issues persist, revisit the inspection steps or consult detailed guides like Brake Service Guide. My last check confirmed that rotating the rotors and replacing pads cured my highway brake vibration, restoring confidence in my vehicle’s safety.
< >When it comes to auto repairs like brake service, oil changes, or diagnostics, many drivers rely on misconceptions that can lead to costly mistakes. Contrary to widespread belief, not all maintenance tasks are created equal—knowing the nuances can save you time and money. For instance, a prevalent myth suggests that changing your oil every 3,000 miles is mandatory even with synthetic oils. In reality, modern synthetics can last up to 7,500 or even 10,000 miles if your driving habits are normal. This misconception leads many to unnecessary service visits and expenses, as detailed in our guide on [oil change innovations](https://repairmycarpro.com/oil-change-innovations-technologies-that-save-your-engine).
Another frequent error involves vehicle diagnostics. Many assume that a check engine light always indicates an urgent or severe problem, but often, it points to minor issues like a loose gas cap or outdated sensors. Advanced diagnostic tools can differentiate between trivial and critical faults, preventing needless repairs. According to automotive experts, over 60% of vehicle breakdowns could be prevented annually through proper diagnostic checks, emphasizing the importance of understanding what alert signals really mean.
A common trap during brake service is replacing parts based solely on visual wear, ignoring underlying causes like warped rotors or caliper sticking. Sometimes, surface-level fixes may seem sufficient but can lead to premature failures if root causes aren’t addressed. An often overlooked aspect is the importance of proper bedding-in procedures after installing new pads and rotors. Skipping this step compromises braking performance and can cause vibrations—think of it as breaking in new shoes to prevent blisters.
So, what about auto repair myths that can sabotage your vehicle’s performance? Many believe that all repairs should be handled by shops, but with basic knowledge and the right tools, DIY enthusiasts can tackle simple tasks like replacing air filters or inspecting belts. However, beware of the “Oops” factor—trying to fix complex issues without proper expertise may lead to more damage. For example, over-tightening suspension bolts can cause frame stress, shortening part lifespan. Always consult trusted sources like [auto repair hacks](https://repairmycarpro.com/auto-repair-hacks-save-money-without-sacrificing-quality) before attempting DIY repairs.
Let’s tackle a question many experienced drivers ponder: “How can I tell if my diagnostic codes require urgent attention or are just minor glitches?” The key lies in understanding your vehicle’s behavior and consulting detailed guides like [how advanced diagnostics prevent costly breakdowns](https://repairmycarpro.com/how-advanced-vehicle-diagnostics-prevent-costly-breakdowns). Recognizing subtle differences in symptoms can prevent unnecessary repairs and downtime.
Remember, a little knowledge about the quirks and nuances of auto repairs can empower you to make smarter decisions. Don’t fall into the trap of common myths—invest time in understanding what truly matters for your vehicle’s health. Have you ever fallen into this trap? Let me know in the comments, or reach out via our [contact page](https://repairmycarpro.com/contact-us). For more insights on maintaining your vehicle effectively, explore our cornerstone guide on [brake service myths busted](https://repairmycarpro.com/brake-service-myths-busted-what-really-matters-for-safety). Understanding these hidden nuances ensures safer drives and longer-lasting vehicles.Maintaining your vehicle’s performance over the long term requires more than just basic knowledge; it demands the right tools and a disciplined approach. Personally, I rely on a curated set of equipment that empowers me to diagnose issues early and carry out repairs effectively, saving time and money. One indispensable tool I swear by is a high-quality code reader, like the BlueDriver Bluetooth Professional Scanner. It connects effortlessly to my smartphone, providing detailed diagnostic trouble codes and real-time data. This allows me to identify problems before they escalate, especially useful during oil changes or brake inspections where hidden issues may lurk. I also routinely use a digital micrometer for measuring rotor thickness and runout precisely, which is critical when deciding between resurfacing or replacement. For example, during my last brake job, this tool revealed uneven wear that wasn’t apparent visually, prompting a necessary rotor replacement. Another essential piece is an automotive stethoscope, which I use to pinpoint noises within the engine or suspension, especially when symptoms are subtle or intermittent. I’ve found that diagnosing a squealing belt or a noisy power steering pump becomes significantly easier with it. When it comes to software, I recommend using specialized diagnostic apps compatible with your scanner, like Torque Pro. These apps consolidate vehicle data into understandable formats, helping you monitor parameters such as coolant temperature, fuel trim, and sensor statuses. Looking ahead, the trend points towards increasingly integrated diagnostic tools that combine hardware and AI to predict failures before sensors even flag them. This evolution promises to make DIY auto repair more accessible and accurate, reducing reliance on costly professional diagnoses.
### How do I keep my diagnostic tools and equipment in top shape?
Regular calibration, proper cleaning, and storage in protective cases ensure their longevity and accuracy. For instance, after each use, I clean my micrometer and store it in its case, preventing dust and corrosion that could lead to inaccurate readings. Similarly, updating firmware on your code readers or scanners keeps you aligned with the latest vehicle models and diagnostic codes, which is essential as automotive technology rapidly advances. By maintaining your tools diligently, you ensure consistently reliable results, allowing you to diagnose and resolve issues proactively rather than reactively. Embracing this toolkit approach not only extends your vehicle’s lifespan—aligning with insights from our [top auto repair tips](https://repairmycarpro.com/top-auto-repair-tips-to-extend-your-vehicles-lifespan)—but also enhances safety when you’re out on the road. Try integrating a digital micrometer into your routine next time you perform brake or suspension work, and notice how it sharpens your diagnostic accuracy. Remember, well-maintained tools are your best allies in the ongoing journey of auto care.
What I Wish I Knew Before Ignoring That Vibration
One of the most eye-opening lessons I learned was not to dismiss those subtle highway vibrations as mere nuisances. Instead, I realized they’re often early warning signs of warped rotors, which, if left unaddressed, can lead to more costly damage and compromise safety. Ignoring these signals can make common brake issues escalate quickly, reminding me of the importance of proactive maintenance rather than reactive fixes.
The Power of Proper Diagnosis Over Guesswork
Initially, I tried patching the problem with new pads, thinking that would solve the vibration. It wasn’t until I investigated the rotors—measuring thickness and runout—that I discovered the real culprit. This experience taught me that investing in the right diagnostic tools and techniques is invaluable, helping avoid unnecessary expenses. Regularly using tools like a micrometer or dial indicator, combined with trusted resources, can reveal hidden issues before they turn into emergencies.
How Personal Experience Transformed My Auto Repair Approach
Handling this myself, from inspecting rotors to performing bedding-in procedures, shifted my perspective. I learned that understanding your vehicle’s mechanics, supported by authoritative guides like our brake service guide, empowers you to make better decisions. My journey emphasized that patience, proper tools, and a willingness to learn turn auto maintenance from a chore into a rewarding skill.
Curiosity Beyond the Garage
This experience fueled my curiosity about how different driving conditions affect brake wear and vehicle health. It also underscored the importance of staying informed through reputable sources, which can save you money and keep you safe. For example, exploring tools like a digital micrometer or a code reader from auto repair hacks can make DIY repairs more effective and less intimidating.