
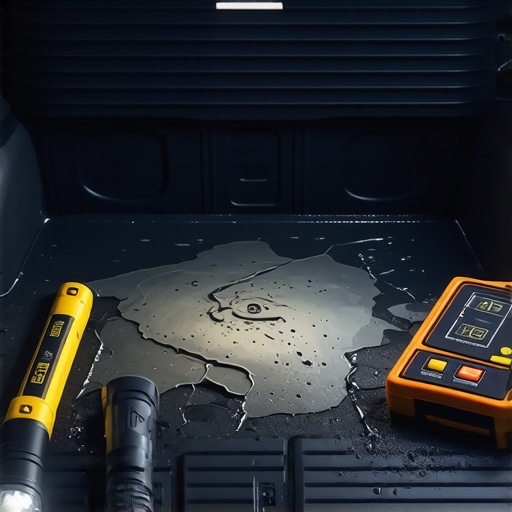
Ever opened your trunk on a rainy day and noticed that soggy smell or a muddy patch where there shouldn’t be one? I remember the moment I first realized my trunk floor was damp—it was after a heavy thunderstorm, and I was trying to load groceries, only to find my belongings getting wet. That sinking feeling hit me hard. Turns out, water had been sneaking in slowly, messing up my trunk’s interior and risking much more than a simple nuisance.
Today, I want to share how I finally cracked the code of finding that sneaky leak—so you don’t have to play detective blindly. We’ll explore practical, straightforward ways to identify where that water is coming from, saving you time, money, and frustration. Because let’s face it: water damage doesn’t just spoil your weekend plans; it can lead to rust, mold, and significant repair costs if left unchecked.
Why Ignoring a Water Leak Can Be a Costly Mistake
Water finding its way into your trunk might seem minor at first—just a little dampness, right? But the reality is, that moisture can quickly turn into a bigger problem. Corrosion can set in on metal components, mold can develop on upholstery, and electrical wiring may suffer damage, leading to expensive repairs. According to automotive experts, water leaks are among the top contributors to long-term vehicle deterioration—a silent enemy that often goes unnoticed until it causes more damage.
One common mistake I made early on was assuming that wiping the surface dry would solve the problem. Sadly, water can seep through tiny gaps that aren’t visible to the naked eye. The secret is to find the actual entry point before it worsens. Next, I’ll guide you through how I used simple tools and some clever tricks, like the incense trick, to identify and seal that sneaky leak.
Before we dive into the practical steps, do you ever notice water accumulation in your trunk after rain, or find that damp smell hanging around? If yes, don’t worry—you’re not alone. Many car owners face this issue without realizing where the leak originates. The good news? With a bit of patience and a systematic approach, you can pinpoint and fix the leak yourself.
To understand just how crucial this is, consider this: studies have shown that water intrusion is a leading cause of vehicle body rust, which can halve a car’s lifespan if left unresolved. Addressing the problem early is more than just about comfort—it’s about preserving your investment.
Now, let’s get into how I identified the leak source using some simple, yet effective methods—ones that I wish I had known earlier. Ready to become a water leak detective for your vehicle?
Gather Supplies and Prepare for Inspection
Start by collecting some basic tools: a flashlight, a water spray bottle filled with water, and a few rags or towels. If you want to be extra thorough, get a mirror on a stick to access tight spots and disposable gloves to keep your hands clean. Remember, patience is key in this process, and wearing casual clothes that can get a little dirty helps.
Seal Off the Vehicle Interior
Remove all items from your trunk and clean the area thoroughly. Vacuum out any debris or loose dirt, as these can hide small gaps or leaks. Close all doors and windows, then set out some old towels or plastic sheets inside the vehicle to trap any water that might enter during testing. This creates a controlled environment so you’ll know where new water appears.
Simulate Rain or Use a Water Hose
Position your vehicle in the driveway or garage where you can safely spray water. Use the water spray bottle to mimic light rain on potential entry points, such as trunk seals, tail light areas, or around the rear windshield. For a more comprehensive test, use a garden hose with a spray nozzle set to a gentle mist. Slowly pour water along the edges of your trunk, tailgate, and any seams, paying particular attention to the rubber seals.
Apply the Incense Trick to Pinpoint Leaks
This method proved invaluable in my own experience. Light a stick of incense and hold it near suspect areas while spraying water. If the incense begins to flicker or draw smoke inward, it indicates that water is entering through that point. I found this technique especially effective around the tail light gaps, which are often overlooked. Remember to do this in a well-ventilated space and blow out the incense before it burns down too low.
Visual Inspection and Look for Water Traces
After spraying water, open the trunk and check for any signs of moisture or dampness. Use your flashlight to look into corners and seams where water might seep in. Look for water droplets, water stains, or rust marks, which can be clues. In my case, I discovered a small tear in the trunk seal that I hadn’t noticed before, thanks to these signs.
Identify Hidden or Hard-to-See Entry Points
If no water appears during initial tests, move to less obvious areas. Examine the rear windshield seal, tail light assemblies, and the body panel welds. Sometimes, water can enter through tiny gaps caused by vehicle age or minor accidents. For these, applying a thin bead of marine-grade silicone sealant can provide a quick fix, but be sure to clean and dry the area thoroughly first.
Test Multiple Times for Accuracy
Run the test as many times as needed, adjusting water pressure and spraying angles. Remember, leaks can be intermittent or worsen with specific conditions. Record your findings meticulously, noting any areas where water consistently enters. This systematic approach saved me hours of guesswork and prevented unnecessary repairs.
Seal and Repair the Entry Points
Once confirmed, prioritize sealing the leaks. Use appropriate automotive sealants or replace damaged seals and gaskets. For minor tears, automotive-grade silicone or rubber repair tapes work well. If the leak is around the tail light area, consider replacing the faulty gasket or tightening the mounting bolts. For larger issues, consulting a professional or visiting a trusted auto repair shop might be necessary, especially to ensure long-term waterproofing.
Remember, maintaining your vehicle’s seals and gaskets, and performing regular inspections, can keep water out of your trunk and prevent costly damages down the line.
Many vehicle owners assume that basic diagnostics and regular maintenance are straightforward, but in reality, there’s a lot of nuance that many overlook. A common misconception is that a simple code scan can tell you everything about your car’s health. While automotive diagnostic tools are powerful, relying solely on generic error codes without understanding their context can lead to misdiagnosis. For example, an OBD-II scanner might indicate a misfire, but that doesn’t pinpoint the root cause; it could be a spark plug issue, fuel injector problem, or vacuum leak. Advanced diagnostics involve interpreting live data and understanding how different symptoms interrelate.
One trap I see often is ignoring the importance of sensor calibration. Many believe replacing a sensor is enough, but if it’s not correctly calibrated post-replacement, it won’t provide accurate data, leading to further issues. This is especially true with oxygen sensors and MAf sensors, which directly influence engine performance. Skipping this step can cause your vehicle to run inefficiently or trigger a check engine light repeatedly.
A less obvious mistake involves neglecting the vehicle’s electronic control units (ECUs). Modern cars have multiple ECUs coordinating various functions. Malfunctions or communication errors between these units can manifest as unrelated symptoms, making diagnostics complex. Advanced repair approaches now include reprogramming or updating ECU firmware, which can sometimes resolve issues that hardware replacements alone can’t fix. For in-depth insights, check out my detailed guide on [how advanced vehicle diagnostics prevent costly breakdowns](https://repairmycarpro.com/how-advanced-vehicle-diagnostics-prevent-costly-breakdowns).
Now, pondering a sophisticated question—how do you determine whether a sensor fault is the root cause or just a symptom? This requires analyzing the sensor’s data in real-time, understanding its correlation with other parameters, and sometimes performing controlled tests. For example, measuring the voltage of a throttle position sensor while varying throttle input can reveal whether the sensor is truly faulty or if there’s an issue elsewhere in the intake system.
One common myth is that brake fluid never needs replacing, but experts, such as those referenced in [brake service myths busted](https://repairmycarpro.com/brake-service-myths-busted-what-really-matters-for-safety), agree that brake fluid absorbs moisture over time, leading to corrosion and brake fade. Failing to replace it periodically is a rookie mistake that can compromise safety.
Similarly, many believe that performing an oil change is just about draining and refilling; however, innovations like synthetic blends and special additives enhance engine longevity, reducing wear and tear significantly. To maximize your engine’s lifespan, consider reading about [oil change innovations that save your engine](https://repairmycarpro.com/oil-change-innovations-technologies-that-save-your-engine).
Investing in Precision Diagnostic Tools
To truly keep your vehicle running smoothly, I rely heavily on a professional-grade OBD-II scanner like the Launch CRP123X. This device provides real-time data, freeze frame capabilities, and advanced code definitions, which are essential for diagnosing complex issues. Unlike generic scanners, it allows me to interpret live sensor readings, helping me identify problems early before they escalate. Additionally, I use a vacuum gauge to detect intake leaks, which can cause rough idling and poor fuel economy—an approach I highly recommend to anyone serious about preventive maintenance.
Leverage Software for Proactive Maintenance
Modern vehicles generate a wealth of data, and I utilize software such as AutoEnginuity or Bosch’s ECool for deep diagnostics. These platforms connect via Bluetooth or wired interfaces to read deep system parameters, including ABS, transmission, and airbag codes. They also enable me to view live data streams—crucial for troubleshooting intermittent faults. Regularly checking parameters like coolant temperature, fuel trims, and sensor voltages helps ensure the vehicle remains reliable over time. For instance, monitoring fuel trim values can alert you to vacuum leaks or fuel system issues long before a warning light appears.
Adopt Routine Visual and Physical Inspections
Alongside digital diagnostics, I perform systematic visual inspections of key components. Using a flashlight and a mirror on a stick allows me to examine hard-to-see areas thoroughly. I pay close attention to belts, hoses, seals, and bushings for cracks, leaks, or abnormal wear. This hands-on approach complements electronic diagnoses by catching mechanical issues early. For example, noticing a slight seepage around the valve cover gasket can prevent oil leaks that might lead to engine damage if left unaddressed. Routine inspections, combined with diagnostic tools, maximize my vehicle’s longevity.
Utilize Specialized Tools for Specific Repairs
For specialized jobs like brake caliper rebuilds or oil seal replacements, I employ tools such as a slide hammer for bearing removals and a digital torque wrench to ensure precise tightening. Accurate torque application is crucial for preventing over-tightening or insufficient clamping, which can cause component failure. Investing in quality, purpose-built tools saves time, reduces frustration, and ensures repairs are done right the first time. Remember, using the right tools not only preserves your vehicle but also enhances safety during repairs. For example, I use a leak-down tester to verify engine compression after repairs, ensuring everything functions properly—this small step can catch issues that simple visual inspections might miss.
Embrace Long-Term Maintenance Practices
Keeping your vehicle in top shape is an ongoing process. I follow a maintenance schedule that includes regular oil changes with high-quality synthetic oils, which I’ve found to significantly reduce engine wear—more on the latest oil change innovations. Additionally, I check and replace filters, belts, and fluids proactively, rather than waiting for failures. This approach pays off by avoiding costly repairs and maintaining optimal performance. Moreover, I keep a detailed service log, noting dates and observations, which helps me detect patterns or recurring issues early.
Preparing for the Future of Vehicle Maintenance
The automotive industry is rapidly shifting towards integrated diagnostic systems and AI-assisted repair tools. I predict that the trend will include more user-friendly interfaces and remote diagnostics, allowing even casual DIYers to perform complex assessments. Embracing these technologies today, like cloud-connected diagnostic tablets, will empower you to maintain your vehicle more effectively tomorrow. For your next step, try using a vacuum gauge to detect subtle intake leaks—it’s an inexpensive yet powerful method that can save you from big headaches down the line.
How do I maintain vehicle diagnostics over time?
Regularly update your diagnostic software and sensors, perform routine visual checks of belts, hoses, and seals, and keep detailed maintenance logs. This multi-layered approach ensures you catch issues early and extend your vehicle’s lifespan significantly. For deeper insights into diagnostics and maintenance, visit decoding vehicle diagnostics, which offers comprehensive guidance. Remember, staying proactive with diagnostics and maintenance tools is your best defense against costly breakdowns and long-term wear.
The Hidden Pitfalls I Surprised Myself With
One of the toughest lessons I learned was that even seemingly minor symptoms can hide complex issues. I used to dismiss small signs like occasional rough idles or odd smells, thinking they weren’t urgent. But over time, I realized ignoring these signs only led to more costly repairs. Patience and attention to detail are essential; taking the time to systematically diagnose saved me from unnecessary expenses and stress.
Tools and Resources That Elevated My Repair Skills
Investing in quality diagnostic tools like the Launch CRP123X transformed how I approach vehicle problems. They provided insights that standard scanners couldn’t, especially when interpreting live sensor data. Pairing this with informative guides such as the article on decoding vehicle diagnostics and detailed repair strategies from trusted sources has made me more confident and efficient in troubleshooting and repairs.
Emotional Lessons That Drive Me Forward
There’s a powerful sense of empowerment in understanding your vehicle deeply. Knowing I can identify leaks, faulty sensors, or worn components without rushing to a mechanic has boosted my confidence. This journey of continuous learning reminds me that automotive maintenance isn’t just about fixing cars—it’s about gaining independence and peace of mind. Every time I crack a tricky problem, I feel more connected to my vehicle and responsible for its longevity.
What Can You Take Away From My Experience?
My advice is to stay curious and proactive. Regular inspections, investing in the right diagnostic tools, and leveraging reliable resources can make all the difference. Remember, vehicle repair isn’t just a chore—it’s an ongoing conversation with your car about what it needs to run smoothly for years to come. So, what repair challenge are you ready to tackle next? Share your story below and let’s learn together!