

I remember the morning I nearly took out my neighbor’s prize-winning mailbox. It was pouring rain, I was running late for a meeting, and when I threw my truck into reverse, the dashboard screen looked like a bowl of gray oatmeal. I couldn’t see a thing. I squinted, I rubbed my eyes, but the ‘blurry camera syndrome’ had officially claimed another victim. For weeks, I just lived with it, thinking I’d eventually have to drop two hundred dollars on a new OEM camera and spend a Saturday afternoon tearing my tailgate apart. It felt just as stressful as hearing a grinding noise only when backing up—that immediate sense of dread that your wallet is about to get a lot lighter. [image_placeholder_1]
Stop Squinting at Your Dashboard Screen
We rely on these little lenses more than we realize until they go fuzzy. Most people assume the internal sensor is failing or that moisture has permanently ruined the electronics. While that can happen, I’ve found that 90% of the time, the problem is much more ‘skin deep.’ I once made the rookie mistake of spending eighty bucks on a specialized ‘lens restoration kit’ that did nothing but make the plastic even cloudier. It was a classic case of overthinking a simple problem. I’ve since learned that auto repair hacks don’t have to be complicated to be effective. Today, I’m going to show you how a common household item and about five minutes of your time can restore that high-definition clarity you used to have. We aren’t just talking about wiping off some mud; we are talking about removing the oxidized ‘fog’ that builds up on the plastic lens over years of sun exposure. Have you ever found yourself straining to see if that’s a curb or a kid behind you because your camera has gone soft?
Is a five dollar fix actually worth your time?
You might be skeptical. How can something that costs less than a latte fix a piece of safety equipment? According to data from the National Highway Traffic Safety Administration (NHTSA), backup cameras have reduced backing-up accidents by nearly 40%, but that safety margin disappears when the image is obscured. The ‘secret’ isn’t some high-tech solution; it’s understanding that your camera lens is just like your headlights—it’s made of polycarbonate that hates UV rays. Before you go performing easy vehicle diagnostics or calling a shop, you need to try this surface restoration. It’s the same principle as polishing a scratched watch face, and the results are honestly life-changing for your morning commute. We’re going to look at the exact steps to clear the fog without scratching the delicate optics any further.
Gather Your Secret Weapons First
You don’t need a mechanics toolbox for this one. In fact, you probably have the MVP of this project sitting next to your bathroom sink right now: white, non-gel toothpaste. Avoid the fancy charcoal or blue gel versions; we need the basic, slightly gritty stuff because it acts as a micro-abrasive. Think of it like a liquid sandpaper that’s too weak to hurt your teeth but just strong enough to shave off the microscopic layer of sun-damaged plastic on your lens. You’ll also want a clean microfiber cloth and a small bowl of warm water. I remember trying this the first time on a beat-up work truck I bought for cash. I was convinced it was a prank I’d read online, but after five minutes of scrubbing, the screen went from ‘Is that a wall?’ to ‘I can see every individual blade of grass.’ It was the kind of low-cost victory that makes auto repair hacks so addictive for DIYers on a budget.
Wash Away the Grime First
Before you start polishing, you have to get the literal dirt off. If you start rubbing toothpaste into a lens covered in road salt or sand, you aren’t polishing—you’re sanding your camera with rocks. Take your damp cloth and gently wipe the lens housing. This isn’t just about the glass; clean the plastic around it too. This simple step is as foundational as knowing vehicle diagnostics explained easy checks before your road trip to ensure everything is in working order. I once rushed this part and ended up catching a piece of grit in my cloth, leaving a tiny swirl mark that haunted me every time I put the car in reverse. Don’t be like me. Take the thirty seconds to ensure the surface is pristine. 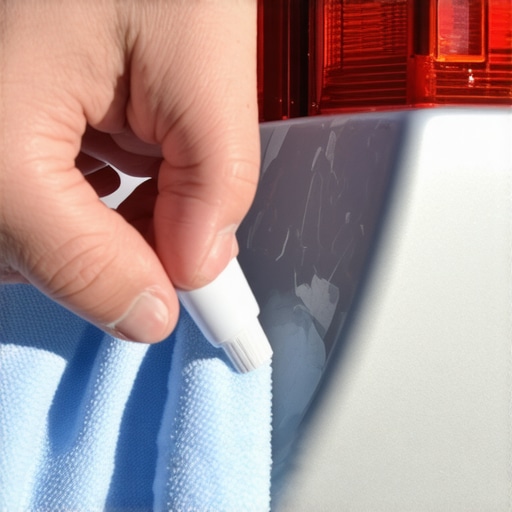
The Circular Motion That Changes Everything
Apply a pea-sized amount of the white toothpaste directly to your fingertip and smear it over the lens. Now, using your microfiber cloth, rub in small, firm circles. Don’t press so hard that you’re trying to push the camera into the bumper, but use enough pressure to feel the resistance of the paste. This is the same logic used when you how to save your transmission with a simple fluid exchange—you’re removing the old, degraded material to let the system work like new again. As you rub, the paste might start to dry out; just add a tiny drop of water to keep it moving. You’ll notice the paste turning a slightly grayish-yellow color—that’s the oxidation actually lifting off the plastic. It’s incredibly satisfying to see the ‘fog’ literally disappear into the cloth.
Rinse and Protect for Long Term Clarity
Once you’ve buffed for about two or three minutes, use a fresh, damp part of the cloth to wipe away all the residue. If it’s still a bit cloudy, don’t panic; just repeat the process one more time. The final step that most people miss is protection. Since we just stripped away the dead plastic, the fresh layer underneath is vulnerable to the sun. Applying a tiny bit of high-quality car wax over the lens will seal those microscopic pores. Making this a habit is one of the top auto repair tips to extend your vehicles lifespan because it prevents the UV damage from returning in a month. I’ve found that a quick wax every few months keeps my camera looking like it just rolled off the showroom floor, even in the middle of a brutal summer.
While clearing that camera lens is a satisfying win, it’s just the tip of the iceberg when it comes to keeping a modern vehicle in peak condition. I’ve seen so many DIYers get overconfident after a quick fix and then fall headfirst into much more expensive traps. We’ve been conditioned to believe that if the dashboard isn’t glowing with a warning light, everything is fine. In reality, the most dangerous issues are the ones that don’t trigger a sensor until it’s already too late. It’s like assuming your engine is perfect just because the oil looks golden on the metal—but there’s often hidden sludge building up behind your clean dipstick that can eventually starve your lifters of oil.
Your OBD-II scanner is a storyteller, not a judge
The biggest mistake I see today is the ‘parts cannon’ approach. Someone buys a cheap code reader, sees a P0420 code, and immediately spends five hundred dollars on a new catalytic converter. The truth? That code just means the oxygen levels are off, and it’s often why your scanner says P0420 but the converter is actually fine. It could be a tiny vacuum leak or a lazy sensor. Real expertise is about decoding vehicle diagnostics to find the root cause rather than just treating the symptom. Have you ever replaced a part the computer told you to, only for the light to come back on two days later? Let me know in the comments, because I’ve definitely been there earlier in my career.

Why does your lane assist act crazy after an alignment?
This is the nuance most shops won’t tell you about. In older cars, a wheel alignment was just a mechanical adjustment of tie rods. In modern cars equipped with Advanced Driver Assistance Systems (ADAS), your car’s ‘eyes’—including that backup camera we just cleaned—are linked to the steering angle sensor. According to research by SAE International, even a one-degree deviation in physical alignment without a corresponding digital recalibration can cause safety systems to misinterpret the car’s position on the road. This is specifically why your lane keep assist acts erratic after a standard wheel alignment. You can’t just fix the hardware anymore; you have to talk to the software too.
The danger of ignoring silent mechanical shifts
We often wait for a noise or a vibration to tell us something is wrong. But by the time you hear a grinding noise in your wheels, you’ve likely already moved past a simple pad replacement and into the territory of ruined rotors or seized calipers. I’m a huge advocate for how advanced vehicle diagnostics prevent costly breakdowns by catching these trends early. Whether it’s monitoring fuel trims or checking for brake service myths that suggest you can wait until the pedal pulses, proactive maintenance always beats reactive repairs. Have you ever fallen into the trap of waiting for a sound that never came until the car just stopped? It’s a lesson most of us only need to learn once.
If I had to pick one ‘desert island’ tool, it wouldn’t be a wrench; it would be a digital multimeter. While some old-school guys swear by test lights, I’ve seen too many people fry delicate ECUs because they didn’t realize a test light draws current. This is exactly the 20 tool every driver needs for basic electrical troubleshooting. When you use a multimeter, you aren’t just seeing if ‘power is there,’ you’re seeing exactly how much. This is the difference between guessing and knowing how to find a parasitic battery drain with a basic multimeter without pulling every fuse in the dark. I personally use a Fluke 115 because the True-RMS readings never lie when I’m chasing a bad ground that’s causing ghosts in the dashboard. 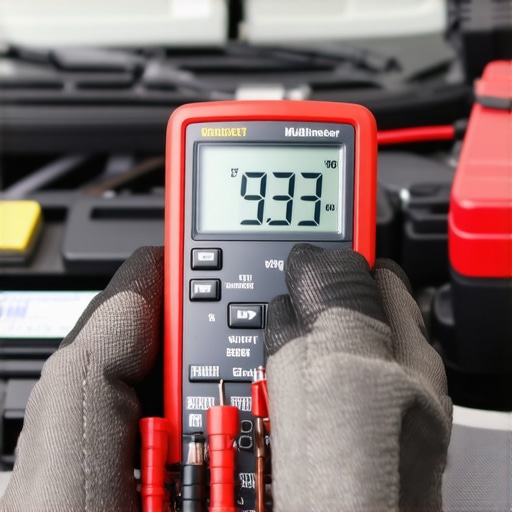
How do I maintain my vehicle’s complex systems over time?
The secret isn’t just following the manual; it’s about exceeding it. Most manufacturers suggest 10,000-mile oil intervals to keep ‘cost of ownership’ low on paper, but if you want longevity, you need to look at oil change innovations and technologies that save your engine. I’ve started installing bypass oil filters on my high-mileage builds. These filters tap into the oil gallery and filter down to 2 microns, whereas a standard filter only catches about 20-30 microns. It’s like giving your engine a constant blood transfusion of pure gold. These essential auto repair strategies for frequent drivers are what separate the guys who trade in every four years from the ones who drive their favorite trucks for a decade or more.
The twenty dollar tool that saves you thousands
Authority in this space requires more than just a wrench; it requires data. The Auto Care Association’s recent ‘State of Auto Care’ report highlights that as vehicles become ‘software-defined,’ the physical components like the thermostat are becoming more integrated into the computer’s logic. If you don’t know how to tell if your thermostat is stuck open or closed via live data on a scanner, you’re only doing half the job. I predict that in the next five years, we’ll move away from diagnostic ports entirely, shifting toward encrypted 5G telematics that alert your phone to a failing water pump before the needle even moves. We are entering an era where your car will be more self-aware than its driver.
Prepare for the era of remote car health monitoring
If you really want to level up your DIY game, stop waiting for the squeak. Follow the ultimate guide to brake service for safety and performance and perform a ‘drag test’ on your calipers every time you rotate your tires. Don’t just look at the pads; feel the slide pins. If they don’t move with the flick of a finger, your fuel economy and safety are already taking a hit. Take the twenty minutes this weekend to verify your brake fluid’s copper content—it’s the one advanced check that prevents a total ABS module failure down the road.
The Hardest Lesson I Learned About Trusting the Computer
I used to think the ‘Check Engine’ light was the final word on vehicle health. It took a few expensive mistakes to realize that sensors are just messengers—and sometimes they’re confused messengers. I’ve seen people replace high-dollar parts when the real culprit was a loose ground wire or a bit of corrosion. Real authority comes from combining what the scan tool says with what your hands feel. For instance, always check if your caliper slide pins are bone dry before you blame the master cylinder for a soft pedal. It’s these small, physical checks that save you the most money and prevent unnecessary work.
#IMAGE_PLACEHOLDER_E#
Gear That Makes These Jobs Actually Easy
You don’t need a professional shop setup, but you do need a few high-quality items to avoid frustration. I always recommend a digital multimeter because it’s the 20 tool every driver needs for basic electrical troubleshooting. Along with that, a simple Bluetooth OBD-II adapter and a basic tube of white toothpaste for your lenses can solve half your dashboard headaches. I trust these tools because they provide objective data where others offer expensive guesses.
Stop Being a Passive Passenger in Your Own Car
Taking control of your vehicle’s maintenance doesn’t have to start with an engine swap. It starts with a five-minute fix for a blurry camera or a quick check of your fluid levels. These small wins build the confidence to tackle more auto repair hacks that keep your car out of the shop and on the open road. Your car is likely the second biggest investment you’ll make; treat it like a partner rather than just a machine. By staying proactive and using top auto repair tips to extend your vehicles lifespan, you’re not just saving money—you’re ensuring your safety and peace of mind every time you shift into reverse. Have you ever tried the toothpaste trick on your camera or headlights, or did you think it was just another internet myth? Let me know in the comments below!