
It was 6:00 AM on a Tuesday, and I was already running late for a client meeting. I walked out to my driveway, coffee in hand, only to see that familiar, agonizing tilt of my front-left fender. The tire wasn’t flat—not totally—but it was definitely lower than it was on Sunday. This had been going on for weeks. I’d top it off with air, feel like a genius for two days, and then wake up to the same sagging rubber. I felt like I was losing my mind. I even considered that maybe someone was playing a slow-motion prank on me. The truth is, slow leaks are the most annoying part of car ownership because they are invisible to the naked eye. After years of doing my own vehicle diagnostics explained: easy checks before your road trip, I finally realized that the solution wasn’t a fancy sensor or a trip to a technician—it was sitting under my kitchen sink. Today, I am going to show you how to stop the cycle of constant refills and pinpoint exactly where that air is escaping.
Stop Playing the Guessing Game with Your Pressure Gauge
I used to think I could just ‘feel’ where a leak was. I’d run my hand over the tread, listening like a safe-cracker for a tiny hiss. It never worked. In fact, early on, I made the mistake of just using plain water in a bottle, thinking I’d see a splash. Spoilers: you won’t. Without the right surface tension, the air just escapes silently. You need a specific mixture to make the invisible visible. If you’ve ever had to learn how to fix a leaking tire valve stem in minutes, you know that the smallest hole can cause the biggest headaches. According to the NHTSA, properly inflated tires are crucial for safety, as under-inflated tires are a leading cause of tire failure. Finding that leak isn’t just about convenience; it is about keeping your rims off the pavement and your car on the road. Have you ever felt that sinking feeling in your stomach when the ‘low tire’ light pops up for the third time in a week?
Is a $2 Spray Bottle Actually Better Than the Repair Shop?
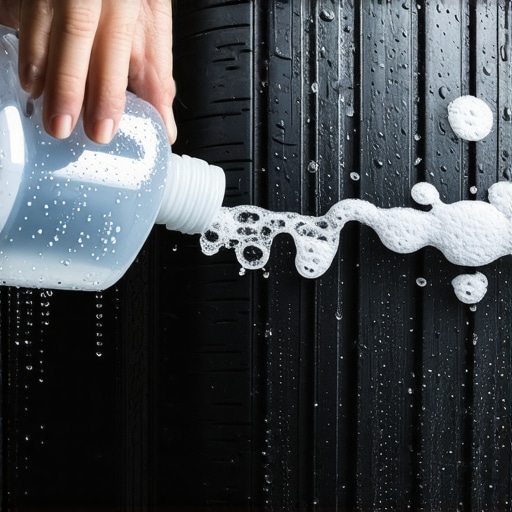
Most people think they need to submerge the whole tire in a massive dunk tank to find a leak. That is great if you have a professional shop, but for the rest of us, it is overkill. The spray bottle method is often more precise because it allows you to isolate sections of the tire, including the bead and the valve stem, without making a massive mess in the garage. While some issues might require you to check how to tell if your car is out of alignment by looking at your tires, a slow leak is usually a localized puncture or a faulty seal. I’ve found thorns, tiny finishing nails, and even corroded valve seats using this method when the ‘pros’ told me they couldn’t find anything wrong. We are going to dive into the exact recipe for the ‘bubble juice’ and the systematic way to coat your tire so you don’t miss a single square inch.To get started, you need to mix up a solution that has enough surface tension to trap escaping air. I use about two tablespoons of liquid dish soap—the heavy-duty blue stuff usually works best—mixed into a standard 16-ounce spray bottle filled with lukewarm water. Don’t shake the bottle like a cocktail; you want a soapy liquid, not a container full of dry foam that obscures your view. This simple mixture is one of those top auto repair tips to extend your vehicles lifespan because it prevents you from unknowingly driving on low-pressure tires that eventually shred from the inside out.
The Right Way to Coat Your Tire
Start by inflating the tire to its maximum recommended PSI—check the sticker on your driver-side door jamb, not the number on the tire sidewall itself. Higher pressure forces air out faster, making the bubbles more obvious. Begin your inspection at the valve stem. This is the most common failure point I see. Spray the base of the stem where it meets the rim and the tip where the cap screws on. If you see a cluster of growing bubbles, you’ve found it. If not, you might need to learn how to fix a leaking tire valve stem in minutes if the core is simply loose or the rubber has dry-rotted. #IMAGE_PLACE_HOLDER_B#
Check the Bead and the Tread Without Missing a Spot
Once the stem is cleared, spray the ‘bead’—that is the area where the rubber meets the metal rim. Corrosion or road salt on the rim is a silent killer of tire pressure. I remember a particularly frustrating Saturday when I sprayed the whole tread three times and found nothing. I was ready to give up until I realized I hadn’t checked the inner bead facing the suspension. I crawled under the car with my bottle, and sure enough, a tiny stream of bubbles was escaping from a spot where the rim was slightly bent from a pothole. This kind of hands-on work is as essential as decoding vehicle diagnostics: what your car is trying to tell you because it identifies mechanical failures that electronic sensors often oversimplify.
Don’t Ignore the Tread Grooves
Finally, move to the tread. Spray a six-inch section, wait ten seconds, and look for a ‘mushroom’ of bubbles. These aren’t always big; sometimes it looks like a tiny, fizzing white head on a beer. If you find a nail, don’t pull it out yet! Mark the spot with a piece of chalk or a crayon so you don’t lose it. If you pull it now without a plug kit ready, you will have a completely flat tire in thirty seconds. While you are down there, look for uneven wear patterns, as this is one of the essential auto repair strategies for frequent drivers to catch alignment issues before they ruin a new set of tires. I once found a leak caused by a thorn so thin it looked like a piece of hair. The bubbles were the only reason I caught it before it became a highway blowout. The dangerous truth about ignoring a grinding noise in your wheels is that it often starts with neglected maintenance like this, where low pressure causes the tire to overheat and put extra stress on your hub assembly.It is easy to fall into the trap of thinking technology has solved every automotive mystery. In my experience, many drivers rely far too heavily on a ‘Check Engine’ light or a TPMS sensor to do the critical thinking for them. But here is the professional nuance: sensors are merely messengers, and sometimes they are incredibly misleading. I have seen countless cases where people waste hundreds of dollars because why your scanner says p0420 but the converter is actually fine, often discovering the real culprit was a $5 gasket or a pinhole exhaust leak. The same logic applies to your tires. A digital sensor tells you the pressure is low, but it cannot tell you that your aluminum rim has become porous or that road salt has compromised the bead seat.
Stop Assuming Your Dashboard Scanner Is Infallible
One of the biggest ‘oops’ factors I see with DIY diagnostics is the ‘over-soaping’ mistake. People assume that more soap equals better bubbles, but the opposite is true. If your mixture is too viscous, a micro-leak won’t have enough pressure to displace the heavy suds; the air simply migrates underneath the foam without creating the tell-tale ‘mushroom.’ You need a thin, highly reactive film to catch the leaks that occur over weeks rather than hours. This level of granular attention is what differentiates a basic fix from how advanced vehicle diagnostics prevent costly breakdowns. If you are using ‘heavy’ soap, you are likely masking the very problem you are trying to find.
Can You Really Trust the Shop’s Quick Inspection?
According to research by AAA, a significant percentage of drivers ignore manual checks because they over-trust automated systems, yet these systems often fail to trigger until a tire is 25% below the recommended pressure. Most high-volume shops won’t spend thirty minutes rotating a tire in a tank to find a pinhole; they will give it a ten-second glance and suggest a replacement. I once spent an hour chasing a leak that only manifested when the valve stem was pulled at a specific angle during cornering. This is why I always emphasize brake service myths busted: what really matters for safety—true safety comes from inspecting the hardware with your own eyes, not just waiting for a computer to complain. #IMAGE_PLACE_HOLDER_C#
Why Quality Components Beat Quick Fixes Every Time
Once you find that leak, the next trap is the ‘bargain bin’ repair. If you find a faulty valve, don’t reach for the cheapest rubber you can find. The truth about using cheap aftermarket sensors in your engine or wheels is that they lack the thermal resilience of OEM parts. Whether you are performing a tire plug or learning the trick to bleeding brakes alone without a helper, the quality of your materials dictates the longevity of the repair. Using a sub-par valve core is just setting yourself up for another flat in six months. Have you ever fallen into the trap of replacing a part the computer ‘told’ you was bad, only to have the light stay on? Let me know in the comments—I have a feeling many of us have a collection of perfectly good sensors sitting in our toolboxes.Finding the leak is only half the battle; keeping that tire in service for another 20,000 miles requires a shift from ’emergency mode’ to a ‘maintenance mindset.’ I used to rely on those cheap $0.99 pencil gauges you find at gas stations, but I learned the hard way that they can be off by as much as 5 PSI. Now, I exclusively use a calibrated digital pressure gauge with a backlit display. Why? Because accuracy at the decimal level is what allows you to spot a slow leak before the TPMS light even flickers. This is part of the essential auto repair strategies for frequent drivers who want to avoid being stranded. If you are serious about your car’s health, invest in a small portable air compressor that plugs into your 12V outlet. It saves you from driving on a soft tire to the nearest gas station, which is exactly how sidewalls get heat-damaged and ruined.
How can I keep my tires from wearing out prematurely?
Consistency is your best friend here. Beyond just checking pressure, you need to look at the rubber itself. I make it a habit to wipe down my valve stems with a damp cloth every time I check the air. Grit and road salt are the primary reasons seals fail, and a clean cap prevents debris from being forced into the core the next time you add air. This level of detail is similar to top auto repair tips to extend your vehicles lifespan because it addresses the root cause of component failure rather than just the symptoms. If you notice the steering wheel vibrating, don’t just add air and hope for the best; the reason your steering wheel is vibrating at low speeds is often a thrown wheel weight or an internal tire belt separation that a simple pressure check won’t fix. #IMAGE_PLACE_HOLDER_D# According to the technical standards set by the Tire Industry Association (TIA), a safe, permanent repair must involve a ‘patch-plug’ combo that seals the inner liner and fills the path of the puncture. Just shoving a rope plug in from the outside is an emergency fix, not a long-term solution. In the near future, I expect we will see more ‘smart tires’ hitting the consumer market—tires with embedded RFID chips that monitor tread depth and rubber temperature in real-time. Until then, we are the sensors. If you’ve been ignoring that ‘low tire’ warning, I challenge you to go out right now and check your spare tire pressure. Most people forget the spare exists until they are on the side of the highway with a flat, only to realize the backup is just as empty as the primary. Mastering these small auto repair hacks save money without sacrificing quality and ensures you are never the person waiting two hours for a tow truck over something as simple as a three-pound drop in pressure.
What That Tiny Mushroom of Bubbles Taught Me About Car Care
Finding a leak manually isn’t just about saving twenty bucks at a local shop; it is about developing a mechanical intuition that most drivers lack. I learned the hard way that patience is far more important than pressure. If you rush the spray or use too much soap, you will miss those microscopic leaks that only show up after thirty seconds of waiting. I also realized that auto repair hacks save money without sacrificing quality when you focus on the basic physics of the problem instead of just throwing parts at a dashboard light. My biggest lightbulb moment was discovering that a ‘clean’ tire is easier to diagnose—road grime can actually seal a tiny hole temporarily, only to have it pop open again at highway speeds.
The Gear That Lives in My Trunk Year-Round
If you want to move beyond the guesswork and constant refills, I recommend a few specific tools that have never let me down. First, ditch the gas station gauge and get a professional-grade digital pressure gauge; it is the only way to catch a 1 PSI drop over a week. Second, keep a small bottle of pre-mixed bubble juice and a portable 12V inflator in your trunk. These are part of my essential auto repair strategies for frequent drivers because they turn a potential roadside disaster into a simple five-minute check in your own driveway. I also highly recommend bookmarking the Tire Industry Association (TIA) safety standards, as they provide the best guidance on when a tire is repairable and when it is a safety risk. #IMAGE_PLACE_HOLDER_E#
Take Control of Your Drive Today
You do not need a degree in engineering to keep your car safe and efficient. By taking twenty minutes to perform your own decoding vehicle diagnostics: what your car is trying to tell you, you gain a level of confidence and road-readiness that no dashboard sensor can provide. Don’t wait for the sagging rubber or the warning light to ruin your morning. Grab your spray bottle, find that leak, and get back on the road with the peace of mind that comes from a job done right. Have you ever found a nail or a leak in a spot that completely surprised you? Let me know in the comments below!