Ever jammed your foot on the brake pedal, only to feel it slowly sink to the floor? I’ve been there, panic creeping in as I wondered if I’d just lost all my stopping power. That moment of helplessness is frustrating—and honestly, a little terrifying. It feels like your brakes are betraying you just when you need them most.
I’m here to tell you, you’re not alone, and more importantly, this issue isn’t as hopeless as it seems. Today, I want to share what I discovered through my own experience—and how I finally got my brakes firm again. If your brake pedal feels spongy or sinks despite a full fluid reservoir, this post is your friendly guide to understanding why it happens and, more importantly, how to stop it.
What’s really going on when your brake pedal sinks?
The first time my pedal sink issue appeared, I thought I’d simply low on brake fluid. Nope. After topping up, I still had the same problem. That’s when I learned that a sinking brake pedal isn’t always about fluid levels. Often, it’s a sign that air has snuck into your brake lines or your calipers and wheel cylinders are not sealing properly.
Air in the brake system compresses under brake pressure, which results in that soft, sinking pedal. Think of it like trying to squeeze a sponge instead of pressing onto a solid piece of wood. The fluid may be full, but air pockets prevent the force from reaching the brake pads effectively.
Addressing this can feel intimidating—like diagnosing a mystery with no clear clues. Early on, I made the mistake of assuming a simple bleed would fix everything. But after bleeding my brakes multiple times without success, I realized there’s more to the story. Sometimes your brake calipers or master cylinder are the culprits.
To get to the bottom of this, I recommend checking your brake calipers for leaks, ensuring your wheel cylinders are sealing properly, and inspecting the master cylinder for internal leaks or failures. For a step-by-step guide to fix common brake issues, you might find this resource helpful: 4 DIY Brake Service Fixes for 2026 Smart Caliper Drag.
Understanding the mechanics behind a sinking brake pedal can seem complex at first, but it’s crucial for maintaining safe driving. If you’re asking yourself whether this problem is serious enough to warrant a visit to the mechanic, I’d say it definitely is. Brake issues are not something to DIY away if you’re unsure—safety always comes first.
In the next section, I’ll walk you through the specific steps to identify whether your brake system just needs a bleed, or if more invasive repairs are necessary. Trust me, once I figured out the cause in my own car, I was back to feeling confident behind the wheel. Let’s get started.
Check for Air in the Brake Lines
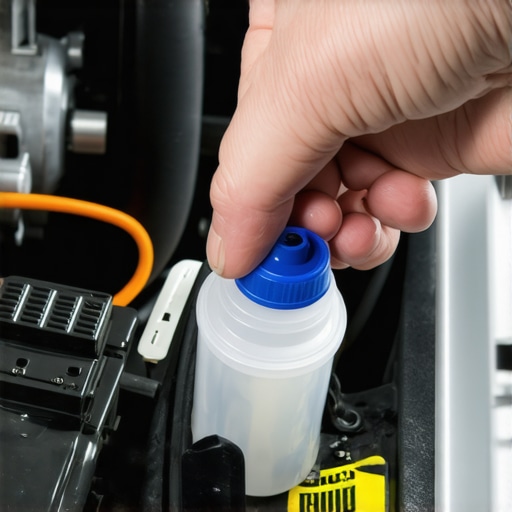
My first time dealing with a sinking brake pedal, I felt overwhelmed, but the process was straightforward. I started by inspecting the brake fluid reservoir for proper levels—if low, topping it off seemed simple, but the real issue was trapped air. To remove air, I used a wrench to loosen the bleeder screw on each caliper, then pressed the brake pedal slowly to push out the air—this is much like squeezing a sponge to expel water. After each bleed, I tightened the screw properly and repeated the process until the pedal firmed up. Be sure to check the fluid for bubbles or discoloration, which indicates air or contamination. This step often resolves sponginess caused by trapped air, which compresses under pressure and prevents effective braking.
Perform a Brake System Bleed Correctly
Once I understood that air can be stubborn, I used a manual brake bleed kit, following a disciplined sequence: starting from the furthest wheel from the master cylinder, typically the right rear, I attached the bleeder hose, opened the valve slightly, and pressed the brake pedal slowly and steadily. Then, I closed the valve without releasing the pedal and moved on to the next wheel. The key is to keep the brake fluid reservoir topped up during this process to prevent more air from entering. It’s like bleeding a wound—you want to ensure all air is expelled for a firm pedal response. For safety and efficiency, I watched for air bubbles in the clarified brake fluid. This process can take time but is essential for removing residual air after initial checks.
Inspect and Replace Faulty Components
If bleeding didn’t solve the problem, I moved to examining the calipers and wheel cylinders. Think of these as tight seals around a valve; if worn or leaking, air can enter or brake fluid can leak out. I looked for puddles or dirt around these parts, which can indicate leaks. Using a flashlight, I checked for corrosion or damage. If I found signs of leaks or sticking calipers—like uneven brake pad wear—I replaced the faulty parts. Remember, calipers can get gummed up or stuck over time, similar to a stubborn door hinge, leading to inconsistent pedal feel. Checking the master cylinder involved inspecting for internal leaks—if the piston doesn’t seal well, air and fluid mix, causing pedal sinking. In such cases, replacing the master cylinder or having a professional calibrate the system is necessary.
Review Brake Fluid Quality and Compatibility
My experience also underscored the importance of clean, compatible brake fluid. I avoided standard DOT 3 or DOT 4 fluids that might be contaminated or expired. If your vehicle uses a specialized fluid, ensure you’re using the correct type—using the wrong fluid can cause internal corrosion, leading to internal leaks in the master cylinder. For modern vehicles, I also considered the impact of brake fluid age—old fluid can absorb moisture, reducing boiling point and causing sponginess under hard braking. Regular fluid changes, such as every 2-3 years, are recommended; for insight, check out this guide on brake fluid longevity.
Test and Calibrate the System
After replacing parts or bleeding, I tested the brakes on a quiet street. To ensure everything functioned properly, I gently applied pressure to see if the pedal felt firm and responsive. If your vehicle has electronic or brake-by-wire systems, calibration might be necessary—this is like resetting a smartwatch to ensure new parts sync properly. For those with advanced systems, check out DIY calibration steps for 2026 brake systems. Often, a simple calibration aligns sensors and actuators, preventing future issues. If problems persist, consulting a professional for detailed diagnostics or system recalibration is advisable, as some components may require specialized tools.Many car owners believe that sticking to the standard 5,000- to 7,500-mile oil change interval is enough to keep their engines healthy, but in reality, this common myth can lead to costly damage. Modern turbocharged and direct-injection engines, for instance, require more nuanced attention to oil quality and change timing. Relying solely on the traditional mileage guideline ignores vital factors like driving conditions, engine type, and oil formulation, which can vary significantly. Experts warn that using outdated intervals or synthetic blends unnecessarily may do more harm than good, as synthetic oils can break down prematurely in high-stress environments, leading to internal sludge buildup. If you’re interested in optimizing your vehicle’s health, I recommend reading about the latest oil change strategies, such as the 4,000-mile rule for preventing carbon clogging, at this guide.Maintaining your vehicle’s health over time requires more than just sporadic repairs; it demands the right tools, systematic routines, and an understanding of long-term care. Personally, I rely on a blend of mechanical instruments and diagnostic software that has proven invaluable in diagnosing issues early and ensuring optimal performance.
One fundamental tool I swear by is a **code scanner with extended capabilities**. Unlike generic OBD-II readers, my scanner supports bi-directional communication, allows for real-time sensor monitoring, and can perform system calibrations—all critical for modern vehicles that are packed with electronic systems. For instance, when dealing with brake-by-wire systems, the ability to perform a dedicated calibration without a dealer’s intervention often saves time and money. You can find step-by-step guides on this process at this detailed calibration guide. My personal recommendation is the **Autel MaxiCOM MK808** for its balance of features and user-friendliness.
Alongside diagnostic tools, having a **quality set of hand tools** is indispensable. I prefer a **Torx and spline socket set** because many modern vehicle components—like calipers and electronic modules—use these fasteners. Coupling this with a **magnetic tray** ensures small parts don’t get lost during repair, which is a common beginner mistake.
For routine maintenance like oil changes and fluid replacements, I trust **long-reach oil funnels** and **digital oil testers**. Regular oil analysis using a **lab test kit** can reveal early signs of engine wear or contaminants, enabling proactive decisions before major failures occur. It’s a practice I adopted after reading about how specialists predict engine lifespan, which you can explore at this resource on oil change strategies.
Scalability is also key. As my vehicle collection grew, I invested in a **modular maintenance station**. It allows me to comfortably work on vehicles at various heights, making routine tasks less physically taxing and more precise. Advances in lift technology and portable workstations suggest that in the future, even DIY enthusiasts will have access to mobile, space-efficient setups that rival professional garages.
How do I maintain vehicle diagnostics over time? Regular software updates for my diagnostic tools are crucial. Manufacturers frequently release firmware that enhances compatibility with new vehicle models or improves diagnostic accuracy. I recommend subscribing to updates from your scanner’s manufacturer and periodically checking for new features that could help you detect issues before they become severe.
Looking ahead, the trend of integrating AI-driven diagnostics and predictive maintenance will redefine how we care for our cars. Imagine vehicles that warn you of potential failures months in advance, thanks to onboard sensors and cloud analytics—this is where the industry is heading.
Don’t hesitate to try the advanced calibration techniques mentioned earlier or upgrade your diagnostic arsenal. The more precisely you can diagnose issues early, the longer your vehicle stays in top shape, ultimately saving money and keeping you safe. For a hands-on start, try calibrating your brake-by-wire system using this step-by-step guide—it’s easier than you think and incredibly empowering.
The Hidden Truths That Changed My Approach to Auto Maintenance
One of the most enlightening lessons I discovered is that not all brake issues are created equal. I used to assume a soft pedal meant just bleeding the brakes, but I learned that internal component wear, such as a failing master cylinder or stuck calipers, can be the real culprit. This insight pushed me to look beyond surface fixes and dig deeper, saving time and preventing future breakdowns.
Another personal discovery was the significance of quality diagnostic tools. Investing in a robust code scanner that supports bi-directional communication and system calibration has repeatedly given me a clearer picture of my car’s health. This knowledge is a game-changer, especially with modern vehicles that rely heavily on electronic systems—further detailed in this DIY calibration guide.
A surprising lesson was the role of brake fluid quality and correct type. Using the wrong or contaminated fluid can wreak havoc on braking performance and cause internal corrosion—something I only appreciated after replacing a master cylinder prematurely. Regularly updating my knowledge with trusted resources, like oil change and fluid maintenance rules, has kept my vehicle in top shape.
My Toolbox for Protecting My Car’s Heart and Soul
If you’re serious about auto repair and diagnostics, I highly recommend starting with a versatile code scanner like the Autel MaxiCOM MK808. Its capabilities for performing system calibrations and real-time monitoring are invaluable, especially for complex brake-by-wire systems.
Complement your scanner with quality hand tools, such as a complete Torx and spline socket set—many electronic components and calipers use these fasteners. Also, consider tools like digital oil testers and lab-grade fluid analysis kits to proactively catch engine wear and contamination early, reducing costly repairs down the line.
For work comfort and efficiency, investing in a modular maintenance station and long-reach oil funnels transforms routine tasks into streamlined practices—making regular maintenance less of a chore and more of a safeguard against unexpected failures.
Step Up Your Auto Care Game Today
Every vehicle owner has the power to extend their car’s longevity and safety with the right knowledge and tools. Whether it’s fixing a sinking brake pedal, mastering system calibration, or understanding the nuances of modern engine oil, taking proactive steps can prevent costly emergencies. Remember, vehicles are complex machines—don’t hesitate to empower yourself with expert resources and a little DIY spirit. Curious about tackling your own brake system calibration? Check out this step-by-step guide and start making a difference today.