

Picture this: you’re about to leave for work, coffee in hand, when suddenly you notice your side mirror flopping like a rag doll every time you drive over a bump. It’s one of those irritating little problems that sneaks up on you—your mirror wobbles dangerously but still hangs on with that stubborn screw. I’ve been there, and let me tell you, it’s more common than you think. The good news? Fixing a floppy side mirror with just one screw isn’t as complicated as it sounds, and I’m here to walk you through it.
Why a Loose Mirror Can Be More Than Just Annoying
First off, a side mirror that’s loose or floppy isn’t just a minor inconvenience. It compromises your visibility, which is crucial for safe driving. That’s why addressing this issue promptly can save you from potentially dangerous situations down the road. Plus, ignoring a wobbly mirror can lead to further damage—like stripped threads or cracked plastics—that might require more extensive repairs later. Believe me, I learned this the hard way early on when I tried just tightening the screw without inspecting the real cause. That mistake cost me extra time and money, and it’s a lesson I don’t want you to repeat. For more insights on auto safety, check out my article on brake service and safety.
Is Fixing a Mirror Really Worth the Effort?
It’s understandable to wonder if a little loose mirror needs your attention when it’s still hanging. But consider this: a small wobble might seem harmless now, but over time, it can turn into a major headache. Plus, fixing it yourself can be rewarding—and cost-effective. I used to think these minor repairs weren’t worth my time until I realized that knowing how to handle simple fixes boosts my confidence as a car owner. Early on, I made the mistake of assuming that a loose screw was all there was to it, only to find out later that the mounting bracket was slightly bent. Don’t fall into that trap. If you want to learn easy, DIY solutions that save you money and hassle, keep reading.
Secure the Mirror Base First
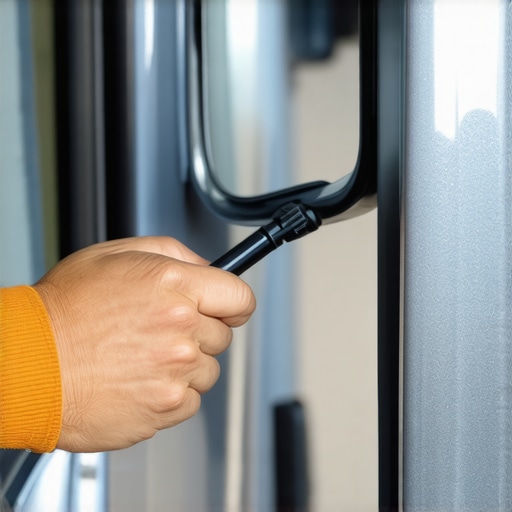
Start by inspecting the mounting point where the mirror connects to the door. Use a screwdriver to tighten the main screw that holds the mirror’s base. I remember the first time I tackled this, my hands were shaky, but once I felt the screw tighten snugly, the wobble started to diminish. Be careful not to overtighten, as that can crack the plastic or strip the threads. If the screw is loose, this alone might solve your problem.
Check the Mounting Bracket for Damage
Next, gently wiggle the mirror to see if the mounting bracket is bent or cracked. Sometimes, a minor impact can deform the bracket, causing the looseness even if the screw is tight. In my case, I noticed slight bending, which I fixed by realigning the bracket with a rubber mallet—carefully tapping it back into position. If the bracket is cracked, you may need to replace it, but most of the time, realignment and tightening suffice.
Replace or Reinforce the Screw If Worn
If the screw or its thread hole shows signs of wear, a new screw or thread repair may be necessary. I’ve used a thread repair kit (like a helicoil) when the screw wouldn’t hold. This is similar to fixing a stripped thread in engine repair—it’s a fundamental skill that pays off. Be sure to select a screw with the same dimensions and thread pitch to ensure a tight fit.
Address Molded Plastic Components Carefully
Sometimes, plastic components surrounding the screw can be worn or melted. Use a plastic repair kit or epoxy to reinforce weak spots, mimicking the way you might fix a cracked bumper. I once used epoxy to reattach a loose plastic cover, restoring stability. Allow sufficient curing time before reassembling the mirror.
Position and Test Your Mirror
After tightening and reinforcing, gently adjust your mirror to its proper position and drive slowly to test stability. Pay attention to any wobbling or rattling. If the mirror stays firm, you’ve successfully fixed it. Otherwise, revisit the previous steps—sometimes a combination of tightening and bracket adjustment is needed for the perfect fit.
When to Seek Professional Help
If, despite your efforts, the mirror remains loose or the mounting points are broken beyond repair, consider reaching out to a professional. A qualified auto body technician can replace damaged brackets or even install new mirrors efficiently. Remember, a secure mirror isn’t just about convenience—it’s vital for your safety on the road. For more tips on maintaining your vehicle’s safety, visit this comprehensive brake service guide.
Many car owners operate under common myths that can lead to costly mistakes. For instance, a widespread misconception is that all diagnostic tools provide foolproof results. In reality, advanced vehicle diagnostics require trained interpretation; otherwise, critical issues might be overlooked or misdiagnosed. Relying solely on generic scanner codes without understanding their nuance can cause you to miss underlying problems that only a professional can identify. Additionally, many believe that changing oil frequently is unnecessary—yet, innovations in oil change technology suggest intervals should be optimized based on driving habits and oil quality, not just mileage.
What do most drivers overlook when diagnosing brake problems?
The trap lies in assuming a squealing noise always means worn brake pads. While often true, sometimes noises are caused by underlying issues such as dust buildup or uneven rotor wear, which can be misdiagnosed without proper inspection. Neglecting these nuances can lead to premature replacement or overlooking a bigger problem, like sticking calipers. Many shops warn against the hasty jump to pad replacement without proper diagnostics, as detailed in brake service myths. Overlooking minute details can also cause you to miss advanced issues, like warped rotors or caliper piston failure, which only a trained eye can detect.
Another common misconception is that simple oil changes address all engine issues. But, as auto repair hacks suggest, the real savings come from proactive diagnoses—catching wear or leaks early. For example, ignoring subtle engine oil consumption spikes could be a sign of timing chain wear or other internal problems, often missed by the untrained mechanic. Regularly checking vehicle diagnostics can prevent breakdowns by revealing hidden issues early.
In your experience, have you ever fallen into this trap? Let me know in the comments. Remember, understanding the nuances in vehicle diagnostics and repair ensures safer driving and longer vehicle lifespan. It’s vital to go beyond the surface—trust expert insights and precise inspections to keep your car performing at its best.
Investing in the Right Equipment for Auto Maintenance
Maintaining your vehicle over time isn’t just about doing the basics; it’s about equipping yourself with reliable tools that ensure quality work. I personally rely on a high-quality digital multimeter because it allows me to diagnose electrical issues accurately without guessing. For instance, I use the Fluke 115 Multimeter, which provides precise voltage and current readings, making troubleshooting complex circuits much easier. Additionally, a scan tool like the Autel MaxiCOM MK808 is invaluable for reading advanced vehicle diagnostics. It decodes error codes beyond generic OBD-II scans, helping me identify issues like sensor failures or actuator faults early, saving me time and money.
For brake system diagnostics, I find a dedicated brake bleeder kit essential. It speeds up the process of flushing and bleeding brakes, ensuring optimal pedal feel and safety. When it comes to oil changes, I recommend a filter wrench that fits your specific filter; using the right wrench prevents damaging the filter housing and speeds up the process. Advanced tools like an ultrasonic cleaner can also help restore injectors or sensors, extending their lifespan and improving your vehicle’s performance.
Software solutions to streamline vehicle maintenance
Modern auto repair heavily relies on software. I suggest using maintenance tracking apps like RepairPal or auto-diagnostic software that interfaces with your scan tool. These platforms can keep track of service schedules, alert you when certain components are due for replacement, and provide troubleshooting guides. For example, when diagnosing a misfire, consulting decoded data via these tools helps identify whether it’s spark, fuel, or compression related. This approach minimizes guesswork and guides systematic troubleshooting.
Looking ahead, the trend is clearly moving toward smarter diagnostic systems integrated with vehicle telematics. Vehicles are becoming increasingly connected, allowing you to receive real-time health reports on your smartphone. Staying updated with these advancements means you can preempt failures before they happen, maintaining long-term vehicle reliability.
How do I maintain diagnostic tools and repair equipment over time?
Regular calibration and proper storage are key. Keep your digital multimeter calibrated according to the manufacturer’s instructions and store it in a dry, dust-free area. Clean scanning cables and connectors after each use to prevent corrosion, which can affect readings. For software tools, ensure your firmware and applications are updated regularly to access the latest features and security patches. Additionally, replacing worn-out parts like O-ring seals on your brake bleeding kit or filters on your ultrasonic cleaner prevents inaccuracies during repairs. Consistent maintenance of your tools ensures they work accurately and last longer—saving you money and preventing diagnostic errors.
For more detailed strategies on extending your vehicle’s lifespan and avoiding costly repairs, read top auto repair tips. Remember, investing in high-quality tools and proper maintenance practices pays off over time. One advanced tip I recommend trying right now is regularly testing your vehicle’s sensors with a multimeter to catch issues early—this one simple step can prevent unexpected breakdowns and costly repairs, as detailed comprehensively in decoding vehicle diagnostics. Take action today, and you’ll thank yourself later when your car runs reliably for years to come.
Over the years, my journey into auto repair has been filled with unexpected lessons that transformed my approach. One crucial insight I discovered is that embracing a mindset of continuous learning — whether through trial, error, or expert advice — elevates your ability to handle even tricky issues like a stubborn mirror or complex diagnostics. Sharing stories from my own wrench-turning adventures, I’ve learned that patience and curiosity often outweigh the value of costly professional repairs. Remember, every setback offers a chance to grow your skills and confidence. So, I encourage you to keep experimenting responsibly, leveraging knowledge from trusted sources, and trusting your instincts — because becoming proficient in auto repair is as much about mindset as it is about tools.