
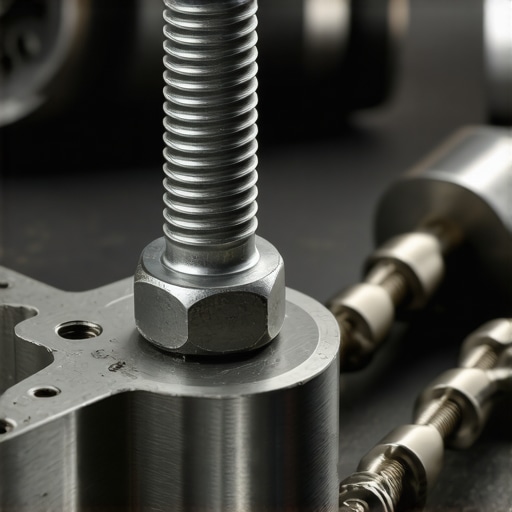
I’ve been exactly where you are right now. You’re elbow-deep in a “quick” repair, perhaps trying to figure out how to tell if your thermostat is stuck open or closed, when the unthinkable happens. You apply just a little too much pressure, and then you hear it—the sickening *tink*. That sound is the universal signal for a ruined weekend. The head of the bolt is in your socket, and the rest of the shank is buried deep in the metal. I remember my first big blunder: I tried to “help” a stubborn exhaust manifold bolt with a massive breaker bar and absolutely zero penetrating oil. I sheared it off flush against the head. I spent the next six hours cursing, sweating, and nearly crying in my driveway. It felt like I’d just turned a twenty-dollar fix into a two-thousand-dollar engine replacement. But here is the good news: I’ve learned the hard way so you don’t have to. Today, we are going to walk through the exact steps to get that stubborn metal out without losing your sanity or your life savings. We’ll look at real-world auto repair hacks to save money while tackling the toughest extractions.
When Your Simple Afternoon Repair Goes Sideways
The reality is that bolts break because of age, heat cycles, or—more often than not—improper torque. It’s a frustrating cousin to the common mistake that snaps your wheel studs during a tire rotation. When that metal shears, your brain immediately jumps to the worst-case scenario. You start looking at essential auto repair strategies for frequent drivers just to see if you should give up and trade the car in. Don’t panic. Most broken bolts are actually salvageable if you don’t start drilling randomly. According to technical data from the Society of Automotive Engineers (SAE), the tension in a fastener is what provides the clamping force, but once that head is gone, that tension is often released, meaning the “stump” might actually be looser than you think. Have you ever felt that sinking feeling in your chest when a bolt gives way? Drop a comment and tell me your horror story.
Is this actually a job you can handle in a home garage?
You might be skeptical. You’ve probably seen those cheap “easy-out” kits at the hardware store and heard the legends of people breaking those brittle extractors inside the bolt, making a bad situation ten times worse. I did exactly that on a water pump once, and I ended up needing a specialized shop to save the block. It was a disaster. However, if you have the right patience and follow a proven sequence—using heat, vibration, and the correct drill bits—you can absolutely do this yourself. We’re going to focus on techniques that respect the existing threads so you don’t end up needing a heli-coil or a prayer. We’ll start with the least invasive methods before we bring out the heavy artillery.
Soak it in oil and walk away for an hour
Before you even touch a wrench, you need to realize that chemistry is more powerful than muscle. When a bolt shears off, it’s often because the threads have effectively cold-welded themselves together due to corrosion. You need a high-quality penetrating oil to break that bond. It is a lot like checking to see if your caliper slide pins are bone dry; if there is no lubrication, everything grinds to a halt. Spray the broken shank liberally and let it sit. I once rushed a job on an old rusty suspension link and broke my only extractor because I didn’t wait. Now, I spray the bolt, go have lunch, and let the liquid work its way into the microscopic gaps. This patience is one of the top auto repair tips to extend your vehicles lifespan and save your components from unnecessary trauma.
Give that drill bit a perfect target
If you decide to drill, you only get one shot at being centered. If your hole is off-center, you will eventually drill right into the threads of the engine block or the bracket, which turns a simple extraction into a nightmare. Use a spring-loaded center punch or a hammer-driven punch to create a deep divot exactly in the middle of the broken bolt. I learned this the hard way on a ’94 Jeep Cherokee. I thought I could eye-ball it, but the drill bit skated across the hardened steel and chewed a jagged path into the aluminum cylinder head. It took me three days to fix a mistake that a ten-second punch-mark would have prevented.
Why left-hand bits are your secret weapon
Standard drill bits turn clockwise, which is exactly the direction that tightens a bolt. If you use a standard bit, you risk driving the broken piece even deeper. Left-hand drill bits turn counter-clockwise. As the bit bites into the metal, the torque and the heat from the friction often grab the bolt and spin it right out of the hole before you even need to use an extractor. Think of it as a form of vehicle diagnostics explained through physical feedback; the bit tells you exactly how much tension is left in those threads. If the bolt doesn’t spin out, you at least have a perfectly centered pilot hole for your extraction tool.
The candle trick that beats rusted threads
When penetrating oil fails, heat is the equalizer. Using a propane torch to heat the metal surrounding the bolt causes it to expand, slightly enlarging the hole. But here is the real pro move: touch a paraffin wax candle to the threads of the hot bolt. The wax melts and wicks into the threads through capillary action, providing a level of lubrication that spray oils can’t reach. It’s a low-tech solution to a high-stress problem, much like decoding vehicle diagnostics to find a simple sensor fault instead of replacing an entire engine. Just as you might worry about the hidden sludge building up behind your clean dipstick, the rust inside those threads is an invisible enemy that only heat and wax can truly conquer. Always keep a steady hand and work slowly; rushing the extraction is the fastest way to turn a project into a permanent problem.
Why your extractor might be your worst enemy
Most DIYers reach for a spiral flute extractor the moment a bolt snaps. I’m here to tell you: stop. In my experience, these “easy-out” tools are often a trap. They are made of incredibly hard, brittle tool steel. If you exert too much torque and the extractor snaps inside the bolt, you’ve just put a piece of hardened steel—which a standard drill bit cannot touch—inside a hole you were already struggling with. It is a mistake that forces many into essential auto repair strategies for frequent drivers just to cope with the expensive downtime. Instead, I prefer straight-fluted extractors or the welding method which doesn’t rely on wedge-force that actually expands the bolt against the threads. Have you ever snapped an extractor and felt that instant regret? Let me know in the comments below.
Stop trusting the ‘heat it until it is red’ advice
While heat is a great tool, many people overdo it. The National Institute for Automotive Service Excellence (ASE) warns that excessive heat can actually alter the molecular structure of the surrounding casting, especially in aluminum engine blocks. You risk warping the surface or damaging nearby rubber seals, much like how the truth about those stop-leak additives in your radiator reveals they can cause more clogs than they fix. Instead of raw heat, try ‘thermal cycling’—heating the area and then cooling it rapidly with a penetrant. This creates microscopic fractures in the rust bond. People often think the heat ‘melts’ the rust, but it is actually the rapid expansion and contraction that does the heavy lifting.
Does every broken bolt require a full engine teardown?
The short answer is no, but it requires a change in strategy. If the bolt is flush, the pro-level move is to place a nut over the broken stud and fill the center with a MIG or TIG welder. The intense, localized heat of the weld breaks the rust bond, and the new nut gives you a fresh hex surface to turn. It is far more effective than most auto repair hacks to save money because it preserves the original threads without the risk of a drill bit wandering. This is as critical as performing vehicle diagnostics explained before a long trip; you don’t want to start with a compromised system. Many beginners believe that if a bolt is broken deep in a hole, it is ‘gone.’ However, by using a guide bushing, you can drill perfectly straight and use a square-style extractor to grab the walls of the bolt without spreading it. This level of patience and tool selection is essential for top auto repair tips to extend your vehicles lifespan. If you aren’t seeing progress after three heat cycles, it’s a sign to step back before you turn a manageable extraction into a permanent part of the engine block. Treat the physical repair with the same precision you’d use for decoding vehicle diagnostics and you will save your project.
Stop guessing and start using the gear that pays you back
After twenty years under hoods, I’ve realized that the difference between a pro and a weekend warrior isn’t just talent—it’s the kit in their drawer. You don’t need a ten-thousand-dollar rolling chest, but you do need the right gadgets for when the mechanical stuff goes digital. For instance, I always keep a specific circuit tester in my glovebox; it is the $20 tool every driver needs for basic electrical troubleshooting. When your car won’t start and you’ve already checked the battery, this thing is a lifesaver. I also swear by a high-impedance multimeter. Knowing how to find a parasitic battery drain with a basic multimeter has saved me from buying three unnecessary alternators in the last decade. If you are serious about your garage, stop buying the ‘value’ sets and invest in a set of flare nut wrenches and a high-quality torque wrench. Using a torque wrench on everything—even your oil drain plug—is one of those top auto repair tips to extend your vehicles lifespan because it prevents the very sheared bolts we’ve been fighting today.
How do I maintain my cars health over the long haul?
Maintenance is a mindset, not just a checklist. You have to stay ahead of the chemical breakdown of your fluids. We often focus on the big stuff, but oil change innovations technologies that save your engine are useless if you aren’t consistent. Similarly, following the ultimate guide to brake service for safety and performance means more than just swapping pads; it means flushing the old, moisture-heavy fluid out of the lines every two years. According to technical service data from Mitchell 1, nearly 40% of mechanical component failures in vehicles over five years old can be traced back to fluid neglect or improper fastener tension. I personally use a ‘paint pen’ method: every time I torque a critical bolt, I mark it with a dab of yellow paint. This lets me see at a glance if anything is backing out due to vibration. It’s a simple, pro-level habit that scales your garage confidence.
Look ahead to the future of DIY repairs
The world of auto repair is shifting rapidly toward predictive maintenance. We are moving away from fixing what is broken and toward how advanced vehicle diagnostics prevent costly breakdowns through real-time data. In the next few years, I expect to see more consumer-grade AI tools that can ‘listen’ to your engine through a smartphone and identify a failing bearing before it even starts to hum. This shift means that the mechanical skills you’re learning today—like extracting a broken bolt—will become even more valuable as we try to keep older, analog vehicles on the road in a digital world. If you want to level up right now, my challenge to you is this: go buy a real torque wrench and use it on your next tire rotation. It’s the single best way to ensure you never have to read an article about broken bolts again.
The Most Expensive Mistakes I Made So You Don’t Have To
Looking back at my years in the garage, I’ve realized that the bolt itself is rarely the problem—it is my own ego. If I could go back, I’d tell myself that if a bolt doesn’t move with moderate pressure, more force is never the answer. I used to think a bigger breaker bar was a sign of skill, but it is actually a sign of impending disaster. Now, I rely on a high-quality torque wrench for every task, because using it is one of the top auto repair tips to extend your vehicles lifespan and keep your sanity intact. Another lightbulb moment came when I stopped buying ‘cheap’ drill bits. A single high-speed steel bit that stays sharp is worth more than a drawer full of dull, budget-friendly options that just generate heat and frustration. Finally, I learned that ‘the walk away’ is a valid mechanical strategy. If you are angry, you will break things. Spray the penetrant, go watch a video on vehicle diagnostics explained, and come back when you are calm.
The Unsung Heroes of My Tool Chest
You don’t need to spend a fortune to be prepared for the worst-case scenarios. Aside from the extraction kits we discussed, I always keep the $20 tool every driver needs for basic electrical troubleshooting close at hand, because mechanical issues and electrical ghosts often travel together. I also highly recommend investing in a set of extraction-specific pliers; they have unique vertical serrations that grab onto shallow heads that a standard pair of pliers would just slip off of. For everything else, a reliable multimeter is essential—learning how to find a parasitic battery drain with a basic multimeter can save you from a weekend of chasing shadows when you’d rather be driving.
Your Journey From Frustrated to Fixer
Extracting a broken bolt is a rite of passage for any DIY mechanic. It is the moment you stop being a part-swapper and start being a problem-solver. By applying these auto repair hacks to save money, you are not just fixing a car; you are building the confidence to handle any curveball the road throws at you. Don’t let a piece of sheared steel stop your progress. Take it slow, use the right tools, and remember that every expert was once a beginner staring at a broken stud in disbelief. You’ve got this. Have you ever encountered a bolt that seemed truly impossible to remove? Let me know your story in the comments below!