
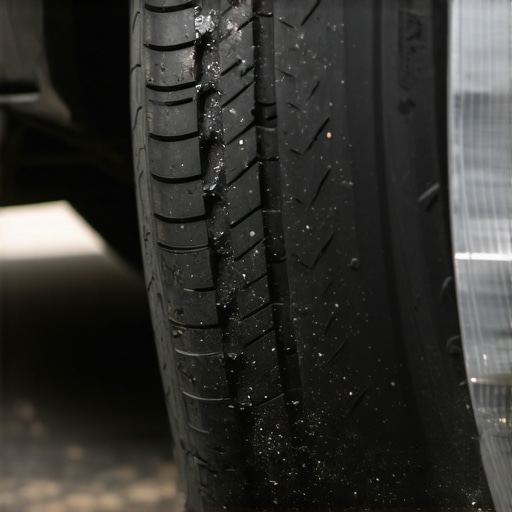
I stood there staring at my front passenger wheel, genuinely confused by the dark, gooey splatter decorating my nice alloy rim. It looked like I’d run over a giant jelly donut filled with black ink. I wiped a bit off with a paper towel, shrugged, and figured I’d deal with it during my next oil change. That was the most expensive shrug of my life. Fast forward three weeks: every time I turned into a parking spot, my car sounded like a skeleton having a seizure in a trash can. That splatter was the lifeblood of my CV joint, and once it was gone, the joint literally ground itself to pieces. If I had just spent five minutes looking behind the tire, I could have caught the tiny split in the rubber boot and saved my entire axle. My mistake cost me hundreds when a twenty-dollar piece of rubber could have fixed it. Today, I’m going to help you avoid that $600 headache by teaching you the ‘dirty’ signs of a failing boot before the joint goes belly-up. We are going for a preventative strike on your drivetrain.
Grease on Your Wheels is a Mechanical Emergency
I’ve learned the hard way that essential auto repair strategies for frequent drivers always start with your eyes, not your ears. If you wait until you hear the noise, you’re already writing a big check to the mechanic. The very first thing you should do—right now, if you can—is look at the inner barrel of your front wheels. When a CV boot tears, the centrifugal force of the spinning axle flings that thick, dark grease everywhere. It’s not just a mess; it’s a death sentence for your drivetrain. Learning how to spot a bad cv axle before it strands you starts with identifying this ‘grease ghost.’ A quick visual check is one of the most effective vehicle diagnostics you can perform at home without any tools. Have you ever noticed a weird, oily residue on your rims that didn’t come from a puddle?
Is this just a way for mechanics to scare me?
It’s a fair question to be skeptical about. You might think a little crack in a rubber sleeve isn’t a big deal, but here is the surprising reality: according to engineering data from Automotive Service Excellence (ASE) specialists, it’s not just the loss of grease that kills the joint—it’s the entry of road grit. A torn boot acts like a vacuum, sucking in sand and salt that turns your lubricant into an abrasive grinding paste. Once that ‘paste’ gets into the bearings, the countdown to a total breakdown starts. By staying proactive with top auto repair tips to extend your vehicles lifespan, you can replace a boot for the price of a nice dinner instead of replacing an axle for the price of a mortgage payment. Let’s get into the specifics of the ‘squeeze test’ and what you need to look for when you’re actually under the wheel well.To get a real look at what’s happening, you don’t even need to jack up the car yet. Start by cranking your steering wheel all the way to one side. This stretches the rubber boot out, exposing the ‘valleys’ between the ribs where cracks like to hide. If you’ve ever wondered what your car is trying to tell you, this is where the conversation gets loud. I remember a Saturday morning when I thought my boots were fine because there wasn’t a huge mess. I did the full-lock turn, reached in, and gave the rubber a firm squeeze. A tiny, hairline fracture opened up and oozed a single drop of gray goo. It looked like a paper cut, but that tiny slit was already letting in the road salt that destroys metal. That’s why auto repair hacks always prioritize these two-minute inspections over expensive replacements.
Get Your Hands Dirty with the Squeeze Test
Once you have the wheel turned, you need to feel the rubber. A healthy CV boot should feel like a thick, flexible garden hose. If it feels brittle, plastic-like, or ‘crunchy,’ the rubber has heat-cycled too many times and is ready to snap. Reach into the wheel well—be careful of hot components—and run your fingers through the accordion-like folds. You are looking for ‘weeping.’ This is when the grease hasn’t exploded yet, but the rubber is porous enough that a thin film of oil is coating the surface. 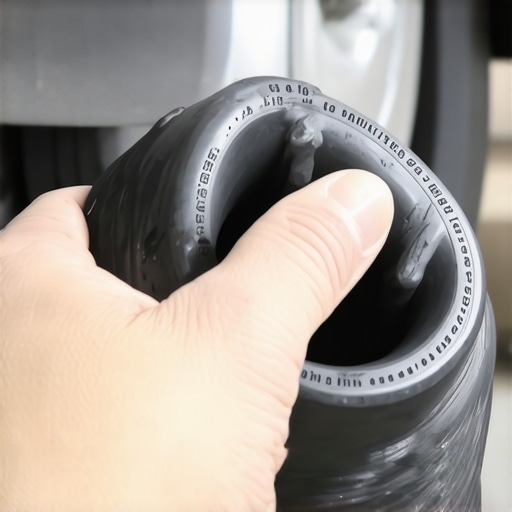 This is one of the most effective easy checks before your road trip. If your fingers come back with a thick, tacky black substance that smells like sulfur, your boot is compromised. It’s a messy job, but it’s the only way to catch the failure in the ‘rebootable’ stage. If the joint is still quiet, you can often just replace the rubber and the grease, saving the expensive metal core.
Don’t Confuse Axle Grease with Other Leaks
It’s easy to panic when you see fluid, but not every puddle is a death sentence for your drivetrain. CV grease is unique; it’s incredibly thick, almost like cold peanut butter, and it’s usually black or dark gray. If the fluid you see is thin and watery, you might actually be looking for caliper slide pins that are leaking or a brake line issue. Another common mix-up happens during a messy oil change, where spilled oil runs down the frame and drips onto the axle. The ‘smell test’ is your best friend here. Axle grease has a very distinct, heavy chemical odor that lingers on your skin even after washing. If it smells like a literal gear factory, it’s the CV boot.
The Sound of the Point of No Return
If you’ve skipped the visual check and you’re now hearing a rhythmic ‘click-click-click’ while turning, the diagnosis has changed. This is one of the most critical essential auto repair strategies to memorize: noise equals mechanical wear. When the grease is gone, the steel balls inside the joint rub directly against the housing. At this stage, how to spot a bad cv axle becomes less about prevention and more about damage control. You aren’t just looking for a tear anymore; you’re looking at a complete axle replacement because the internal tolerances are ruined. I once tried to ‘save’ a clicking axle by just putting a new boot on it. It was a waste of four hours and forty dollars. Once the grit gets in and the clicking starts, the metal is scarred, and no amount of fresh grease will heal it.
The New Part Trap That Most DIYers Fall Into
Everyone tells you to just swap the whole axle the moment you see grease because it is faster. But here is the secret many shops won’t tell you: an original equipment (OE) axle that has been rebooted is almost always superior to a $70 new aftermarket replacement from a big-box store. Those cheap replacements often use lower-grade steel and simplified cage designs that can not handle the same torque loads as your factory parts. It is a classic example of where auto repair hacks can actually backfire if you value long-term reliability. I have seen aftermarket axles snap during hard acceleration because the metal was not heat-treated to the same specs as the original. If your joint is not clicking yet, keep your high-quality factory steel and just fix the rubber.
Why does my steering wheel vibrate even with a brand-new axle?
This is the ‘Oops’ factor that drives people crazy. You replace the bad axle, but now you have a weird shimmy at 60 mph. This happens because many budget axles are not precision-balanced. According to standards and performance testing discussed by drivetrain specialists, even a few grams of weight imbalance on a rotating mass like a CV shaft can cause harmonic vibrations that eventually chew through your transmission seals. It is similar to why your synthetic oil turns black after just five hundred miles—the fluid is doing its job, but there is an underlying mechanical reality most people ignore. If you choose the cheap route, you might save $100 today but spend $1,000 on a transmission leak next year. Always check the ‘runout’ of a new axle before installing it.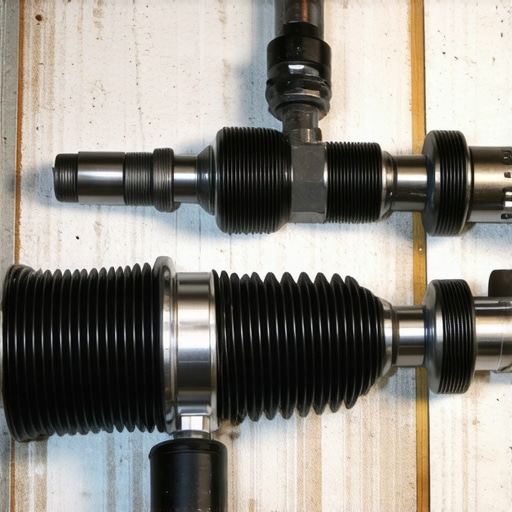
Beyond the Boot: The Hidden Connection to Your Transmission
When you are dealing with a failing boot, you are also dealing with the seal where the axle enters the gearbox. If you yank the axle out aggressively, you can nick that delicate rubber seal. Suddenly, you are not just losing grease; you are leaking vital gear oil. This is why top auto repair tips to extend your vehicles lifespan always emphasize precision over speed. Much like the drain plug crush washer mistake that ruins driveways, failing to replace the $5 axle seal while you have everything apart is a recipe for a second, more annoying repair later. Have you ever fallen into this trap of replacing one part only to break another? Let me know in the comments.
The Only Tools That Actually Save Your Knuckles
To do this job right, you have to move beyond the ‘adjustable wrench and a prayer’ phase of DIY work. I spent years struggling with zip ties on CV boots before I finally bought a dedicated ear-type clamp tool. If you want auto repair hacks that actually stick, this is one of them. Using standard pliers usually results in a loose clamp that lets grease leak out under high speed, whereas professional crimping pliers ensure a permanent, airtight seal. This precision is what separates a weekend fix from a permanent repair. When you are performing easy checks before your road trip, having the right lighting is equally critical. I use a high-lumen rechargeable magnetic work light that I can stick directly to the brake rotor, giving me a crystal-clear view of the inner boot folds where the most dangerous cracks hide.
How do I maintain my drivetrain over time?
Consistency is the secret sauce to a car that hits the 300,000-mile mark. I’ve integrated a full axle inspection into every single oil change I perform. While you are waiting for the pan to drain, you have about ten minutes of ‘dead time’—use it to check your boots and seals. This is the heart of essential auto repair strategies for frequent drivers. Don’t just look for tears; look for ‘ballooning.’ If the boot looks swollen, it means air is trapped inside and heating up, which is a precursor to a blowout. GKN Driveline, the leading manufacturer of CV joints globally, emphasizes in their technical documentation that using grease with exactly 3% Molybdenum Disulfide is non-negotiable for long-term survival. If you use generic ‘all-purpose’ grease, you are literally sandpapering your bearings from the inside out. 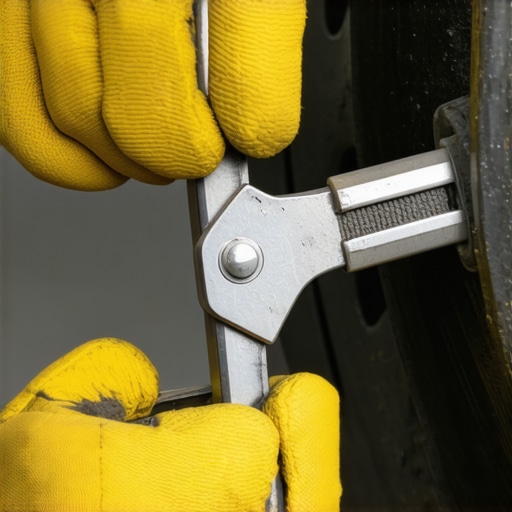
Why High-Torque EVs Are Changing the Game
Looking ahead, the humble CV axle is about to become the most stressed part of your car. With the rise of electric vehicles, we are seeing 100% of torque delivered at zero RPM. This instant ‘snap’ puts immense pressure on the internal cage of the joint. I predict that in the next five years, we will see a shift away from standard rubber boots toward more durable thermoplastic elastomers (TPE) as standard equipment to handle the heat and kinetic energy. Even if you aren’t driving an EV yet, what your car is trying to tell you through small vibrations will become more frequent as parts are pushed to their limits. If you’ve noticed why your synthetic oil turns black quickly, imagine the heat your axle grease is enduring. Take the leap this weekend: get under the car, find that boot, and do the squeeze test. Catching a $20 crack today is the most satisfying win you’ll ever have in your garage.
The Hard Truth About Those ‘Minor’ Rubber Cracks
After years of turning wrenches, I’ve realized that the biggest mechanical disasters usually start as a whisper, not a bang. When I look back at my own failures, the lesson is clear: never underestimate the chemical smell of axle grease. If you smell something heavy and sulfur-like after a drive, stop looking at the engine and start looking at your boots. Another lightbulb moment came when I stopped buying the cheapest parts possible. I learned that keeping your factory axle and simply replacing the rubber is one of the smartest auto repair hacks you can use to maintain high-performance standards. It’s about preserving the high-grade steel that came with your car from the factory. Most importantly, remember that cleanliness is mechanical health. A boot that looks slightly oily is already failing; don’t wait for the explosion of grease to tell you what your eyes already see.
Gear That Makes My Garage Life Easier
If you’re ready to tackle this yourself, there are a few things I never go under the car without. First, a dedicated ear-type clamp tool is non-negotiable—using zip ties or standard pliers is a recipe for a messy leak two weeks later. I also highly recommend a high-lumen magnetic work light to spot those hairline fractures in the rubber valleys. For those who want to dive deeper into long-term maintenance, I always point people toward the technical guides from GKN, the folks who actually design these systems. Integrating these checks into your routine easy checks before your road trip ensures you aren’t stranded in the middle of nowhere. I also keep a stash of high-quality Moly grease on hand, as generic lubricants just won’t cut it for the heat these joints generate.
Own Your Drivetrain’s Future
Taking control of your car’s health doesn’t require a master mechanic’s degree; it just requires ten minutes of your time and a bit of curiosity. By performing these visual inspections, you’re moving from a “reactive” driver to a “proactive” owner. You’re the one in charge of how to spot a bad cv axle before it can ruin your weekend plans. This simple habit is the cornerstone of top auto repair tips to extend your vehicles lifespan and will save you thousands of dollars over the life of your vehicle. Don’t be afraid to get a little grease on your hands—it’s the badge of a driver who knows their machine. Have you ever found a mysterious grease splatter on your wheels and wondered where it came from, or did you ignore it like I once did? Let me know your messiest car stories in the comments below!