
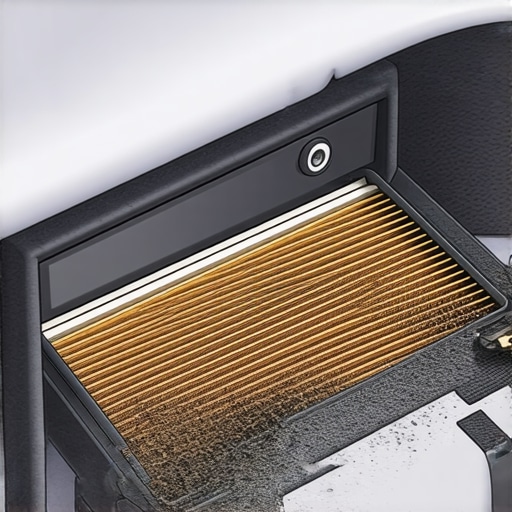
Nothing stings more than rolling down the windows on a scorching day and getting hit with an odor that smells suspiciously like a gym sock. I remember the moment I realized my car had become a stinky surprise—leaving me wondering why my fresh summer drives suddenly turned into a sniff test. It was only after some trial, error, and research that I discovered the culprit was my cabin air filter—and a common mistake that many car owners make. If you’ve ever experienced that unpleasant smell when turning on your AC, you’re not alone. Today, I want to share what I learned about this sneaky issue and how you can avoid falling into the same trap.
Why Your Car’s Air Freshener is Actually a Foul Surprise
At first, I thought it was just the smell of a neglected gym bag or maybe a musty basement. But as the smell persisted, I started digging. What I found was a common mistake—one that can turn your fresh air system into a source of foul odors. That mistake is installing or replacing your cabin air filter incorrectly, or worse, ignoring it altogether. The cabin air filter acts as the lungs of your vehicle’s interior, trapping dust, pollen, and even bacteria. When it’s dirty or improperly installed, it can harbor mold and mildew, resulting in that infamous socks smell. According to automotive experts, neglecting this simple component can cause indoor air quality issues and spread unpleasant odors throughout your vehicle. Understanding the proper installation and maintenance of your cabin air filter can save you from those embarrassing and stinky surprises.
Could a Simple Filter Be Sabotaging Your Drive?
I learned early on that my mistake was thinking I could just shove the filter into place without double-checking the direction of airflow or ensuring a proper seal. Trust me, the devil’s in the details. A poorly fitted filter allows unfiltered air—and the accompanying odors—to circulate freely. To make matters worse, some DIYers forget to replace the filter regularly, letting bacteria and mold build up over time. I had to admit, my rookie error was not consulting a reliable guide to auto maintenance. If I had known the importance of correct installation, I might have skipped the sock smell altogether. Want to know more about preventing costly auto mistakes? Check out [this guide on vehicle diagnostics](https://repairmycarpro.com/decoding-vehicle-diagnostics-what-your-car-is-trying-to-tell-you). Now that I’ve shared my story, let’s move on to the practical steps that will help you dodge this issue altogether.
Remove the Old Filter Carefully
Begin by locating your vehicle’s cabin air filter—usually behind the glove box or under the hood near the windshield. Use a screwdriver to remove any covers or screws holding it in place. Remember, don’t force the filter out—gently slide it free to avoid damaging surrounding components. For instance, during my last filter change, I accidentally cracked the plastic cover, leading to a tiny rattling noise that took me hours to diagnose. Always keep track of screws and clips to prevent losing parts during reassembly.
Check the Filter Orientation and Airflow Direction
Inspect the new filter’s arrows or markings indicating airflow. Align these with the direction of airflow in your vehicle—most filters have an arrow pointing towards the interior of the car. Installing it backwards can cause poor air quality or unfiltered air recirculation. I once installed a filter facing the wrong way, and within a week, I noticed the smell of mold returning. By simply flipping the filter, I restored clean air to my cabin and eliminated the odor.
Mark the Correct Direction The First Time
If your filter has no clear markings, refer to your vehicle’s manual or manufacturer’s website. Mark the correct orientation using a quick scribble with a marker on the filter’s edge. As a quick tip, I keep a small permanent marker in my glove box. During my last filter replacement, this prevented me from inserting it incorrectly, saving me another trip to the car repair shop. Correct orientation ensures proper filtration and airflow efficiency.
Seal the Filter Properly to Prevent Bypassing
Once aligned, gently press the filter into its slot, ensuring it sits flush and seals tightly around all edges. Gaps or misalignment allow unfiltered air, which can harbor mold or bacteria, leading to that sock smell. When I overlooked this step, I noticed dust accumulating on my dash—signs of unfiltered air sneaking past the filter. Take your time to ensure a snug fit, as this simple action quickly improves air quality.
Replace Covers and Secure Components
Reattach any covers, clips, or screws removed earlier. Double-check that everything is fastened tightly to avoid vibrations or rattles while driving. During my recent replacement, I left a cover slightly loose, which caused a squeaky noise at highway speed. This minor oversight reminded me to always double-check all fasteners—to save myself a future headache.
Test the System Before Driving Away
Turn on your vehicle’s AC or heater to verify airflow and check for any unusual sounds or odors. Feel the incoming air stream to confirm it’s fresh and filter-safe. If you detect an odor or poor airflow, double-check the filter installation. During my test run, I realized I forgot to reinsert a clip, which was blocking a vent—quick fix, and I was back to enjoying clean air.
Maintain and Replace Regularly
Set reminders to check and replace your cabin air filter at least once a year or every 12,000 to 15,000 miles—more often if you’re in dusty environments. Regular changes prevent mold buildup and keep your vehicle smelling fresh. I now schedule my replacements alongside oil changes, which is a great auto repair hack that saves time and money. By staying proactive, you avoid those embarrassing moments with foul odors during summer drives.
When it comes to vehicle maintenance, many car owners operate under misconceptions that can lead to unnecessary expenses and safety risks. One widespread myth is that all auto repair is straightforward and can be tackled with basic DIY skills. While some tasks like simple oil changes or replacing brake pads are manageable, there’s a fine line between DIY friendliness and detrimental oversimplification. For instance, numerous drivers believe that just draining and refilling the transmission fluid suffices to maintain transmission health, but as experts highlight, **proper diagnosis and understanding of internal components are crucial** to prevent catastrophic failures. Regularly referencing in-depth guides such as [auto repair hacks to save money](https://repairmycarpro.com/auto-repair-hacks-save-money-without-sacrificing-quality) can help you avoid these pitfalls.
Keeping Your Vehicle Running Smoothly with the Right Tools
Maintaining your vehicle over the long term requires more than just basic knowledge; it demands investing in the right equipment and mastering specific techniques. As someone who’s been working on cars for years, I can attest that having high-quality, precise tools makes all the difference in diagnosing issues early and performing repairs confidently. One indispensable tool I rely on is a scan tool that supports advanced diagnostics, such as the vehicle diagnostic scanner. It allows me to access hidden error codes, monitor real-time sensor data, and spot issues before they escalate into costly repairs. For example, during my last brake service, I used this device to identify a faulty ABS sensor that wasn’t triggering the warning light yet.
Alongside diagnostic software, I recommend investing in a reliable multimeter. A digital multimeter with a high voltage and current range helps me check electrical components like sensors, relays, and the battery. It’s invaluable when diagnosing battery drain issues or verifying sensor signals, ensuring you don’t replace parts unnecessarily. Personally, I prefer a multimeter with auto-ranging capabilities and a comprehensive set of probes; it saves time and minimizes errors.
When it comes to actual repairs or maintenance, I’m a big fan of quality hand tools—specifically, ratchet wrenches with a full set of sockets, precision screwdrivers, and a torque wrench. For precision tasks, such as tightening brake calipers or engine mounts, a torque wrench ensures you meet manufacturer specifications, preventing over-tightening or under-tightening. I recently improved my toolkit with a digital torque wrench that provides a clear readout and remembers previous settings, simplifying repeat jobs.
Looking ahead, I see the trend moving towards smarter diagnostics with apps and cloud-connected devices. In the future, vehicle maintenance may involve integrating your smartphone with car sensors, enabling real-time health reports and proactive alerts. Staying updated with new tools and software is vital to keep pace with these innovations. For further info on long-term vehicle care, check out top auto repair tips.
How do I maintain my diagnostic tools over time?
To ensure your diagnostic devices remain accurate, keep firmware updated and store them in protective cases to prevent damage. Regular calibration, especially for multimeters, helps maintain precision. Also, set aside time for routine software updates, which include bug fixes and new features, enhancing diagnostic reliability. Remember, well-maintained tools are the backbone of effective auto repairs, saving you money and frustration in the long run.
If you haven’t already, consider trying out an advanced diagnostic scanner this month. It’s an investment that pays off by catching issues early and reducing mechanic visits. Combining this with quality hand tools, you’ll be well-equipped to handle most auto maintenance tasks confidently, whether it’s an oil change, vehicle diagnostics, or brake service. Mastering these tools and techniques keeps your vehicle performing at its best and extends its lifespan.
Lessons From My Auto Repair Journey That Changed Everything
One of the most surprising lessons I learned is that seemingly minor maintenance tasks, like correctly installing a cabin air filter, can have a significant impact on your vehicle’s air quality and comfort. I once overlooked the importance of airflow direction markings, only to find my car smelling like a damp gym sock weeks later. That experience taught me to double-check every detail, realizing that attention to detail prevents costly mistakes and keeps your car feeling like new.
Another insight was understanding the importance of regular replacement schedules. It’s tempting to stretch out filter changes to save money, but I discovered mold and bacteria thrive on neglected filters, leading to foul odors and potential health issues. Now, I set calendar reminders for annual replacements, ensuring my cabin air remains fresh regardless of external conditions. Small habits like these save me from one of the most unpleasant surprises—bad smells during a summer drive.
Finally, I realized that proper fit and seal around the filter are crucial. Even if the filter is clean, a gap can let unfiltered air—and odors—circulate into your vehicle. Taking that extra minute to seal everything tightly not only prevents smells but also improves overall HVAC efficiency. These lessons, learned through personal experience, have transformed the way I approach vehicle maintenance and could do the same for you.
Gear Up with Tools That Make a Difference
To maintain your vehicle’s interior air quality effectively, I rely on specific tools that I trust deeply. A high-quality diagnostic scanner supports me in catching issues early—like detecting mold growth in the filter housing before it becomes a smell problem. For instance, my vehicle diagnostic scanner has helped me troubleshoot HVAC irregularities quickly.
Alongside this, a set of precision screwdrivers and a flashlight make accessing hidden components straightforward. A reliable multimeter also helps verify electrical connections, ensuring that the HVAC controls function correctly. Investing in these tools has saved me countless trips to the mechanic, giving me confidence to handle routine tasks like filter replacement with minimal stress. They truly are the backbone of effective DIY auto maintenance.
Looking ahead, smart tools with app integration promise a future where vehicle health reports are at your fingertips. Staying updated and maintaining these devices ensures your diagnoses are accurate and timely. For tips on managing your auto repair toolkit, you might find these strategies helpful.
Keep Your Diagnostic Equipment in Top Shape
Regular software updates and proper storage protect your tools’ longevity. Firmware updates fix bugs and add features, improving diagnostic accuracy. I keep my scanner in a protective case and check for updates monthly, which keeps my troubleshooting precise and reliable. Think of your auto repair tools as investments—maintain them well, and they’ll serve you for years to come.
Action Awaits Your Next Drive
Armed with knowledge and the right tools, you’re now capable of preventing those stinky surprises that can ruin your driving experience. Regularly inspecting and replacing your cabin air filter not only improves air quality but also prolongs the life of your HVAC system. Remember, proactive maintenance creates a fresher, healthier driving environment for you and your passengers.
Now, it’s your turn—have you ever overlooked a simple step that led to unexpected odors or discomfort in your vehicle? Share your story below and let’s learn from each other’s auto repair adventures!