

I was sitting in my driveway last Tuesday, the humidity thick enough to swim in, when I finally hit the ‘Max AC’ button. Instead of a refreshing blast of cool air, I was greeted by a rhythmic, mechanical tap-tap-tap that sounded like a tiny construction crew was renovating my glovebox. It drove me absolutely nuts. I even tried turning the radio up, but you can’t easily drown out a sound that vibrates through your very soul and seems to mock you every time you adjust the temperature. If you’ve ever felt like your car was possessed by a rhythmic ghost, I know exactly where you are. It’s frustrating, it’s distracting, and honestly, it makes you feel like the whole car is about to fall apart. But here is the good news: I’ve been through the ringer with this specific issue, and it’s rarely as catastrophic as it sounds. Today, we are going to identify that gremlin and prove that you don’t need a degree in engineering to reclaim your peace and quiet.
Find the Gremlin Behind Your Glovebox
Most of the time, that clicking is just a twenty-dollar plastic motor called a blend door actuator that has lost its mind. I made a massive mistake when I first started working on my own cars—I assumed the noise meant my entire HVAC unit was toast. I actually paid a shop nearly five hundred dollars to ‘diagnose and repair’ what I later realized was a simple plug-and-play part I could have swapped while wearing pajamas. Talk about a punch to the gut. Now, I always use vehicle diagnostics explained to narrow things down before I ever pull out a credit card or a wrench. If you are currently dealing with the clicking noise under the dash when you change the temperature, you are likely just dealing with a stripped plastic gear that can no longer find its home. It is a classic case of a small, inexpensive part failing and causing a massive headache for the driver. Have you ever found yourself pressing on random parts of your dashboard just hoping the clicking would stop? You aren’t alone in that struggle.
Do I really need to take the whole dashboard apart?
This is the biggest fear every DIYer has when they hear noises coming from the vents. You see a video online of someone with their entire steering column on the floor just to reach one screw, and you think, ‘Nope, I will just live with the noise.’ But hold on a second. While some cars are designed by engineers who clearly never had to fix their own vehicles, many actuators are accessible just by dropping the glovebox or reaching up from the footwell with a small ratchet. According to the automotive experts at Kelley Blue Book, labor costs can account for up to eighty percent of the total bill for interior dashboard repairs because of the time involved in accessing the components. By using some auto repair hacks to save money, you can keep that cash in your pocket. We are going to look at decoding vehicle diagnostics to confirm exactly which actuator is failing so you do not waste time pulling the wrong side of the dash. Using essential auto repair strategies is about working smarter, not harder, and that starts with knowing exactly what that clicking sound is trying to tell you.
How to Pinpoint the Exact Motor Failing
Think of your car’s HVAC system as a series of gates. Each gate is controlled by a tiny motor—the actuator. If a gear inside that motor snaps, it’s like a gate trying to swing on a broken hinge; it just thuds against the stop repeatedly. To find out which one is the culprit, you need to cycle through your settings one by one. Turn on the AC and switch from the floor to the vents, then to the defrost. If the clicking only happens when you change the airflow direction, you are looking at a mode door actuator. If it only happens when you adjust the temperature from hot to cold, it is the blend door. I remember helping a friend with a rattling dash where we spent an hour looking for a loose bolt, only to realize that the clicking noise under the dash when you change the temperature was the only clue we needed. We finally used decoding vehicle diagnostics to see which circuit was struggling to reach its position.
Clear the Way by Dropping the Glovebox
In many modern sedans and SUVs, the most common failure point is sitting right behind the glovebox. You don’t need to be a gymnast to reach it, but you do need to empty out those three years of old napkins and registration papers. Most gloveboxes have a small dampener arm on the side—pop that off first—and then squeeze the sides of the box inward to let it drop past the stoppers. While you are in there, it is the perfect time to see how to tell if your cabin air filter is making your ac weak, because a clogged filter can actually put unnecessary strain on the entire system. 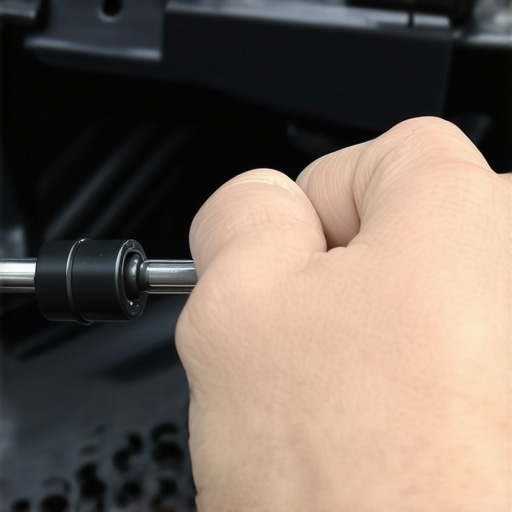
Swap the Part Without Losing Your Sanity
Once the glovebox is out, you will see the actuator. It usually looks like a small black plastic box with a wire harness plugged into it. This is where auto repair hacks to save money really come into play. Instead of using a standard screwdriver, grab a small 1/4-inch drive ratchet or even a ‘thumb ratchet’ for those tight corners. I once dropped a screw into the dark abyss behind the center console of my old Camry, and I spent more time fishing it out with a magnet than I did actually replacing the part. Keep a magnetic tray nearby. Unplug the electrical connector, remove the two or three mounting screws, and the old unit should slide right off the D-shaped shaft of the door.
The Simple Calibration Step to Protect New Gears
Before you bolt everything back together, you need to make sure the door itself moves freely. Use your fingers to rotate the plastic shaft that the actuator connects to. It should swing smoothly without binding. If it feels stuck, no amount of new motors will fix the problem. When you install the new part, the splines might not line up perfectly with the shaft. Don’t force it or you’ll snap the new plastic gear instantly. Plug the wire harness into the new actuator and turn the car’s ignition to ‘On’ without starting the engine. Use the climate controls to move the actuator until it matches the position of the door. This little alignment trick is one of the top auto repair tips to extend your vehicles lifespan because it prevents the motor from stripping its new teeth on the very first cycle. You can even use the 20 tool every driver needs for basic electrical troubleshooting to ensure the connector is sending a 5-volt signal if the new part refuses to respond to your commands.We need to talk about the biggest trap in modern car repair: the belief that a computer code is a definitive repair order. Everyone tells you to just ‘go to the parts store and get the code read,’ but in my experience, that often leads to more wasted money than almost anything else. You see a code for an oxygen sensor and immediately buy a new one, but the real issue might be a cracked vacuum hose or a loose intake boot. This is why how advanced vehicle diagnostics prevent costly breakdowns isn’t just a catchy phrase—it is a philosophy of verification. If you don’t verify the failure with a manual test, you are just firing a ‘parts cannon’ at your wallet and hoping something sticks.
Why does my scanner show a sensor fault when the wiring is the real culprit?
This is the specific nuance that separates a frustrated DIYer from a confident home mechanic. Your car’s computer does not actually ‘see’ the physical sensor; it only monitors the electrical signal returning from it. If a wire is frayed or a ground point is corroded, the computer simply assumes the sensor has died because the signal is missing or wonky. This is exactly why your OBD-II scanner cant find the real electrical ghost without a little manual intervention. I once spent an entire weekend chasing a catalytic converter code, only to realize why your scanner says p0420 but the converter is actually fine—it was just a tiny exhaust leak letting fresh air hit the sensor. A report by the National Institute for Automotive Service Excellence (ASE) suggests that misdiagnosis is the leading cause of failed DIY repairs, often due to a lack of circuit testing. To avoid this, I always use essential auto repair strategies like the ‘wiggle test’ on the wiring harness while the engine is idling. If the RPMs stumble when you touch the wires, you’ve found your ghost. Have you ever fallen into this trap of replacing a perfectly good part because of a misleading code? Let me know in the comments. 
Escape the trap of the parts cannon methodology
The ‘Oops’ factor in advanced repair is neglecting the simple power source. People often jump into a three-hour teardown before checking a ten-cent fuse or a clicking relay. Before you pull the trigger on a hundred-dollar component, use the 20 tool every driver needs for basic electrical troubleshooting to check for 12-volt power and continuity at the plug. It is about being analytical rather than impulsive. If you are dealing with that clicking dash we discussed, and a new actuator doesn’t solve it, don’t just buy another one. Check the signal coming from the HVAC control head itself. This level of detail is what keeps your vehicle reliable and your bank account healthy. By mastering these nuances, you are no longer just a person with a wrench; you are the master of your machine.I used to think my fifteen-dollar Bluetooth OBD-II dongle was the peak of technology until I tried to diagnose a complex CAN-bus communication error on my neighbor’s SUV. It was like trying to perform heart surgery with a butter knife. To truly escape the ‘parts cannon’ cycle, you need a bidirectional scan tool. Unlike the basic code readers that just spit out a generic number, a bidirectional tool allows you to command the car to do things—like forcing an HVAC actuator to move or turning on a fuel pump—without the engine running. This is the gold standard for vehicle diagnostics explained in a way that actually solves problems. I personally rely on a mid-range Autel unit because it lets me see live data streams in graph form, making it much easier to spot a glitchy sensor that is failing intermittently. If you aren’t looking at live data, you are essentially guessing. Combining this with the 20 tool every driver needs for basic electrical troubleshooting allows you to verify if the computer’s command is actually reaching the component.
How do I maintain these sensitive electronic systems over the long haul?
Keeping a modern car healthy involves more than just fluid changes; it requires monitoring the ‘digital health’ of the vehicle. According to the Bosch Automotive Handbook, a flagship reference in automotive engineering, modern luxury vehicles can house over 100 networked Electronic Control Units (ECUs) communicating simultaneously. To prevent these from failing, you must ensure your battery and alternator are in top shape, as low voltage is the number one cause of ‘ghost’ codes. I always suggest using top auto repair tips to extend your vehicles lifespan, such as cleaning your battery terminals annually and checking for how to tell if your cabin air filter is making your ac weak to prevent the HVAC blower motor from drawing too much current and frying a circuit.  Looking ahead, the trend is moving toward ‘Connected Diagnostics’ where your car will likely email you a PDF of its own health report before you even notice a symptom. We are entering an era where how advanced vehicle diagnostics prevent costly breakdowns will be handled by AI-driven cloud platforms. But until your car can fix itself, you still need to be the one with the plan. Using essential auto repair strategies like keeping a digital log of your live data ‘normals’ can help you spot a trend before it becomes a tow-truck bill. I challenge you to plug in a scanner this weekend—even if you don’t have a light on—and look at your short-term fuel trims. Knowing what ‘healthy’ looks like is the best way to spot ‘sick’ early on. By applying these auto repair hacks to save money and staying disciplined with your decoding vehicle diagnostics, you transform from a reactive owner to a proactive technician of your own driveway.
I was sitting in my driveway last Tuesday, the humidity thick enough to swim in, when I finally hit the ‘Max AC’ button. Instead of a refreshing blast of cool air, I was greeted by a rhythmic, mechanical tap-tap-tap that sounded like a tiny construction crew was renovating my glovebox. It drove me absolutely nuts. I even tried turning the radio up, but you can’t easily drown out a sound that vibrates through your very soul and seems to mock you every time you adjust the temperature. If you’ve ever felt like your car was possessed by a rhythmic ghost, I know exactly where you are. It’s frustrating, it’s distracting, and honestly, it makes you feel like the whole car is about to fall apart. But here is the good news: I’ve been through the ringer with this specific issue, and it’s rarely as catastrophic as it sounds. Today, we are going to identify that gremlin and prove that you don’t need a degree in engineering to reclaim your peace and quiet.
Find the Gremlin Behind Your Glovebox
Most of the time, that clicking is just a twenty-dollar plastic motor called a blend door actuator that has lost its mind. I made a massive mistake when I first started working on my own cars—I assumed the noise meant my entire HVAC unit was toast. I actually paid a shop nearly five hundred dollars to ‘diagnose and repair’ what I later realized was a simple plug-and-play part I could have swapped while wearing pajamas. Talk about a punch to the gut. Now, I always use vehicle diagnostics explained to narrow things down before I ever pull out a credit card or a wrench. If you are currently dealing with the clicking noise under the dash when you change the temperature, you are likely just dealing with a stripped plastic gear that can no longer find its home. It is a classic case of a small, inexpensive part failing and causing a massive headache for the driver. Have you ever found yourself pressing on random parts of your dashboard just hoping the clicking would stop? You aren’t alone in that struggle.
Do I really need to take the whole dashboard apart?
This is the biggest fear every DIYer has when they hear noises coming from the vents. You see a video online of someone with their entire steering column on the floor just to reach one screw, and you think, ‘Nope, I will just live with the noise.’ But hold on a second. While some cars are designed by engineers who clearly never had to fix their own vehicles, many actuators are accessible just by dropping the glovebox or reaching up from the footwell with a small ratchet. According to the automotive experts at Kelley Blue Book, labor costs can account for up to eighty percent of the total bill for interior dashboard repairs because of the time involved in accessing the components. By using some auto repair hacks to save money, you can keep that cash in your pocket. We are going to look at decoding vehicle diagnostics to confirm exactly which actuator is failing so you do not waste time pulling the wrong side of the dash. Using essential auto repair strategies is about working smarter, not harder, and that starts with knowing exactly what that clicking sound is trying to tell you.
How to Pinpoint the Exact Motor Failing
Think of your car’s HVAC system as a series of gates. Each gate is controlled by a tiny motor—the actuator. If a gear inside that motor snaps, it’s like a gate trying to swing on a broken hinge; it just thuds against the stop repeatedly. To find out which one is the culprit, you need to cycle through your settings one by one. Turn on the AC and switch from the floor to the vents, then to the defrost. If the clicking only happens when you change the airflow direction, you are looking at a mode door actuator. If it only happens when you adjust the temperature from hot to cold, it is the blend door. I remember helping a friend with a rattling dash where we spent an hour looking for a loose bolt, only to realize that the clicking noise under the dash when you change the temperature was the only clue we needed. We finally used decoding vehicle diagnostics to see which circuit was struggling to reach its position.
Clear the Way by Dropping the Glovebox
In many modern sedans and SUVs, the most common failure point is sitting right behind the glovebox. You don’t need to be a gymnast to reach it, but you do need to empty out those three years of old napkins and registration papers. Most gloveboxes have a small dampener arm on the side—pop that off first—and then squeeze the sides of the box inward to let it drop past the stoppers. While you are in there, it is the perfect time to see how to tell if your cabin air filter is making your ac weak, because a clogged filter can actually put unnecessary strain on the entire system.
Swap the Part Without Losing Your Sanity
Once the glovebox is out, you will see the actuator. It usually looks like a small black plastic box with a wire harness plugged into it. This is where auto repair hacks to save money really come into play. Instead of using a standard screwdriver, grab a small 1/4-inch drive ratchet or even a ‘thumb ratchet’ for those tight corners. I once dropped a screw into the dark abyss behind the center console of my old Camry, and I spent more time fishing it out with a magnet than I did actually replacing the part. Keep a magnetic tray nearby. Unplug the electrical connector, remove the two or three mounting screws, and the old unit should slide right off the D-shaped shaft of the door.
The Simple Calibration Step to Protect New Gears
Before you bolt everything back together, you need to make sure the door itself moves freely. Use your fingers to rotate the plastic shaft that the actuator connects to. It should swing smoothly without binding. If it feels stuck, no amount of new motors will fix the problem. When you install the new part, the splines might not line up perfectly with the shaft. Don’t force it or you’ll snap the new plastic gear instantly. Plug the wire harness into the new actuator and turn the car’s ignition to ‘On’ without starting the engine. Use the climate controls to move the actuator until it matches the position of the door. This little alignment trick is one of the top auto repair tips to extend your vehicles lifespan because it prevents the motor from stripping its new teeth on the very first cycle. You can even use the 20 tool every driver needs for basic electrical troubleshooting to ensure the connector is sending a 5-volt signal if the new part refuses to respond to your commands.
Avoid the Trap of the Parts Cannon
We need to talk about the biggest trap in modern car repair: the belief that a computer code is a definitive repair order. Everyone tells you to just ‘go to the parts store and get the code read,’ but in my experience, that often leads to more wasted money than almost anything else. You see a code for an oxygen sensor and immediately buy a new one, but the real issue might be a cracked vacuum hose or a loose intake boot. This is why how advanced vehicle diagnostics prevent costly breakdowns isn’t just a catchy phrase—it is a philosophy of verification. If you don’t verify the failure with a manual test, you are just firing a ‘parts cannon’ at your wallet and hoping something sticks.
Why does my scanner show a sensor fault when the wiring is the real culprit?
This is the specific nuance that separates a frustrated DIYer from a confident home mechanic. Your car’s computer does not actually ‘see’ the physical sensor; it only monitors the electrical signal returning from it. If a wire is frayed or a ground point is corroded, the computer simply assumes the sensor has died because the signal is missing or wonky. This is exactly why your OBD-II scanner cant find the real electrical ghost without a little manual intervention. I once spent an entire weekend chasing a catalytic converter code, only to realize why your scanner says p0420 but the converter is actually fine—it was just a tiny exhaust leak letting fresh air hit the sensor. A report by the National Institute for Automotive Service Excellence (ASE) suggests that misdiagnosis is the leading cause of failed DIY repairs, often due to a lack of circuit testing. To avoid this, I always use essential auto repair strategies like the ‘wiggle test’ on the wiring harness while the engine is idling. If the RPMs stumble when you touch the wires, you’ve found your ghost. Have you ever fallen into this trap of replacing a perfectly good part because of a misleading code? Let me know in the comments.
Escape the trap of the parts cannon methodology
The ‘Oops’ factor in advanced repair is neglecting the simple power source. People often jump into a three-hour teardown before checking a ten-cent fuse or a clicking relay. Before you pull the trigger on a hundred-dollar component, use the 20 tool every driver needs for basic electrical troubleshooting to check for 12-volt power and continuity at the plug. It is about being analytical rather than impulsive. If you are dealing with that clicking dash we discussed, and a new actuator doesn’t solve it, don’t just buy another one. Check the signal coming from the HVAC control head itself. This level of detail is what keeps your vehicle reliable and your bank account healthy. By mastering these nuances, you are no longer just a person with a wrench; you are the master of your machine.
The Real Cost of Blindly Trusting Cheap Scanners
I used to think my fifteen-dollar Bluetooth OBD-II dongle was the peak of technology until I tried to diagnose a complex CAN-bus communication error on my neighbor’s SUV. It was like trying to perform heart surgery with a butter knife. To truly escape the ‘parts cannon’ cycle, you need a bidirectional scan tool. Unlike the basic code readers that just spit out a generic number, a bidirectional tool allows you to command the car to do things—like forcing an HVAC actuator to move or turning on a fuel pump—without the engine running. This is the gold standard for vehicle diagnostics explained in a way that actually solves problems. I personally rely on a mid-range Autel unit because it lets me see live data streams in graph form, making it much easier to spot a glitchy sensor that is failing intermittently. If you aren’t looking at live data, you are essentially guessing. Combining this with the 20 tool every driver needs for basic electrical troubleshooting allows you to verify if the computer’s command is actually reaching the component.
How do I maintain these sensitive electronic systems over the long haul?
Keeping a modern car healthy involves more than just fluid changes; it requires monitoring the ‘digital health’ of the vehicle. According to the Bosch Automotive Handbook, a flagship reference in automotive engineering, modern luxury vehicles can house over 100 networked Electronic Control Units (ECUs) communicating simultaneously. To prevent these from failing, you must ensure your battery and alternator are in top shape, as low voltage is the number one cause of ‘ghost’ codes. I always suggest using top auto repair tips to extend your vehicles lifespan, such as cleaning your battery terminals annually and checking for how to tell if your cabin air filter is making your ac weak to prevent the HVAC blower motor from drawing too much current and frying a circuit.
Looking ahead, the trend is moving toward ‘Connected Diagnostics’ where your car will likely email you a PDF of its own health report before you even notice a symptom. We are entering an era where how advanced vehicle diagnostics prevent costly breakdowns will be handled by AI-driven cloud platforms. But until your car can fix itself, you still need to be the one with the plan. Using essential auto repair strategies like keeping a digital log of your live data ‘normals’ can help you spot a trend before it becomes a tow-truck bill. I challenge you to plug in a scanner this weekend—even if you don’t have a light on—and look at your short-term fuel trims. Knowing what ‘healthy’ looks like is the best way to spot ‘sick’ early on. By applying these auto repair hacks to save money and staying disciplined with your decoding vehicle diagnostics, you transform from a reactive owner to a proactive technician of your own driveway.
Hard-Earned Lessons from the Dashboard Trenches
Reflecting on years of bruised knuckles and rhythmic clicking, I’ve realized that the physical repair is often the easiest part—it’s the mental hurdle that stops most people. Here are a few lightbulb moments I wish I had known sooner:
- The Cabin Filter Connection: I once replaced an actuator only for the noise to return a month later. The real culprit? A mouse had built a nest in the cabin filter, and a stray twig was jamming the door. Always check for obstructions before assuming the motor is dead.
- Respect the Plastic: Modern dashboards are held together by brittle clips. If you are prying until you’re red in the face, you’ve missed a hidden screw. Slow down and use a plastic trim tool kit.
- Verify the Part Number: Many blend door actuators look identical but have different internal gear ratios. Just because it plugs in doesn’t mean it will calibrate. Always match the OEM number stamped on the plastic housing.
My Personal Diagnostic Shortlist
I don’t believe in buying every tool in the catalog, but a few specific items have paid for themselves ten times over. First, the 20 tool every driver needs for basic electrical troubleshooting (a quality digital multimeter) is non-negotiable for checking ground circuits. Second, I highly recommend ‘The Internal Combustion Engine’ by John B. Heywood if you want to understand the ‘why’ behind the sensor data. Finally, I rely on YouTube channels like South Main Auto for real-world visual walkthroughs. I trust these because they prioritize logic over parts-swapping.
Take the Lead on Your Next Repair
There is a profound sense of satisfaction that comes from silencing a noise that everyone else said would cost a thousand dollars to fix. You don’t have to be a professional to achieve professional results; you just need to be more patient than the problem itself. By mastering vehicle diagnostics explained in this guide, you’ve taken the most important step toward automotive independence. Don’t let a plastic gear mock you from behind the dashboard. Grab your tools, drop that glovebox, and reclaim your peace of mind. Have you ever replaced a part only to realize the real issue was a simple loose wire or a blown fuse? Let me know your biggest ‘oops’ moment in the comments below!