
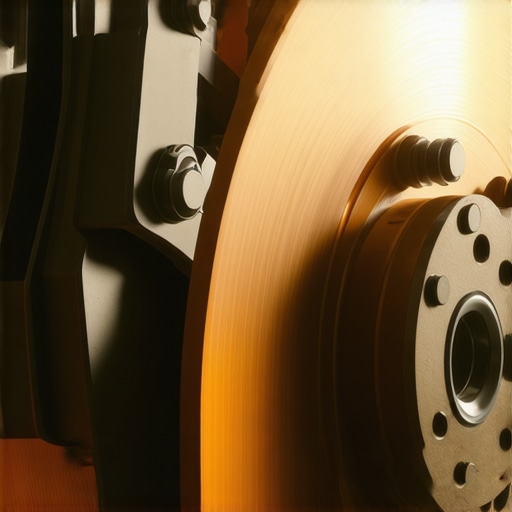
I still remember the first time I felt that sickening ‘give’ under my right foot. I was halfway through a six-hour trek, winding down a long mountain grade, when I went to slow down for a sharp hairpin turn. Instead of that firm, reassuring resistance I expected, the pedal just kept going. It felt exactly like stepping into a bucket of wet sand. My heart did a backflip. I managed to pump the brakes and get the car stopped safely, but the sweat on my palms told the real story. Early in my DIY days, I made the classic mistake of thinking I could just ‘drive through it’ if I was careful. I assumed the brakes were just tired and needed a rest. That was a dangerous assumption that almost cost me a front bumper and a whole lot of pride. If you’ve ever felt your brakes lose their bite after a few hours on the road, you aren’t imagining things, and you definitely shouldn’t ignore it. Today, I’m going to walk you through exactly why this happens and how you can reclaim that firm pedal feel without losing your mind or your savings account. Have you ever faced this specific problem on a trip? [IMAGE_PLACEHOLDER]
Don’t Let Your Brakes Turn to Mush on the Highway
The primary culprit behind a spongy pedal during long hauls is heat. Pure and simple. Your brakes work by converting kinetic energy into thermal energy through friction. On a long drive, especially with frequent braking or heavy loads, that heat builds up in the calipers and pads at an incredible rate. If your brake fluid is old, it has likely absorbed moisture from the air over time. Brake fluid is naturally hygroscopic, meaning it acts like a sponge for water. Since water boils at a much lower temperature than brake fluid, it turns into steam inside your brake lines. Unlike liquid, gas is compressible. So, when you hit the pedal, you’re just squishing steam bubbles instead of moving brake pads. This is why performing vehicle diagnostics for road trips is so vital to catch old fluid before it ruins your vacation. I learned the hard way that skipping a fluid flush is a recipe for disaster. According to the National Highway Traffic Safety Administration (NHTSA), brake system issues are a critical factor in roughly 22% of crashes where a vehicle component failed, often due to neglected maintenance. You might also want to look into the ultimate guide to brake service to see how high-performance fluids can handle these high temperatures much better than the cheap stuff. If the pedal stays low or feels weird even when the car has cooled down, you might need to check if your brake booster is leaking air, as that can cause its own set of terrifying headaches.
Is a Spongy Pedal Actually a Sign of Total Brake Failure?
It’s the question that keeps us up at night when we’re planning a big family trip. Is my car about to become a runaway train? While a spongy pedal doesn’t always mean your brakes have completely failed, it is your car’s way of shouting that the system is seriously compromised. Skeptics often argue that if the car still stops eventually, it’s not a big deal. I used to be one of them until I realized that ‘fine’ disappears the second you need to make an emergency stop on a hot afternoon. Once that fluid reaches its boiling point, you have significantly less stopping power than you did ten miles ago. To fix this properly, you’ll eventually need to learn the trick to bleeding brakes alone to get that nasty air out and restore your safety. Trust me, your future self will thank you when you’re cruising through the mountains with total confidence in your stopping power.
Check Your Fluid for Contamination and Color
The very first thing you need to do is pop the hood and look at your brake fluid reservoir. Think of your brake fluid like the blood in your car’s veins; if it’s dirty, nothing functions right. Fresh fluid should look like clear apple juice or a light amber. If yours looks like burnt coffee or has black flecks floating in it, it’s cooked. This happens because brake fluid is designed to withstand heat, but eventually, the chemical stabilizers break down. When I was first starting out, I ignored a reservoir that looked like ink because I thought as long as it was full, I was safe. I quickly learned that decoding vehicle diagnostics is about more than just looking at levels; it’s about inspecting quality. If that fluid has absorbed water, your boiling point has plummeted, and that’s where the sponge-factor comes from. 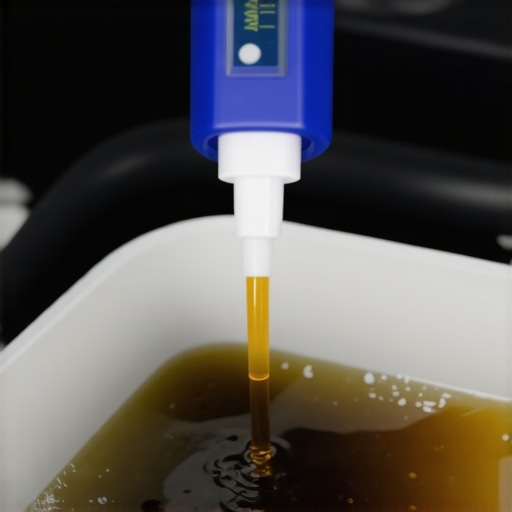
Master the One-Person Bleed Technique
Once you’ve confirmed the fluid is old or that air has entered the system, you have to get it out. This is where most people get intimidated and head straight to a shop, but you can actually handle this in your driveway. In my early twenties, I tried to bleed my brakes by having a friend pump the pedal while I turned the wrench. We ended up with air trapped in the ABS module and a car that wouldn’t stop at all. It was a total mess that took a professional tow to fix. Now, I use the trick to bleeding brakes alone using a simple check-valve bottle. This keeps air from being sucked back into the caliper when you release the pedal. You start at the wheel furthest from the master cylinder—usually the passenger rear—and work your way forward. This ensures every bit of old, bubbly fluid is pushed out of the longest lines first. It’s one of those auto repair hacks that saves you a hundred bucks in labor and gives you back that rock-hard pedal feel.
Inspect the Hard Lines and Rubber Hoses
If you bleed the system and the pedal still feels like you’re stepping on a marshmallow, the problem might be physical expansion. Rubber brake hoses can weaken over time. Under high pressure, instead of pushing the pistons in the caliper, the hose actually swells outward like a balloon. This ‘ballooning’ consumes the hydraulic force that should be stopping your wheels. I once worked on an old truck where the driver complained of a soft pedal only when he was towing. We found that the heat from the brakes was making the old rubber hoses so soft they were practically doubling in size every time he hit the brakes. To avoid this, part of the ultimate guide to brake service involves checking for cracks or ‘wet’ spots on these hoses. If you see any bulging, they need to be replaced immediately. Also, don’t forget to check if your brake booster is leaking air, because a vacuum leak can also mimic that lack of firm resistance, making you work twice as hard for half the stopping power.
Choose the Right Fluid for Your Driving Style
Not all brake fluids are created equal, and this is where many DIYers get tripped up. There are huge brake service myths suggesting that DOT 3, 4, and 5 are all interchangeable—they aren’t. If you’re doing a lot of mountain driving or heavy highway commuting, moving to a high-quality DOT 4 with a higher boiling point can make a massive difference. Just be careful not to use silicone-based DOT 5 unless your car specifically calls for it, as it won’t mix with others and can ruin your seals. I switched to a high-temp synthetic fluid on my daily driver after that mountain scare, and the pedal has stayed firm even on the hottest July afternoons.
But getting the fluid right is only half the battle. The real expertise comes in knowing when the problem isn’t mechanical at all, but rather a diagnostic ghost in the machine. I’ve seen too many DIYers fall into the trap of ‘throwing parts’ at a problem. Everyone tells you to buy a cheap scanner and swap whatever part the code mentions, but in my experience, that’s the fastest way to empty your wallet without fixing the car. Diagnostics isn’t about reading a code; it’s about verifying a circuit. A code for an O2 sensor doesn’t necessarily mean the sensor is dead; it means the data from that circuit is out of range. If you just swap the part, you might be ignoring a vacuum leak or a frayed wire. According to the CarMD Vehicle Health Index, misdiagnosing check engine lights often leads to unnecessary repairs that fail to address the root cause, costing drivers hundreds in wasted parts. This is where decoding vehicle diagnostics becomes an art form rather than a checklist. If you jump the gun, you’re just playing a guessing game.
Stop Treating Your OBD-II Scanner Like a Magic Wand
The biggest nuance most beginners miss is that a scanner is a compass, not a map. It points you in a direction, but it doesn’t drive you to the destination. I remember a case where a friend replaced three different sensors because his scanner kept throwing ‘low voltage’ codes. It turned out the main ground wire to the engine block was corroded. No amount of new sensors would have fixed that. That’s why I always emphasize that how advanced vehicle diagnostics prevent costly breakdowns involves looking at the systemic health of the vehicle rather than just isolated components.
Why does your scanner blame the catalytic converter when it’s actually fine?
This is the ‘P0420’ trap, and it’s the bane of every advanced DIYer’s existence. Your scanner says the converter is under-performing, so you spend $800 on a new one. Then, three days later, the light comes back on. Why? Because a tiny exhaust leak upstream or a lazy oxygen sensor was feeding the computer bad data. This is exactly why your scanner says p0420 but the converter is actually fine. To catch these nuances, you need to look at ‘Live Data’—the actual heartbeats of your engine—rather than just the stored codes. I always recommend having the $20 tool every driver needs, a simple digital multimeter, to verify voltage before you condemn an expensive component. 
Avoid the Voltage Trap with Genuine Sensors
Another ‘oops’ factor I see constantly is the temptation of bargain-bin sensors. Modern ECUs are incredibly sensitive to resistance. A cheap aftermarket sensor might ‘work,’ but its signal might be just slightly too slow or have the wrong voltage range, leading to poor fuel economy or phantom misfires. I’ve learned that the truth about using cheap aftermarket sensors is that they often cost more in the long run through lost efficiency and frustration. If you’re chasing an electrical ghost, you might even need to learn how to find a parasitic battery drain to see if a failing module is keeping the system awake and skewing your readings. Have you ever fallen into this trap of replacing a part only to have the light come right back on? Let me know in the comments.
When you’re deep into a diagnostic rabbit hole, the right tool doesn’t just save time; it saves your sanity. After years of struggling with basic code readers, I finally invested in a bi-directional scan tool. This was a game-changer because it allowed me to actually command the car’s computer to do things—like cycling the ABS pump to purge air that a manual bleed would never touch. If you’re serious about moving beyond basic maintenance, you need equipment that talks back to the car. This level of advanced vehicle diagnostics prevents costly breakdowns by letting you test components before you replace them. I used to think these tools were only for shops, but with the price of modern electronics dropping, having a mid-range tablet scanner is one of the best auto repair hacks to keep your fleet on the road. It’s the difference between guessing and knowing.
How do I maintain my engine and brakes over the long haul?
Consistency is the boring secret to a 300,000-mile car. It’s not just about the big repairs; it’s about the small, repetitive tasks that prevent the big repairs from ever happening. For example, when I do an oil change, I never just swap the oil and filter. I treat it as a full-system inspection. One of the most overlooked details is the little copper or aluminum seal on your oil pan. You might think it’s fine to reuse it, but why you should never skip the crush washer on your drain plug becomes clear when you find a slow drip on your garage floor three weeks later. Similarly, I’ve started adopting essential auto repair strategies for frequent drivers, like performing a brake fluid moisture test every single year, regardless of mileage. This proactive approach ensures that the hydraulic integrity of your system never reaches that ‘spongy’ point I mentioned earlier. Even as we move toward electric vehicles with regenerative braking, the mechanical hardware still relies on clean fluid to prevent internal corrosion in the calipers. 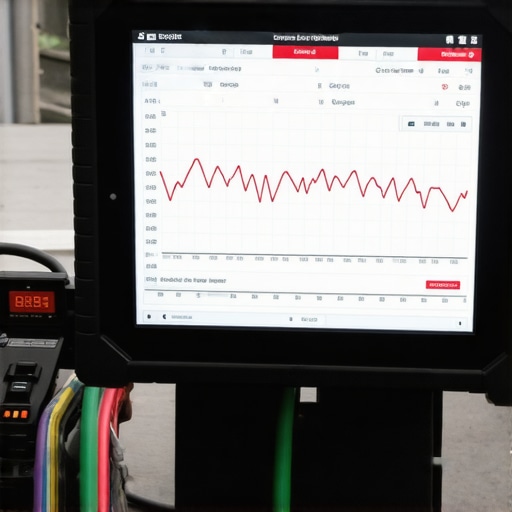
The Future of DIY is Software-Driven
As we look ahead, the trend in auto repair is shifting heavily toward software calibration. We are entering an era where you can’t just replace a steering rack or a headlight without ‘teaching’ the car’s central brain that a new part is present. The Society of Automotive Engineers (SAE) has highlighted in their technical standards that as ADAS (Advanced Driver Assistance Systems) become standard, even a simple wheel alignment will require a sensor recalibration. This might sound intimidating, but it actually gives us more power if we stay educated. By sticking to top auto repair tips to extend your vehicles lifespan, you can stay ahead of these technical shifts. I’m already seeing oil change innovations that use sensors to tell you exactly when the viscosity is breaking down, rather than relying on a sticker on the windshield. To keep your car healthy, you also need to think about the transmission; learning how to save your transmission with a simple fluid exchange can prevent a five-thousand-dollar rebuild later. I challenge you to go beyond just reading codes this weekend—grab a multimeter and actually test the ground wire on your battery. It’s the best way to start mastering the electrical side of your engine.
What My Most Expensive Mistakes Taught Me About DIY Maintenance
Looking back at years of wrenching, the biggest lesson wasn’t about a specific part, but about my mindset. I used to think I could visually inspect brake fluid, but moisture is invisible. Now, I never guess; I use a tester to check for water content as part of my regular vehicle diagnostics. Another hard-earned truth? Don’t assume the computer is always right. Codes tell you where the pain is, not necessarily what’s causing it. If I had known these brake service myths earlier, I would have saved thousands. Lastly, always clean your bleeder valves before you crack them open; even a tiny grain of sand can ruin a caliper’s internal seal.
The Gear That Lives in My Personal Toolbox
You don’t need a professional shop to get professional results, but you do need the right foundation. First on the list is the $20 tool every driver needs—a reliable digital multimeter. Without it, you’re just guessing at electrical ghosts. I also swear by a vacuum-style brake bleeder kit; it turns a frustrating two-person job into a ten-minute solo task. For those deep dives into the engine, I recommend keeping a logbook of your auto repair history. It sounds old-school, but tracking exactly when you performed a fluid swap helps you spot patterns before they become breakdowns. [IMAGE_PLACEHOLDER]
Take Back Control of Your Drive
There is a unique kind of pride that comes from knowing your car is safe because you made it that way. Mastering brake service and basic diagnostics isn’t just about saving money—though these auto repair hacks certainly help—it’s about the peace of mind that comes when you’re descending a steep mountain grade and you know your pedal will be firm every single time. Start small, stay curious, and follow top auto repair tips to extend your vehicles lifespan to keep your ride on the road for the long haul. Have you ever spent hours chasing a sensor code only to find it was a loose wire or a dirty ground? Let me know in the comments below!