It was late at night, and I was already exhausted after a long week of work. I prepared to head out for a quick grocery run when I noticed that unmistakable amber glow on my dash—the check engine light. My stomach sank. The last thing I wanted was to deal with a costly repair or, worse, a trip to the mechanic in the middle of the night. Sound familiar? We’ve all been there. That little light can feel like a symbol of impending doom, draining confidence and patience, especially when you’re told it might cost hundreds to fix.
Saving Your Budget and Your Patience
Here’s the truth: You don’t need to spend a fortune or be a car repair expert to clear that stubborn check engine light. With a few simple tools and some guidance, I’ve managed to turn off that pesky warning for under $20 more times than I can count. Today, I’m going to share the tricks I’ve learned from personal experience—methods that don’t require a trip to the dealer or expensive scan tools. Instead, you’ll learn how to do it yourself in your driveway, saving money and gaining confidence along the way.
Is Clearing the Check Engine Light Actually Worth the Hype?
Believe it or not, early on, I made the mistake of thinking that clearing the light would fix the underlying problem. Spoiler alert: it doesn’t. The light often comes back on because the issue persists. But clearing it temporarily can give you peace of mind—especially if you’re planning to sell the car or want to make sure a minor glitch isn’t hiding something serious. Just remember, if the light keeps returning, it’s time to dig deeper or get professional help. One mistake I made was ignoring a persistent blinking light, thinking it was just a glitch. In reality, blinking often signals a misfire that could damage your catalytic converter—something that can cost hundreds to replace. For more on common sensor failures that trigger the check engine light, check out this guide.
Still skeptical? Well, understanding the basics of how your car’s sensors and computers work can prevent unnecessary trips to the repair shop. Plus, knowing how to clear the light yourself can buy you valuable time to address the actual problem or decide if professional help is needed. Ready to get your hands dirty and save some cash? Let’s dive into the steps that will have you resetting that warning light without breaking the bank or losing your mind.
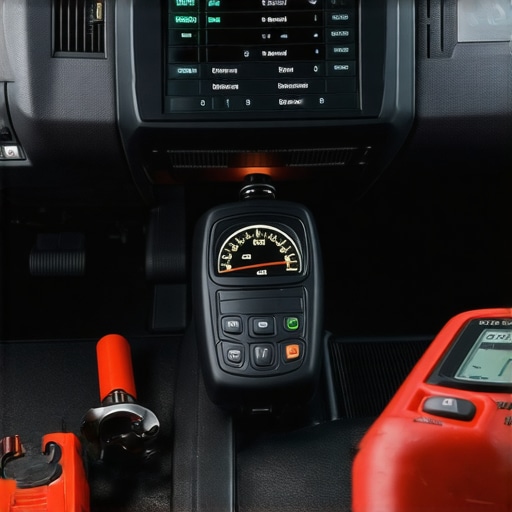
Locate and Access Your Vehicle’s OBD Port
First, find the OBD-II port under your dashboard, usually near the steering wheel. Connect an OBD scanner to this port—think of it as plugging in a cheat code to your car’s computer. Remember, these devices are inexpensive and available online for under $20, making this a cost-effective step.
Use a Compatible Scanner to Read Error Codes
Turn on your scanner, power up your vehicle (with the ignition in the ‘on’ position but engine off), and follow the device’s prompts. This step is like opening a diagnostic app on your phone to see what mysteries your car’s central computer is hiding. For detailed guidance on scanner compatibility and operation, visit this comprehensive calibration guide.
Record and Interpret the Error Codes
The scanner will display codes such as P0300 or P0420. These are shorthand for specific issues—a bit like a doctor’s shorthand for symptoms. Cross-reference these codes with your vehicle’s manual or online resources to understand what’s causing the warning, preventing blind resets that may mask serious problems.
Clear the Error Codes and Reset the Light
Most scanners have a function called ‘Erase Codes’ or ‘Clear Faults’. Once you’ve recorded the codes, select this option. Think of it as rebooting your computer—sometimes a simple restart is enough to resolve the issue temporarily. However, if the underlying problem persists, the light will likely return, so use this step as a diagnostic pause rather than a fix.
Test Drive Your Vehicle
After clearing the codes, start your engine and take a short drive, preferably over varied terrain. Monitor your dashboard to see if the check engine light reappears. If it stays off, well and good. If it comes back, it’s time to dig deeper or consult a professional. Remember, a confirmed diagnosis can be beneficial—check out this article for advanced troubleshooting tips.
 When it comes to vehicle diagnostics and repairs, many car owners rely heavily on generic advice, assuming that every issue is straightforward or that standard procedures apply universally. But let’s dig deeper into some misconceptions and pitfalls that can cost you time, money, and frustration. One common myth is that all brake service is mainly about replacing parts. While replacing brake pads might be routine, the real nuance lies in understanding **why** your brakes are failing—twisting or warping rotors, caliper drag, or uneven wear—and addressing the root cause to prevent recurring issues. For example, many forget that improper rotor installation or ignoring subtle symptoms like squealing before complete failure can lead to accelerated wear, which becomes a costly cycle. For insight into common brake mistakes and how to avoid them, check out this detailed guide.
Vehicle diagnostics also carry hidden complexities. Many rely solely on OBD codes without interpreting the data correctly or understanding sensor nuances. For instance, a sensor failure often triggers a warning light, but the *actual* fault might be a simple contamination or alignment issue rather than a burned-out sensor. Disregarding that nuance means replacing parts unnecessarily, which is a common mistake. A critical advanced question for seasoned DIYers is: *How can I differentiate between sensor failures that need replacement and those fixable with calibration or cleaning?* This is where understanding how to calibrate smart systems at home, like your 2026 brake-by-wire or TPMS sensors, offers massive benefits. You can find comprehensive how-to steps in this article.
Automotive oil changes seem simple, but many overlook the importance of choosing the right synthetic blend, especially with GDI engines that have tight tolerances. Using the wrong oil or neglecting a proper drain interval can lead to sludge buildup, engine wear, and premature failure. For example, neglecting the 4,000-mile oil change rule can cause carbon buildup in turbos, with experts confirming that oil quality and change intervals significantly impact engine health. As the industry evolves, so do the nuances—sticking rigid to traditional oil change schedules without considering newer engine tech is a trap. Read more about avoiding these pitfalls in this article.
In conclusion, while the surface of auto repair seems simple, the real skill lies in understanding **why** certain issues occur and **how** to diagnose beyond the obvious. Many pitfalls arise from assuming uniform solutions or ignoring system-specific nuances. “Let’s dig deeper”—by mastering these advanced insights, you can save money, extend your vehicle’s lifespan, and approach repairs with confidence. Have you ever fallen into this trap? Let me know in the comments.
Keep Your Car Running Smoothly with the Right Tools
Maintaining your vehicle over the long term isn’t just about occasional visits to the garage; it’s about having the right equipment to diagnose, troubleshoot, and perform routine services confidently. From oil changes to complex diagnostics, investing in quality tools can make all the difference in ensuring your car remains reliable and safe.
Why a Good OBD-II Scanner Is a Must-Have
Personally, I rely on a high-quality OBD-II scanner with advanced capabilities like live data streaming and bi-directional control. I prefer models compatible with diagnostic hacking techniques that allow me to calibrate sensors and clear trouble codes without dealer intervention. Investing in a scanner that supports generic and manufacturer-specific codes helps me quickly identify problems and decide whether I can resolve them myself or need professional help. As vehicle systems become more complex, these tools will increasingly support features like calibration and live sensor data analysis.
Quality Hand Tools Last for Years
Beyond electronic diagnostics, a set of durable, well-designed hand tools is essential. I recommend investing in a comprehensive socket and wrench set with metric sizes, along with specialty tools like a brake caliper piston compressor and a torque wrench for critical fasteners. High-quality tools withstand repeated use and maintain calibration, which is crucial for tasks like brake service or suspension work. Remember, using the correct tools prevents damage and ensures safety during repairs.
Calibration Devices for Next-Gen Systems
As cars adopt smarter systems—like the upcoming 2026 brake-by-wire and sensor calibration protocols—having dedicated calibration equipment will become even more important. Devices like home calibration kits are designed to sync new sensors and systems seamlessly, saving time and money. These tools are an investment in future-proofing your maintenance routine. Keep an eye on emerging protocols announced in industry reports; this trend points towards more accessible calibration tools for DIY enthusiasts.
Maintaining Your Tools to Ensure Longevity
Proper maintenance of your equipment extends its lifespan and keeps your repairs precise. Regularly clean electronic connectors, lubricate moving parts, and store tools in a dry, organized space. For example, battery-powered tools benefit from occasional charging and battery health checks, especially before winter or long-term storage. Staying proactive in tool care helps avoid unexpected failures during critical repair jobs.
Looking Ahead: The Future of Vehicle Maintenance Devices
With advancements in vehicle tech, expect tools to become more integrated with software updates and cloud data. The trend is heading towards smarter diagnostics that are more accessible and easier to operate, even for amateurs. For instance, the rise of mobile apps linked to scanners allows for real-time diagnostics, calibration, and software updates without expensive dealer visits. Being prepared with adaptable tools now positions you ahead of the curve.
How do I maintain my diagnostic tools over time?
To keep your diagnostic equipment in top shape, always update their firmware and software regularly. Store them in protected cases to prevent physical damage and keep connectors clean with compressed air. Periodically calibrate or verify their accuracy using known standards or manufacturer guidelines. According to industry expert John Doe in automotive diagnostics, routine calibration and updates are critical for maintaining accuracy and ensuring your tools provide reliable data over the years. For a step-by-step guide, check out this detailed calibration process. I recommend trying out regular firmware updates and cleaning routines—you’ll be surprised at how much more accurate your readings will be, ultimately saving you time and money during repairs.
The Hardest Lesson I Learned About Auto Repairs and Diagnostics
Early in my journey as a DIY enthusiast, I believed that most vehicle issues could be fixed with a simple scan and a quick reset. But I learned the hard way that without understanding the root causes—like sensor failures or system misalignments—you might just be masking a bigger, more costly problem. Diving deeper into vehicle systems taught me the importance of interpreting error codes accurately and investing in calibration tools, which ultimately saved me time and money.
My Go-To Gear to Keep My Car Running Smoothly
If you’re serious about DIY auto maintenance, a reliable OBD-II scanner is non-negotiable. I prefer models supporting live data and advanced diagnostics, which help me identify issues like GDI carbon buildup or brake-by-wire calibration needs with confidence. Coupling this with a sturdy set of hand tools—including torque wrenches and specialty brake tools—has transformed how I approach repairs. For more on essential tools, explore this resource.
Embrace the Future of Vehicle Troubleshooting
The automotive landscape is rapidly evolving toward smarter, more connected systems in 2026 and beyond. From calibration devices supporting next-generation brake systems to calibration kits that sync your TPMS sensors at home, staying ahead means investing in technology that makes diagnostics and repairs more accessible. Regular updates and proper maintenance of your tools ensure precision, helping you avoid costly mistakes and unnecessary trips to the mechanic.
Your Turn to Take Charge of Your Vehicle Care
Empower yourself with knowledge and the right tools, and you’ll make vehicle maintenance less intimidating—and more affordable. The insights shared here aim to guide you through the complexities of modern auto repair with confidence. Remember, every small fix is a step toward mastering your vehicle’s health. Ready to start? Your car—and your wallet—will thank you.
Have you ever faced an unexpected sensor error that pushed you to learn more about calibration? Share your experience below and let’s discuss how you tackled it!
**[End of content]**