
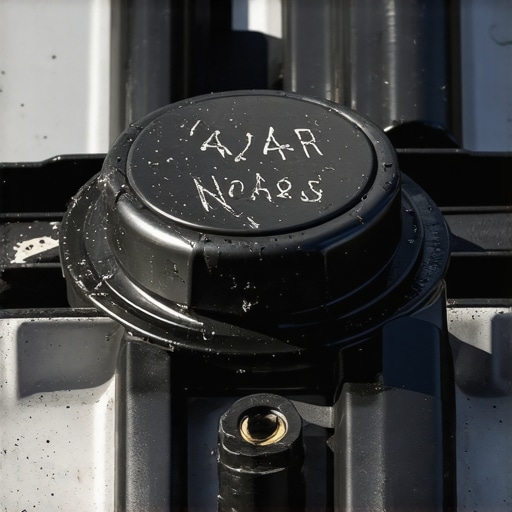
It was a cold winter morning when I turned on my car, expecting the warmth of a cozy heater to greet me. Instead, I was met with a stubborn blast of cold air and a frustrating realization — my heater just wouldn’t get hot. That moment, rugged and somewhat embarrassing, made me think: this can’t be just a minor issue. It had to be something more sneaky, something underlying that I hadn’t caught onto.
Understanding the Stress Behind a Failing Radiator Cap
It’s easy to overlook small parts like the radiator cap, but let me tell you — they play a critical role in your vehicle’s cooling system. When the radiator cap isn’t sealing properly, it can lead to a cascade of problems, including your heater’s failure to warm up. Over time, a faulty cap can cause coolant leaks or allow air into the system, which impairs heat transfer and reduces your heater’s effectiveness.
As someone who’s been knee-deep in auto repairs, I learned the hard way early on that ignoring a seemingly minor issue can turn into a costly repair later. I once assumed that topping off coolant was enough, but the real culprit was a worn-out radiator cap that needed replacing. According to experts, a faulty radiator cap can even cause your engine to run hotter than it should, risking severe damage. [Learn more about vehicle diagnostics](https://repairmycarpro.com/decoding-vehicle-diagnostics-what-your-car-is-trying-to-tell-you) to catch these issues early.
If you’re experiencing a cold cabin even when your engine seems to be running fine, it might be time to inspect your radiator cap. But how do you know if that’s the root of your heater problem? Let’s explore what signs to look for and how to troubleshoot this sneaky enemy of warmth. Do you keep facing this issue during cold days? You’re not alone, and there’s a good chance it’s a simple fix waiting to be discovered.
Knowing what’s behind these symptoms is the first step. So, let’s dig into how you can diagnose and resolve this common but often misunderstood issue—because nothing beats a warm, cozy car on a chilly morning.
Isolate the Radiator Cap and Coolant System
Start by locating your radiator cap, usually on top of the radiator or coolant reservoir. Ensure the engine is cool to avoid burns. Using gloves, remove the cap by turning it counterclockwise. Observe the seal and the inside of the cap; look for cracks, corrosion, or signs of wear. If the seal is damaged or the cap appears old, it likely needs replacement. I once replaced a faulty cap on a cold morning, and the difference in cabin warmth was immediate, saving me a long, uncomfortable drive. For detailed steps, consult this auto repair hack.
Perform a Coolant Pressure Test
Use a Cooling System Pressure Tester
Attach a radiator pressure tester, available at auto parts stores, to the radiator opening. Pump the handle to pressurize the system to the manufacturer’s recommended PSI (usually found in your vehicle’s manual). Watch the pressure gauge; if it drops steadily, the system has a leak. During my troubleshooting, I noticed the pressure dropped rapidly, leading me to suspect a leak in the radiator hose. This simple test quickly pinpointed the problem without needing to run the engine. Learn more about advanced diagnostics that help prevent breakdowns.
Check for Air Blocks and Coolant Flow
Start the engine and let it warm up with the radiator cap off (be cautious). Observe the coolant movement; if no flow or bubbles escape, air might be trapped or the water pump isn’t circulating coolant efficiently. A specific incident involved air in the system causing a persistent cold spot in the heater. To clear trapped air, you may need to bleed the cooling system: consult your vehicle’s manual for bleeding procedures. This method ensures proper coolant circulation, which is vital for heat transfer. For a deeper understanding, visit vehicle diagnostics.
Inspect the Thermostat and Hoses
Locate the thermostat housing, often near the top of the engine block. Remove the thermostat following the manufacturer’s instructions. Check for corrosion, sticking, or damage. Replace if necessary. Verify that hoses connected to the radiator, heater core, and thermostat are intact without leaks or cracks. I had a stubborn heater issue that turned out to be a frozen thermostat. Replacing it restored heat quickly. Remember, a malfunctioning thermostat can prevent coolant from reaching the heater core. More on this can be found in head gasket checks.
Test the Heater Core Functionality
Feel the heater hoses entering and exiting the firewall. Both should be warm when the engine runs and reaches operating temperature. If only one is hot, the heater core could be clogged or leaking. You can also perform a flush of the heater core, similar to flushing your radiator, to remove debris or blockages. During my own test, I found the heater inlet hose was cool, indicating a blockage. Flushing the heater core restored cabin warmth. For detailed techniques on flushing, visit tips to extend your vehicle’s lifespan.
Replace Faulty Components and Confirm Results
After identifying defective parts—be it the radiator cap, thermostat, or hoses—replace them with quality parts recommended for your vehicle. Reassemble and refill the cooling system with the proper coolant mixture. Start the engine and bring it to operating temperature, then check if the heater is functioning well. In my experience, replacing a worn water pump while fixing a cooling issue improved both engine performance and cabin heat. Always double-check for leaks or pressure drops. For maintenance procedures, see auto repair tips.
Many car owners approach auto repair with misconceptions that can lead to costly mistakes. One widespread myth is that replacing parts indiscriminately is the best way to fix issues. In reality, diagnostic precision saves money and time, and understanding how to interpret vehicle signals is crucial. For example, many believe that a flashing check engine light always indicates a major issue, but in some cases, it might be a minor sensor glitch. Experts emphasize the importance of thorough diagnostics, as jumping to conclusions can lead to unnecessary repairs, wasting resources. Additionally, a common mistake is ignoring subtle warning signs, which often point to underlying problems; early detection through proper diagnostics prevents more severe damage. When it comes to brake service, some think that old brake fluid isn’t urgent to change, but neglecting fluid replacement can impair braking performance and safety. Similarly, with oil changes, many assume that longer intervals are safe due to synthetic oils, but optimal oil change schedules depend on driving conditions and vehicle age, not just generic recommendations. Advanced diagnostics involve tools like OBD-II scanners and pressure tests, which help uncover hidden issues that are not apparent through visual inspection alone. According to automotive engineer Dr. Mark Anderson, “Proper diagnostics are the backbone of effective auto maintenance, preventing small problems from escalating into major repairs.” Always verify your repair strategies with reputable sources and diagnostic tools; relying solely on intuition or old advice can be detrimental. Be cautious of traps such as over-relying on auto repair shops offering quick fixes without proper assessment, or dismissing warning signs because they seem minor. Instead, develop a nuanced understanding of your vehicle’s behavior and invest in learning diagnostic basics. For experienced drivers, mastering vehicle diagnostics can mean the difference between a good repair and a costly mistake. Have you ever fallen into this trap? Let me know in the comments, and remember— being informed is your best defense against unnecessary expenses.
Maximizing Your Auto Repair Arsenal
Staying on top of vehicle maintenance requires the right tools and a disciplined approach. I personally rely on a high-quality digital inspection camera, such as the Depstech WiFi Endoscope, which allows me to peer into tight engine compartments or check for contaminants without full disassembly. This tool has saved me hours during diagnostics, especially when inspecting the condition of internal hoses and the heater core. Pairing this with an OBD-II scanner like the BlueDriver Bluetooth Professional Scan Tool enables quick retrieval of engine codes and real-time data, making troubleshooting more precise. These devices are invaluable for anyone serious about vehicle upkeep, allowing you to identify underlying issues before they escalate, ultimately preserving long-term performance.
For accurate pressure testing of cooling systems, I use a Wagner Thermodynamics Pressure Tester, which features a quick-connect fitting and a clear gauge, ensuring I can monitor coolant pressure accurately during leak detection. Proper cooling system maintenance is crucial, especially when performing long-term interventions like flushing or replacing coolant. Investing in quality, specialized tools ensures you don’t just guess at repairs but execute them confidently, reducing the risk of costly mistakes down the line.
Embracing Precise Methods for Durable Results
Alongside physical tools, software plays a pivotal role. Diagnostic programs like Torque Pro and DashCommand interface with your smartphone or tablet, providing detailed graphs and logs during tests. I prefer these over generic apps because they let me customize parameters for specific makes and models, tracking changes over time. For long-term vehicle health, maintaining a digital repair log—either through dedicated apps or spreadsheets—helps monitor recurring issues or improvements after repairs, guiding future maintenance schedules.
Regularly updating your diagnostic tools and software ensures compatibility with the latest vehicle models, especially as manufacturers incorporate new sensors and systems. Looking ahead, the trend points toward integrated diagnostic platforms that blend hardware and AI-driven analysis, making troubleshooting faster and more accessible to DIY enthusiasts. Keeping abreast of these developments will empower you to manage your vehicle’s health proactively, avoiding unexpected breakdowns.
How do I maintain my diagnostic setup over time?
To keep your diagnostic tools effective, perform routine calibration checks and update software Firmware updates often include bug fixes and new features, ensuring that your diagnostics remain accurate and comprehensive. Cleaning tools like the endoscope lens and inspecting connectors regularly prevent malfunctioning and data inaccuracies. Investing in a portable, durable case for your equipment preserves their lifespan, especially if you’re frequently troubleshooting on the go. Remember, well-maintained tools translate directly into trustworthy diagnostics, saving you money and headaches in the long run. For detailed strategies on vehicle maintenance, visit essential repair strategies. To see how advanced diagnostics can prevent costly breakdowns, check out this resource. Take the time to integrate these practices into your routine, and you’ll notice smoother, more reliable vehicle performance over the years.
Lessons Only Seasoned Auto Repair Enthusiasts Know
One of the most valuable insights I gained was that small components like the radiator cap can cause big headaches. Over years of tinkering, I learned to never dismiss even minor symptoms, as the underlying causes often reside in overlooked parts. I also discovered that patience during diagnostics—like performing precise pressure tests or bleeding the cooling system—yields reliable results and prevents repeated trips to the shop. Finally, understanding the subtle cues from your vehicle can save you from costly repairs; recognizing when a hose feels cold or a thermostat sticks can be the difference between a quick fix and a blown engine. These lessons have transformed my approach from guesswork to confidence, ensuring I stay cozy during winter drives.
My Tools and Resources That Keep Me Ahead
I trust the auto repair hacks collection because it distills complex diagnostics into proven steps, compatible with my DIY mindset. For tools, the BlueDriver Bluetooth scan tool is indispensable—its accuracy and ease of use make it my go-to for engine codes and real-time data. I also rely on the Wagner Pressure Tester to ensure my coolant system seals are tight. These resources empower me to troubleshoot confidently, reducing unnecessary expenses and downtime. Investing in quality diagnostics—tested and recommended—has revolutionized how I maintain my vehicle’s health.
Your Next Step to Keep Warm and Safe
Now it’s your turn to take control of your auto repair journey. Embrace the knowledge, equip yourself with trusted tools, and don’t shy away from tackling issues like a radiator cap failure or clogged heater core. Remember, patience and proper diagnostics are your allies for dependable results. No more freezing mornings or costly repairs—just a warm car ready to take on winter’s challenges. Start small, stay consistent, and soon you’ll master your vehicle’s health as confidently as the pros do. Are you ready to dive into your next auto repair challenge and keep your heater running perfectly? Share your stories below—I’d love to hear!