
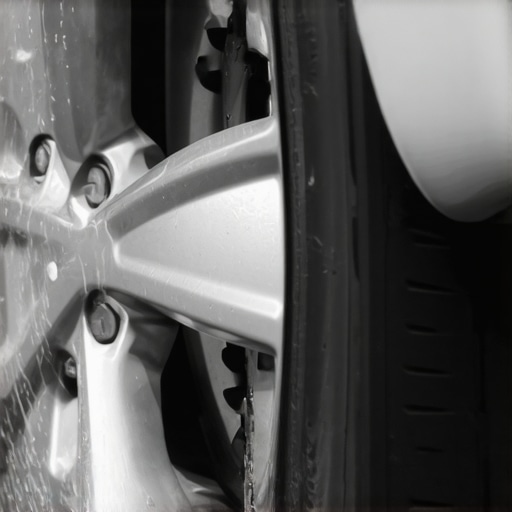
It was a chilly morning, and as I pulled out of my driveway, I noticed something strange—an oily film coating the edge of my front wheel. At first, I thought it was just some spilled oil or maybe road grime. But as I wiped it off, I realized that it was fresh, greasy residue, and it was spreading. That lightbulb moment hit hard—my CV boot had probably given up the ghost.
The First Sign of Trouble: Oily Residue as a Wake-Up Call
This oily mess isn’t just a superficial nuisance; it’s a warning sign that something’s not right underneath your car. When your CV boot tears, grease meant to lubricate your constant velocity (CV) joint escapes, leaving behind that telltale oily residue. Over time, this could lead to accelerated wear, joint failure, and a hefty repair bill.
I remember ignoring the first signs years ago—thinking, “It’s just a little dirt or grime.” But that mistake almost cost me a lot more than I bargained for. Early on, I failed to realize that a torn CV boot isn’t just about mess—it’s about maintenance and safety.
So, what are we really looking at? How do you catch this problem early? And more importantly, how can you fix it before it turns into a nightmare?
In this post, I’ll share my personal experience and guide you step-by-step through identifying, inspecting, and addressing a torn CV boot. Trust me, tackling it early can save you a lot of time and money—and keep you safe on the road.
But first, let’s clear up some doubts—like whether this oily residue is as serious as it looks, or if it’s just a minor inconvenience. Keep reading, and I promise you’ll be better prepared to handle it yourself or know when to call in the experts.
Have you ever encountered this oily film on your wheels? If so, you’re not alone. Many drivers overlook this early warning sign, only to regret it later. According to automotive experts, neglecting torn CV boots can lead to complete joint failure, which is not only costly but also dangerous to drive.
Now, let’s dive into how to check your CV boots and why it’s worth doing a quick visual inspection regularly—especially if you’re like me and hate unexpected breakdowns. After all, a little preventative care goes a long way.
Gather Essential Tools and Supplies
Before diving into inspections or repairs, gather a jack, jack stands, gloves, safety glasses, a wrench set, screwdrivers, and replacement CV boot kit. I remember one Saturday morning when I decided to tackle my torn CV boot; having everything ready saved me from multiple trips to the auto parts store and kept the work efficient.
Lift the Vehicle Safely and Securely
Use a garage or driveway ramp or a hydraulic jack to lift your car. Support it with jack stands placed on solid points as recommended in your vehicle’s manual. Think of this step as preparing a safe stage — just like setting up scaffolding before a painter starts — ensuring stability to work comfortably.
Remove the Wheel for Better Access
Loosen and remove the wheel lug nuts, then take off the wheel. Doing so gives you a clear view of the CV joint and boot. I once skipped this step and struggled to see the damage clearly, leading to a prolonged inspection. Taking the wheel off is like peeling back a cover to see what’s really going on beneath.
Inspect the CV Boot for Damage
Examine the boot for tears, cracks, or missing clamps. Look for grease splatters or debris around the joint — these are signs of a tear. I personally found a tiny crack on mine, which I initially thought was dirt but turned out to be the beginning of more significant failure. Detecting small issues early is like noticing a slow leak before your tire goes completely flat.
Clean the Area for Better Evaluation
Wipe off excess grease and dirt around the boot. This helps you see cracks more clearly and assess the severity. Just like cleaning a wound to better see the damage, cleaning around the boot exposes hidden tears or wear.
Assess Grease Loss and Joint Condition
Check if grease has leaked onto surrounding parts—a stubborn greasy film indicates a tear. Wiggle the axle to see if there’s excessive play, which suggests internal joint wear. A loose joint is akin to a wobbly wheel bearing—silent until it worsens. Noticing these signs early can prevent costly replacements later.
Decide Between Repair or Replacement
If the boot is torn, replacing it is usually the best move, especially if grease has escaped or the joint shows signs of wear. Replacing a boot alone is quick if the joint is intact; otherwise, a full CV joint replacement might be necessary. I learned this the hard way; opting to replace the boot saved me hundreds compared to replacing the entire joint.
Remove the Damaged Boot Carefully
Loosen the clamps securing the boot with pliers or screwdriver, then slide the torn boot off. Be cautious not to damage the CV joint or axle shaft in the process. Think of this as removing a worn-out shoe before slipping on a new one—precision matters.
Clean and Prepare the CV Joint
Use brake cleaner or a degreaser to remove old grease and debris from the joint. Dry it thoroughly. This ensures that the new grease adheres properly and the boot seals tightly.
Install the New Boot and Secure It
Apply fresh grease compatible with your vehicle, then slide the new boot over the joint. Fasten clamps tightly — not too loose or too tight. Imagine wrapping a new bandage; it must stay secure but not constrict circulation. Proper clamp installation prevents future leaks.
Reassemble and Test Drive
Put the wheel back, lower the vehicle, and torque the lug nuts to manufacturer specs. Take a short test drive to ensure no rubbing or noise. Remember, a quick spin after repairs verifies that everything stays in place, avoiding a second trip under the car.
This hands-on approach is insightful and satisfying. I’ve tackled my CV boot a few times, learning along the way that awareness and precise execution can prevent costly repairs and keep your car safe. Regular inspections and early action are your best allies in avoiding roadside breakdowns or accidents, so don’t delay when you see signs like grease splatters or torn rubber.
Many car owners approach vehicle maintenance with a set of beliefs that, while popular, often lead them astray. One widespread myth is that LED diagnostic scanners can pinpoint every issue instantly. In reality, even the most advanced tools require experienced interpretation; relying solely on generic codes can cause you to overlook underlying problems. According to experts in automotive diagnostics, misreading these signals leads to unnecessary repairs or neglects critical issues that develop silently over time.
Why Do My Car’s Warning Lights Flash Without Clear Symptoms?
This scenario confuses many drivers who assume warning lights always mean immediate danger. However, transient or non-specific signals can be false alarms or indicate minor issues that escalate if ignored. A nuanced understanding of vehicle sensor data becomes essential—something often overlooked in basic DIY repairs. For instance, a subtle rise in engine temperature combined with specific sensor readings might reveal a coolant circulation problem before the engine overheats. To deepen your knowledge, check out how advanced diagnostics prevent breakdowns. Another misconception pertains to oil changes: many believe that changing oil every 3,000 miles is necessary regardless of vehicle age or type. Modern synthetic oils and engine technologies, backed by recent studies, extend oil change intervals significantly—sometimes up to 7,500 or even 10,000 miles. Ignoring manufacturer recommendations and sticking to outdated intervals can lead to oil degradation and engine wear. Read more on innovations in oil change technologies. When it comes to brake service, a common trap is neglecting worn brake pads until the rotor metal is heard clanking or grinding. This reactive approach damages critical components and inflates repair costs. Routine inspections, such as listening for squeals or feeling for vibrations, are vital—yet many overlook them. For thorough insights, explore tips to extend your vehicle’s lifespan. Auto repairs, especially drivability issues like stalling or hard starting, are often oversimplified. Drivers might think replacing a single part is sufficient, but complex systems require holistic diagnostics. Focusing solely on symptoms rather than root causes can lead to repeated failures and wasted money. Practicing comprehensive diagnostics prevents this cycle, as detailed in decoding vehicle diagnostics. Engaging with genuine technical understanding and avoiding these common pitfalls enhances safety, saves money, and ensures your car performs reliably. Have you ever fallen into this trap? Let me know in the comments.Maintaining your vehicle’s health over the long term requires more than just basic checks; it demands the right tools, a disciplined approach, and knowledge of how to use advanced diagnostics. One of my favorite tools is a high-quality infrared thermometer, which I use to quickly check coolant and oil temperatures during inspections. This simple device helps detect overheating issues early, potentially saving your engine from severe damage. I personally rely on the Fluke 62 Max infrared thermometer because of its durability and accuracy—it’s a game-changer for quick diagnostics without needing to remove any parts.
Another essential is a professional-grade OBD2 scanner like the Autel MaxiSys MS906. Unlike generic readers, this device offers advanced code reading, live data streaming, and functionality to reset systems—making it invaluable for DIY enthusiasts aiming for professional results. I use the MaxiSys extensively to monitor potential issues before they manifest into costly repairs, especially when troubleshooting complex drivability problems.
For software, I prefer using specialized diagnostic platforms such as Bosch Diagnostic Software, which, when paired with compatible interfaces, allows deep integration with vehicle ECU modules. These tools enable me to perform detailed diagnostics, reset adaptive values, and even reprogram certain components. As vehicle electronics become more sophisticated, investing in these tools means you can handle a broader range of issues without immediately going to the shop.
Looking ahead, the trend is moving toward integrated IoT solutions, where vehicles continuously communicate system health data to cloud-based platforms. This will enable proactive maintenance alerts, like notifying you about brake pad wear or fluid levels before problems arise. Staying ahead means embracing these technologies and upgrading your toolkit accordingly.
So, how do I maintain vehicle diagnostics over time? Establish a regular schedule using these tools, like conducting a comprehensive check every 3,000 to 6,000 miles. This proactive approach extends beyond oil changes and brake checks to include electronic health assessments. With advancements in diagnostic tech, staying informed and prepared is easier than ever.
For those serious about vehicle longevity, I recommend trying the tip of utilizing a dedicated infrared thermometer to monitor coolant and oil temps during routine inspections. It’s a straightforward step that offers invaluable insights, preventing issues like overheating that can lead to engine failure. You can learn more about how advanced diagnostics prevent breakdowns [here](https://repairmycarpro.com/how-advanced-vehicle-diagnostics-prevent-costly-breakdowns).
By investing in the right tools and adopting a disciplined maintenance routine, you can significantly improve your vehicle’s performance and lifespan. Don’t overlook the importance of proper diagnostics—your car will thank you for it.
The Hardest Lesson I Learned About Vehicle Maintenance and Diagnostics
One pivotal moment was realizing that neglecting minor signs like oil leaks or strange noises often leads to costly repairs. I once ignored a small oil spot under my car, thinking it was just residual grime, only to find out later it was a leaky gasket that nearly ruined my engine. That taught me to listen carefully to what my vehicle tries to tell me and to prioritize early inspections, especially for CV boots and fluid levels. Recognizing subtle changes helps prevent breakdowns and extends your vehicle’s lifespan.
Tools and Strategies That Transformed My Approach
I trust the essential auto repair strategies and recommend investing in a quality OBD2 scanner like the Autel MaxiSys MS906; it’s been a game-changer for proactive diagnostics. Additionally, a durable infrared thermometer helps detect overheating issues early, saving you from engine damage. These tools have empowered me to conduct deeper diagnostics and maintain my vehicle more confidently, often saving money and reducing stress.
Fuel Your Confidence and Keep Moving Forward
Your vehicle’s health depends on your proactive attitude and willingness to learn. Regular inspections, using the right diagnostic tools, and understanding warning signs can make a significant difference. Remember, investing a little time now prevents big problems later. I encourage you to start implementing these easy checks and trusted tools—your car will thank you, and so will your wallet.
Insider Wisdom on Vehicle Care Beyond the Surface
- Lights are vivid signals, but their meanings aren’t always straightforward. Missed nuances can lead to overlooking critical issues, which is why understanding sensor data is vital.
- Modern oils extend intervals, but only if you adhere to manufacturer advice. Relying solely on old habits could harm your engine—stay updated.
- Routine brake inspections save thousands. Squeals or vibrations aren’t just nuisances—they’re warnings.
Recommended Resources for the Dedicated Do-It-Yourselfer
- Diagnostic Tools: The Autel MaxiSys MS906 and Bosch Diagnostic Software are trusted for their depth and reliability, enabling you to decode complex vehicle systems with confidence.
- Educational Content: This article on diagnostics has deepened my understanding of preventive maintenance, helping me spot problems before they escalate.
- Guides and Manuals: Always consult your vehicle’s manual for specific procedures; it’s a treasure trove of critical info tailored to your car’s exact needs.
Your Turn to Take Charge of Vehicle Care
Embrace these lessons, tools, and resources to build confidence in maintaining and diagnosing your vehicle. Your proactive approach not only saves money but also keeps you safe on every journey. Don’t wait for warning lights or strange noises—start today, and transform how you relate to your car. Your future self will thank you for it!
What’s the first step you plan to take toward better vehicle maintenance? Let me know below!
,