

Ever been stranded on the side of the road, engine hot and steaming, only to realize that pesky vacuum leak is playing hide-and-seek with you? I remember a summer afternoon when my car suddenly lost power after a quick stop, and I couldn’t figure out why till I noticed a faint hissing sound only when the engine was warm. It’s frustrating because this kind of leak tends to fool even seasoned DIYers, showing up unpredictably and causing all sorts of weird behaviors.
In today’s post, I’m going to share how I finally cracked the code on this elusive issue. We’ll explore why some vacuum leaks only come alive when the engine hits its favorite hot weather spot and, more importantly, how you can track down and fix this sneaky problem yourself.
Cracking the Mystery of Hot-Weather Vacuum Leaks
Vacuum leaks are one of those sneaky issues that often slip past early diagnostics because they’re not always obvious. The reason they tend to flare up only when the engine is hot has to do with the materials and components expanding as they heat up. Plastic and rubber parts, like vacuum hoses and intake manifolds, expand when warm, which can open tiny, almost invisible cracks or disconnects that tight hoses don’t reveal when they’re cool.
Early on, I made the mistake of assuming a vacuum leak would be obvious — maybe a loud hissing or a rough idle all the time. But I learned that sometimes, the leak is just a hairline crack that only becomes significant at higher temperatures, changing the airflow and creating a lean mixture that affects engine performance.
Understanding this nuance is crucial because diagnosing these leaks requires more than just a quick check under the hood. It’s about knowing where to look as the engine warms up and using the right methods to detect subtle changes. Techniques like a smoke test can be game changers here; they allow you to see tiny leaks by introducing harmless smoke into the intake system, revealing exactly where the air is sneaking out. For a deeper dive into vehicle diagnostics (including smoke testing), check out this guide, which I found particularly helpful when I first encountered this problem.
If this situation sounds familiar, whether you’re trying to diagnose your own vehicle or just want to be prepared for similar issues, stay tuned. In the next sections, I’ll walk you through common signs to watch for and practical steps to identify and fix these elusive vacuum leaks, saving you money and frustration.
And hey, have you ever faced this type of problem with your car’s vacuum system? Drop your experiences in the comments — I love hearing real stories and solutions from fellow enthusiasts. Let’s get started on fixing this mystery once and for all!
Prepare Your Workspace and Safety Measures
Before diving in, ensure your engine is cool to prevent burns and disconnect the negative terminal of your battery to avoid electrical surprises. Gather necessary tools such as a flashlight, rubber gloves, a compatible smoke machine or propane torch, and cleaning supplies like brake cleaner. A clutter-free work area enhances safety and efficiency, reducing the chance of missing tiny leaks.
Identify Suspect Areas During Warm-Up
Start your vehicle and let it idle until it reaches normal operating temperature. Pay attention to subtle signs, such as hissing sounds or fluctuating RPMs. Use a flashlight to inspect vacuum hoses and intake manifold gaskets closely, looking for cracks, disconnections, or brittle rubber. During this phase, small leaks become more apparent due to material expansion. In my experience, a quick visual scan during warm-up often reveals the first clues.
Use a Smoke Test to Detect Tiny Leaks
This is the decisive step. Connect a smoke machine to the intake system following the manufacturer’s instructions. Turn it on and observe where the smoke escapes—tiny leaks like hairline cracks or disconnected hoses will become visible as smoke seeps out. For example, I once used a simple smoke generator from a local auto parts store and identified a pinhole crack in a plastic vacuum connector that was only evident when hot, saving me days of fruitless guessing.
Alternative Method: Propane or Carb Cleaner
If a smoke machine isn’t available, carefully spray a small amount of carb cleaner or propane around suspected areas while the engine idles. Any change in engine RPM indicates a leak. Exercise extreme caution—avoid open flames or inhaling fumes. This method helped me locate a tiny vacuum leak in a hard-to-reach hose tucked behind the engine block, which was causing inconsistent idle at high temperatures.
Mark and Confirm Your Findings
Once you’ve detected a leak, mark its location with a non-permanent marker or write on masking tape. Shut off the engine and prepare to repair or replace affected parts. Confirm the fix by repeating the smoke test or spray method to ensure the leak no longer shows signs of escaping. It’s an satisfying moment when the engine runs smoothly without the earlier symptoms.
Implement the Repair or Replacement
For cracked hoses, cut and replace with exact match parts. Use high-quality hoses rated for automotive use. If the intake manifold gasket shows signs of cracking or damage, replace it with OEM or high-grade aftermarket parts. Tighten clamps to manufacturer specifications to prevent future leaks. My trick was to ensure all clamps were snug without overtightening, which can damage rubber parts and cause new leaks—something discussed in detail at auto repair tips.
Test Under Real Conditions
After repairs, reassemble all components, reconnect the battery, and run the engine at operating temperature again. Listen for hissing sounds, and observe engine performance. A steady idle and smooth acceleration indicate success. Keep a note of the repair process and any findings for future reference, especially if you face similar issues again. Remember, consistent monitoring and early diagnosis extend your vehicle’s lifespan and save money, as highlighted in tips for vehicle lifespan.
Many car enthusiasts and everyday drivers alike operate under misconceptions that can lead to costly mistakes. For instance, it’s a widespread belief that changing your oil every 3,000 miles is universally necessary; however, modern synthetic oils often extend this interval to 7,500 or even 10,000 miles, as supported by vehicle manufacturers and experts like those at auto repair professionals. Relying solely on old rules of thumb can cause unnecessary oil changes and expense.
When it comes to vehicle diagnostics, a common myth suggests that a check engine light always indicates a severe problem. In reality, many diagnostic trouble codes (DTCs) reveal minor issues or sensor anomalies that don’t immediately threaten engine health but still require proper interpretation. Advanced diagnostics, such as multi-sensor analysis, can differentiate between harmless quirks and genuine faults, preventing unnecessary repairs.
Braking systems are often misunderstood, leading drivers to dismiss subtle signs of wear. The myth that “brakes feeling soft isn’t urgent” can be dangerous; a spongy pedal might indicate air in the lines or deteriorating calipers. Proper brake service involves more than just replacing pads — it includes bleeding lines and inspecting pistons, as detailed in brake myths busting. Ignoring these nuances can compromise your safety.
Let’s talk about the pitfalls auto repair shops might fall into. Many mechanics aim to replace parts proactively without thoroughly diagnosing the root cause, leading to unnecessary expenses for the customer. A meticulous diagnostic approach, including smart repair strategies, can save money and ensure lasting fixes.
Now, here’s a question for the more advanced driver: How do you ensure that your vehicle’s ECU isn’t misinterpreting sensor data, leading to inappropriate repairs or adjustments? Modern vehicles have complex electronic systems, and miscommunication among sensors can cause significant issues if not properly diagnosed. Utilizing comprehensive diagnostic tools, and understanding sensor interactions, can prevent unnecessary replacements and pinpoint genuine problems early. For an in-depth explanation, check out decoding vehicle diagnostics.
Are you guilty of falling for any of these misconceptions? Or do you know some hidden nuances that most people overlook? Drop your experiences or tips in the comments; it helps everyone avoid these common pitfalls. Remember, mastering these subtle points is key to effective auto maintenance and safe driving—let’s keep your ride smooth and trouble-free.Maintaining your vehicle’s performance over time requires more than just basic know-how; it demands the right tools, consistent routines, and a keen understanding of how to troubleshoot effectively. From oil changes to complex diagnostics, investing in quality equipment ensures longevity and safety. One of my favorite tools is a high-quality OBD-II scanner, like the Innova 3160g, which provides comprehensive code reading and live data. I personally rely on this device because it quickly pinpoints engine issues and helps me understand sensor behaviors, saving time and money. Regularly updating the scanner’s firmware ensures you’re accessing the latest diagnostic features, which is crucial as vehicle technology evolves prediction in vehicle diagnostics points toward increasingly integrated electronic systems, making proper diagnostic tools essential for effective maintenance.
How do I maintain my tools over time?
Keeping your diagnostic and repair tools in top shape involves proper storage, regular calibration, and adherence to manufacturer recommendations. For example, storing electronic gear in anti-static cases safeguards against static damage, especially in humid environments. Calibrating mechanical tools like torque wrenches periodically prevents under-tightening or overtightening bolts, which could jeopardize your repairs. I also recommend creating a dedicated toolkit with labeled compartments; this not only prolongs tool lifespan but makes your repair process more efficient. Incorporating a routine check-up of your equipment—cleaning sensors, updating software, and inspecting for damage—can significantly extend their usable life. As vehicles become increasingly complex, the importance of reliable tools becomes even more critical, ensuring each maintenance task is performed with precision and confidence. To keep your tools effective, invest in protective storage solutions, stay current with updates, and develop a maintenance routine tailored to your gear. For more insights on effective repair strategies, check our comprehensive guide on auto repair strategies.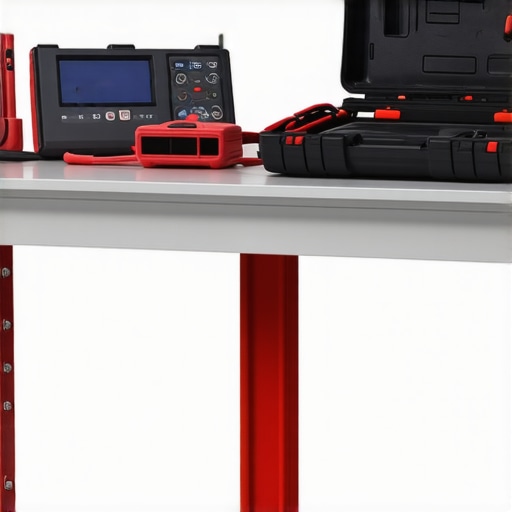
In addition to personal tools, leveraging specialized software like OEM-specific diagnostic programs can be a game changer. These platforms provide manufacturer-specific data, enabling precise repairs that generic scanners might miss. While such software can be costly, many professionals find the investment pays off through reduced diagnostic time and improved repair quality. As vehicle systems advance, staying updated with the latest diagnostic software becomes as important as physical tools. So, one actionable tip I suggest: invest in a reputable OBD-II scanner and keep it updated regularly. This small step can dramatically improve your ability to diagnose and maintain your car effectively.
Lessons from the Front Lines of Car Care
One of the most valuable insights I gained was the importance of patience and observing subtle changes over time. Rushing the diagnosis often leads to unnecessary part replacements, but taking the time to monitor engine behavior during warm-up can reveal hidden issues. I’ve learned that rubber and plastic expand at different rates, making temperature-sensitive leaks more detectable when the engine is hot. Trusting your senses—listening, feeling, and watching—can often guide you to the culprit faster than relying solely on tools.
Another lesson is the power of proper tools. A smoke machine, though seemingly simple, transformed my ability to pinpoint tiny leaks that traditional methods missed. Investing in quality diagnostic equipment has saved me time, money, and frustration, and it’s a habit I recommend for any serious car enthusiast or mechanic. Remember, knowing your tools and how to use them effectively is just as critical as understanding the engine itself.
Lastly, I realized that understanding the ‘why’ behind these issues motivates better maintenance practices. Recognizing that materials expand and contract with heat helps me anticipate potential problems before they escalate. It’s a reminder that our cars are complex systems, but with curiosity and patience, we can troubleshoot like pros, ensuring safety and reliability every mile.
A Toolkit of Gems for Auto Diagnostics Enthusiasts
My go-to resource is the auto repair hacks guide, which offers practical tips that bridge the gap between amateurs and pros. For diagnostics, I trust the latest insights on oil and engine tech; they keep me updated on best practices and emerging trends. When it comes to specific tools, a reliable OBD-II scanner like Innova 3160g is indispensable—it’s helped me avoid costly guesswork and get straight to the root of engine issues.
For repairing vacuum leaks, nothing beats hands-on experience complemented by expert advice. Forums and specialized videos have been invaluable for seeing how others tackle similar problems, fostering a community of learning that’s worth more than any manual.
Fuel your Confidence: Keep Moving Forward
Remember, diagnosing and fixing your vehicle’s quirks isn’t just about repairs—it’s about cultivating confidence and independence on the road. The next time you face an engine hiccup, approach it with patience and knowledge. Your car’s health depends on your curiosity and willingness to learn. Have you ever managed to track down a sneaky vacuum leak without professional help? Share your stories below, and let’s keep inspiring each other to master the art of auto care.