
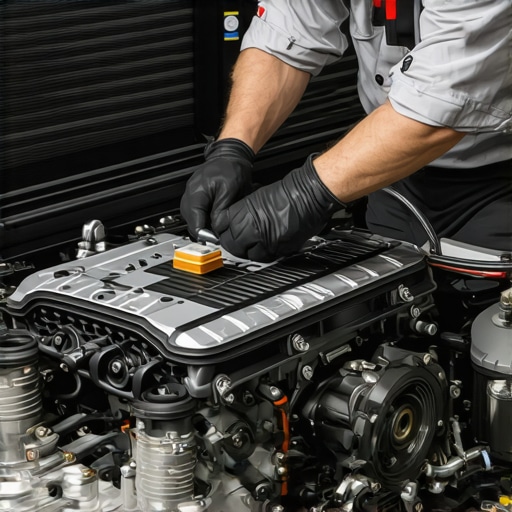
Have you ever been stranded on the side of the road, engine sputtering like an old radio, desperately trying to figure out what’s wrong? I remember my lightbulb moment vividly—my car started misfiring during a family road trip, and I had no diagnostic scanner in hand. It was frustrating, a real test of patience. But after some trial, error, and a little intuition, I discovered that I could identify a failing ignition coil without any fancy tools.
Unlocking the Mystery: How to Tell Which Ignition Coil Is Failing
If your car is running rough, hesitating, or feeling like it’s not firing on all cylinders, chances are one of your ignition coils is giving you trouble. The key is knowing how to detect that failure early—before it leaves you stranded or causes more damage. Today, I’ll share the tips and tricks I wish I knew earlier, so you can troubleshoot confidently and save yourself a costly trip to the mechanic.
Is This Really Possible Without a Scan Tool?
At first, I thought I needed an expensive diagnostic scanner. Turns out, you can spot a failing coil with simple methods, like listening for misfires, feeling vibrations, or checking for specific signs. Early on, I made the mistake of ignoring rough idling, assuming it was just bad fuel or a dirty air filter. But those little clues can point directly to ignition issues, and I’ll guide you through recognizing them. Have you faced similar doubts—wondering if there’s a way to diagnose ignition problems with just your senses and basic checks? If so, you’re not alone. For more tips on troubleshooting, check out decoding vehicle diagnostics.
Some early mistakes I made included rushing to replace parts prematurely without confirming the problem. Trust me, that wastes time and money. A smarter approach, supported by automotive research, involves listening carefully to engine sounds, feeling for vibrations, and inspecting spark plugs—simple yet effective cues to identify misfiring coils.
Next, we’ll dive into practical steps to pinpoint which ignition coil is failing, so you can address the issue efficiently and get back on the road with confidence.
Test for Engine Misfires and Rough Idling
Start your diagnosis with your senses. When I faced my own coil failure, I first noticed my engine misfiring and rough idling, especially during acceleration. To confirm, listen closely for popping sounds or hesitations. Feel for vibrations through the steering wheel or seat—these are clear signs your engine isn’t firing smoothly. Similar to checking a faulty water pipe by listening for hissing or feeling for damp spots, your senses can reveal a lot about ignition issues. If these signs are present, move on to more targeted checks.
Inspect Spark Plugs and Coils
Remove and Examine Spark Plugs
Shift into safety mode: disconnect the negative battery terminal for safety. Remove the spark plugs connected to suspected cylinders. Look for fouling, cracks, or wear—these clues point toward ignition problems. For instance, wet or oily plugs suggest oil leaks affecting coil performance, while white, blistered electrodes imply overheating. When I checked my plugs, I noticed one was significantly worn, hinting that the coil feeding it might be failing. Replacing the spark plug alone won’t fix the coil, but it’s a quick step to rule out related issues.
Conduct a Coil Spark Test
Unlock your vehicle’s hood and locate the ignition coils—often under the engine cover. If accessible, remove the coil from its spark plug; if not, consider skinning the cover for better access. Connect a spark tester between the coil’s output and the spark plug hole. Have someone crank the engine while you observe the spark tester; strong, consistent sparks indicate a healthy coil. A weak or absent spark signals a failing coil. I once tested my coils this way, and seeing a faint, intermittent spark confirmed the coil’s weakness. Remember to perform this test in a well-lit area, and always exercise caution around live electrical parts.
Swap Coils to Isolate the Problem
If your vehicle’s engine has multiple coils, you can swap suspected coils between cylinders—say, switching coil A with coil B. Drive the vehicle or restart the engine after swapping. If misfire symptoms follow the coil, you’ve identified the culprit. It’s like swapping a problematic lightbulb into another socket; if the issue moves with the coil, it’s faulty. During my test, swapping coils made the misfire shift to another cylinder, confirming the coil’s failure. This simple swap is a reliable and cost-effective way to diagnose ignition coil issues without a scanner.
Utilize Basic Engine Codes and Checks
While an OBD-II scanner can pinpoint issues faster, even without one, you can use the engine’s Check Engine light as a guide. If the CEL blinks or remains steady, consult a comprehensive guide like decoding vehicle diagnostics. Sometimes, pulling codes with a basic code reader or visiting a local mechanic for a quick scan can save time. Early detection through these codes complements your tactile and visual checks, ensuring you don’t overlook subtle signs of coil failure.
Confirm and Replace
Once you’ve identified a suspect coil, replace it promptly to prevent further damage. Using quality parts ensures longevity and optimal performance. If you’re unsure about handling coils—especially on modern engines with tight spaces—consider professional help. Regular inspections and timely replacements extend your vehicle’s lifespan, keeping you safe on the road. For comprehensive repair strategies, visit essential auto repair strategies.
Many car owners believe that vehicle diagnostics are straightforward or rely solely on high-tech scanners, but this is a misconception. The common myth is that electronic tools are the only way to accurately identify issues. In reality, seasoned mechanics and experienced DIYers understand the importance of nuanced checks, such as listening for irregular engine sounds or feeling for subtle vibrations, which often reveal underlying problems that generic scans might miss. Rushing to replace parts based solely on error codes without performing detailed observation can lead to unnecessary expenses and further damage. An advanced mistake is overlooking the significance of specific sensor behaviors; for instance, a gradual engine temperature increase during idle, combined with odd idling patterns, can signal a failing coolant sensor, as highlighted in automotive expert studies.
Why do some diagnostic tools provide false positives, and how can we interpret their warnings more effectively?
Recognizing the limitations of your diagnostic equipment is crucial. External research suggests that over-reliance on OBD-II codes without corroborating evidence can result in misdiagnosis, delaying proper repairs. Therefore, integrating basic manual checks with electronic readings ensures a comprehensive understanding of your vehicle’s health. Remember, understanding the nuance between a passing error code and an actual fault prevents unnecessary part replacements and saves money. Want to enhance your diagnostic skills? Visit this guide on auto repair strategies for expert insights. Have you ever fallen into this trap? Let me know in the comments.
How do I maintain my diagnostic tools and equipment over time?
Consistency is key when it comes to auto diagnostics. I personally rely on the OBDLink MX+ Bluetooth scanner, which I use daily to quickly retrieve fault codes and monitor real-time data from my vehicle’s ECU. Its fast connection and compatibility with both Android and iOS devices make it invaluable. To ensure longevity, I keep it in a dedicated case and regularly update its firmware through the manufacturer’s software, ensuring I always have the latest diagnostic capabilities. Additionally, I use a digital multimeter—a Fluke 117—for precise electrical checks, especially when troubleshooting sensors and wiring. Regular calibration and cleaning prevent corrosion and ensure accurate readings.
Beyond hardware, I utilize software like vehicle diagnostic apps that provide detailed insights and maintenance suggestions, extending the usefulness of my tools. As vehicle technology advances, integrating a factory-level diagnostic interface, such as Autel MaxiSys, allows for deeper access to newer vehicle modules, making long-term diagnostics more reliable.
What about long-term maintenance of diagnostic systems and tools?
To keep my diagnostic equipment functioning optimally over the years, I follow a few simple practices. I store all devices away from extreme temperatures and humidity, which can damage sensitive electronics. I also keep a maintenance log to track firmware updates, calibration schedules, and any repairs. This habit helps me avoid unexpected failures and ensures consistent performance. For software, I subscribe to updates and periodically review online forums for tips on optimizing tool use. Staying proactive with maintenance not only saves money but also improves diagnostic accuracy, giving me confidence during troubleshooting.
Scaling up diagnostic capabilities for your auto repair setup
As your repair skills grow, consider investing in modular diagnostic tools that expand with your needs. For example, adding an advanced professional scan tool like the Snap-On Zeus can allow access to additional modules and live data streams. These tools often come with service-specific adapters, enabling you to diagnose everything from ABS to transmission issues efficiently. Over time, building a suite of reliable testing devices enhances your ability to catch problems early, saving time and money in auto repairs.
Looking ahead, diagnostic technology is moving towards AI-powered predictive maintenance, which can anticipate failures before they happen. Embracing these innovations now prepares you for a future where vehicle health is monitored continuously via connected devices, reducing roadside surprises. For practical tips on integrating advanced diagnostics into your routine, visit auto repair strategies.
If you’re eager to give your DIY diagnostics a real boost, try calibrating your multimeter regularly following the manufacturer’s instructions or exploring the latest updates for your OBDeleven device. Proper maintenance of your tools ensures they won’t let you down in the middle of a tricky fix. Remember, staying proactive with your diagnostic setup can save you significantly in the long run—so pick a trusted tool today and start practicing!
Lessons from the Garage: Hard-Won Insights on Diagnosing Ignition Issues
- Never underestimate subtle signs like slight vibrations or uneven idling—they often hold the key to hidden ignition coil problems. My first mistake was ignoring these cues, which led to more costly repairs later.
- Swapping coils between cylinders proved to me that simple, hands-on tests can be as effective as high-tech scanners for pinpointing faults. It’s a practical step any DIY enthusiast can master.
- Relying solely on error codes without cross-checking with visual and tactile clues can be misleading. A holistic approach saves you time and money, emphasizing the importance of patience and observation.
Tools and Knowledge That Changed My Approach
- The decoding vehicle diagnostics guide became my go-to resource for understanding error codes and their real meanings, preventing unnecessary part replacements.
- Investing in a quality digital multimeter, like the Fluke 117, allowed me to verify electrical issues accurately. Regular maintenance of my tools, including firmware updates and calibration, keeps my diagnostics sharp.
- Building a reliable toolkit that scales with my skills—adding advanced scanners when needed—gives me the flexibility to handle complex problems without feeling overwhelmed.
Your Next Step Toward Confident Repairs
Deciphering engine troubles without high-end scanners is entirely possible with keen observation, basic tools, and strategic testing. This approach empowers you to maintain your vehicle proactively, saving money and reducing downtime. Remember, every challenge is an opportunity to learn and grow as a car owner or DIYer.
Are you ready to trust your senses and simple tests to diagnose issues? Share your experiences or ask questions below—let’s learn together!