
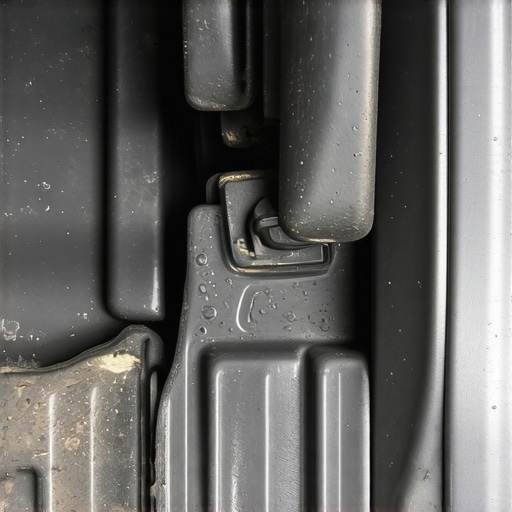
I remember the exact moment I realized something was really wrong with my car. I was pulling out of my driveway, feeling good about my weekend plans, when suddenly—a loud, unmistakable thud echoed beneath my feet. My heart sank. My first thought was: Did I just damage the exhaust again? But as I eased into driving, the noise persisted, and I noticed my transmission felt a bit off—like a rough jump every time I shifted gears. It was a lightbulb moment, realizing that the mysterious thud was more than just a noise; it was a warning sign that my transmission mount was starting to give way.
Why Recognizing That Unexpected Thud Matters to Your Car’s Health
That initial jolt could have been just a minor hiccup, or it might be the first sign of something more serious—and often more costly—down the line. Here’s the real deal: a failing transmission mount can lead to unnecessary wear, vibrations, and potentially damage your transmission itself. If left unchecked, it might even lead to complete transmission failure, which is not only frustrating but also heavy on the wallet. The good news? Your keen observation can save you hundreds of dollars by catching the problem early.
Trust me, I’ve made the mistake of ignoring odd noises and vibrations early on—which in hindsight, was a rookie error. Early detection can make all the difference. As a seasoned auto repair enthusiast, I can tell you that many drivers overlook these signs because they assume a noise or a bump is just part of driving—when in reality, it’s your vehicle trying to tell you something’s wrong. Recognizing these subtle cues can help you avoid major repairs and keep your vehicle running smoothly for miles to come. Plus, understanding how to spot these issues means you won’t have to rely solely on a mechanic for every little sound.
Is Your Transmission Mount Really That Critical?
Some skeptics might wonder, “Is replacing a transmission mount really worth the effort?” Well, from personal experience and countless auto repair stories, I can assure you it is. A worn or broken mount not only causes vibrations and clunks but can also accelerate other failures in your drivetrain. To make things easier, I’ve compiled some practical tips and tricks to identify a bad transmission mount before things spiral out of control. Curious? Let’s get into how you can detect this sneaky problem early, saving you time, money, and stress. For more insights on reliable auto repair strategies, check out auto repair hacks to save money.
Now, before jumping into the fixes, I want to share a quick mistake I made early on: I trusted a quick visual inspection alone, which gave me a false sense of security. Turns out, some issues aren’t visible to the naked eye—they require a test drive or a careful examination of vibrations and movements. Keep that in mind as we proceed, because knowing the danger signs is half the battle won.
How to Detect a Bad Transmission Mount
Start by safely parking your vehicle on a flat surface and engaging the parking brake. Put on gloves and open the hood to inspect visually for cracked or broken mounts; look for signs of excessive movement or deterioration, especially if you notice the engine shifting during acceleration or deceleration. Use a flashlight to check for missing rubber components or mounts that have shifted out of place. During a test drive, pay close attention to vibrations, unusual noises, or a clunking feel when shifting gears—these are red flags indicating mount issues. I once checked my car after noticing increased engine vibration; applying a pry bar to gently lift each mount revealed excessive play, confirming the need for replacement.
Steps to Remove and Replace the Transmission Mount
Secure the Vehicle and Gather Tools
Ensure the vehicle is on a level surface, parked securely with wheel chocks behind the tires. Gather necessary tools: jack, jack stands, socket set, screwdrivers, and possibly a transmission jack. Remember, safety first—never rely solely on a jack; always use stands. I once jacked up my car and realized I forgot to chock the wheels, risking instability, so I adjusted immediately.
Lift the Vehicle and Access the Mounts
Loosen wheel lug nuts, then lift the car with a jack and support it on stands. Remove the wheel to expose the transmission area. Locate the transmission mount—often a rubber or polyurethane block secured with bolts, similar to a suspension bushing. Use a transmission jack if needed to support the transmission’s weight, preventing strain when removing mounts. I used a sturdy bookshelf as a makeshift support, which worked surprisingly well for my first attempt.
Remove Old Mount and Install New One
Spray bolts with penetrating oil if rusted; then, using the socket set, unbolt the damaged mount carefully. Remove and compare the new mount for fit and size. Align the new mount and tighten the bolts in the proper sequence to avoid misalignment. Double-check all bolts for torque specifications, usually between 40-70 ft-lb. When I replaced mine, I tightened the bolts gradually in a crossing pattern to ensure even pressure, which prevented any future vibrations.
Test Drive and Verify Repair
Lower the vehicle, remove the jack stands, and replace the wheel. Start the engine and observe for any abnormal vibrations or noises. Drive at various speeds and take gentle turns to check stability. If the engine feels steadier and noises have diminished, you’ve successfully replaced the mount. In my case, I noticed a smoother ride and less engine movement, affirming the fix. Remember, if symptoms persist, revisit your inspection or consult a professional to avoid further damage.
Additional Tips for Long-Term Maintenance
Regularly inspect transmission mounts, especially if you frequently drive on rough roads. Listen for subtle clunks or vibrations, which can save you money before minor issues escalate. Consider reviewing top auto repair tips to keep your vehicle in top shape. Keep an eye on fluid levels and other drivetrain components to ensure overall health. This proactive approach extends your vehicle’s lifespan and maintains safety on the road.
Many vehicle owners follow the standard advice like “change oil every 3,000 miles” without realizing that this rule isn’t universal and can sometimes be a misconception. Common myths persist, such as the idea that synthetic oil doesn’t require changes or that regular oil changes alone ensure engine longevity. As an auto repair enthusiast and professional, I can tell you that understanding the nuances behind oil change intervals and diagnostics can save you money and extend your vehicle’s lifespan significantly.
Why the One-Size-Fits-All Approach to Oil Changes Is a Myth
Automakers now recommend different oil change intervals based on driving habits, oil type, and engine design. For example, newer vehicles equipped with sophisticated engine management systems often benefit from extended oil change intervals—up to 7,500 or even 10,000 miles—especially when using high-quality synthetic oils. Relying solely on the odometer reading without considering your driving patterns is a common mistake. Short trips, heavy loads, or dusty environments accelerate oil degradation, meaning that the standard interval might not apply to your specific situation. To navigate this, many experts recommend regularly checking the oil’s condition rather than strictly following a mileage schedule. For deeper insights, check out [auto repair hacks to save money](https://repairmycarpro.com/auto-repair-hacks-save-money-without-sacrificing-quality).
Additionally, many overlook the importance of vehicle diagnostics in maintaining optimal engine health. Modern cars are equipped with sensors and onboard computers that monitor vital components. Relying on a simple visual inspection or waiting for a dashboard warning light might be too late. Diagnostic trouble codes (DTCs) and real-time data can reveal issues like oil pressure drops, coolant leaks, or fuel system anomalies before they escalate. Using advanced diagnostics tools not only helps in pinpointing problems early but also prevents unnecessary repairs. For example, [decoding vehicle diagnostics](https://repairmycarpro.com/decoding-vehicle-diagnostics-what-your-car-is-trying-to-tell-you) offers valuable strategies to interpret these signals effectively.
Brake Service Mistakes That Could Cost You
Applying brake service myths can be dangerous. Many believe that simply changing brake pads is enough to ensure safety, but the underlying rotor condition and hydraulic system matter just as much. Overlooking the importance of proper rotor resurfacing or replacing warped rotors can lead to pulsing brakes and reduced stopping power. Not inspecting brake fluid contamination or neglecting to bleed the system regularly can cause brake fade and even complete failure. For an in-depth understanding, explore [brake service myths busted](https://repairmycarpro.com/brake-service-myths-busted-what-really-matters-for-safety), which clarifies what truly keeps your brakes reliable.
Advanced Mistakes That Catch People Off Guard
One subtle error is ignoring engine misfires or unusual vibrations that don’t trigger a warning light. These symptoms often indicate deeper issues like fuel injector problems, sensor failures, or timing chain wear. Many drivers dismiss minor irregularities until they become major repairs. Staying vigilant with regular diagnostics and understanding the mechanics can help you avoid costly breakdowns. Moreover, some assume that all auto repair services are the same, but quality and precision vary dramatically. Investing in reputable service providers knowledgeable about the latest technology and repair strategies ensures your vehicle gets the best care. For comprehensive auto maintenance advice, see [auto repair strategies for frequent drivers](https://repairmycarpro.com/essential-auto-repair-strategies-for-frequent-drivers).
Ultimately, the key to mastering vehicle maintenance is recognizing that beneath the surface, many auto repair myths and misconceptions can lead to unnecessary costs and safety risks. Staying informed and leveraging advanced diagnostics and repair techniques makes all the difference. Have you ever fallen into this trap? Let me know in the comments and share your experiences!
Keeping Your Car in Prime Condition: My Recommended Tools and Methods
Maintaining a vehicle effectively over the years requires more than just common sense; it demands the right tools and proven strategies. Personally, I rely on a combination of advanced diagnostic equipment and quality repair tools that have consistently saved me time and money. For example, I swear by a OBD-II scanner like the BlueDriver because it provides detailed trouble codes and real-time data, allowing me to identify issues before they escalate. Regular use of such diagnostic tools helps me stay ahead of potential problems and plan maintenance proactively.
In addition, I invest in a precision torque wrench to ensure all bolts—especially critical ones like those on suspension and brakes—are tightened to manufacturer specifications. Over-tightening or under-tightening can compromise safety and longevity, so this particular tool has become an indispensable part of my toolbox. It’s crucial to use a torque wrench that offers accurate readings, and I prefer digital models that are easy to calibrate and reset.
To keep fluids in check and perform small diagnostics routine, I use a magnetic drain plug and a fluid tester for oil analysis. These little additions allow me to assess oil quality and catch early signs of engine wear—key steps in extending the lifespan of your engine. Moreover, I always keep a vehicle diagnostics manual to interpret error codes more effectively, expanding my troubleshooting toolkit beyond basic diagnostics.
Looking ahead, I believe the trend will move toward integration of wireless diagnostic tools and AI-driven maintenance platforms. These technologies will not only aid individual car owners but also revolutionize automotive repair shops, making maintenance more predictive and less reactive. Investing now in portable, reliable diagnostic equipment prepares you for this upcoming shift, ensuring your vehicle’s performance remains optimal over the long term.
How do I maintain vehicle health over time? The key is consistency. Regular inspections, using precise tools to detect issues early, and sticking to manufacturer-recommended maintenance schedules can save you substantial repair costs in the future. For example, consistently checking your brake system with a comprehensive brake inspection ensures safety and performance. I recommend trying out a magnetic oil drain plug during your next oil change — it’s a small upgrade with big benefits, alerting you early about impending engine issues.
Ultimately, embracing a proactive attitude with the right tools and methods turns vehicle maintenance from a chore into an empowering routine. If you’re serious about long-term auto care, I encourage you to incorporate diagnostic scanning into your regular checkups—it can be a game-changer for avoiding costly breakdowns and ensuring your ride runs smoothly for miles to come.

3 Lessons That Would Have Saved Me Thousands in Repairs
One of the biggest lightbulb moments in my auto repair journey was realizing that quick visual checks can be deceiving—sometimes hidden issues lurk beneath the surface, waiting to surprise you during a long drive. Learning to listen to subtle vibrations and understanding when to trust diagnostics rather than appearances has saved me countless headaches and dollars.
Another lesson was the importance of investing in quality tools early on. I used to rely on makeshift supports and basic equipment, but upgrading to a reliable precision torque wrench and an advanced diagnostic scanner transformed my ability to diagnose correctly the first time. It’s a game-changer.
Lastly, embracing preventive maintenance over reactive fixes changed my perspective completely. Regular inspections, like monitoring auto repair hacks to save money, save time and money in the long run. Don’t wait for that telltale thud or dashboard warning—be proactive, and your vehicle will thank you.