
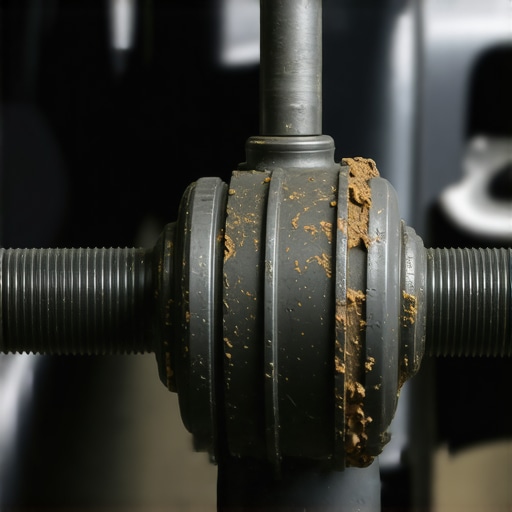
Ever been caught off guard by a sudden clunking noise every time you shift gears? I remember the first time it happened to me. I was pulling out of my driveway, just a normal morning, and suddenly that unmistakable thunk echoed through the car, making my stomach drop. At first, I thought I hit a pothole or maybe something was loose. But soon, I realized it was something more serious — my U-joint was probably on its last legs. That lightbulb moment made me realize just how crucial this small component really is for smooth driving.
Why a Simple Clunk Could Spell Big Trouble
This isn’t just a quirky noise to ignore. That clunk when shifting into gear can be a warning sign of a failing U-joint. These little parts are the unsung heroes of your driveshaft, connecting your transmission to your wheels and allowing for smooth motion. When they start to fail, it often begins with that telltale noise. But ignore it, and you risk more costly repairs — or even a dangerous breakdown down the line. The good news? Identifying and fixing this issue early can save you a lot of money and hassle. Today, I’ll walk you through how to tell if your U-joint is toast before it’s too late. If you’ve ever wondered whether that unsettling noise is just a minor hiccup or a sign of impending disaster, stick around. We’re about to demystify the signs and show you how to get ahead of the problem.
Will this be the repair that breaks your budget?
I admit, I made a rookie mistake early on — assuming noises meant minor issues. Trust me, jumping straight to replacing parts without proper diagnosis can eat into your savings. That’s why it’s essential to follow proven steps to diagnose the problem correctly. For example, a quick vehicle diagnostics check can reveal whether the clunk signifies U-joint trouble or something else entirely. My recommendation? Don’t just rely on your ears. Take time to inspect or consult a professional to avoid unnecessary replacements. By catching these warning signs early, you can prevent a complete drive shaft failure and keep your car running smoothly for miles to come. So, how do you know if that noise is your U-joint crying for help? Well, that’s what we’ll tackle next.
Start with a Visual Inspection
Park your vehicle on a flat surface, turn off the engine, and engage the parking brake. Use a flashlight and safely crawl under the car or lift it with a jack and stands for better access. Check the driveshaft connecting to the transmission and the axles for any signs of rust, corrosion, or obvious damage. Look for torn or missing boot covers that protect the U-joints from dirt and debris. If you notice any leakage or excessive play, it’s time to dig deeper.
Test for Excessive Play by Hand
Grip the driveshaft near the U-joint with your hands or use a pry bar for leverage. Gently wiggle the joint back and forth, feeling for looseness or binding. A healthy U-joint should be snug without any noticeable movement. During this step, I once found a loose joint that I initially dismissed as minor. When I replaced it, the clunking noise vanished immediately, saving me from a costly repair.
Perform a Spin Test to Detect Rolling Noise
In some cases, raising the vehicle and rotating the driveshaft by hand can reveal abnormal noises or vibrations that indicate bad U-joints. Listen carefully for clicking or grinding sounds, which often point to internal wear. This method is similar to testing a crank in a bicycle wheel for wobble — if it doesn’t spin smoothly, it’s suspect.
Use a Jack and Safety Stands Properly
Always support the vehicle securely before conducting further tests. Once elevated, free the driveshaft from the transmission or differential to check for axial or radial play. Be cautious; a misaligned or poorly supported car can be dangerous. Safety should always come first — I’ve learned this one the hard way after a minor slip during my first inspection.
Check the U-Joint for Movement and Damage
If you find looseness, look for damaged or corroded cross bearings and needle rollers. Rust or discoloration often indicates a failing component. For a tougher diagnosis, you might remove the U-joint and physically move it by hand. If it moves excessively or feels gritty, replace it immediately.
Conduct a Test Drive to Confirm Issues
Once you’ve replaced a suspect U-joint, take the vehicle for a test drive. Pay attention to any continued noises or vibrations. During my last repair, I replaced a U-joint that looked fine externally, but during the test drive, the noise persisted. Rechecking revealed I missed a faulty joint on the other side. Multiple component checks are key to a thorough fix.
Know When to Seek Professional Help
While these steps work well for DIYers, persistent issues or ambiguous signs warrant a professional diagnosis. Modern vehicles benefit from diagnostic tools that can pinpoint drive shaft problems more precisely. If you’re unsure, consulting a trusted mechanic ensures safety and correctness; I’ve learned that cutting corners often leads to more expenses later, especially with critical components like the U-joint.
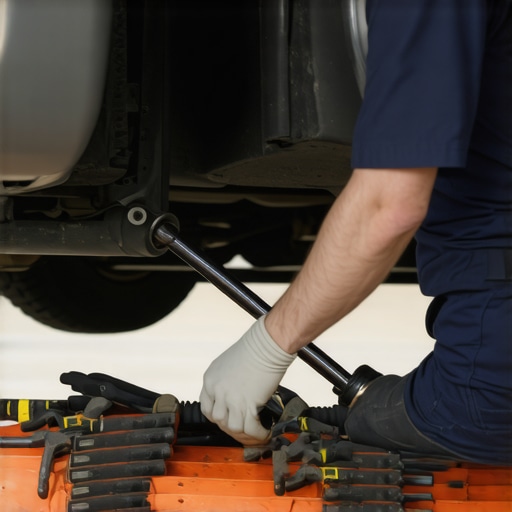
Image prompt: A mechanic inspecting a driveshaft under a lifted car for signs of wear and damage, with tools laid out around.
Proper diagnosis of U-joint failure involves systematic visual checks, physical testing for play, and cautious road testing. Following these steps ensures you catch issues early, avoiding catastrophic failures and costly repairs down the line.
Many car owners believe that routine checks and simple repairs are straightforward, but there’s often more nuance than meets the eye. One widespread myth is that a quick visual inspection is always sufficient to diagnose complex issues like brake problems or engine misfires. In reality, modern vehicles incorporate advanced systems that require sophisticated diagnostic tools, such as external scanner devices for accurate reading — relying solely on visual cues can lead to overlooked problems, eventually causing costly repairs. For example, a driver might notice a slight vibration and assume the brake pads are worn out, but without proper diagnostics, underlying issues like brake caliper sticking or rotor warping could be missed, risking safety and further damage. A mistake I see frequently is assuming an oil change is just about replacing the oil; however, many overlook the importance of inspecting the entire lubrication system, including filter condition, oil quality, and related components, which significantly impacts engine longevity. Additionally, many think that brake service simply involves pad replacement, but comprehensive brake maintenance includes checking brake fluid quality, rotor condition, and caliper functionality — neglecting these can diminish braking performance unexpectedly. What truly frustrates seasoned mechanics is when drivers ignore dashboard warning lights, assuming they’re just sensor glitches. Modern cars use complex, interconnected electronic systems; ignoring warning signals like ABS or TCS lights can lead to dangerous situations or expensive electronic failures if not properly diagnosed using specialized tools. As a rule of thumb, many underestimate the importance of routine diagnostics by professional mechanics, believing that ignorance is cheaper — but advanced diagnostics can preempt breakdowns, saving money and ensuring safety. According to expert studies, vehicles with proactive diagnostic routines experience fewer breakdowns and extended lifespan, emphasizing that diagnostic oversight often accelerates wear and tear. For those who want to go beyond basic maintenance, mastering diagnostics and understanding the intricacies of vehicle systems can be a game changer. For example, learning to decode your vehicle’s onboard diagnostic codes through external tools provides insights that simple visual checks can’t reveal, especially with complex systems controlling fuel injection, ignition, and emissions. Have you ever fallen into this trap of underestimating vehicle diagnostics? Let me know in the comments! By appreciating the hidden complexities, you equip yourself to make smarter maintenance choices, avoid costly mistakes, and keep your vehicle running smoothly for years to come.
Keeping Your Vehicle Running Smoothly Over Time
Maintaining your vehicle’s performance isn’t just about the occasional oil change or brake service; it requires a strategic approach using the right tools and techniques to ensure longevity and reliability. As your car ages, proactive maintenance becomes increasingly crucial to prevent costly repairs and keep everything functioning seamlessly. One of my personal favorites is an automotive scan tool like the Autel MaxiCOM MK808. I use it regularly because it provides comprehensive diagnostics, allowing me to read and clear trouble codes, monitor live data, and perform calibration procedures. This device has saved me from unnecessary trips to the mechanic by catching issues early—especially with complex sensor faults or electronic glitches that aren’t visible during a basic visual check.
Another indispensable piece of equipment is a high-quality diagnostics scanner. Modern vehicles rely heavily on electronic systems, and having an advanced scanner at hand enables you to quickly identify engine or transmission problems before they escalate. I recommend investing in a portable, Bluetooth-enabled scanner compatible with smartphone apps, which makes routine checks more accessible and less cumbersome. The trend in auto diagnostics is moving toward more affordable yet powerful tools that integrate seamlessly with your devices, making regular maintenance more manageable.
For fluid health, consider a digital oil tester. I personally use the OilLife Test Kit, which assesses the oil’s viscosity and contaminants through a simple sample. This practice helps determine if your oil is degrading prematurely, especially if you experience increased engine temps or sluggish performance—reminders that an oil change might not be enough. With advances like synthetic oils and oil additives, understanding the real condition of your lubricant can prevent engine wear and save you money over time.
Supporting tools include a sturdy mechanic’s creeper for easier undercarriage inspections and a set of supplied socket adapters for stubborn drain plugs — I’ve found these invaluable during oil changes, especially in tight spaces. Additionally, a flexible inspection camera can help you visually check hard-to-reach areas like the cooling system or behind the engine components without dismantling too much.
Looking ahead, the future of vehicle maintenance seems to hinge on AI-driven diagnostics and predictive analytics. Devices will soon predict failures before symptoms even appear, reducing downtime dramatically. For now, however, combining quality manual tools with modern diagnostic tech is your best bet for effective & efficient vehicle care.
Wondering how to keep your car in top shape?
One action you can start today is to learn how to decode your vehicle’s onboard diagnostic codes. It’s a game-changer for proactive maintenance, giving you insight into hidden issues early. So why not try using a professional-grade scanner on your next oil change or brake service? Taking control now can prevent big problems later, keeping your ride smooth and safe for miles to come.
Lessons Hidden in Every Repair Journey
One of the biggest realizations I’ve had is that many vehicle issues share common roots, yet each requires a tailored approach. Early on, I believed that a simple noise or dashboard light was always a quick fix, but I soon learned that diagnostics demand patience and critical thinking—an insight that saved me from costly mistakes. Another lesson? Never underestimate the power of routine checks—I’ve caught potential failures before they became emergencies simply by trusting my tools and instincts. Finally, I discovered that sharing experiences with fellow enthusiasts opens new perspectives, revealing subtle clues that a single person might overlook, reinforcing that continuous learning is key to vehicle mastery.
Tools and Resources That Changed My Approach
Over the years, I’ve come to depend on specific tools that elevate the quality of auto repair and diagnostics. The Autel MaxiCOM MK808 has been a game-changer, providing in-depth insights into vehicle systems that save me time and money. For routine oil health checks, I trust the latest digital oil testers, which help me determine whether an oil change is truly needed, preventing premature engine wear. When it comes to brake service, I recommend reading this comprehensive guide that dispels common myths and ensures you’re focusing on what truly matters for safety. Combining these tools with expert advice from sites I trust has transformed my approach into a proactive, rather than reactive, maintenance routine.
Your Road Ahead Starts Now
Embarking on a journey to become more confident with vehicle diagnostics and auto repair isn’t just about fixing cars—it’s about empowering yourself to safeguard your mobility and wallet. Every check, diagnostic, and repair is an investment in peace of mind. Remember, the more you understand your vehicle, the better you’ll be at avoiding costly breakdowns and enhancing performance. So, pick up that scanner, learn to decode those error codes, and never shy away from taking control of your auto care. Your vehicle’s health depends largely on the actions you take today—make them purposeful, and enjoy the ride ahead.