
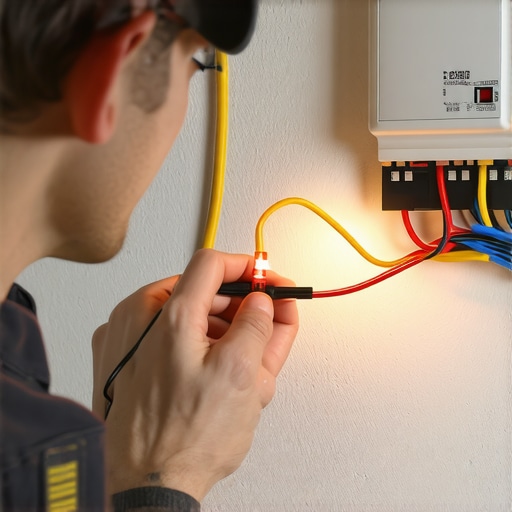
I remember the moment vividly: I was sitting in my driveway when my car’s battery suddenly died—again. Not just a dead battery; this one drained overnight despite the car sitting idle. My initial thought was to jump to the worst-case scenario—an electrical short, a parasitic drain lurking somewhere. Frustration crept in as I realized regular diagnostics hadn’t pinpointed the culprit. That light bulb went off when I remembered an old trick I learned years ago—using just a simple test light. It was a lightbulb moment that changed how I approached tricky electrical problems.
Figuring Out a Parasitic Drain Without Fancy Tools
The idea sounded almost too straightforward. Could I really find a parasitic drain with just a test light? The answer is yes, and I want to share that experience with you. When your vehicle’s battery keeps disappearing, yet you’ve replaced the alternator, checked for obvious shorts, and still have mystery drain, it’s time to try something different. The best part? This method requires only a basic test light, a tool I bet most DIYers already own or can acquire easily. By the end of this post, you’ll learn how to follow my steps and identify electrical anomalies without costly diagnostic equipment.
Is a Test Light Really Effective for This Job?
You might be skeptical. I was too—at first. In fact, early in my auto repair journey, I made the mistake of assuming that complex electronic issues needed complex solutions. I once wasted hours on a digital multimeter, only to realize I overlooked the simple, reliable test light approach. It’s amazing how a cheap tool can be so powerful when used correctly. This method is grounded in the principle that most electrical faults manifest as odd current draws, which can be pinpointed with a quick, visual check. If you’ve ever wondered whether diagnosing electrical issues is worth the hassle, I assure you that the answer is yes—especially when you’re doing it yourself.
Curious to see how I tackled my battery drain problem step-by-step? Before we dive into the practical details, let me address a common concern that may be holding you back: “Is this method accurate enough to trust?” The truth is, with attention and patience, it’s surprisingly effective. Just remember, one early mistake I made—assuming the drain only occurred when the car was off—caused me some delays. Always test in different scenarios, and you’ll catch those sneaky parasitic draws. Ready to become your vehicle’s electrical detective? Let’s get started.
Identify the Power Switch to Your Vehicle’s Battery
Start by ensuring your vehicle is turned off and all accessories are unplugged. Remove the negative terminal from your battery and connect the test light’s alligator clip to the terminal. Turn on the vehicle’s accessories briefly to see if the test light glows. This confirms if there’s a drain when the vehicle is off. I recall a time when my test light lit up immediately, revealing a stuck interior light switch that kept the circuit alive even after shutting down, saving me from a costly wiring repair.
Locate the Fuses That Control Various Circuits
Next, keep the test light connected and systematically pull the fuses one at a time from the fuse box. After removing each fuse, observe whether the test light turns off. If it does, the circuit controlled by that fuse is not drawing power; if it stays on, you’ve pinpointed the suspect circuit. For instance, I once found that a fog light relay was stuck in the ‘on’ position due to corrosion, causing my battery drain.
Check and Isolate the Faulty Circuit
Once you identify the circuit with a drain, probe further by disconnecting components within that circuit. For example, if your interior lights circuit shows a drain, disconnect the door switches, dome lights, and any aftermarket accessories. Reconnect the fuse and watch the test light. When the light turns off after disconnecting a particular component, you’ve found the culprit. This step-by-step elimination mirrors the approach I took when troubleshooting a random power loss — eventually discovering a faulty aftermarket stereo wiring that kept the circuit engaged.
Use the Test Light to Confirm the Parasitic Draw
Finally, measure the current draw by connecting your test light to the positive terminal and the ground. If the light illuminates brightly with the vehicle off, a parasitic drain exists. The safe range is typically under 50 milliamps; a brighter light indicates a problem. In my case, an unusually bright test light pointed me directly to the tail light assembly that had a faulty wiring harness, and replacing it resolved my battery issues.
Always remember, patience and methodical testing are key. Don’t rush through these steps, and double-check your connections. This simple but effective method can save you time and money compared to professional diagnostic tools. For more detailed insights on vehicle electrical systems, consider reviewing vehicle diagnostics explained. Keep your vehicle in top shape by understanding its electrical heartbeat, and you’ll catch issues before they lead to breakdowns.
When it comes to vehicle diagnostics and repairs, many drivers rely on common wisdom or quick fixes, but this often leads them astray. A frequent misconception is that completing a scheduled oil change or brake service is enough to keep their car running smoothly. In reality, understanding the nuances of these processes can significantly extend your vehicle’s lifespan and save you money. For example, many believe that all oils are created equal, but modern synthetic oils used in oil changes have advanced formulations that offer superior protection and fuel efficiency. Overlooking such details can lead to premature engine wear, especially if the oil is not suited for your driving conditions.
Furthermore, a common myth is that brake pads are the primary component requiring replacement during brake service. While they are important, the true safety depends on evaluating the condition of rotors, calipers, and brake fluid—factors many drivers neglect. Advanced diagnostics reveal that uneven brake pad wear often signals deeper issues like caliper sticking, which, if ignored, can result in uneven braking or rotor damage.
A trap many fall into involves DIY repairs without understanding the system complexities. For instance, with some auto repair hacks, attempting to fix a transmission or cooling system without proper diagnosis can escalate the problem, leading to costly repairs later. It’s a trap that lures many into thinking they can save money but ends up costing more if the problem isn’t pinpointed correctly.
One piece of advice I wish I had known earlier is the significance of advanced vehicle diagnostics. Simple tests might not reveal intermittent faults or early-stage component failures. Modern diagnostic tools can detect issues before they cause breakdowns, something I personally learned when I used advanced diagnostics to uncover a faulty sensor causing engine misfires. Neglecting this nuance can cause you to replace parts unnecessarily or miss critical safety issues.
Have you ever fallen into this trap? Let me know in the comments. Mastering these subtleties empowers you to maintain your vehicle proactively, avoiding surprises and ensuring safety on the road.
Investing in Reliable Tools for Long-Term Vehicle Health
When it comes to maintaining your vehicle, having the right tools makes all the difference. I personally rely on a high-quality digital multimeter, which is indispensable for diagnosing electrical issues like parasitic drains. Unlike basic test lights, a good multimeter allows for precise voltage and current measurements, helping you identify subtle problems before they escalate. Additionally, a dedicated automotive stethoscope helps me pinpoint mechanical noises, saving diagnostic time and preventing unnecessary part replacements. For oil changes, I recommend investing in an oil filter wrench and a high-quality funnel to ensure mess-free operations. These tools not only improve your efficiency but also extend the lifespan of your vehicle by ensuring maintenance is performed correctly.
Keeping Up with Maintenance and Its Role in Longevity
Consistent maintenance is key to a vehicle’s long-term performance. Regular oil changes with modern synthetic oils, as explained in this guide, help reduce engine wear and improve fuel efficiency. Brake service, including rotor inspection and pad replacement, should be performed based on driving habits rather than just mileage—early detection prevents costly repairs. Routine fluid checks and replacements, such as coolant and brake fluid, minimize the risk of overheating or caliper sticking. Properly maintained components work in harmony, reducing unexpected breakdowns and ensuring safety.
Longevity through Advanced Diagnostics and Preventive Actions
Modern vehicle diagnostics involve more than just a scanner; they require strategic testing. Using advanced diagnostic techniques, you can detect early signs of electrical or mechanical issues. For example, monitoring battery health regularly with a multimeter can prevent sudden failures. Applying these diagnostics periodically, especially before long trips, ensures peace of mind and saves money. As technology advances, I predict that software-driven diagnostics, integrated with smartphone apps, will become standard, making maintenance more accessible for DIY enthusiasts.
How do I keep my vehicle in top shape over time?
Routine inspections combined with proper tool usage ensure your vehicle remains reliable. Regularly checking tire tread and brake performance, as well as performing fluid top-offs, prevents minor issues from becoming emergencies. Incorporate preventive measures like replacing worn belts and hoses in a timely manner, and always consult specialized resources or contact a trusted mechanic if you’re unsure. Staying proactive helps extend your car’s lifespan, saving you money and enhancing safety.
Try adopting a regular diagnostic schedule using tools like a multimeter and inspection mirrors. These simple yet powerful practices can reveal hidden problems and keep your vehicle running smoothly for years to come. For expert advice tailored to your vehicle’s needs, don’t hesitate to reach out through our contact page.
Lessons from the Trenches: Little Things That Changed Everything
One of the most eye-opening lessons I learned was that sometimes a tiny, overlooked component—like a faulty relay or a corroded ground wire—can cause major electrical headaches. These small issues are often missed by standard scans but become obvious with a careful, test light-guided inspection. It’s taught me to always dig deeper and question every symptom—what seems minor might be the root cause.
Another insight came when I realized that understanding how circuits are wired in my vehicle allowed me to troubleshoot seamlessly. Instead of blindly replacing parts, knowing how to trace circuits back to their source saved me money and time. It proved that a little knowledge about wiring diagrams can go a long way in DIY repair.
Finally, patience. Rushing through diagnosis usually results in missing the real problem. Taking the time to systematically test and eliminate suspects turned simple fixes into satisfying achievements. This patience transforms a frustrating experience into a rewarding puzzle-solving journey.
Tools and Resources That Have Made the Difference
My go-to tool for electrical diagnostics is a high-quality multimeter. True, a test light is simple and effective, but a multimeter provides precise voltage and resistance readings that can uncover hidden issues, like a partially broken wire. I trust modern oil change techniques, because they ensure my engine runs smoothly over miles, and similar principles apply to electrical health—careful measurements prevent breakdowns.
For wiring diagrams and circuit tracing, I rely on reputable online repositories that decode vehicle electrical systems comprehensively. Having a clear diagram saves hours of guesswork and boosts confidence when diagnosing complex issues.
Books and forums dedicated to automotive electrical troubleshooting are invaluable. They provide real-world tips that go beyond the textbook, like tricks to identify intermittent faults or special tools for tough-to-reach connectors. Investing in these resources helps turn a hobbyist into a capable DIY mechanic.
Your Next Step Toward Confidence in Vehicle Repair
Equip yourself with good tools, build patience, and adopt a systematic approach to diagnostics. Whether you’re tackling parasitic drains, steering quirks, or engine misfires, remember that understanding your vehicle’s inner workings is empowering. Start small, stay curious, and you’ll find a new appreciation for your car’s mechanical heartbeat.
Do you have a tricky electrical issue you’ve struggled with? Share your story below and let’s troubleshoot together! Your hands-on experience might just help a fellow enthusiast boost their repair game.