

I was merging onto the highway last July, windows down to catch the breeze, feeling pretty good about my old truck—until I stepped on the gas to pass a slow-moving semi. A piercing, high-pitched whistle erupted from the engine bay, sounding exactly like a tea kettle hitting its boiling point. My heart sank. The vibration through the pedal felt thin, and my mind immediately went to the worst-case scenario. I pulled over onto the gravel shoulder, convinced my turbocharger had finally surrendered or a serpentine belt was about to shred itself into a million pieces. I’ve spent years under the hood, but that specific, sharp shriek? It’s enough to make any driver’s stomach do a flip.
That Shrill Shriek Under Your Hood Needs an Answer
The truth is, a whistle during acceleration is your car’s way of screaming for help before something truly expensive breaks. Most people ignore it until the car starts stumbling at red lights or they see a puff of smoke. I’ll be honest: I once spent nearly three hundred dollars on a brand-new alternator because I was absolutely certain the bearing was the culprit. It wasn’t. It turned out to be a tiny, five-dollar vacuum hose with a hairline fracture that only opened up under pressure. Since then, I’ve learned that decoding vehicle diagnostics isn’t just about plugging in a scanner; it’s about listening to the physical symptoms your car is throwing at you. Today, I’m going to show you how to identify the difference between a harmless belt squeak and a serious intake leak. We are going to save you from throwing parts at a problem you haven’t properly diagnosed yet.
Is this whistling sound going to cost me a fortune?
That’s the fear, right? You hear a noise and immediately see dollar signs flying out of your bank account. But here’s the reality: many high-pitched whistles are actually caused by simple air leaks that you can fix in your driveway. Experts at Car and Driver have long pointed out that an undiagnosed intake leak can cause your engine to run lean—meaning too much air and too little fuel—which can eventually damage your spark plugs or even melt a piston if you ignore it for months. If you’ve been hearing this sound lately, have you checked your rubber hoses yet? Or are you worried it might be something deeper like an oily mess under your turbo that hints at a clogged line? Knowing exactly where to look is half the battle won. If you aren’t sure where the air is escaping, you can even find a vacuum leak with soapy water and a little bit of patience. Before you go out and buy a new alternator that whines right out of the box, let’s look at the most common culprits together. Have you ever had a mystery noise that completely stumped you until you found a five-minute fix?
Start With a Simple Visual Sweep of the Rubber
The very first thing you should do is treat your engine bay like a crime scene. Most whistling sounds come from ‘unmetered air’—basically, air entering the engine where it shouldn’t. I remember working on a neighbor’s hatchback last fall; she was convinced her transmission was dying because of a weird shrieking noise when she hit 40 mph. Within two minutes, I found a massive tear in the intake boot. It looked fine from the top, but when I squeezed the rubber, a gap the size of a quarter opened up. Start by checking every rubber hose you see. Look for cracks, dry rot, or hoses that feel ‘crunchy’ when you move them. If your car has a turbocharger, pay extra attention to the plastic intercooler pipes. Sometimes, a loose clamp is the only thing standing between you and a quiet ride. Interestingly, the check engine light code that actually means your air filter is loose can often be the first electronic clue that your air intake system is compromised.
Use Soapy Water to Spot the Bubbling Culprit
If a visual check doesn’t reveal the leak, it’s time for the old-school bubble test. This is one of my favorite auto repair hacks because it costs virtually nothing. Mix some dish soap with water in a spray bottle and lightly mist the vacuum lines while the engine is idling. If there’s a leak, the vacuum will either suck the bubbles in or, if it’s a pressurized part of the intake, blow them out into a foamy mess. It’s like finding a puncture in a bicycle tire. Learning how to find a vacuum leak with soapy water is an essential skill that saves you from the frustration of guessing which $50 sensor to replace. 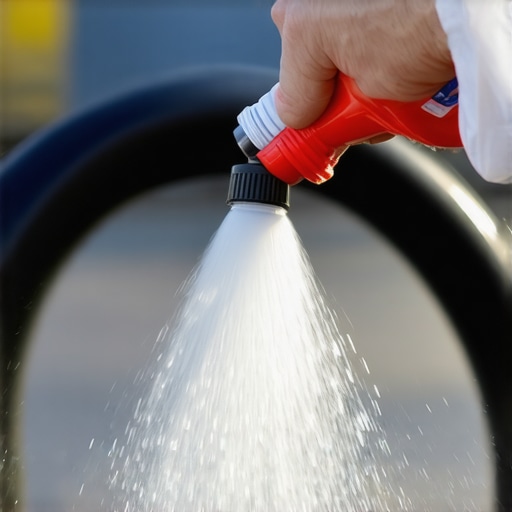
Don’t Forget the Brake Booster Connection
One area people almost always overlook is the brake booster. This large, round drum behind your master cylinder uses engine vacuum to help you press the pedal. If the internal diaphragm or the check valve starts to fail, you’ll hear a distinct whistle that changes tone whenever you touch the brakes. I once spent three days chasing a ‘turbo leak’ that was actually just a failing seal on the brake booster. If you suspect this is the case, you need to know how to tell if your brake booster is leaking air before you start dismantling your intake manifold. A failing booster doesn’t just make noise; it can make your car dangerous to stop in an emergency.
Check the Boost System If You Have a Turbo
For those driving turbocharged vehicles, that whistle might be ‘boost bleed.’ This happens when the high-pressure air meant for your cylinders escapes through a faulty gasket or a cracked housing. If you see oil residue around your turbo connections, that’s a red flag. An oily mess under your turbo often indicates that pressure is escaping and carrying oil vapor with it. Keep your ears open for a sound that mimics a jet engine spooling up; if it’s too loud or ends with a ‘flutter,’ your wastegate or a bypass valve might be stuck. Properly decoding vehicle diagnostics in these scenarios often requires watching your boost gauge or using a scanner to see if the MAP sensor is reading lower than expected.
Stop Treating Your Scan Tool Like a Magic Wand
Most DIYers—and even some pros who should know better—think that plugging in an OBD-II scanner is like reading a direct order from the car’s brain. They see a ‘Lean’ code and immediately buy a new oxygen sensor. I’m here to tell you that’s the most expensive way to fix a car. In my experience, a code is merely a starting point, a clue in a much larger investigation. If you are blindly swapping parts based on a code without decoding vehicle diagnostics through physical testing, you’re just gambling with your paycheck. The Society of Automotive Engineers (SAE) J1979 standard actually specifies that diagnostic trouble codes are designed to monitor emissions, not necessarily to point to a specific failed component. This means a vacuum leak, a clogged fuel filter, or even a bad ground can all trigger the exact same code.
Why does my scanner show zero errors while the engine shudders?
This is the ultimate frustration for any driver. You hear that high-pitched whistle or feel a stumble, but the dashboard is clear. This happens because some issues are ‘intermittent’ or don’t last long enough to trigger a formal fault. I’ve dealt with the sensor that ruins your shifting but doesnt trigger a light more times than I can count. When this happens, you have to move beyond codes and look at ‘Live Data’—watching how the fuel trims react in real-time as you replicate the noise. 
The Hidden Trap of Premature Part Swapping
Here is the ‘oops’ factor that kills many project cars: ignoring the basics because the problem feels ‘high-tech.’ People see black oil and panic, but why your synthetic oil turns-black after just five hundred miles is often perfectly normal and not a sign of engine failure. The same logic applies to electronics. I once watched a guy spend $400 on a control module when the real culprit was a corroded pin in a harness connector. This is why your obd ii scanner cant find the real electrical ghost—it can’t see a broken wire or a rusty bolt. If you want to master how advanced vehicle diagnostics prevent costly breakdowns, you must learn to verify the electrical path before you condemn the part.
Master the Physical and Digital Balance
True expertise comes from knowing when to trust the computer and when to trust your hands. For those who drive heavy miles, following essential auto repair strategies for frequent drivers means performing ‘wiggle tests’ on wiring harnesses while the engine is running to see if the RPMs dip. This physical interaction reveals what a static scan never will. Have you ever fallen into the trap of replacing a part only to find the light stay on? Let me know in the comments—I’ve definitely been there, and it’s a lesson you only need to learn once.
Throw Away Your Guesswork with a Simple Multimeter
If I had to pick just one device that has saved my sanity more than any other, it’s not a fancy tablet scanner—it’s a basic digital multimeter. You can spend thousands on snap-on equipment, but the $20 tool every driver needs for basic electrical troubleshooting is often enough to solve 90% of your sensor issues. I use mine to check for ‘voltage drop’ across grounds and battery terminals. According to the Bosch Automotive Handbook, even a minor resistance of 0.5 ohms in a ground circuit can cause a sensor to send garbage data to the ECU, making you think a part is dead when it’s just a dirty bolt. If your engine is whistling or stumbling, testing the reference voltage at the sensor connector is the first step toward a real fix.
What is the secret to making a car last 300,000 miles?
Consistency is the boring but honest answer. Most people treat maintenance as a reaction to a problem, but the pros treat it as a scheduled defense. I’ve seen engines that look brand new inside after a quarter-million miles because the owners stayed ahead of the curve. This means looking beyond the basics and following top auto repair tips to extend your vehicles lifespan, such as cleaning your battery terminals annually and flushing your coolant before it turns acidic. It’s about the small wins that prevent the massive failures. 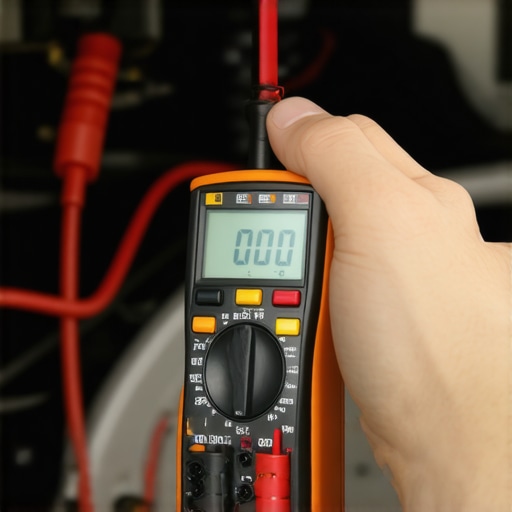
Don’t Wait for the Dashboard Light to Change Your Fluids
We’ve all been guilty of stretching an oil change an extra thousand miles, but modern engines with variable valve timing are incredibly sensitive to sludge. I’ve been following oil change innovations and technologies that save your engine, and the shift toward high-detergent full synthetics is a game changer. However, oil isn’t the only fluid that dies. If you want to keep your gears from grinding or slipping, you need to learn how to save your transmission with a simple fluid exchange. A lot of shops will tell you a transmission is ‘sealed for life,’ but that’s a marketing myth. Changing that fluid every 60,000 miles is the difference between a car that shifts like butter and one that ends up at the scrap yard.
Predictive AI is the Next Frontier for Your Garage
Looking ahead, the way we fix cars is shifting from diagnostic to predictive. We are moving toward a world where your car’s internal software will analyze vibration patterns in your wheel bearings or shifts in fuel trim before a part actually fails. This is how advanced vehicle diagnostics prevent costly breakdowns in the modern era. We’re already seeing consumer-level dongles that can predict a battery failure weeks before the car won’t start. For now, though, you still need to be the primary investigator. Don’t just read the guide; get out there and perform a ‘wiggle test’ on your wiring harnesses to see if you can trigger that whistle or stumble yourself. Start by mastering the ultimate guide to brake service to ensure your stopping power is as reliable as your engine’s pull. Go pop your hood today and check one vacuum line you’ve been ignoring—you might just find that five-dollar fix.
The $500 Mistake I Made So You Don’t Have To
If there is one thing years of greasy knuckles have taught me, it is that the most expensive part is rarely the solution to a noise. I once replaced an entire turbo unit only to find the ‘whistle’ was a loose clamp on a bypass hose. I learned the hard way that visual inspections trump electronic guesses every single time. Here are the lightbulb moments that changed my approach to DIY repair:
- Code scanning is just the invitation to the party: A code tells you what the computer thinks is wrong, but it cannot see physical reality.
- Rubber fails before metal does: 90% of whistling sounds are air leaks in hoses, not mechanical failure in the engine block.
- Safety is silent: A whistle that changes when you brake is a red flag you cannot ignore, especially if you need to know how to tell if your brake booster is leaking air before your pedal goes hard.
The Toolkit That Actually Saves You Money
You do not need a professional garage to fix most of these issues. I personally rely on a few specific items that have paid for themselves ten times over. First, the $20 tool every driver needs for basic electrical troubleshooting is a simple multimeter to verify sensor health. Second, keep a spray bottle of soapy water handy; it is the most effective leak detector ever invented for intake systems. #IMAGE_PLACE_HOLDER_E# Finally, I always recommend keeping a physical logbook of your maintenance history, including oil change innovations and technologies, to track how different fluids affect your engine voice over time. These are not just tools; they are your eyes and ears under the hood.
Your Car Is Speaking—Time to Listen
Diagnostic work can feel like trying to solve a puzzle in the dark, but once you start listening to the physical symptoms, the light turns on. Mastering vehicle diagnostics does not happen overnight, but every whistle you find makes you a more capable owner. Whether you are following top auto repair tips to extend your vehicles lifespan or performing a DIY brake service, the goal is always the same: confidence behind the wheel. Don’t let a high-pitched whistle intimidate you into a costly shop visit. You have the skills to find the leak, fix the hose, and get back on the road safely. Have you ever had a mystery noise that turned out to be a simple loose bolt or a cracked hose? Let me know your best ‘easy fix’ story in the comments below!