
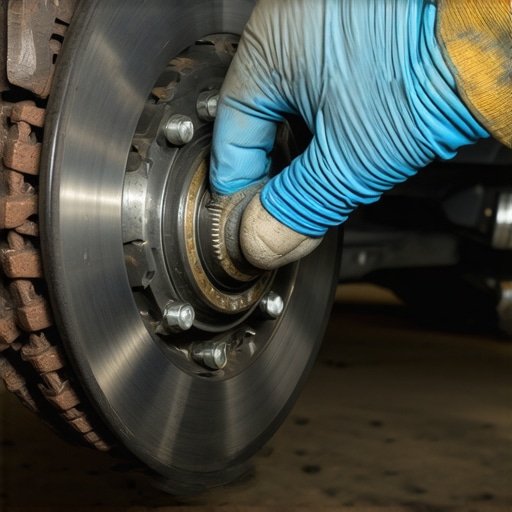
I was pulling into the local coffee shop last Saturday, feeling pretty good about my morning, until I tapped the brake pedal. SCREEEEEECH. It sounded like a banshee being dragged across a chalkboard. Every single person on the patio looked up from their lattes, and I just wanted to sink into my driver’s seat and disappear. That piercing noise is more than just a nuisance; it’s a public announcement that your car is crying for help. But here’s the secret I learned the hard way: half the time, that noise doesn’t mean you need to drop five hundred bucks at a shop. I used to think every little chirp meant a total system failure, but usually, it is just a plea for a little lubrication or a quick cleaning.
Stop the Noise Before Your Neighbors Start Complaining
If you are tired of that high-pitched whistle every time you hit a red light, you are in the right place. We are going to silence those pads today using simple tools you probably already have in your garage. Most people assume they need a full brake service for safety and performance the moment they hear a sound, but often the culprit is just simple vibration. I remember my first DIY attempt where I replaced perfectly good rotors because I didn’t understand the difference between ‘wear’ and ‘vibration.’ It was a two-hundred-dollar mistake that taught me to look closer before pulling out the credit card. Have you ever felt that spike of anxiety the moment your car starts making a sound you can’t explain?
Wait, am I going to accidentally break something important?
It is completely normal to be a bit nervous about touching your own stopping power. However, as long as you aren’t dealing with a dangerous grinding noise in your wheels, you are likely just dealing with harmonics. A surprising fact from the technical experts at Delphi Technologies suggests that brake squeal is actually a high-frequency vibration—essentially the brake pad acting like a violin bow against the rotor. It doesn’t always mean the pads are gone; it just means they are ‘singing.’ Before you head to a pro, we can check a few things ourselves. If you find your brake lights stay on or the pedal feels spongy, those are bigger issues, but for a simple squeal, we can usually fix it with a little patience and the right grease. Let’s get into the nitty-gritty of how to identify exactly which wheel is screaming and what to do about it.
Track Down the Noisy Culprit
The first thing you need to do is identify which wheel is causing the racket. It sounds simple, but acoustics can be deceptive when you are sitting in the cabin. I usually find a quiet side street, roll down all my windows, and have a friend stand on the sidewalk while I drive past and brake. If you don’t have a spotter, you can perform some vehicle diagnostics explained by simple ear checks. If the sound only happens when you are backing up, check out our guide on why your car makes a grinding noise only when backing up to see if it’s a debris issue rather than a vibration issue.
Pull the Wheel and Inspect the Pad Surfaces
Once you’ve identified the squealing corner, get the car up on jack stands. I’ll never forget the first time I did this; I used a cheap bottle jack on soft asphalt, and the car started to sink while I was reachng for a lug nut. It was a terrifying lesson in why you always use proper stands on a solid surface. After you get the wheel off and the caliper removed, look closely at the pads. You are looking for ‘glazing.’ If the pad surface looks like a polished, shiny mirror, it has overheated and hardened. This hard surface vibrates against the rotor like a glass finger on a wine rim. Using a bit of medium-grit sandpaper to scuff the pad surface back to a matte finish can often kill the noise instantly without requiring a full brake service for safety and performance.
Apply the Brake Grease Where It Actually Matters
The most common mistake I see—and one I definitely made when I started—is putting grease on the friction side of the pad. Never do that. The grease belongs on the metal ‘ears’ of the pad and the back of the shim where it touches the caliper piston. Think of this grease as a shock absorber. It dampens the high-frequency vibrations before they can turn into an audible squeal. 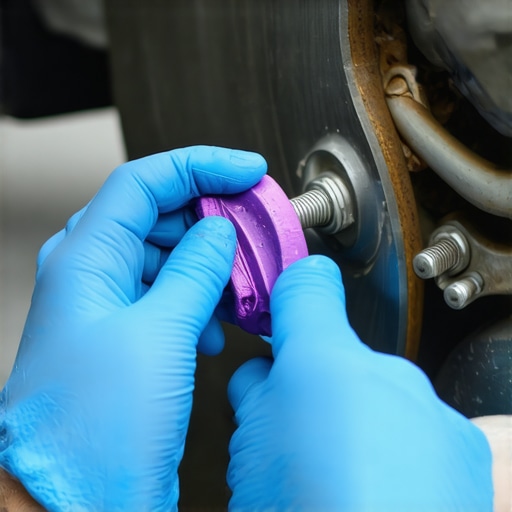
Clean Those Rotors With Brake Parts Cleaner
Before you bolt everything back together, take a can of brake parts cleaner and douse the rotors. Even the oils from your fingers can cause ‘hot spots’ that lead to uneven braking or noise. If you notice your steering wheel shaking during this process, it might not just be noise; you might need to check if your steering wheel is vibrating at low speeds due to warped rotors. Applying these auto repair hacks to save money will keep your car quiet and your wallet full.
Why Your Brake Shims Need More Than Just Luck
Sometimes the thin metal shims on the back of the pads get bent or rusty. If they aren’t sitting perfectly flat, they act like a tuning fork. I once spent three hours chasing a squeak only to realize a tiny piece of a rusted shim was vibrating against the rotor. Replacing these clips is a five-dollar fix that is often included in high-quality pad kits. Following these top auto repair tips to extend your vehicles lifespan ensures that you aren’t just masking a problem, but actually solving the mechanical resonance that causes the headache.
Stop trusting your scan tool blindly
Most DIYers—and even some pros—treat a diagnostic scanner like a magic wand. They see a code, buy the part the code mentions, and are shocked when the light stays on. It is a classic trap. For instance, why your scanner says p0420 but the converter is actually fine is one of the most misunderstood scenarios in modern repair. Often, a small exhaust leak or a slightly lazy sensor is the real culprit, not the thousand-dollar catalyst. True vehicle diagnostics involve looking at live data streams, not just reading stored codes. If you aren’t looking at fuel trims and oxygen sensor voltages, you aren’t diagnosing; you’re just guessing with your wallet.
Why does my engine make that weird tapping sound after an oil change?
I have had readers message me in a panic because they hear a rhythmic ticking after a fresh service. You would think new oil makes things quieter, right? Not always. If you used the wrong viscosity or a low-quality filter, you might be starving the top end of the engine. There is a specific reason why your engine makes a tapping noise only after an oil change, and it often comes down to the variable valve timing (VVT) solenoids. These components rely on very specific oil pressure to function. According to a study by the Society of Automotive Engineers (SAE), even a slight deviation in oil viscosity can lead to increased timing chain wear and phaser noise in modern turbocharged engines. It’s not just about ‘fresh’ oil; it’s about the right oil for the engineering tolerances of your specific block. 
The hidden danger of the ‘cheap’ aftermarket sensor
We all want to save money, and auto repair hacks to save money are great until they cost you more in the long run. I once tried to save eighty bucks by using a generic crankshaft position sensor. Two weeks later, the car died in the middle of a busy intersection. The truth about using cheap aftermarket sensors in your engine is that many modern ECUs are calibrated for the exact electrical resistance of OEM parts. A cheap sensor might report ‘close enough’ data, but ‘close enough’ eventually puts your car into limp mode.
Don’t ignore the nuances of preventative care
We often focus on the big failures, but the small details keep the car alive. For example, how to tell if your oil filter is actually doing its job isn’t about looking at the outside; it’s about understanding bypass valves. If a filter clogs, it opens a valve to let unfiltered oil through to prevent total starvation—so your engine stays lubricated, but it’s eating dirt. Investing in how advanced vehicle diagnostics prevent costly breakdowns means catching these invisible failures before they turn into a ‘for sale’ sign. Have you ever fallen into this trap of replacing a part only to have the problem stay exactly the same? Let me know in the comments below, and let’s figure out what went wrong together.
Grab a multimeter before you touch another wire
If there is one thing that changed my DIY game more than anything else, it wasn’t a fancy scanner; it was a simple digital multimeter. I used to spend hours guessing where power was going, but now I know for certain. The $20 tool every driver needs for basic electrical troubleshooting is the bridge between being a parts-changer and being a real technician. I remember struggling with a car that wouldn’t start—I had already replaced the starter and the battery in a fit of frustration. It turned out to be a simple corroded ground wire hidden behind the engine block. If I had known how to find a parasitic battery drain with a basic multimeter back then, I would have saved six hours and three hundred dollars. Having the right data in front of you turns a stressful weekend into a satisfying project.
How do I maintain my diagnostic equipment over time?
Owning the tools is only half the battle; you need to keep them calibrated and updated to ensure they remain reliable. For digital scanners, this means checking for firmware updates at least once a quarter to ensure you have the latest PID definitions for newer vehicle models. For your mechanical tools, like torque wrenches, it means never storing them under tension. If you leave a torque wrench dialed into 80 lb-ft in your toolbox, the internal spring eventually loses its accuracy. Precision is non-negotiable when you are following essential auto repair strategies for frequent drivers. 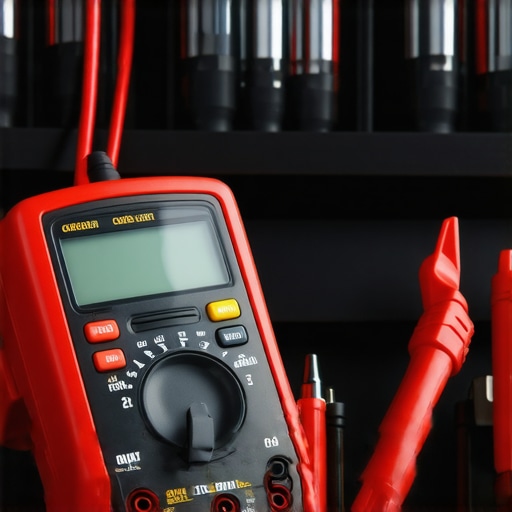 In their technical training modules, Autel North America highlights that nearly 70% of communication-related fault codes in modern vehicles aren’t actually hardware failures, but rather voltage drops or electrical “noise” at the connector level. This is why cleaning your connections with a bit of electronic cleaner is a top-tier move for anyone serious about top auto repair tips to extend your vehicles lifespan.
Why I never trust a ‘hand-tightened’ bolt anymore
When it comes to your brakes, “good enough” is a dangerous philosophy that I learned to abandon early on. I used to think I had a “calibrated elbow,” but after seeing how heat expansion affects bolt tension, I bought a dedicated torque wrench for every brake service for safety and performance job. If you over-tighten a caliper slide pin, you risk snapping the bolt inside the bracket; under-tighten it, and it eventually vibrates loose. Both scenarios lead back to that screaming noise or worse.
Look toward the future of remote fixing
We are moving into an era where cars are essentially rolling computers with wheels. I suspect that in the next five years, we will see a massive shift toward “predictive DIY” powered by telematics. Instead of waiting for a check engine light to ruin your morning, your car will send a data packet to your phone explaining exactly which sensor is drifting out of its expected voltage range. By decoding vehicle diagnostics early, you can swap a fifty-cent o-ring before it kills a five-hundred-dollar pump. This proactive approach is exactly how advanced vehicle diagnostics prevent costly breakdowns. I want you to go out to your driveway this weekend and try one specific thing: grab a voltmeter and check your battery’s resting voltage. If it’s below 12.4 volts while the engine is off, you’ve just found your next preventative maintenance task before it leaves you stranded.
Hard Truths I Learned Under a Jack Stand
If there is one thing that years of grease and scraped knuckles have taught me, it is that a car is a system, not just a pile of parts. Most drivers get intimidated by a noise and rush to a shop, but the real power comes from listening. One of the biggest lightbulb moments I ever had was realizing that silence in a braking system is more about geometry and lubrication than just buying the most expensive pads. I spent years buying ‘premium’ parts only to realize that brake service myths busted: what really matters for safety is often just proper installation and shim alignment. Another huge lesson: never skip the small stuff. I used to think the little packet of grease that comes with pads was optional. It is not. That tiny smear of silicone-based lubricant is the only thing standing between you and a sound that could wake the dead. Finally, I learned that a clean workspace is a diagnostic tool in itself. If you are working in the dirt, you are inviting contamination into your calipers, which leads to exactly the high-pitched screams we are trying to stop.
The Essential Gear for Every Home Tech
You do not need a five-figure tool chest to be effective, but you do need precision. For my own projects, I swear by a high-quality click-type torque wrench. It removes the ‘guessing’ from your safety-critical bolts. I also highly recommend keeping a dedicated notebook for your car. Tracking when you noticed a sound or when a specific code popped up is a core part of how advanced vehicle diagnostics prevent costly breakdowns by spotting patterns before parts fail. I also suggest looking into oil change innovations: technologies that save your engine, like magnetic drain plugs and high-micron synthetic filters, which act as a first line of defense for your engine’s internals. These tools do more than fix problems; they give you the data needed to understand why the problem happened in the first place. #IMAGE_PLACEHOLDER_A#
Reclaiming Your Driveway Today
Taking the leap from ‘driver’ to ‘technician’ is one of the most rewarding transitions you can make. It transforms your car from a source of anxiety into a source of pride. When you finally hit that brake pedal and hear absolutely nothing but the wind, you will know you did the job right. The road to a reliable vehicle is paved with top auto repair tips to extend your vehicles lifespan, and it all starts with your willingness to pick up a wrench and try. Remember, every master mechanic started exactly where you are—wondering what that weird noise was. Have you ever spent hours chasing a squeak only to find out it was something incredibly simple? Let me know your most frustrating (or satisfying) DIY story in the comments below!