
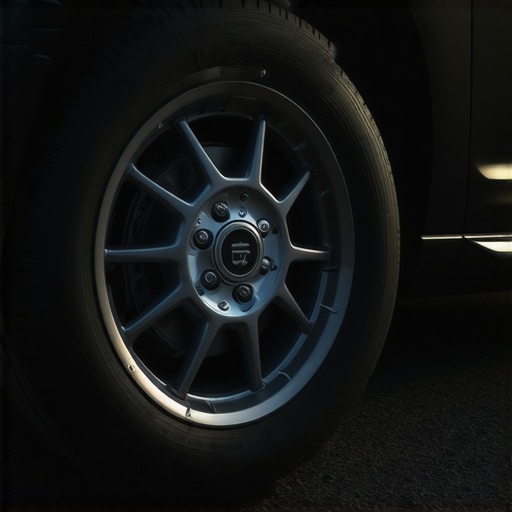
There I was, middle of a family road trip, trying to hold a heavy SUV at a red light on a steep 15-degree incline, and my brake pedal started acting like a jackhammer. It’s a terrifying sensation. Your foot is down, but the car feels like it’s fighting you, vibrating with a rhythmic thud-thud-thud that echoes right up your leg. My first thought? ‘There goes my transmission.’ I was wrong, but that mistake cost me a week of stress and a lot of unnecessary worry. It turns out that gravity has a funny way of exposing every little flaw in your braking system that you might not notice on flat city streets.
Stop the Shakes Before They Stop You
If you’re feeling that pulsing sensation only when you’re fighting gravity, you aren’t alone. Most people assume they just need a quick fix, but the hill factor adds a layer of diagnostic mystery. When you’re on a slope, your vehicle’s weight shifts, putting immense pressure on the front rotors. If those rotors are even slightly out of true, that extra weight amplifies every imperfection. I learned the hard way that ignoring this can lead to more dangerous issues, like when your car pulls to the left when you brake hard. Getting ahead of the problem with a proper brake service is the difference between a confident stop and a white-knuckled prayer.
Is this just a normal thing old cars do?
Absolutely not. I used to think a little vibration was just ‘character’ in an older vehicle until I almost overshot a stop sign on a rainy afternoon. That’s when I learned about lateral runout and heat spotting. According to the Car Care Council, heat is the number one enemy of brake components, and nothing generates heat like riding the brakes down a long hill or holding a heavy vehicle steady on a grade. I made the mistake of thinking I could just ‘tough it out’ until my next oil change, but that delay only caused more damage. Have you ever felt that sinking feeling in your stomach when the pedal starts vibrating mid-slope? It’s a wake-up call your car is sending you.
Why Gravity Makes Every Warp Worse
When you’re on flat ground, your brakes have it relatively easy. On a hill, you’re asking them to hold back thousands of pounds of kinetic energy wanting to roll downward. If your vehicle diagnostics aren’t showing a dashboard light, it’s likely a mechanical issue like ‘cementite’ buildup—hard spots on the rotor that don’t wear down like the rest of the metal. Identifying this early is one of those auto repair hacks that saves you hundreds in the long run. We need to look at whether it’s your ABS kicking in unnecessarily or if your rotors have simply reached their limit. Stay tuned, because I’m going to show you exactly how to tell the difference without spending a dime at a shop first.
The first thing you need to do is isolate whether the shake is coming from the front or the rear. Think of your rotors like a vinyl record; if the record is warped, the needle—your brake pads—is going to jump every time it hits that high spot. On a flat road, you might not feel it much, but on a hill, that weight transfer is like someone pressing down hard on the needle. You can start by performing easy vehicle checks before you even leave your driveway. Pull your wheels and look for ‘heat spots’—those small, bluish-tinted patches on the rotor surface. They are essentially hardened steel that refuses to wear down, causing that rhythmic thumping and pulsing against your foot.
Test Your Brake Booster Without Any Tools
Sometimes the vibration isn’t the rotor at all, but the system struggling to maintain pressure against the added resistance of a slope. To see if the vacuum is the culprit, turn your engine off and pump the brake pedal five or six times until it feels rock hard. Keep your foot firmly on the pedal and start the engine. If the pedal drops slightly, your booster is likely fine. If it stays hard or pushes back against you, you need to learn how to tell if your brake booster is leaking air. I remember a humid July afternoon when I spent four hours replacing rotors on a minivan, convinced they were warped. After the test drive, the vibration was still there. It turned out to be a tiny crack in a vacuum hose that only opened up when the engine shifted slightly on an incline.
Grease Those Pins Before You Buy New Parts
Before you shell out for a full brake service, check your caliper slide pins. If these pins are dry or rusted, the caliper can’t ‘float’ properly. It gets stuck at an angle, and when you’re on a hill, it bites into the rotor unevenly, creating a shudder. Pull the pins, wipe them clean, and use a high-temp silicone grease. This is one of those auto repair hacks that can save you $300 in parts when a simple lubrication was all that was needed to restore a smooth stop.
Check Your Parking Brake on a Safe Incline
If the vibration feels like it’s coming from the seat rather than the steering wheel, the issue is usually in the back. Find a quiet, safe hill and see if your emergency brake holds the car independently. If it doesn’t, you’ve found why your parking brake won’t hold on a steep hill, and likely the source of your rear-end vibration. Addressing the rear drums or rotors is just as vital as the front because they provide the stability that prevents the car from ‘nose-diving’ during a stop. Knowing what really matters for safety means looking at the whole system, including the often-neglected rear components that take a beating on steep terrain.
While checking the rear components is a great start, I have to let you in on a secret that most chain shops won’t tell you: your rotors probably aren’t ‘warped’ in the way you think. Most people assume the metal has literally bent out of shape, but that is almost physically impossible under standard driving conditions. In my experience, the vibration is actually Disc Thickness Variation (DTV). This happens when brake pad material transfers unevenly onto the rotor surface at high temperatures. When you are holding a heavy vehicle on a 15-degree incline, you are essentially baking those pads onto the hot metal. This creates ‘cementite’—a super-hard iron carbide—that creates a microscopic ‘bump’ every time the pad passes it. Truly addressing this requires looking past the usual brake service myths busted to understand what really matters for safety.
The Critical Lug Nut Mistake You Might Be Making
The biggest ‘oops’ factor I see happens during the simplest part of the job: putting the wheels back on. If you or a hurried technician use an impact wrench to zip those lug nuts on without a torque stick or a manual torque wrench, you risk distorting the hub flange. Even a tiny unevenness at the hub is magnified at the outer edge of the rotor. This distortion creates a runout that feels like a violent shudder the moment you hit a slope. I have seen enthusiasts spend hundreds on the ultimate guide to brake service only to have the shake return because they ignored torque specs. It is the same attention to detail that explains why you should never skip the crush washer on your drain plug; precision is what separates a DIYer from a pro.
Can Your Brake Fluid Chemistry Cause a Physical Vibration?
It sounds like a stretch, but consider the physics of heat. Research by the Society of Automotive Engineers (SAE) highlights that moisture-contaminated brake fluid lowers the boiling point significantly. On a steep hill, that internal moisture can turn to steam. These tiny steam bubbles create air pockets that make the pedal feel spongy and can cause the ABS valves to oscillate rapidly, mimicking a mechanical vibration. Before you buy new rotors, check the brake fluid color. If it looks like dark tea or soy sauce, you are dealing with a chemical failure, not just a mechanical one. Mastering these auto repair hacks will save you from replacing perfectly good parts. Have you ever fallen into this trap? Let me know in the comments.
It’s one thing to find the problem; it’s another to keep it from coming back. I used to rely on my eyes, but eyes are terrible at measuring ten-thousandths of an inch. That’s why I finally invested in a digital dial indicator with a magnetic base. If you want to stop the guessing game, you need to measure the lateral runout of the rotor while it’s mounted on the hub. Bendix Technical Bulletin TIB-8012 specifically notes that even 0.002 inches of runout can lead to a noticeable vibration under load. By using this tool, I found that my brand-new rotors were actually fine—it was a speck of rust on the hub face causing the wobble. Cleaning that off saved me from returning a perfectly good part and looking like an amateur. 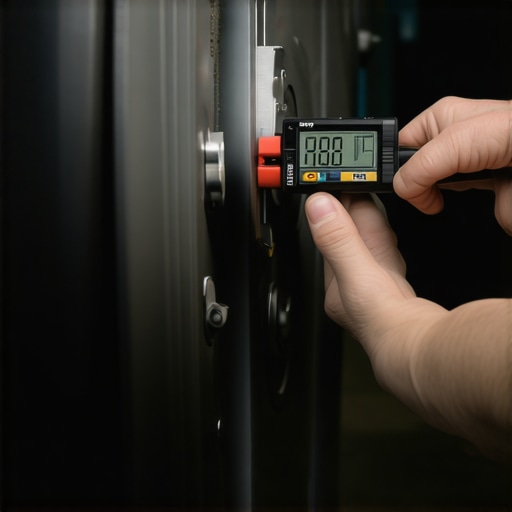
Why Your Tool Kit Needs a Dial Indicator
Many drivers assume that decoding vehicle diagnostics is strictly about reading codes from a computer, but mechanical precision is a diagnostic of its own. When you use a dial indicator, you are looking for the physical truth of how your parts rotate. It’s the difference between a ‘good enough’ repair and one that lasts another 50,000 miles.
How do I maintain my brake performance over time?
Consistency is the secret sauce. You can’t just do a massive overhaul once every five years and expect perfection. I’ve started integrating a ‘brake health check’ into every oil change. While the oil is draining, I pull the wheels and check for uneven pad wear. It’s part of the top auto repair tips to extend your vehicles lifespan that most people ignore because they are in a rush. I also recommend a fluid moisture test every six months. You don’t need a lab; a $10 electronic brake fluid tester can tell you if your fluid has reached the 3% moisture threshold where performance drops off a cliff. Following essential auto repair strategies for frequent drivers means being proactive rather than reactive.
The Digital Future of Your Daily Commute
We are moving toward a world where your car will tell you exactly what’s wrong before you even feel a shudder. I’m already seeing ‘smart’ brake pads in high-end European models that communicate wear levels directly to the cloud. In the next decade, advancements in vehicle diagnostics will likely include sensors that predict rotor warping based on your driving habits and local topography. If you live in a hilly area, your car might soon suggest a higher-grade pad material automatically via an app. For now, take my advice: next time you have the wheels off, don’t just look at the pads. Grab a wire brush and clean the mating surface between the rotor and the hub. It’s a five-minute task that prevents 90% of the ‘warped rotor’ complaints I hear about. Give it a shot this weekend and feel the difference on that first downhill stop.
The Hardest Lessons My Rotors Taught Me
After years of chasing vibrations, I finally realized that the most common mistakes happen before the first bolt is even tightened. First, I learned that ‘new’ doesn’t always mean ‘flat’; I’ve pulled brand-new rotors out of the box that had factory defects, which is why I never skip a runout check now. Second, I discovered that my impact wrench was my own worst enemy. Zipping lug nuts on might be fast, but it’s the quickest way to distort your hub and create that annoying pulse. Finally, I stopped ignoring the chemistry. I used to think of brake fluid as a ‘lifetime’ fluid, but once I saw how moisture creates steam and mimics mechanical failure, I changed my tune. These realizations are part of the brake service myths busted that every driver should know to stay safe on the road.
#IMAGE_PLACEHOLDER_E#
Stop Guessing with These Essential Shop Tools
If you want to move beyond basic part-swapping, there are three items I swear by. I trust a magnetic dial indicator because it provides the physical proof of lateral runout that your eyes simply can’t see. I also never do a brake job without a manual torque wrench; it’s the only way to ensure even pressure across the hub flange. For a quick diagnostic, I use a digital brake fluid tester to check for water contamination before I ever touch a caliper. Using these tools is one of those auto repair hacks that turns a frustrating afternoon into a successful repair. I personally rely on these because they remove the ‘maybe’ from the equation and save me from buying parts I don’t need.
Smooth Stops are Closer Than You Think
Dealing with a vibrating brake pedal on a steep grade can be nerve-wracking, but it’s a problem you can solve with patience and the right approach. By focusing on the small details—like cleaning your hub surfaces and checking the brake fluid color regularly—you’re doing more than just fixing a noise. You are investing in your vehicle’s reliability and your own peace of mind. Remember, these top auto repair tips to extend your vehicles lifespan are all about consistency and precision. Don’t be afraid to get your hands dirty and master your machine. Have you ever replaced your rotors only to have the shaking return just a few weeks later? Let me know in the comments below!