
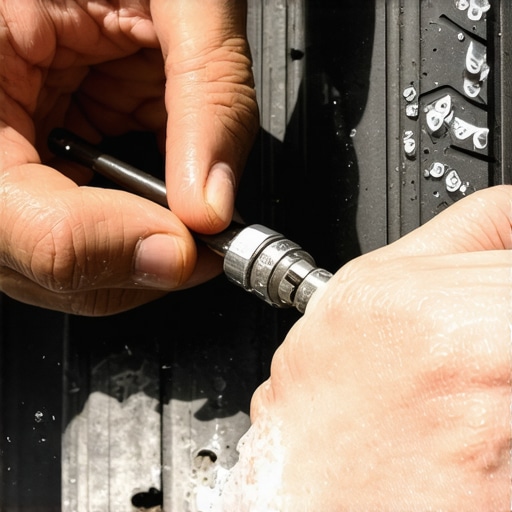
Imagine this: You’re all packed for a weekend getaway, the coffee is hot in the cup holder, and just as you pull out of the driveway, that dreaded orange low tire light starts glowing on the dash. I remember one specific Tuesday where I filled my front-left tire three times before lunch. I was convinced I had a nail or a slash, but after a quick spray of soapy water, I saw the bubbles dancing right at the tip of the valve stem. It’s frustrating and honestly a bit embarrassing when you realize how much time you’ve wasted on a five-minute fix. Today, I’m going to show you how to identify and kill that leak for good without spending fifty bucks at a tire shop.
That Moment You Realize It Is Not a Puncture
Most of us jump to the worst-case scenario. We assume we need a new set of rubber or at least a patch job. I’ve made that mistake myself—years ago, I actually tossed a perfectly good tire because I didn’t know how to find a pinhole leak in your rim versus a simple valve issue. I felt like a total amateur when the tech at the shop pointed out the crusty, leaking core I could have swapped in my own driveway. If you’ve ever dealt with a slow leak that just won’t quit, have you checked the most obvious spot yet? Let me know in the comments if you’ve ever been tricked by a valve stem before!
Is a DIY Valve Fix Really Secure?
You might be thinking that messing with the thing that keeps the air in your tires is a recipe for a highway disaster. I get it. But here’s the reality: valve stems are remarkably simple components. According to the National Highway Traffic Safety Administration (NHTSA), maintaining proper tire pressure is one of the most critical factors for vehicle safety, and a slow leak is often the silent killer of fuel economy and tread life. By following a few top auto repair tips to extend your vehicles lifespan, you can handle this repair with total confidence. We aren’t reinventing the wheel; we’re just making sure the air stays where it belongs.
The Tools You Actually Need
Before you start tearing things apart, you need to know if the leak is coming from the valve core or the rubber stem itself. A quick check as part of your vehicle diagnostics before your road trip can save you hours of headache. Most of the time, all you need is a four-way valve tool that costs less than a burger. I used to think I needed a whole compressor setup, but a simple hand pump and a new core are usually enough to get you back on the road. Let’s dive into how we can spot the difference between a loose core and a rotting stem before you get your hands dirty.
Stop the Guesswork with a Soapy Spray
Before you touch a single tool, you need ocular proof of the leak. Take a spray bottle—even an old window cleaner bottle works if you rinse it out—and fill it with a mix of dish soap and lukewarm water. I usually aim for a heavy-handed squirt of soap to make the bubbles more resilient. Spray the entire valve stem, focusing heavily on the opening at the top and the base where it meets the metal. If you see a cluster of tiny bubbles growing like a slow-motion foam party, you have found your culprit. 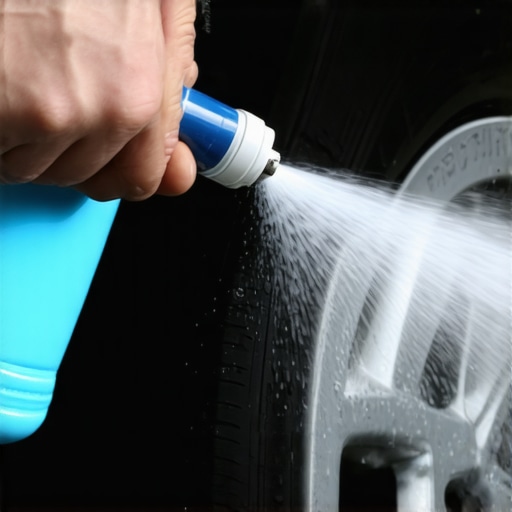 This simple step is the foundation of how advanced vehicle diagnostics prevent costly breakdowns because it eliminates the ‘parts cannon’ approach of replacing things that aren’t actually broken. I remember a humid afternoon in a gas station parking lot where I was convinced my rim was cracked and leaking from the bead. I was sweating through my shirt, ready to call a tow truck for a simple flat, until I sprayed some soapy water I borrowed from the window-washing bucket. Watching those bubbles emerge from the valve cap saved me a three-hundred-dollar wheel replacement. It is like being a detective with a five-cent clue.
Spin Out the Old Core Like a Pro
Once the bubbles confirm the leak is at the tip, it is time to look at the valve core. This is the tiny brass assembly inside the stem that actually holds the air back. Think of it like the washer in a leaky kitchen faucet; if it is worn or gunked up with road salt, air will snake right past it. Use the notched end of your four-way valve tool to engage the core. Turning it counter-clockwise will release the remaining air pressure—be prepared for a sudden hiss of air that might startle you! Applying these auto repair hacks to save money without sacrificing quality allows you to swap just the internal component rather than the whole rubber assembly. Sometimes, the core is not even broken; it is just loose from years of vibration. I once ‘fixed’ a neighbor’s car just by tightening the core half a turn, and he thought I was a mechanical wizard. If the core looks corroded or the tiny rubber seal at its base is shredded, throw it away and thread in a new one. It should be snug, but do not crank it like you are tightening a lug nut or you will snap the delicate brass threads.
Is the Stem Rotting from the Inside Out?
If the soapy water did not bubble at the tip but instead hissed around the base where the rubber meets the metal rim, you are dealing with a degraded stem. Grab the top of the stem and gently wiggle it side to side. If you see deep cracks, dry rot, or ‘alligator skin’ patterns in the rubber at the base, the stem is toast. This is one of those essential auto repair strategies for frequent drivers because rubber stems age significantly faster in extreme heat or road salt conditions. Replacing the entire stem requires breaking the bead of the tire to pull a new one through from the inside, which is a more involved job, but catching it early prevents a high-speed blowout on the highway. I have seen stems that looked fine at a glance but would dump fifteen pounds of air every time the car hit a pothole because the rubber was so brittle. Always check the base; it is the anchor of your tire’s integrity.While you are wiggling that stem, you have to consider the brain attached to it. On modern vehicles, your valve stem is often the gateway to a TPMS (Tire Pressure Monitoring System) sensor. This is where most DIYers get tripped up. They see a light on the dash, check the pressure, see it is fine, and then assume the car is glitching. In reality, these sensors have tiny batteries with a lifespan of about five to ten years. Once that battery dies, the sensor stops talking to the car. I once spent an entire Saturday morning bleeding brakes because I thought a soft pedal was related to a traction control light, when in reality, it was just a dead sensor in the rear right tire messing with the computer’s head. Decoding vehicle diagnostics is the difference between a quick reset and a weekend of wasted labor.
Why Your Tire Light is Smarter (and Dumber) Than You Think
Here is my contrarian take: stop trusting your dashboard as the ultimate truth. Most people think a ‘Check Engine’ or ‘Low Tire’ light is a specific command to buy a part. It isn’t. It is just a starting point for a conversation. For example, why your scanner says p0420 but the converter is actually fine is a classic case of the computer misinterpreting an upstream sensor issue. The same happens with your tires. If you have a slow leak and your light stays on even after you fill it, do not just assume the sensor is dead. It might be ‘ghosting’—retaining a low-pressure code that requires a specific relearn procedure rather than a new part.
Don’t Gamble with Cheap Aftermarket Sensors
One of the biggest traps I see is the temptation to save five bucks on parts. We all want to find auto repair hacks to save money without sacrificing quality, but the valve stem area is not the place for bargain-bin generic parts. The AAA Foundation for Traffic Safety has highlighted that technical malfunctions in safety systems often stem from poor-quality electronic components that fail to communicate with the vehicle’s ECU. Using a generic sensor can lead to a ‘sensor not found’ error that drives you crazy. I’ve learned the hard way that the truth about using cheap aftermarket sensors is usually a second trip back to the tire shop to replace the ‘new’ part with an OEM version. 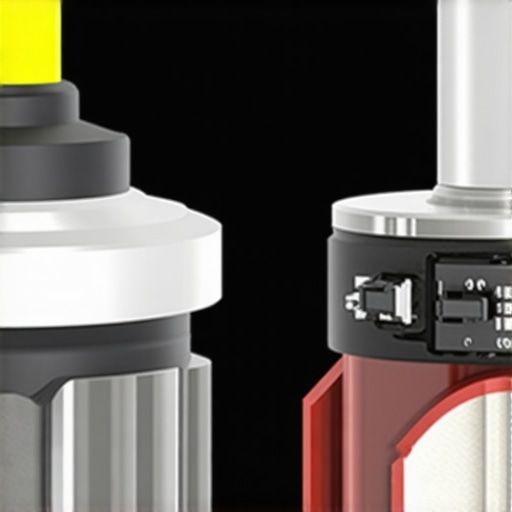
Should You Replace the TPMS Sensor Every Time You Get New Tires?
This is the advanced question that separates the pros from the amateurs. The short answer is: no, but you should always service them. Most tire shops will try to sell you a full sensor replacement for eighty dollars a pop. Unless the battery is dead or the stem is physically broken, you usually only need a service kit—new rubber gaskets, a new nut, and a new core. Think of it like a brake service where you might just need new pads rather than entire new calipers. It keeps the seal fresh without the high cost of the electronics. Have you ever fallen into this trap of paying for a full sensor when you only needed a two-dollar gasket? Let me know in the comments.I’ve spent plenty of Saturday mornings chasing ghosts in my electrical system, and I’ve realized that having the right hardware is half the battle. If you are serious about avoiding the shop, you need a dedicated OBD-II scanner that can actually read TPMS data. Most cheap code readers only see engine faults, but a mid-range scanner allows for decoding vehicle diagnostics that include individual tire temperatures and sensor battery life. This is why I always carry the 20 tool every driver needs for basic electrical troubleshooting in my glovebox. It’s not just for fuses; a basic multimeter can help you check the signal strength at a receiver if you suspect the car’s computer is the problem rather than the sensor itself. 
Don’t Crush Your Valve Seals
When you are swapping out a core or a sensor, the biggest mistake is over-torquing. I’ve seen seasoned mechanics snap a brass stem because they treated it like a lug nut. The Tire Industry Association (TIA) specifically warns that TPMS valve nuts must be torqued to exact manufacturer specifications—usually between 35 to 80 inch-pounds—to prevent seal failure or galvanic corrosion. If you don’t have a small inch-pound torque wrench, you are essentially guessing with your safety. Using these auto repair hacks to save money without sacrificing quality means investing in the precision tools that prevent you from breaking the parts you just bought.
How do I keep my tire sensors working for the long haul?
Maintenance isn’t a one-time event; it is a habit. Every time you perform an oil change or a brake service, take thirty seconds to inspect your valve caps. Always use high-quality plastic or nickel-plated caps to prevent the ‘fusion’ effect where a cheap metal cap seizes onto the stem. This is one of the most overlooked top auto repair tips to extend your vehicles lifespan because it protects the delicate internal threads from road salt and moisture. I personally apply a tiny drop of anti-seize to the threads of my metal stems every autumn; it’s a five-second insurance policy against a seized cap that would otherwise require a whole new sensor to fix.
The Next Generation of Smart Rubber
Looking ahead, I predict we are moving away from these localized sensors entirely. We are already seeing oil change innovations that monitor chemistry in real-time, and tires are next. Future ‘smart tires’ will likely have sensors embedded directly into the tread structure to monitor wear patterns and road friction, not just air pressure. Until then, staying on top of your current setup is your best defense against a blowout. I want you to go out to your driveway right now, pull off your valve caps, and check for any signs of green or white corrosion. If you see it, clean it now before it strands you later.
The Harsh Truth About Small Leaks and Stripped Threads
I’ve spent years under hoods and in wheel wells, and if there is one thing I have learned, it is that the smallest parts often cause the biggest headaches. Here are a few lightbulb moments from my own garage:
- Pressure is a liar: Ambient temperature changes your PSI significantly. Never judge a leak until the tire has sat for at least an hour out of the sun.
- Salt is a slow killer: If you live in a snowy climate, your valve stem isn’t just holding air; it is fighting a chemical war. Regular cleaning saves you from needing more intensive essential auto repair strategies for frequent drivers later on.
- Gentle hands win: Most DIYers think ‘tighter is better.’ In the world of brass valve cores, tighter usually means a trip to the tire shop for a broken stem.
Build Your Own Tire Survival Kit for Under Thirty Bucks
You do not need a professional shop setup to handle these issues. I personally rely on a few specific tools that live in my trunk: a high-quality 4-way valve tool, a digital pressure gauge for precision, and a small spray bottle of soapy water. Knowing vehicle diagnostics through easy checks before you leave the driveway is worth more than any roadside assistance membership. I also keep a set of nickel-plated valve caps to prevent the ‘galvanic welding’ that happens with cheap aluminum ones. These small investments are part of the auto repair hacks to save money without sacrificing quality that I swear by. #IMAGE_PLACEHOLDER_E#
Take Command of Your Car Maintenance Today
Fixing a leaking valve stem or managing your TPMS sensors might seem like a job for the ‘experts,’ but you’ve got this. Every time you take the initiative to troubleshoot a problem yourself, you’re not just saving money; you’re gaining the confidence to handle whatever the road throws at you. Don’t let a tiny piece of rubber or a glowing orange light ruin your weekend getaway. By following top auto repair tips to extend your vehicles lifespan, you stay in the driver’s seat of your car’s health. Have you ever been surprised by a simple fix after fearing a major repair bill? Let me know your stories in the comments below!