
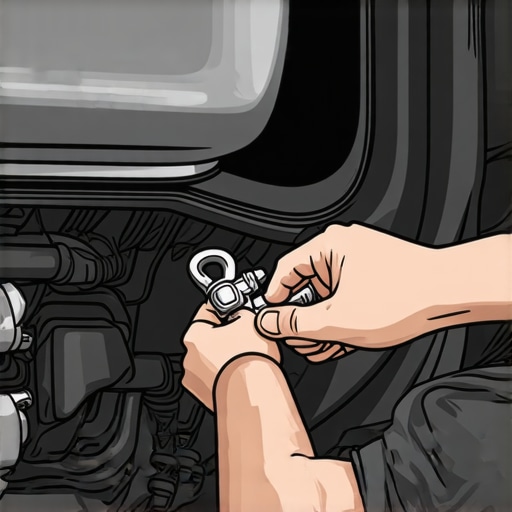
I’ll never forget the first time I heard that unmistakable rattling from under my car. It was a gnawing sound that seemed to grow louder every day, right when I needed quiet the most—driving home late at night after a long day. That annoying clatter was more than just a noise; it was a warning sign that something was loose and could potentially lead to bigger problems if left unattended. Many car owners, myself included, have faced this frustration, wondering if it requires a costly repair or a mechanic visit. But here’s what I learned: sometimes, a simple fix can do the trick, and you won’t need to empty your wallet at the shop.
Why That Rattling Matters and How a Hose Clamp Could Save the Day
Exhaust shields are designed to protect other vehicle components from the intense heat of the exhaust system. When they become loose, they rattle and rattle, creating a distracting noise that can make you think something’s seriously wrong. Ignoring this can sometimes lead to damage to the shield or even parts of the exhaust system itself. Over time, the vibrations can also loosen other components, compounding the problem.
My personal experience taught me that a quick, inexpensive fix—like using a hose clamp—can stabilize that rattling shield without the need for complicated repairs. Recently, I discovered that a simple hose clamp could be tightened around the shield, holding it firmly in place. This revelation not only saved me money but also restored peace and quiet during my drives. If you’re tired of that incessant rattle, I promise there’s an easy solution waiting for you, and it starts with understanding how to properly secure that shield.
Is Using a Hose Clamp Really a Reliable Fix?
Early on, I made the mistake of assuming that a temporary fix wouldn’t last. Trust me, I learned the hard way that if properly installed, a hose clamp can endure the vibrations and heat of the exhaust system. The key is choosing the right clamp and installing it correctly. For more detailed car repair tips that save you money without sacrificing quality, check out these expert auto repair hacks.
Now, if you’re wondering whether this is just a quick fix or a permanent solution, stay tuned. I’ll walk you through the step-by-step process to secure that rattling shield effectively. Before we dive in, it’s worth noting that avoiding common DIY pitfalls can make your repair more successful and long-lasting.
So, have you ever faced this pesky exhaust rattle? If so, you’re not alone—and there’s an easy fix that might just save you a trip to the mechanic. Ready to stop the noise and protect your ride? Let’s get started.
Prepare Your Tools and Vehicle
Start by gathering a set of hose clamps — preferably stainless steel for durability. You’ll also need a flathead screwdriver or pliers to tighten the clamp, and gloves to protect your hands. Park your car on a level surface, engage the parking brake, and ensure the engine is cool to prevent burns. Locate the rattling exhaust shield beneath your vehicle, usually near the muffler or exhaust pipe.
Identify the Loose or Damaged Shield
Inspect the area for the loose shield, looking for obvious gaps, broken mounts, or corrosion. Use a flashlight if necessary. Compare its position with the manufacturer’s original placement; if the shield has shifted or is hanging loosely, it’s a candidate for a fix. I remember the first time I did this, I struggled to reach the shield without a jack, so I used a pair of ramps to get a better angle.
Remove or Loosen Existing Fasteners
If the shield is still attached with bolts or clips, carefully remove or loosen them with the appropriate tools. If they’re rusted or seized, applying penetrating oil beforehand can ease the process. This step is critical because a loose but attached shield can be stabilized with a clamp, but a completely detached one needs reattachment first.
Position the Hose Clamp Correctly
Slide the hose clamp over the part of the shield that rattles against the exhaust pipe or frame. It’s best to position the clamp where the shield contacts the pipe firmly. If needed, gently bend or reposition the shield to ensure it sits snugly. Remember, proper alignment prevents future rattling and reduces stress on the clamp.
Secure the Shield with the Clamp
Use your screwdriver or pliers to tighten the hose clamp around the shield and pipe. Turn clockwise to secure. It should be tight enough to hold the shield firmly but not so tight that it crushes or deforms the metal. I once overtightened and cracked a shield, leading to more extensive repairs; so, caution is key. Visualize it as giving the shield a firm handshake — sturdy but gentle.
Test the Repair
Start the engine and let it idle. Walk underneath and gently jog the shield with your hand to check for movement. If it remains steady, you’ve successfully stabilized it. If it still rattles, loosen the clamp slightly, reposition, and retighten. Keep in mind that factors or vibrations might loosen the clamp over time, so periodic checks are recommended.
Additional Tips for Longevity
Applying a bit of anti-seize compound on the clamp can prevent rust and ease future adjustments. Also, maintaining the exhaust system overall can prevent excess movement. Remember, a simple hose clamp fix can last years with proper care, similar to these auto repair tips.
Sometimes, a messy repair begins with a forgotten step: ensuring the clamp is the right size and properly tightened. Don’t rush this task—taking your time guarantees a more durable fix, saving you both money and noise disturbances in the long run. When in doubt, consulting with a professional or checking detailed repair guides can prevent common pitfalls like over-tightening or misalignment.
Many car enthusiasts and even seasoned DIYers tend to believe that vehicle diagnostics and repairs are straightforward processes, but the reality is far more nuanced. A common misconception is that if the check engine light just flashes or if a car runs rough, a quick scan or part replacement will solve the issue. However, this oversimplification often leads to misdiagnosis and costly mistakes. In my experience, understanding the subtle differences and advanced diagnostic techniques can prevent unnecessary repairs and prolong your vehicle’s lifespan. For example, relying solely on generic code readers may overlook underlying issues by not differentiating between true faults and temporary glitches, which can sometimes be caused by environmental factors or sensor anomalies. Moreover, many drivers mistakenly assume that all warning lights indicate the same urgency, but certain indicators, such as the traction control or stability lights, might be linked to unrelated systems that require specialized tests.
A particularly tricky area is brake service. Some believe that brake pads are the only wear items, yet ignoring related components like calipers, rotors, and ABS sensors can compromise safety. For instance, warped rotors often get replaced prematurely when in fact proper system calibration or brake fluid quality might be the real culprits. When it comes to oil changes, a frequent mistake is to follow the traditional 3,000-mile rule blindly. Modern synthetic oils and advanced engine designs enable much longer intervals, but many overlook early signs of oil degradation, such as sludge buildup or oil filter clogging, which can harm performance. Regularly scheduled maintenance is vital, but raising your diagnostic awareness ensures you’re not just ticking boxes but actually preserving your vehicle’s health.
How can diagnostics be advanced enough to prevent major breakdowns?
Investing in sophisticated diagnostic tools and understanding their capabilities can significantly reduce unexpected failures. These tools analyze vital parameters—like fuel trim, sensor output consistency, and even electrical resistance—that go unnoticed by simple code scans. This broader approach is backed by automotive experts who emphasize that a combination of data analysis, visual inspections, and historical vehicle behavior is the best strategy. For example, learning to interpret live data streams accelerates root cause identification, saving time and money. Regularly exploring in-depth guides, such as advanced vehicle diagnostics, enhances your troubleshooting skills.
Avoid the trap of rushing repairs based solely on first impressions. Deep knowledge of diagnostic nuances can distinguish between a minor sensor glitch and a developing mechanical failure. This insight becomes especially critical when fixing issues related to braking systems or engine control, where errors might not trigger immediate faults but can escalate if ignored. Remember, a proactive approach rooted in understanding the intricacies of your vehicle’s systems can prevent costly repairs down the line.
Have you ever fallen into this trap? Let me know in the comments.
Investing in Precision Tools for Longevity
Maintaining your vehicle’s health requires the right equipment and a commitment to regular checks. I personally rely on a high-quality digital multimeter, such as the Fluke 117, because it provides accurate readings of your car’s electrical system, helping me quickly identify issues like battery or alternator concerns without unnecessary guesswork. Additionally, a fuel pressure gauge offers immediate insights into the fuel system’s integrity—crucial when diagnosing sluggish performance or rough idling. When I replaced my brake pads last year, I used a magnetic dial indicator to measure rotor runout, ensuring even contact and prolonged brake effectiveness. These tools don’t just help with immediate repairs; they empower you to understand your vehicle better, saving money and time in the long run.
Leverage Advanced Diagnostic Software
While traditional code readers are useful, investing in sophisticated diagnostic software like OEM-licensed scan tools can elevate your maintenance game. I use OBDeleven for my VW, which allows real-time data streaming and deep system checks. This kind of software reveals hidden issues—like sensor drifts or subtle electrical faults—that generic scanners might miss. Regularly updating your diagnostic software ensures you’re equipped to handle emerging vehicle technology trends, future-proofing your maintenance routines. According to auto repair experts, employing such tools reduces unnecessary part replacements and helps catch problems before they escalate.
Procedural Methods That Boost Long-Term Results
An example from my routine involves diligent cleaning of the brake system with dedicated components like brake cleaner and anti-seize on bolts. Not only does this prevent corrosion, but it also ensures smoother operation over the years. When performing oil changes, I use a magnetic oil drain plug to catch any metallic debris, allowing early detection of internal wear. Furthermore, decoupling routine tasks—such as inspecting hoses, belts, and suspension components during every oil change—creates a preventative care system. These methods aren’t glamorous but are instrumental in extending part lifespan and maintaining optimal vehicle performance. Check out these tips to integrate preventive measures into your routine.
How do I sustain vehicle performance over time?
The key lies in consistent, informed maintenance combined with using the right tools for diagnostics and repairs. Each check—be it fluid levels, brake condition, or electrical health—builds a comprehensive picture of your vehicle’s status, enabling timely action. Regularly calibrating your diagnostic tools with certified standards ensures ongoing accuracy, much like professional shops do. As vehicle technology evolves with hybrid and electric systems, staying updated with specialized equipment becomes even more critical. Over time, this proactive approach minimizes unexpected breakdowns and keeps your vehicle running reliably for years to come.
For example, mastering diagnostic decoding techniques can reveal subtle issues before they lead to costly repairs. Try performing a live data check on your engine coolant temperature sensor today—it’s a simple step that can prevent overheating problems down the line. Equip yourself with quality tools and knowledge, and your vehicle’s performance will thank you.
Lessons Hidden in My Repair Journey
Throughout my years working on cars, I realized that the most overlooked aspect is patience—trusting that a simple fix, like choosing the right hose clamp, can save both time and money. I once tried to patch a rattling shield with makeshift solutions, only to find out that precision and proper tools make all the difference. The biggest lightbulb moment was understanding how regular diagnostics, combined with quality tools like a multimeter, transform guesswork into confident repairs.
Another lesson I learned is that not every issue needs an immediate replacement. Often, tightening, cleaning, or realigning parts can extend their lifespan significantly. For example, using anti-seize compounds on bolts or cleaning connectors with proper tools can prevent future headaches. Embracing a mindset of continual learning helped me move from reactive fixes to proactive maintenance, ensuring my vehicle stays in top shape longer.
Finally, I discovered that understanding your vehicle’s unique behavior—like how certain noises correlate with specific components—empowers you to diagnose problems early. This knowledge stems from deep dives into resources like advanced vehicle diagnostics and regular hands-on experience. The real reward is the confidence to handle unexpected issues without panic, saving money and stress.
My Go-To Resources for Vehicle Diagnostics and Repairs
- OEM-licensed scan tools—Tools like OBDeleven provide detailed insights beyond generic code readers, helping me spot subtle issues before they become costly problems. Their real-time data is invaluable.
- High-quality multimeters—A reliable multimeter, such as the Fluke 117, helps diagnose electrical issues accurately, ensuring that problems like battery drains or sensor faults are identified quickly.
- Curated repair guides—Websites and e-books that focus on specific topics, like auto repair hacks, keep me informed and prepared for common DIY tasks.
- Regular training and tutorials—Staying updated with the latest repair techniques through reputable channels ensures my skills evolve in tandem with vehicle technology, especially with hybrid and electric models becoming more prevalent.
Seize the Moment and Take Control of Your Vehicle’s Health
Maintaining a vehicle doesn’t have to be intimidating—every small fix, like tightening a hose clamp or checking a sensor, builds confidence and skills. With the right tools and knowledge, you’re better equipped to handle unexpected issues and prolong your car’s lifespan. The journey of mastering auto repair is ongoing, but each step brings greater independence and peace of mind. Why wait for a breakdown? Start diagnosing and fixing today, and watch your car reward your efforts with reliable performance.