Have you ever been backing out of your driveway, only to be greeted by that embarrassingly loud squeal from your brakes? It’s like nails on a chalkboard every time you tap the pedal. I remember the first time it happened to me—honestly, I thought I’d need to replace the entire caliper or get new pads. But after some digging, I realized it wasn’t always about spending a fortune on new parts. Sometimes, the culprit is something simple, fixable, and surprisingly common.
Why Brake Squeal Drives Us Crazy—and What It Really Means
That high-pitched squealing isn’t just annoying; it’s a signal. Most of the time, it’s a warning that your brake system needs some attention—no, you don’t necessarily need new parts. In fact, many seasoned DIY enthusiasts have managed to silence that offending noise with just a few tweaks. The key is understanding what causes brake squeal in the first place. It could be worn brake pads, uneven surfaces, or just some dust and debris making things abrasive.
I was quick to assume I’d have to toss out my entire braking system, but I made a rookie mistake early on: I didn’t check for small issues like rust or dust accumulation. That’s a mistake I see so many people make—assuming the worst before testing the simplest solutions. Trust me, proper diagnosis can save you a lot of money and frustration. You might just need to clean certain parts, apply some lubricant, or adjust a few components. For example, I found this quick trick is a game-changer for silencing squeaky brakes without replacing anything.
Is Brake Noise Actually Worth the Hype?
Now, I know what some of you are thinking—”Doesn’t squealing just mean I need new brakes?” Well, not always. In fact, a study by the Motor & Equipment Manufacturers Association notes that brake squeal is often caused by vibrations and minor issues that can be fixed easily, saving you a trip to the mechanic and some serious cash. I learned this the hard way: I replaced my pads unnecessarily because I thought noise meant complete wear, but in reality, a simple brake caliper adjustment fixed everything.
If you’re tired of that relentless squeal and want to learn how to fix it yourself, you’re in the right place. Over the next sections, I’ll walk you through the practical steps I’ve used based on personal experience and trusted advice. Tackling this issue isn’t just about comfort—it’s about keeping your brakes healthy and reliable for the miles ahead. So, if you’ve faced that grating noise and wondered whether it’s time for new parts, stick around. We’re about to turn that squeal into silence!
,
Assessing Brake Pads and Rotors
Start by inspecting your brake pads for uneven wear or damage, which can cause vibrations and squeal. Remove the wheel to access the brake assembly—think of it like peeling an orange to find the juicy interior. Lay the wheel flat and check the pads; if they look thin or uneven, they might be the culprit. Use a flashlight to spot any debris, rust, or dust buildup. I once found a stubborn chunk of dirt stuck between my pad and rotor, causing a relentless squeal. Cleaning this out with a wire brush or brake cleaner often solves the problem.
Cleaning and Lubricating Contact Points
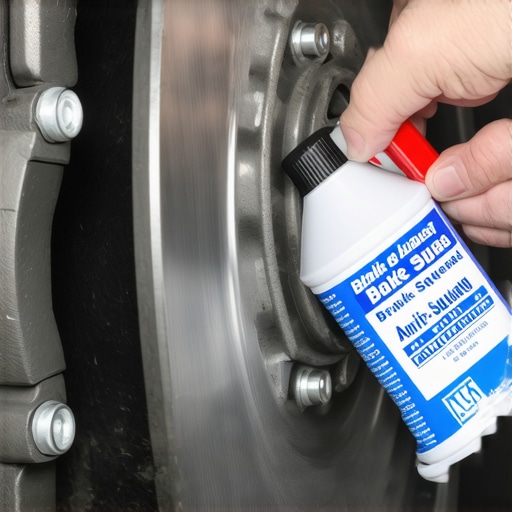
Next, focus on the caliper’s contact points. These are like hinge joints—they need to move smoothly. Apply high-temperature brake lubricant to the backing plates of the pads and the caliper slides. Be cautious not to get grease on the braking surfaces; that can reduce stopping power. During my first attempt, a quick spray of brake lubricant on the caliper slides instantly quieted my squeal.
Adjusting Brake Components for Silence
If noise persists, it might be an issue with the caliper alignment. Slightly loosening and retightening the caliper bolts can help them seat better. Think of it as tuning a guitar string—you want just the right tension. Remember, a proper calibration ensures the pads contact the rotor evenly, preventing vibrations that cause squeal. I once struggled with tight bolts, but carefully tightening them with a ratchet set me on the path to silence.
Replacing Worn Brake Pads
When cleaning and adjusting don’t do the trick, it’s time to replace worn pads. Invest in quality replacements; cheap pads can be noisy and wear unevenly. During my DIY project, I wore protective gloves and used a C-clamp to retract the piston, creating space for the new pads. This simple step prevented caliper damage and made installation smoother. Keep the new pads aligned correctly and torque the bolts to manufacturer specs.
Final Checks and Road Test
After all adjustments, spin the wheel manually to check for smooth rotation. Listen for any squeals or sticking. A test drive at low speeds will reveal if the noise is gone. During my last attempt, I took a short drive—coming back, the brakes were whisper-quiet. If squeals reappear, revisit earlier steps or consider professional help for deeper issues like warped rotors or brake hardware failure.
Applying these techniques can save you money and frustration, transforming that grating squeal into quiet confidence behind the wheel. Regular maintenance, like inspecting brake sensors and cleaning contact points, keeps your braking system in tip-top shape—making stops safe and silent.
Many car owners have a misconception that every brake squeal signals the need for a new set of pads, but in reality, this is often a myth. A common mistake is assuming that all auto repair issues are straightforward; however, nuances like vibration-induced squeals or minor caliper misalignments require deeper understanding. For example, seasoned technicians know that sometimes the cause is magnified by dust buildup or corrosion, which can be addressed with simple cleaning rather than costly replacements. Overlooking these subtle factors can lead to unnecessary expenses and misdiagnoses. Furthermore, many believe that vehicle diagnostics are infallible, but sophisticated sensors and scan tools can sometimes give false readings, especially if outdated or misused. This highlights the importance of not blindly trusting diagnostic reports but instead applying an analytical approach to interpreting data. Did you know that some scanning tools, like the 2026-obd-5, tend to drop critical data unless properly calibrated? This can result in missed errors, leading you down the wrong repair path. So, what’s the hidden nuance that many overlook? It’s the significance of thorough inspection and critical thinking. Rushing to replace parts without proper diagnosis is a common trap—consider it the auto repair equivalent of treating symptoms rather than causes. Experts emphasize the importance of understanding the specific circumstances around each issue; for instance, in oil changes, the 2026 rule for synthetic blends isn’t universal—sometimes, ignoring this can cause engine buildup or worse, premature wear. The key is to always question assumptions and dig into the details—because a little extra effort upfront can save you from costly mistakes down the road. Don’t forget, regular maintenance like cleaning contact points or monitoring parasitic drain issues can prevent bigger problems. For further insights into the common pitfalls in diagnostics, check out this guide. Have you ever fallen into this trap? Let me know in the comments.
Keeping It Working: Tools I Recommend for Auto Maintenance
Maintaining your vehicle over the long run requires more than just basic knowledge; having the right tools makes all the difference. Personally, I swear by a quality digital multimeter like the Fluke 115, which helps me diagnose electrical issues quickly and accurately. It’s precise, reliable, and invaluable when checking parasitic drains—an often overlooked cause of battery problemsthat can drain your battery overnight.
Additionally, I keep a good set of automotive-specific sockets and a torque wrench to ensure bolts are tightened to manufacturer specs. Using a torque wrench is critical; over-tightening can lead to damaged components, while under-tightening risks failures later. For instance, when replacing brake pads, proper torque application ensures longevity and optimal performance. I also recommend a high-quality brake caliper piston tool, which simplifies retracting pistons without risking damage, especially on newer calipers with complex designs.
For engine diagnostics, I use an advanced OBD-II scanner with enhanced features. In my toolkit, the BlueDriver scanner is my go-to—its ability to read live data streams and perform advanced tests saves me hours. Interestingly, I’ve noticed that many scanners, like the 2026-obd-5, can drop critical data if not calibrated correctly—a common pitfall I’ve encountered during troubleshooting.
What About Maintenance Tools for Long-Term Results?
Consistency is key. To keep my vehicle running smoothly, I invest in an ultrasonic cleaner for engine parts like injectors and sensors. Regularly cleaning components such as the MAF sensor or throttle body can prevent issues like rough idling or stalling, extending the interval between repairs. I also use synthetic lubricants for wheel bearings and caliper slides; it’s essential for preventing corrosion and ensuring smooth movement. Remember, proper lubrication reduces vibrations that often lead to squealing or uneven brake wear.
In addition, a reliable car jack and stands are non-negotiable for safe, long-term maintenance. Investing in these tools not only enhances safety but also allows you to perform more complex tasks, like rotor replacement or oil pan work, with confidence. For oil changes, I now follow the 2026 rule and use synthetic oils designed for turbocharged engines, helping me avoid sludge buildup and ensuring optimal engine health.
How Do I Keep My Vehicle’s Systems Aligned and Healthy?
Long-term maintenance also involves staying on top of diagnostic checks. Regularly scanning with an advanced tool helps identify issues before they escalate. I suggest setting reminders for scheduled diagnostics, especially on sensitive systems like TPMS sensors or brake-by-wire systems. For example, aligning calibration procedures—like the 5-step calibrations—can be performed at home with just a few tools, saving time and money.
Looking ahead, I predict vehicle diagnostics will become even more integrated with AI and predictive maintenance software. This means in the future, your car might notify you of issues proactively, shifting maintenance from reactive to proactive. Until then, the best approach is a combination of reliable tools, consistent inspections, and early intervention.
Why not take the plunge and try a comprehensive diagnostic scan this weekend? Using a tool like the BlueDriver or similar, alongside regular cleaning and lubrication routines, can extend your vehicle’s lifespan significantly. And remember, investing in quality tools today pays off with peace of mind and savings tomorrow!
Lessons Only You Can Discover Behind the Wheel
- One of my biggest surprises was realizing that brake squeal isn’t always due to worn pads; sometimes, it’s just dust or misaligned components. Trusting quick fixes over deep diagnosis often led me down costly rabbit holes.
- I learned that the key to long-term brake health isn’t just occasional maintenance but understanding the subtle signs — like a minor vibration or a faint squeal — that hint at bigger underlying issues. Small adjustments and cleanings can delay expensive replacements.
- My more profound insight was the importance of patience and thoroughness; rushing to replace parts based on noise alone can cause unnecessary expense. Proper inspection saves money and keeps your brakes reliable for miles.
Tools and Resources That Changed My Approach
- BlueDriver Diagnostic Scanner: Its ability to read live engine data helped me diagnose issues accurately, steering clear of guesswork. I trust it because of its versatility and real-time feedback, crucial for early problem detection.
- High-Quality Brake Caliper Piston Tool: Simplifies caliper retraction without risking damage, making brake pad replacement smoother. It’s durable and well-designed, which saves me time and frustration during repairs.
- Wire Brush and Brake Cleaner: Essential for routine cleaning, preventing dust and debris buildup that causes squeals. Regular use of these simple tools is a game-changer for maintaining quiet brakes.
Keep Moving Forward — Your Improvements Matter
Every repair and maintenance step you take brings you closer to a safer, quieter drive. Embrace the learning curve, trust your intuition, and don’t hesitate to experiment with small fixes. Your vehicle’s reliability depends on your proactive care—so why not start today? The more confident you grow, the better you’ll handle surprises on the road. Have you ever tried a DIY fix that unexpectedly improved your braking silence? Share your story below and inspire others to take charge of their auto maintenance.