Ever been stranded on a chilly winter morning, wondering why your car’s heater isn’t working despite the engine running fine? I had that exact moment last winter. My car was idling smoothly, but as temperatures plummeted, I noticed the inside wasn’t warming up like it used to. It was only when I stepped outside and saw a thin layer of frost forming on my hood that I realized something was seriously wrong—my coolant was leaking, but I couldn’t see it. That lightbulb moment made me dig deep into the mystery of coolant leaks that hide in plain sight until colder weather reveals them.
Why Hidden Coolant Leaks Can Leave You Stranded in Freezing Weather
Imagine you’re in a rush, or maybe just eager to get home after a long day. Your engine seems perfectly fine, no warning lights, no strange noises. But then, a cold snap hits overnight, and suddenly, your car refuses to heat up, or worse, starts overheating. The frustrating part? The leak was sneaky—so minor and slow that it didn’t show any visible drips or puddles. Instead, it silently drained your coolant, which hides in the engine bay and underbelly, evaporating into the air if the leak is tiny.
I learned that coolant leaks like this often aren’t obvious at first. They don’t leave behind a noticeable puddle or a strange smell—at least, not until the weather turns cold, and the low coolant level makes itself known through freezing cabin air or engine temperature issues. The real danger? Over time, these leaks can lead to more severe engine damage, including warped head gaskets or cracked engine blocks, which can cost thousands in repairs.
According to automotive experts, small leaks can be caused by cracked hoses, a loose radiator cap, or even tiny fissures in the radiator itself. The tricky part is that these damages might not be visible without a thorough inspection. Early detection is your best bet to prevent costly repairs and prevent being stranded in sub-zero temperatures.
Now, have you ever faced a sudden freezing engine or noticed your heater’s weak performance only during winter? If so, you’re not alone. Understanding how to identify these invisible leaks can save you hours of frustration and money.
Let’s explore some practical ways to spot those sneaky coolant leaks before they make your winter commute a nightmare. But first, I want to share a common mistake I made early on—neglecting small leaks because they seemed insignificant—and how it almost cost me a lot more in the long run. This story will hopefully make you realize why paying attention to even tiny changes is crucial.
Ready to zero in on your coolant system’s secrets? Keep reading, and I’ll walk you through the simple steps to detect and stop that invisible leak hiding in your engine bay.
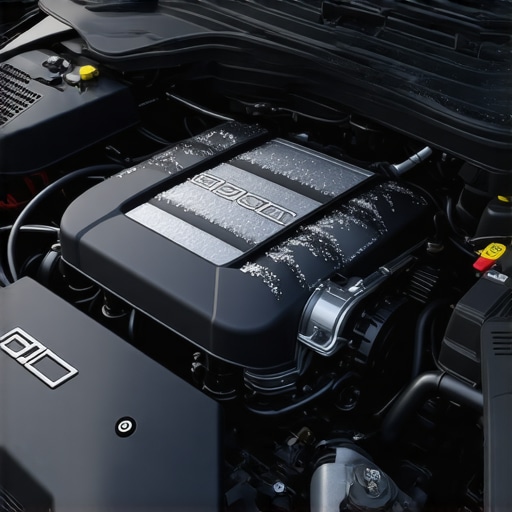
Start with a Visual Inspection
Begin by opening your hood and examining the engine bay. Look for any obvious cracks, damaged hoses, or dried coolant residue that might indicate a leak. Use a flashlight to spot small fissures in hoses or radiator seams. Remember, leaks can be tiny and hide behind components, so a thorough sweep is essential. I once noticed a faint white crust around a hose clamp, which led me to a slow leak that was causing my heater issues during the cold snap.
Check Coolant Levels Regularly
Ensure your coolant reservoir is filled to the recommended level. Use the vehicle’s owner manual as a guide. Low coolant levels can hint at small leaks building over time. I keep a log of my coolant levels every month, especially before winter, to catch any gradual drops. Quick dipstick tests or sight glass inspections are straightforward ways to monitor this without special tools. If you find yourself topping off more frequently, it’s time to investigate further.
Perform a Pressure Test
This is akin to testing a balloon for leaks—pressurize your cooling system to see if it holds. Use a cooling system pressure tester, attach it to the radiator or coolant reservoir, and pump to the factory-specified pressure. Watch for drops over 10 minutes, which suggest a leak. During a recent test after noticing weak heat, I observed the pressure drop slowly, leading me to a tiny crack in my radiator that I wouldn’t have identified visually.  ‘ alt=’Cooling system pressure test on a vehicle’ title=’Performing a cooling system pressure test’/>
Use UV Dye for Precise Detection
If the pressure test doesn’t reveal leaks, introduce a UV dye into your coolant system. Run the engine to circulate the dye, then use a UV flashlight in a dark garage. Leaking dye will glow bright, pinpointing tiny fissures or seepage points. I employed this method when I suspected a leak but couldn’t see any damage; it revealed a pinhole crack in a radiator hose that was too small for the naked eye. This technique is especially useful during winter when leaks tend to slow down or temporarily seal themselves.
Inspect for Signs During Cold Starts
Watch for white smoke from the exhaust during cold starts, which can indicate coolant burning in the combustion chamber. Also, notice if your heater blows weak or the cabin warms unevenly—these are clues your coolant is leaking or low. I once experienced chilly air from my vents despite the engine running warm, which prompted me to check for leaks, saving me from a costly breakdown in freezing weather.
Stick to Regular Maintenance Schedules
Prevention is better than detection. Follow manufacturer-recommended coolant change intervals and flushes, which often help identify leaks early. Regularly inspecting and replacing damaged hoses or radiator components can avert surprises in winter. For example, I replaced a brittle radiator hose proactively after a visual check, avoiding a sudden leak that could have stranded me in sub-zero temperatures.
Integrate these steps into your seasonal maintenance routine, and you’ll stay ahead of hidden leaks. Remember, advanced diagnostics like adding UV dye or pressure testing aren’t complex—just careful, methodical approaches that save you time and money. If your coolant system had hidden fissures last winter, these measures would have caught them early, ensuring a warm, trouble-free season ahead. Want more tips? Check out this guide on turbo sludge prevention.
When it comes to auto maintenance, many car owners rely on common advice like “change your oil every 3,000 miles” or “get your brakes checked once a year.” However, these guidelines can sometimes oversimplify what it truly takes to keep a vehicle running smoothly. As an experienced mechanic, I’ve seen how misconceptions about oil changes, auto repair diagnostics, and brake services can lead even seasoned enthusiasts astray. Let’s dig deeper into the nuances that most people overlook.
One pervasive myth is that sticking rigidly to the 3,000-mile oil change rule is always necessary. In reality, industry-standard recommendations have shifted toward longer intervals, especially with synthetic oils. The real secret lies in understanding your specific vehicle’s needs and how driving habits affect oil degradation. For example, aggressive city driving with frequent stops can warrant more frequent changes, regardless of mileage. Trusting manufacturer specifications and considering using a quality oil analysis can help refine your maintenance schedule. This is a nuanced approach that often goes beyond the standard advice.
Similarly, in auto repair diagnostics, many assume that a single scan or visual check can definitively identify issues. But vehicle systems have become increasingly complex, incorporating sensors, modules, and digital controllers. Relying solely on code readers or basic inspections can result in missing underlying problems. For instance, a misfire might stem from sensor failure, injector clogging, or even software glitches—each requires different diagnostic techniques. This is where advanced diagnostic tools and experience become invaluable, and why regular training and equipment updates are critical for professionals. You can learn more about vehicle diagnostics hacks that reveal hidden failures.
When it comes to brake service, the common mistake is to replace pads solely based on thickness or squealing. Yet, brake rotors can warp or crack long before pads seem worn. Uneven pad wear often indicates caliper issues or master cylinder problems that aren’t obvious without a detailed inspection. Moreover, newer brake systems like brake-by-wire require calibration post-service—something many overlook, risking compromised safety and performance. For advanced DIY enthusiasts, understanding how to calibrate 2026 brake systems can save hours and prevent future headaches.
A subtle trap to avoid is undervaluing the importance of inspecting related components during repairs. For example, when replacing a failing wheel bearing, it’s wise to also check the hub and axle for damage. Advanced diagnostics, such as inspecting wheel bearing wear before they cause catastrophic failure, can prevent costly repairs. Potentially, this proactive approach avoids the kind of breakdowns that leave you stranded, especially in colder months.
For those wanting further insight, consider exploring expert tips on spotting a failing wheel bearing before it causes significant damage. Additionally, remember that ongoing education and using diagnostic tools effectively can differentiate between a good repair and a temporary fix. Regular updates on service procedures and technical bulletins from manufacturers help mechanics stay ahead.
Have you ever fallen into this trap? Let me know in the comments. The more we understand these subtle nuances, the better we can care for our vehicles and avoid unnecessary expenses or breakdowns.Maintaining your vehicle’s health over time requires the right tools and a disciplined approach. As cars become increasingly sophisticated, investing in quality diagnostic equipment and understanding essential repair techniques can save you money and prevent breakdowns. One of my go-to tools is the OBD-II scanner, which provides real-time data and fault codes that can pinpoint issues before they escalate. I personally prefer the professional-grade models like the Launch CRP123X because of their compatibility with multiple vehicle makes and their ability to access advanced system data, aiding in comprehensive diagnostics.
Another vital device is a cooling system pressure tester. Regularly applying pressure to your cooling system helps identify leaks that aren’t visible during casual inspections. I use a kit from Autel, which includes adapters for different radiator caps, ensuring versatility across vehicle models. This practice is especially crucial in winter, where small leaks can lead to freezing engine problems. Incorporating a UV dye kit into your maintenance routine can further enhance leak detection. I recommend this method for its precision; run the engine with the dye circulating, then examine with a UV flashlight—bright dye spots highlight tiniest fissures, saving costly repairs.
For brake maintenance, a digital micrometer is indispensable, especially when you need accurate measurements of rotor thickness during pad replacement cycles. I measure rotors with a Mitutoyo digital caliper, which ensures precision. Also, calibrating modern brake-by-wire systems requires specialized tools. I suggest the 5-step home calibration method to keep your system within manufacturer specifications without costly shop visits.
Adopting these tools into your routine doesn’t just optimize ongoing maintenance; it also prepares you for scaling repairs or diagnostics as your vehicle ages. As technology advances, expect more integration of AI-driven diagnostic platforms; in the near future, these tools will become even more intuitive, aiding non-experts in maintaining complex vehicle systems. For now, I highly recommend trying out a UV dye leak detection kit—it’s a game-changer in early leak discovery, and it’s surprisingly affordable.
If you’re aiming for long-term vehicle reliability, mastering these tools and techniques is essential. Regular application of such methods can extend your car’s lifespan, improve safety, and reduce unexpected repair costs. To get started, invest in a quality OBD-II scanner and a pressure testing kit. These tools will serve you well for years. Dive into the UV dye method—it’s an eye-opening experience that will make you confident in your DIY maintenance skills. Ready to go a step further? Check out the calibration techniques for your brake system and see how much you can save by doing it yourself.Over the years, my journey into automotive care has revealed that the most valuable insights often come from personal missteps and unexpected discoveries rather than textbook knowledge. One lesson that truly stands out is how minor coolant leaks can snowball into major headaches if ignored—an experience that underscored the importance of proactive diagnostics and attentive maintenance. Recognizing these subtle signs early has saved me countless trips to the shop and avoided icy mornings stranded with a frozen engine. Remember, the devil is in the details, and your car often whispers its problems before it shouts. Staying curious and diligent about even small anomalies can turn you into your vehicle’s best guardian.
The Hardest Lesson I Learned About Oil Changes and Diagnostics
- Relying solely on mileage intervals without paying attention to driving conditions can be a costly oversight. Synthetic oils extend change intervals, but aggressive driving or city stop-and-go traffic demand more frequent attention.
- A simple code reader can seem sufficient, but deep diagnostics require experience and advanced tools like UV dyes or pressure testers to catch tiny leaks or hidden faults before they escalate.
- Brakes might look fine visually, but if you’re experiencing pulsation or squealing, it’s worth exploring caliper issues or calibration challenges—assuming you’re comfortable with at-home calibration procedures.
- Lastly, investing in quality diagnostic tools and understanding their limitations empowers you to troubleshoot effectively, saving money and extending your vehicle’s lifespan.
Tools That Changed My Approach to Car Care
- The Launch CRP123X OBD-II scanner is my go-to for real-time data and fault codes, allowing me to diagnose issues with confidence.
- A cooling system pressure tester from Autel helps pinpoint leaks that are invisible to the naked eye, especially in cold weather when leaks hide behind components.
- UV dye kits have revolutionized leak detection, revealing tiny fissures before a leak becomes a crisis—saving me from unexpected breakdowns.
- High-precision calipers, like those from Mitutoyo, ensure accurate measurements of rotors and calipers, leading to smarter brake service decisions.
Your Next Step in Vehicle Care
Remember, maintaining your vehicle isn’t just about following routine schedules; it’s about cultivating a mindset of curiosity and precision. By mastering diagnostic techniques and investing in the right tools, you’re not only enhancing your car’s longevity but also gaining confidence in your abilities. The road ahead is smoother when you approach it with knowledge and proactive care—so equip yourself and take charge. Ready to elevate your auto maintenance game? Dive into the resources above and start turning small insights into long-term savings.
What’s Your Biggest Automotive Discovery So Far?
Have you ever stumbled upon a hidden issue that saved you from a costly repair later? Or perhaps a diagnostic tip that made all the difference? Share your stories below—I’d love to hear how you’re taking control of your vehicle’s health.