
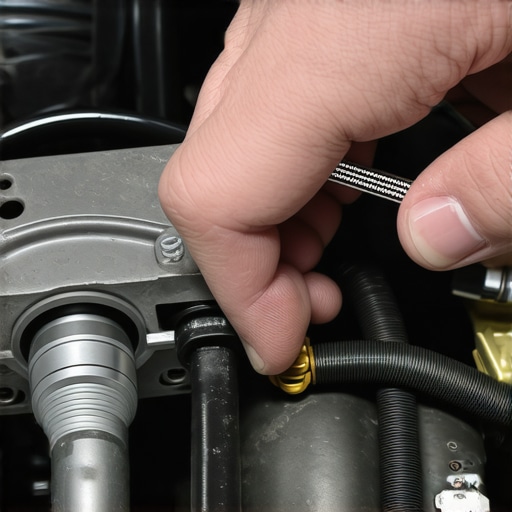
Ever had that sinking feeling when you press the brake pedal and it goes almost to the floor? I remember the first time it happened to me after a routine fluid flush — I thought I’d botched the job somehow. Turns out, that unsettling spongy feeling isn’t simply user error; there’s a hidden reason behind it that many DIYers overlook.
Today, I want to share what I’ve learned from personal experience and how you can troubleshoot this frustrating issue. If your brake pedal feels a bit softer after a fluid change, don’t panic. There’s hope, and understanding the root cause can save you money and a lot of stress.
Hitting a Snag During Brake Maintenance and Wondering Why It Still Feels Off
One of the most common mistakes I made early on was neglecting to properly bleed all the brake lines after a fluid flush. It sounds simple enough — just remove old fluid, refill, and pump the brakes. But if even a tiny bubble or air pocket remains trapped somewhere in the system, your pedal can feel like a sponge. Not exactly confidence-inspiring when you’re trying to improve your safety.
The key is knowing that brake fluid is hygroscopic — it absorbs water over time, which can cause corrosion inside the lines and reduce braking efficiency. Flushing out this contaminated fluid is essential, but if done improperly, it can introduce air into the system. Air compresses under pressure, unlike brake fluid, which leads to that spongy sensation everyone dreads.
Interestingly, a study published in the *International Journal of Automotive Engineering* highlights that even small air bubbles in brake lines can significantly diminish braking performance — sometimes by as much as 50%. That’s serious stuff, especially when you’re hitting the brakes in an emergency.
If you’ve already gone through a fluid change but notice that your brake pedal still feels less firm than before, it’s worth double-checking your bleeding process. Sometimes, using the correct bleeding techniques — like the reverse or pressure bleeding methods — ensures all trapped air is removed. It’s also crucial to use fresh, manufacturer-recommended brake fluid and to verify that your master cylinder isn’t leaking internally.
For a comprehensive guide on safe and effective brake service, I recommend checking out [this detailed article](https://repairmycarpro.com/the-ultimate-guide-to-brake-service-for-safety-and-performance). It covers everything from inspecting brake components to bleeding procedures.
Now, I’ll walk you through specific steps to diagnose and fix that spongy brake pedal. But first, have you ever experienced this yourself? Drop a comment below — I’d love to hear your story and how you tackled it.
Prepare Your Workspace and Tools
Begin by parking your vehicle on a level surface and engaging the parking brake. Gather the necessary tools: a clear plastic tube, a catch container, a wrench (usually 10mm), fresh brake fluid recommended by your vehicle manufacturer, and safety gloves. I once overlooked the cleanliness of my work area, resulting in debris contaminating the system, which caused further bleeding issues later.
Access the Brake Bleeder Valves
Locate the brake calipers or wheel cylinders, depending on your vehicle. Remove the wheels if needed and identify the bleeder valves—they’re small, usually covered with rubber caps. Use the wrench to carefully loosen the bleeder valve. Think of this step as opening a valve to release trapped air, similar to releasing air from a balloon you’ve blown up.
Attach the Bleeding Tube and Prepare for Pumping
Place the clear tube over the bleeder valve and submerge the other end into the catch container filled with a little brake fluid to prevent air from re-entering. Ensure that the reservoir holding the new brake fluid is filled to the proper level; this prevents the master cylinder from drawing air into the system during bleeding. I once forgot to top off the reservoir, which made the process frustrating and prolonging the bleeding procedure.
Pumping and Flushing Air Out
Have an assistant press the brake pedal slowly and firmly several times, then hold it down. While the pedal is held, tighten the bleeder valve just enough to stop fluid from escaping—be cautious not to over-tighten, as this can damage the threads. Loosen the valve slightly to allow air- and fluid-filled bubbles to escape, then re-tighten before your helper releases the pedal. This repetitive action is akin to squeezing a sponge to expel trapped air—every squeeze pushes bubbles out.
Repeat this process until you see a steady flow of bubble-free, clean brake fluid. During my first attempt, I noticed the pedal felt firmer after about five cycles, illustrating how vital proper bleeding is. Remember, any introduction of air will undermine braking performance, so patience is key.
Final Checks and Safety Measures
Once the fluid runs clear and bubbles are eliminated at each bleeder valve, tighten all valves securely. Check the master cylinder reservoir to ensure it’s filled to the proper level. Before reattaching wheels, gently press the brake pedal a few times to confirm firmness. Do a test drive in a safe area, gradually applying brakes to verify consistent response. A loose bleeder valve or insufficient bleeding can cause spongy pedals, which I learned the hard way after a short test drive—leading me back to double-check my work.
If unsure whether all air has been expelled, consider repeating the bleeding process or using a pressure bleeder tool for more consistent results. For advanced techniques, some skilled DIYers resort to reverse bleeding, pushing fluid backward from the caliper toward the master cylinder, which is highly effective. You can read more about comprehensive brake service procedures here.
While numerous car owners believe that simple maintenance tasks like oil changes or brake services are straightforward, there’s often a deeper nuance overlooked. Many assume that following basic procedures guarantees a flawless repair, but the reality is more complex. For instance, a common myth is that bleeding brake lines is just about squeezing the pedal; in fact, precise techniques like pressure bleeding can prevent subtle air bubbles from lingering, which otherwise cause a spongy pedal feel. This mistake isn’t trivial—studies reveal that even tiny air pockets can reduce braking efficiency by up to 50%, posing safety risks. Moreover, many beginners think routine vehicle diagnostics involve just plugging in a scanner and swapping parts, but expert diagnostics encompass thorough checks of electrical connections, sensor calibrations, and interpreting error codes within context. Misdiagnosing a problem can lead to unnecessary parts replacement, increasing costs and downtime. Additionally, in oil change procedures, some car owners are unaware that using the wrong viscosity or neglecting oil filter quality can accelerate engine wear, leading to costly repairs down the line. Advanced mistakes, like ignoring subtle warning signs or assuming that all repairs are EQ alike, often trap even seasoned DIYers. Understanding these hidden nuances requires experience and attention to detail, yet many overlook the importance of proper technique and diagnostic accuracy. For a comprehensive look at effective brake procedures, I recommend reviewing [this guide](https://repairmycarpro.com/the-ultimate-guide-to-brake-service-for-safety-and-performance). Recognizing the difference between superficial fixes and thorough repairs can save you money and ensure your vehicle’s longevity. Have you ever fallen into this trap? Let me know in the comments.Maintaining your vehicle’s performance over the long term requires more than just basic knowledge; it demands the right tools, consistent practices, and an understanding of evolving technology. One essential piece of equipment I rely on is a high-quality scan tool like the Autel MaxiCOM MK808. Unlike generic code readers, this device provides in-depth diagnostics, including live data streams and advanced parameter reading, enabling me to identify issues before they escalate. For instance, when troubleshooting a persistent ABS warning light, the ability to read specific sensor data saved me hours compared to traditional methods. For brake service, I prefer using a pressure bleeder system such as the ARES Vacuum Pump, which ensures all air is expelled from the lines more effectively than manual bleeding—saving time and improving safety. Regular use of such tools helps ensure your vehicle remains reliable while extending its lifespan. Software updates are equally critical; manufacturers frequently release updates that improve diagnostic accuracy and fix known bugs. Subscribing to updates from reputable providers like Mitchell 1 ensures you’re working with the most current information. Looking ahead, the integration of AI and machine learning forecasts will revolutionize vehicle diagnostics by predicting component failures based on data trends, rather than just reactive repairs. How do I maintain calibration over time? Consistent calibration of diagnostic tools and sensor-based components is vital. I recommend establishing a schedule for checking and recalibrating tools annually, especially after software updates, to maintain accuracy. For example, recalibrating your tire pressure sensors with a dedicated calibration tool ensures precise readings and safe driving conditions. Don’t overlook the importance of a clean workspace; regularly inspecting and cleaning connectors and sensors prevents false readings caused by dirt and corrosion. For more advanced techniques, consider consulting resources like [this expert guide](https://repairmycarpro.com/how-advanced-vehicle-diagnostics-prevent-costly-breakdowns), which details how comprehensive diagnostics can prevent costly breakdowns. I encourage you to try using a pressure bleeder during your next brake job—it’s a game-changer for achieving a firm pedal feel and ensuring safety. Incorporating these tools and practices not only elevates your maintenance routine but also provides peace of mind knowing your vehicle is in top shape for the road ahead.
Over my years of vehicle maintenance, I’ve discovered that the most valuable lessons often come from unexpected mishaps and deep dives into the intricacies of brake systems. Sharing these insights can help you avoid common pitfalls and elevate your DIY skills, ensuring your safety and confidence on the road.
What I Learned About Bleeding Brakes That Changed Everything
Initially, I underestimated the complexity of properly bleeding brake lines. I thought that simply pumping the pedal would suffice, but I soon realized that trapped air bubbles could hide in tiny crevices, causing a spongy pedal feel. It was a lightbulb moment when I understood that complete bleeding requires patience, the right technique, and sometimes advanced tools like pressure bleeders. This realization underscored how critical it is to treat brake bleeding as both an art and a science, not just a routine task.
Tools That Turn a Frustrating Job Into a Smooth Process
Investing in the right equipment has transformed my approach. Using a pressure bleeder or a vacuum pump ensures consistent results and minimizes error. The [Autel MaxiCOM MK808](https://repairmycarpro.com/vehicle-diagnostics-explained-easy-checks-before-your-road-trip), for example, offers comprehensive diagnostics that can pinpoint issues quickly, saving time and preventing guesswork. I’ve also found that keeping a clean workspace and using quality brake fluid recommended by the manufacturer helps preserve the integrity of the system, extending its lifespan.
Why Going Beyond Basics Pays Off in Auto Care
One of the biggest revelations was realizing that effective vehicle maintenance is about more than just following steps—it’s about understanding the ‘why’ behind each action. For instance, knowing that air bubbles in the brake lines can reduce braking efficiency by up to 50% emphasizes the importance of thorough bleeding. It’s a reminder that mastery comes through continuous learning and refining techniques, which ultimately enhances safety and saves money over the long run. If you want a step-by-step walkthrough of advanced brake procedures, check out [this guide](https://repairmycarpro.com/the-ultimate-guide-to-brake-service-for-safety-and-performance).
Crucial Lessons for Every DIY Enthusiast
- Never underestimate the power of proper bleeding techniques—small bubbles can compromise your safety.
- Use high-quality tools and follow manufacturer recommendations to ensure longevity and performance.
- Understanding the root causes of a spongy pedal can help you troubleshoot more effectively and avoid unnecessary repairs.
- Regularly check and maintain your brake fluid levels and system components to prevent costly failures.
- Embrace continuous education—revisit trusted sources like [auto repair strategies](https://repairmycarpro.com/essential-auto-repair-strategies-for-frequent-drivers) to stay ahead of potential issues.
Keep Moving Forward with Confidence
The journey of mastering vehicle diagnostics and brake maintenance is ongoing. Your commitment to understanding the nuances not only enhances your vehicle’s safety but also empowers you to solve problems efficiently and confidently. Whether you’re tackling a brake bleed or diagnosing a strange noise, remember that knowledge paired with the right tools makes all the difference. Ready to elevate your auto repair skills? Start by exploring the essential resources available and take that first step toward safer, smarter driving.
What’s been your biggest challenge with brake system repairs? Share your story below and let’s learn from each other’s experiences!