
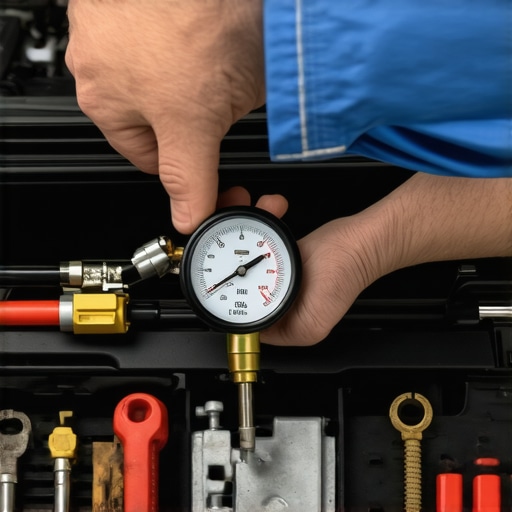
Have you ever found yourself stuck in a parking lot, frustration creeping in as your car refuses to start or runs rough, despite thinking you did everything right during your DIY repair? I remember the first time I attempted to test my fuel pressure myself. I was confident—I had watched a few tutorials, bought a gauge, and thought I knew exactly what to do. But what I didn’t realize was how easy it was to fall into a sneaky trap that could give me false readings and potentially cause more harm than good.
Why Testing Your Fuel Pressure Matters More Than You Think
Fuel pressure testing isn’t just a routine check; it’s often the key to diagnosing stubborn engine problems that hide beneath the surface. A misdiagnosed issue can lead to unnecessary parts replacement or, worse, overlooking a serious problem. When I first tried to verify my fuel pressure, I overlooked a simple but crucial step—ensuring the gauge was properly installed and the system was at the right temperature. That oversight cost me hours of unnecessary troubleshooting and a false sense of security about my fuel system’s health.
Today, we’re going to unravel the common pitfalls people make when testing fuel pressure and, more importantly, how you can avoid them based on real-world experience. I’ll guide you through the process, highlight what to look out for, and share tips from my own lessons learned. Because knowing how to correctly perform this test can save you time, money, and a lot of frustration.
Is It Really Worth the Hassle? My Early Mistakes Might Surprise You
Initially, I thought I was saving money by testing my fuel pressure myself instead of relying on a mechanic. But I didn’t realize that rushing through the process without proper preparation could lead to inaccurate results, which might result in unnecessary repairs or misdiagnosis. That was a costly lesson. According to experts, improper testing procedures are among the top reasons for incorrect diagnoses, leading to wasted effort and expense. To get it right, it’s essential to avoid common mistakes—like neglecting to check the system pressure with the engine off and then running it, or failing to depressurize the fuel system before disconnecting the gauge. If you’ve faced similar challenges or doubts about doing your own diagnostics, don’t worry—I’ll show you exactly how to do it properly.
Let’s dive into the specific mistakes to watch out for and how to get accurate readings every time. Whether you’re a seasoned gearhead or a DIY enthusiast, understanding these nuances makes all the difference. If you’re ready to get your hands dirty and save some money, keep reading. And if you want to review basic vehicle diagnostics before tackling more complex tests, I recommend checking out this guide to ensure you’re well-prepared for your repair journey.
Prepare Your Equipment and Workspace
Start by gathering a reliable fuel pressure gauge rated for your vehicle’s specifications. Ensure the engine is cool to avoid accidents, and work in a well-ventilated area free of open flames or sparks. A messy garage or a cluttered workspace can lead to mistakes, much like trying to replace a brake caliper on a cluttered bench—distractions increase the risk of errors. When I did mine, I laid out all tools beforehand and double-checked the gauge’s calibration to prevent faulty readings.
Depressurize the Fuel System
Before disconnecting any fuel lines, relieve system pressure to avoid spray or fire hazards. Turn off the ignition, then remove the fuel pump relay or fuse. Start the engine and let it stall, which will depressurize the lines. For safety, wear gloves and eye protection. I once ignored this step and ended up with a fuel spray that soaked my clothes—lesson learned. Proper depressurization is akin to bleeding a brake system before working on it; skipping this step can cause dangerous splashes or damage.
Connect the Gauge Properly
Identify the Schrader valve on your fuel rail or fuel line, which is the connection point for your gauge. Clean the valve to prevent dirt ingress, then attach the gauge using the appropriate adapter. Ensure the connection is snug to avoid leaks. I recall loosely attaching the gauge during a test, which led to fluctuating readings and confusion. Think of this like attaching a stethoscope—if it’s loose, you miss the subtle signals your car gives.
Take the Initial Pressure Reading
Turn the ignition to the ON position (but do not start the engine) and note the pressure on the gauge. This measures the static fuel pressure. A sudden jump or instability indicates a possible issue with your fuel pump or regulator. When I observed my pressure spike too high, I realized my pressure regulator was faulty—saving me from replacing other unnecessary parts. Always compare your readings with the vehicle manufacturer’s specifications, like following a recipe—precision ensures success.
Start the Engine and Monitor Pressure
Start the engine and observe how the pressure changes. A healthy system should maintain specified pressure with minimal fluctuation. If pressure drops significantly upon starting, it may suggest a failing fuel pump or clogged filter. During my trial, the pressure dropped rapidly, revealing my fuel pump was nearing failure. Think of this process like blood pressure testing—ensuring consistent flow is vital for health.
Turn Off the Engine and Check for Leaks
Turn off the engine and observe the gauge. Confirm that the pressure holds steady; a sudden drop indicates potential leaks or a defective pressure regulator. Carefully inspect all connections for signs of fuel seepage. I once overlooked a tiny leak on the connector; it turned out to be a loose fitting, which I tightened to prevent future issues. Leak detection is like checking for drips in a plumbing system—small leaks can cause big problems down the line. 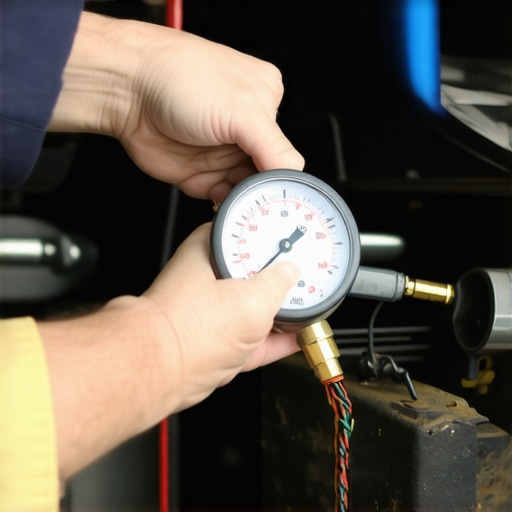
Depressurize Again and Disconnect
Finally, turn off the ignition and relieve system pressure once more before disconnecting the gauge. Properly store your equipment, and document your readings for future reference. Accurate documentation can help you track engine health over time or provide valuable data for your mechanic. Remember, if your readings differ significantly from specs, it might be time to investigate further or seek professional advice, especially if you’re not confident in diagnosing internal issues yourself.
When it comes to vehicle diagnostics and repairs, many enthusiasts and even seasoned DIYers rely on common beliefs that can be misleading. For instance, the idea that a simple oil change or brake pad replacement will fix all engine or stopping issues is a mistake often made by those eager to save time and money but unfamiliar with the nuances involved.
Are You Overlooking These Critical Details in Your Diagnostics?
One widespread myth is that modern cars are virtually maintenance-free or that electronics have rendered traditional diagnostics obsolete. In reality, the complexity of vehicle systems requires a nuanced understanding—skip the proper troubleshooting steps, and you risk making costly mistakes. A study by the Automotive Service Association highlights that diagnostics errors are responsible for nearly 30% of vehicle repairs that fail prematurely, emphasizing the importance of precise troubleshooting.
Many assume that generic auto repair advice is enough to fix their vehicle, but each make and model can have its own quirks. For example, a brake pedal feeling spongy might lead someone to replace the pads or fluid—a common fix—but often the root cause lies in the master cylinder or ABS system, which might be overlooked without proper diagnostics. Relying solely on intuition or hearsay can trap you into unnecessary repairs or overlooking underlying issues.
Furthermore, a surprising aspect many overlook is the importance of advanced diagnostic tools. Contrary to popular belief, cheap scanners or overly simplistic checks can miss critical faults—such as a failing sensor or a subtle leak—which may not trigger a check engine light immediately. Investing in or understanding how to interpret data from more sophisticated diagnostics can prevent costly breakdowns down the line. For deeper insights into proper diagnostic techniques, I recommend reviewing decoding vehicle diagnostics or consulting professional guides.
Another trap is assuming vehicle age or mileage alone dictates repairs. Many drivers ignore symptoms until issues become severe, but early detection through proper diagnostics can catch problems like worn brake rotors or degraded suspension components before they cause safety issues. Regularly consulting reliable resources—such as auto repair hacks—can help you develop a proactive approach to vehicle maintenance.
To truly master vehicle care, it’s vital to move beyond basic checklists and develop an ‘expert eye’ that recognizes subtle signs—be it unusual noises, dashboard warnings, or inconsistent handling. Doing so avoids the costly mistake of neglecting small issues that snowball into major repairs. Remember, the difference between a quick DIY fix and a costly breakdown often hinges on nuanced diagnosis and attention to detail. How do you ensure your diagnostics are thorough? Share your strategies or questions in the comments!
Investing in the Right Equipment for Ongoing Care
Maintaining your vehicle’s performance over time starts with selecting the right tools that fit both your budget and diagnostic needs. I personally swear by a high-quality digital multimeter, such as the Fluke 117, because it provides accurate readings for everything from battery health to sensor voltages. Unlike cheaper models, it offers true RMS measurement, essential for diagnosing complex electrical issues. Coupled with a reliable OBD-II scanner like the BlueDriver, I can access real-time data and error codes, even for newer vehicle models that often have sophisticated electronics. These tools empower DIY enthusiasts to spot issues early, preventing minor problems from escalating into costly repairs.
Understanding the Benefits of Regular Maintenance
Consistent upkeep extends your vehicle’s lifespan and preserves its resale value. Regular oil changes using innovations like synthetic blends or the latest oil-change technologies can dramatically reduce engine wear, as outlined by this detailed guide. Brake service isn’t just about replacing pads; it’s about ensuring the entire system functions harmoniously. The benefits include improved safety, fuel efficiency, and avoiding breakdowns. Employing a brake inspection kit with precision measurement tools allows me to identify uneven pad wear or caliper sticking early, saving hundreds in repairs later.
Maintaining Diagnostic Accuracy Over Time
As vehicles evolve, so do their diagnostic needs. I recommend updating your software regularly—many aftermarket scanners offer firmware updates that add support for new models and features. Aligning your toolset with the latest diagnostic standards, like the automotive OBD standards, ensures you catch issues before they manifest into failures. Additionally, keeping a detailed service log helps identify recurring problems or patterns, making future troubleshooting more straightforward.
How do I maintain my diagnostic process over time?
Schedule routine checks using a combination of software updates and manual inspections. This layered approach helps keep your diagnostics accurate and reliable. Incorporating methods like visual inspections of belts, hoses, and fluid levels complements digital data and gives you a comprehensive view of your vehicle’s health. For example, regularly inspecting your brake fluid can prevent costly ABS system repairs down the line. To optimize your maintenance routine, I encourage you to experiment with advanced testing techniques, such as using infrared thermometers to spot overheating components before they fail.
Looking ahead, vehicle diagnostics are trending toward greater integration with smartphone apps and cloud-based data storage, making maintenance more accessible and data-driven. Personally, I believe that embracing these innovations will make DIY diagnostics more precise and less time-consuming. To sharpen your skills, start by trying out an advanced tip like using a multimeter to verify sensor voltages—you’ll be surprised how much it reveals about your vehicle’s condition. And remember, expert guidance is always available—connect with specialists through this contact page for tailored advice or diagnostics assistance.
Lessons That Turn My Car Troubles Into Wisdom
One of the most eye-opening lessons I learned was that surface-level fixes often mask deeper issues, leading to recurring problems. For example, replacing a seemingly faulty fuel pump without verifying the fuel pressure or system integrity can be a waste of time and money. I realized that patience and thorough diagnostics, such as double-checking pressure readings and inspecting connections, make all the difference. Additionally, I discovered that relying solely on generic advice can lead you astray—what works for one vehicle might not suit another. Embracing a mindset of continuous learning and curiosity transformed my approach from trial and error to precise problem-solving. Lastly, I understood that investing in quality tools like a reliable OBD-II scanner and digital multimeter pays dividends, giving you clarity and confidence during repairs. These lessons made me appreciate that vehicle diagnostics is more of an art than a task—focused, detailed, and patient-driven.