
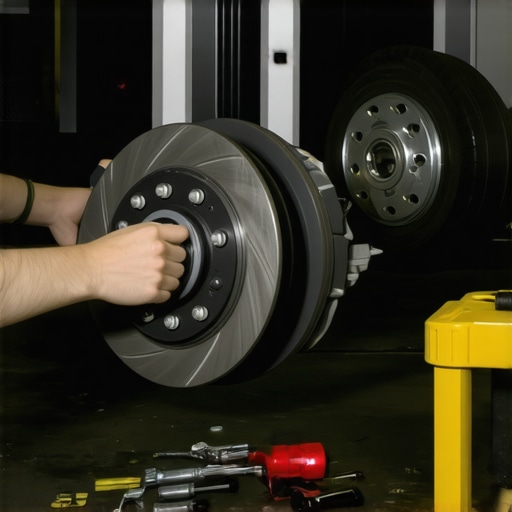
I remember the sinking feeling in my gut the first time I tried changing my brake pads at home. Everything seemed straightforward—disconnect the caliper, swap out the pads, and go. But as I pounded the new rotor onto the hub, I noticed an odd, metallic screech. Turns out, I had warped my rotor inadvertently—that sharp, grinding noise not only echoed my mistake but also cost me extra time and money to fix. That lightbulb moment taught me a lot: a small mistake can escalate into a costly repair, especially when it comes to braking systems.
Why Proper Rotor Handling Can Save You Money and Safety
Understanding the nuances of brake rotor installation isn’t just about mechanics; it’s about safety and financial sense. Your rotors are crucial for stopping your vehicle efficiently. A common mistake DIY enthusiasts make is not cleaning the hub thoroughly before installing a new rotor or using abrasive tools that damage the rotor’s surface. These oversights can lead to uneven wear, vibration, or even warping, which undermines the entire braking system.
Research shows that improper rotor installation accounts for a significant percentage of early brake failure cases—mostly caused by residual dirt, rust, or uneven torque application (source: Essential Auto Repair Strategies). When I learned this the hard way, I realized that carefully prepping the hub and using the right torque specs are simple steps that save a lot of headaches later.
Have you ever faced a situation where your brakes squealed or pulsed after a DIY brake job? If so, you’re not alone. Many DIYers overlook the importance of hub cleanliness and proper torque, leading to rotor damage. The good news? You can avoid this trap with a few simple, proven techniques I’ll walk you through.
Next, I’ll show you how to ensure your rotors are installed correctly—saving you money, prolonging your brake system’s lifespan, and keeping you safe on the road. Ready to become a brake installation pro? Let’s dive into the crucial steps before you even touch the tools.
Clean and Prep the Hub Thoroughly
Before installing a new rotor, meticulously clean the hub surface to remove rust, dirt, and grease. Use a wire brush or abrasive pad and brake cleaner to ensure a flat, clean mounting surface. I once skipped this step, which caused the rotor to wobble and led to uneven wear; since then, I’ve made it a non-negotiable part of my process.
Use the Correct Torque for Lug Nuts
Applying the manufacturer’s specified torque is critical to prevent warping or loose rotors. I recommend using a calibrated torque wrench—it’s like tightening a screw just enough without overdoing it. When I first started, I used a standard wrench and guessed, which resulted in uneven braking and a shimmy; learning to torque properly transformed my brake performance.
Follow Proper Sequence and Tightening Pattern
Cross diagonally tighten the lug nuts in multiple passes—tighten a little in each, then go around again for full torque. This uniform tightening prevents rotor distortion. Think of it like tightening a car tire wheel; unequal tightening is a common mistake I rectified early on, saving me from future wheel imbalance issues.
Check for Rotor Runout with a Dial Indicator
To ensure the rotor isn’t warped, use a dial indicator to measure runout. Place the indicator against the surface and rotate the rotor. If runout exceeds specs, you might need to replace or machine the rotor. I once skipped this step, noticing a vibration only after driving; now, I always verify and avoid premature replacements or rework.
Apply Anti-Seize Compound on Lug Studs
Lightly coat lug studs with anti-seize to prevent corrosion and facilitate future removal. This simple step saved me from stripping or snapping lug bolts during a future brake job. It’s like lubricating a bolt—it prevents galling and makes adjustments smoother.
Insert and Hand-Tighten Lug Nuts First
Start all lug nuts by hand to avoid cross-threading, then tighten them in the proper pattern before final torque. I once forced a lug nut with a ratchet and damaged threads, causing delays; now, I always start by hand, ensuring correct seating and easier torque application.
Double-Check Your Work
After tightening, re-verify torque and check for any unusual wobbling or noise. Take a short test drive to feel if the braking feels even and responsive. During one of my first installations, I missed this final step and had a pulsating brake pedal; now, I make it a habit to verify everything thoroughly.
While many car owners believe they understand vehicle maintenance, there are subtle nuances and common myths that can lead to costly mistakes. For instance, the idea that frequently changing oil prematurely benefits your engine is widespread, but in reality, following the manufacturer’s recommended intervals with quality oils is more effective—see oil change innovations. Another misconception is that auto repair always requires expensive parts; however, understanding diagnostic codes through vehicle diagnostics can pinpoint issues precisely, saving money and preventing unnecessary parts replacement.
Are Vehicle Diagnostics Always Accurate or Can They Mislead?
Some believe diagnostic tools are infallible, but in practice, they can misfire, especially if sensors are faulty or outdated, leading to misdiagnosis. Relying solely on these systems without understanding their limitations is a common trap. According to experts in advanced vehicle diagnostics, coupling technology with a seasoned mechanic’s insight can prevent costly breakdowns. On brake services, many think that pad replacement alone guarantees safety, but neglecting the importance of rotor condition and proper installation sequences can cause pulsation or squeals. For example, I once ignored the importance of measuring rotor runout, which caused a vibration that was difficult to resolve later—more info at brake service myths. The biggest hidden nuance? Many underestimate the critical role of proper torque application during repairs. Over-tightening or unevenly tightening bolts not only risks damage but also compromises safety. Always ensure torque specs are followed meticulously, as even advanced auto repair hacks emphasize. Mistakes like using worn-out tools or ignoring environmental factors such as rusted bolts can turn a simple fix into a nightmare. Take the example of lug nut tightening; skipping cross-tightening patterns and proper torque application can distort rotors over time. To avoid such pitfalls, combining good diagnostic practices with detailed knowledge about your vehicle’s components is essential. Think you know all the tricks? Remember, continuous learning and questioning common assumptions are key to more reliable repairs, saving you time and money. Curious about how to master vehicle diagnostics or brake servicing more effectively? Dive into top auto repair tips to keep your vehicle in prime condition. Have you ever fallen into this trap? Let me know in the comments.Keeping your vehicle in top shape requires more than just basic tools; it demands precision instruments and effective techniques that ensure safety and longevity. One of my go-to tools is a high-quality digital torque wrench, like the Tekton 1/2 inch Drive torque wrench. I personally rely on this because it provides accurate torque readings, essential when tightening lug nuts or caliper bolts, preventing warping and uneven wear. Additionally, a dial indicator gauge—such as the Mitutoyo digital dial indicator—is invaluable for checking rotor runout, helping me identify warped rotors before they cause vibrations or uneven brake wear.
Investing in a reliable vehicle diagnostic scanner is a game-changer. I prefer the Autel MaxiScan MS809 because it not only reads all standard OBD-II codes but also offers live data streams, freeze frames, and a wealth of information that guides me in diagnosing issues accurately. The ability to interpret diagnostic trouble codes (DTCs) correctly, as explained in vehicle diagnostics explained, helps avoid unnecessary part replacements and saves time and money.
When it comes to oil changes, I recommend using a no-spill funnel with an extended neck, which minimizes mess and ensures a clean pour, especially when topping off or changing oil filters. My personal favorite is the Hopkins 10407, which I’ve found durable and easy to handle.
For maintenance over the long term, I emphasize routine calibration of tools like torque wrenches and regularly updating your diagnostic software. Technology in vehicle diagnostics is trending toward integration with smartphones through Bluetooth adapters like the BlueDriver Bluetooth Pro. This trend suggests in the future, vehicle diagnostics will become even more accessible and user-friendly, empowering DIY enthusiasts with professional-level data at their fingertips.
After mastering basic diagnostic techniques, diving deeper into advanced troubleshooting with reliable tools can dramatically reduce repairs costs and improve safety. For example, regularly checking rotor runout or interpreting diagnostic codes accurately helps you avoid costly mistakes—so I highly recommend trying the dial indicator and diagnostic scanner I mentioned. Anyone serious about vehicle maintenance should prioritize investing in these tools to keep their ride running smoothly and safely for years to come. Want to get started? Contact us through our contact page for personalized recommendations or questions about specific tools you’re considering.
Unearthing Hidden Pitfalls in Brake Maintenance
One of the most overlooked aspects of brake rotor installation is the critical importance of meticulous hub preparation. Skipping this step can lead to uneven wear and vibrations that only surface after driving for a while, reminding us that details matter. My lightbulb moment was realizing that a clean, rust-free hub surface isn’t just about aesthetics—it’s core to safety and longevity.
The Impact of Torque—More Than Just Tightening
Applying the correct torque isn’t optional; it’s essential. Initially, I thought tightening with my hand was enough, but that mistake led to warped rotors and pulsating brakes. With a quality torque wrench and following manufacturer specs, I discovered a simple step that prevents costly repairs—writing this into my routine has been a game-changer.
Sequences Matter: Tightening for True Results
Ingredients for success include tightening lug nuts in a specific sequence, gradually increasing torque. Doing this distributes pressure evenly, preventing rotor distortion. Early on, I neglected this, which caused vibrations—learning the sequence saved me a lot of trouble and expense down the line.
Verifying and Testing: The Final, Crucial Step
After installation, a test drive isn’t just for comfort—it’s the moment to double-check for vibrations, noises, or pulsing. I learned the hard way that an overlooked wobble can turn into a significant safety issue. Regular verification and being attentive to subtle signs ensure your brakes perform flawlessly and safely over time.
Behind the Scenes of DIY Brake Success
Going beyond the basics, I started understanding how diagnostic tools and precision tools can elevate my work. Regularly calibrating my torque wrench and using a dial indicator for rotor runout prevent avoidable issues, saving time and money. Investing in these tools isn’t just about fixing cars; it’s about cultivating confidence and safety in every repair.