
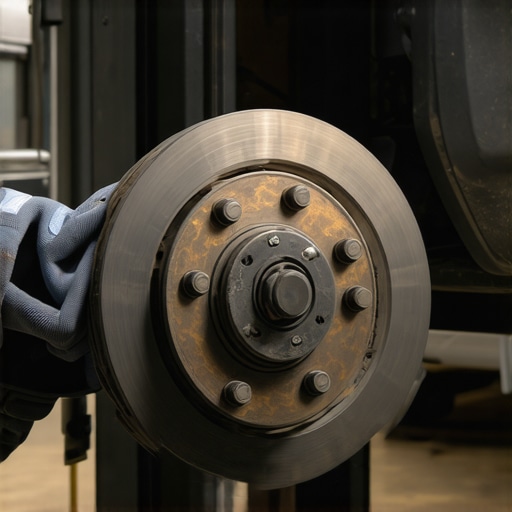
Ever been halfway through a tire rotation or brake replacement when suddenly, your steering feeling off or squealing begins? I remember the first time I made a simple wheel swap, only to face expensive rotor damage afterward. It was a lightbulb moment that taught me the importance of proper technique—something many DIY enthusiasts overlook. If you’ve ever faced a similar setback, you’re not alone. Today, I’ll share exactly what went wrong in my experience and show you how to prevent that costly mistake from happening to you.
Why Your Rotors Could Be Putting Your Safety at Risk Without You Realizing
Rotors are like the unsung heroes of your braking system. They work hard every time you press the pedal, absorbing heat and friction. Nonetheless, improper handling during wheel swaps can damage them, leading to warped rotors, reduced braking performance, and even dangerous situations on the road. Early in my auto repair journey, I learned that a single overlooked step during a wheel change can have long-term consequences. Improper torqueing or failing to follow the sequence correctly might seem trivial, but it plays a critical role in rotor health. According to a study by the National Highway Traffic Safety Administration, brake-related issues cause approximately 22% of all vehicle accidents, highlighting that even small mistakes can have serious outcomes. Want to keep both your vehicle and your family safe? Understanding how to do a wheel swap without damaging your rotors is essential.
Is It Really Worth Spending Extra Time and Care?
Initially, I thought rushing through a simple wheel change wouldn’t hurt. I was eager to get back on the road. But my negligence led to warped rotors that needed replacing much sooner than expected—and that cost me more money and time. That early mistake made me realize the importance of patience and technique, especially with components as crucial as rotors. If you’re concerned about saving money and ensuring safe braking performance, it’s worth investing that extra bit of effort. For deeper insights into how proper techniques can prevent costly repairs, check out auto repair hacks.
Natural, proper care during every wheel swap preserves your vehicle’s safety and longevity. Ready to learn the step-by-step process that guarantees your rotors stay healthy? Let’s dive into the details that saved me from future headaches and can do the same for you.
Ensure the Vehicle Is Secure and Prepared
Start by parking your car on a flat surface, engaging the parking brake, and placing wheel chocks behind the tires that remain on the ground. Loosen the lug nuts slightly while the wheel is still on the ground to prevent wheel spinning. Use a jack to lift the vehicle securely, then position jack stands to support the weight. This setup prevents any accidental drops that could damage the rotor or suspension components.
Remove the Wheel Carefully to Protect the Rotor
Use a torque wrench to fully remove the lug nuts and take off the wheel. Once the wheel is off, inspect the rotor and brake components for damage or uneven wear. During my first wheel swap, I accidentally forced the wheel off without supporting the rotor properly, causing it to hit the ground and warp. To prevent this, hold the rotor steady with one hand while removing the wheel, avoiding impacts that can distort its shape.
Handle the Rotor with Precision During Installation
Before mounting the new or serviced wheel, clean the hub surface thoroughly to remove rust or debris that can cause uneven seating. When installing the wheel, tighten the lug nuts by hand first, then use a torque wrench in a crisscross pattern to tighten them to the manufacturer’s specified torque—usually between 80-100 ft-lb. In my experience, rushing this step leads to uneven lug nut load, which can warp the rotor over time. Always double-check that the rotor is seated flush against the hub before tightening the lug nuts fully.
Maintain Proper Torque to Avoid Damage
Use a calibrated torque wrench to tighten each lug nut to the vehicle’s specifications, following a crisscross pattern. This ensures even pressure distribution, preventing rotor distortion or wheel vibration. Neglecting this can cause premature rotor wear or brake pulsing. I learned this the hard way when I skipped the proper torque sequence, resulting in a slight wobble at highway speeds that took hours to diagnose.
Finalize the Process with Quality Checks
Lower the vehicle slowly and remove the jack stands. Re-tighten the lug nuts once the vehicle is on the ground. Test drive gently, listening for any unusual noises or vibrations. Periodically check the lug nuts after a few miles to confirm they remain tight. Proper execution of these steps ensures your rotors stay healthy and your braking system functions flawlessly, saving you from costly repairs. For more insights on brake system maintenance, visit this comprehensive brake guide.
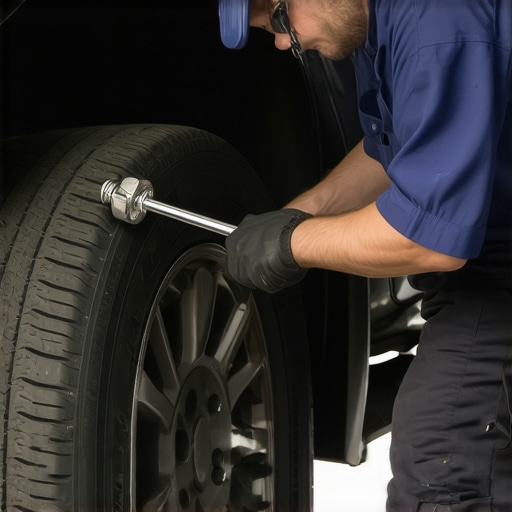
Many car owners operate under assumptions about auto repair that can compromise vehicle safety and lead to unnecessary expenses. One widespread misconception is that inexpensive or DIY fixes are always sufficient. While casual repairs can be effective for minor issues, trusting the smallest fix without proper diagnostics often masks underlying problems. For instance, a quick oil change without checking the health of the oil filter or examining the turbocharger can result in engine damage over time. Advanced vehicle diagnostics, such as discussed here, help identify hidden faults that simple repairs might overlook, preventing costly breakdowns.
Another mistaken belief is that all brake service involves just replacing pads. In reality, neglecting to inspect the rotors, calipers, and brake fluid can severely impair braking performance. Many think that once the pads look fine, the system is healthy. However, warped rotors or contaminated brake fluid are silent killers of brake reliability. This misconception is a trap that can lead to increased repair costs down the road. To understand the nuances of effective brake service, check out this article.
Are Modern Diagnostics Only About Code Reading, or Is There More?
Some believe that vehicle diagnostics are simply about pulling error codes from the ECU, but in reality, advanced diagnostics involve much more. Skilled technicians perform thorough easy checks and interpret data patterns to uncover issues like sensor malfunctions, wiring problems, or mechanical wear that isn’t always obvious through code alone. Relying solely on generic code readers can cause you to miss critical problems, risking breakdowns or safety hazards. Embracing true diagnostic expertise ensures that repairs address root causes, saving money and time.
Lastly, there’s the myth that oil changes are all about replacing the fluid—no more, no less. In fact, innovations like synthetic oils and high-technology filters have transformed how we maintain engines. Regularly scheduled oil changes, coupled with using the right products, can extend engine life significantly. Learn more about these innovations here.
Understanding these nuances and dispelling common myths allows you to make smarter, safer auto repair decisions. Remember, car maintenance isn’t just about quick fixes but about interpreting signals correctly and investing in proper diagnostics and quality parts. Have you ever fallen into this trap? Let me know in the comments.
< >
>
Tools I Recommend for Reliable Auto Maintenance
Having the right equipment is crucial for performing effective auto repairs and diagnostics at home. I swear by a high-quality digital multimeter like the Fluke 117, which provides precise readings of voltage, current, and resistance—indispensable for wiring checks and sensor diagnostics. For brake servicing, a torque wrench such as the CTS, calibrated to your vehicle’s specifications, ensures lug nuts are tightened correctly, preventing rotor warping. When it comes to oil changes, an oil filter wrench like the Lisle 58600 makes quick work of stubborn filters without damaging the housing. Investing in a good creeper allows you to work comfortably under the vehicle, reducing fatigue during long repair sessions.
My personal go-to for diagnostics is an OBD-II scanner with advanced features, like the BlueDriver Bluetooth Professional Scan Tool. It not only reads error codes but also provides real-time data and freeze frames, making troubleshooting far more efficient. As vehicle systems evolve, software like the RepairSolutions app can analyze repair histories and suggest the most effective fixes based on the symptoms you describe. Embracing these tools has streamlined my repair process, helping me save money and prevent minor issues from turning into costly breakdowns.
Where Auto Maintenance is Heading
The future points toward smarter, connected tools integrated with vehicle telematics. Cloud-based diagnostic platforms will give technicians and DIY enthusiasts instant insights into vehicle health, regardless of location. Augmented reality (AR) assistance is already emerging, guiding users through complex repairs with visual overlays. Staying updated with these innovations ensures you can keep your vehicle running smoothly and safely for years to come.
How do I keep my vehicle working well over time?
Regular maintenance is the cornerstone of vehicle longevity. Stick to scheduled auto repair strategies tailored for your driving habits, and don’t overlook the importance of comprehensive diagnostics for ongoing health checks. Use quality parts and precise tools, like those I mentioned earlier, to avoid temporary fixes that can cause long-term damage. For example, routinely inspecting your brake system with a professional-grade brake service guide helps spot issues before they escalate. Remember, consistent upkeep with the right tools isn’t just about immediate fixes; it’s about preserving your vehicle’s performance and safety over the years.
If you haven’t already, consider trying out an advanced diagnostic tool like the BlueDriver scanner. Its comprehensive data can reveal hidden problems, saving you from unexpected breakdowns. Regularly checking and maintaining vital components ensures your car remains dependable and efficient. For personalized advice or repairs, reach out through our contact page to connect with professionals dedicated to keeping your vehicle in prime condition.

Visualize the essential tools that make auto maintenance safer, more accurate, and less stressful—an organized toolbox with a digital multimeter, torque wrench, OBD-II scanner, and oil filter wrench, ready for any repair.
Lessons No One Tells You About Auto Maintenance
One of the most eye-opening realizations I had was how a simple oversight during a wheel swap can lead to costly rotor warping. I once hurriedly removed a wheel without supporting the rotor properly, and it hit the ground, causing subtle damage that only revealed itself during braking. That moment underscored the importance of patience and proper technique—lessons that saved me from repeating the mistake. Trust me, paying attention to seemingly small details can make a significant difference in your vehicle’s safety and longevity.
Another deep insight was realizing that even professional mechanics sometimes overlook the importance of re-torquing lug nuts after a brief drive. That slight oversight can loosen the lug nuts gradually, leading to uneven rotor seating and vibrations. Incorporating a second torque check after a few miles helped me avoid problems down the line, emphasizing the value of thoroughness over speed in maintenance routines.
Lastly, I discovered that understanding the subtle cues your car gives—like unusual vibrations or squeals—can serve as early warnings of rotor issues. Preventative measures, combined with a keen ear and eye, are your best tools. These insider tips have transformed how I approach vehicle care, proving that knowledge and patience are your greatest allies in auto maintenance.
My Trusted Resources for Auto Repair Confidence
Equipping yourself with the right tools and information is crucial. I swear by the advanced vehicle diagnostics guide—it helped me see beyond error codes, revealing issues that standard scans might miss. For tools, I rely heavily on a calibrated torque wrench like the CTS; precise tightening ensures even pressure, preventing rotor warping. Another must-have is a high-quality OBD-II scanner, like the BlueDriver, which provides detailed data to catch problems early. These resources have been instrumental in elevating my DIY repairs and ensuring my vehicle’s safety.
Additionally, staying updated with industry insights through reputable sites such as auto repair hacks has kept me informed about cost-effective techniques. For comprehensive understanding, the brake service guide is an invaluable resource that I revisit regularly. Combining practical tools with reliable information has transformed how I care for my vehicle, making repairs safer and more affordable.
Take Action and Keep Your Brakes Feeling Smooth
Remember, auto maintenance is a journey—not a one-time event. Embracing patience, continual learning, and the right resources ensures your vehicle remains safe and reliable for years to come. The next time you perform a wheel change or brake service, do it with confidence, knowing that small, deliberate steps protect your investment and loved ones. Are you ready to implement these insider tips and elevate your auto care routine? Share your experiences or questions below, and let’s grow together in knowledge and safety.