
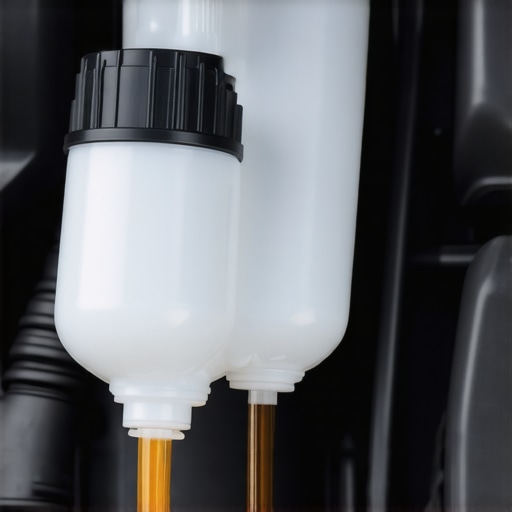
I vividly remember the day I first noticed it—driving home after a long day, I checked my brake fluid level, and it was just a tad lower than usual. At first, I brushed it off, thinking maybe I didn’t top it up properly during my last service. But over the next few weeks, that tiny decrease turned into a noticeable dip, and I hadn’t seen any puddles or visible leaks under my car. The mystery was real, and honestly, it was a bit unsettling. Have you ever faced that bewildering moment when your brake fluid seems to vanish into thin air, yet there’s no sign of a leak? If so, you’re not alone, and I want to share with you what I learned from my experience and how you can tackle this issue head-on.
Cracking the Code of Vanishing Brake Fluid
Is Your Brake Fluid Actually Disappearing?
Initially, I thought my brake system was somehow leaking through tiny cracks or loose hoses, but inspections turned up nothing. That’s when I stumbled upon the idea that brake fluid could be lost internally—something I didn’t realize was a thing. It turns out, the fluid can seep into the brake pads or rotors, especially if there’s brake caliper or seal deterioration, causing what’s known as *brake fluid absorption*. Instead of leaks, the fluid gets absorbed where it shouldn’t, leading to a loss without visible signs. Early on, I made the mistake of simply topping up the fluid without checking the underlying cause, which only delayed the real fix. Trust me, this is a common pitfall, and understanding it can save you a lot of trouble and money.
According to industry experts, internal absorption of brake fluid is a more common culprit than most drivers realize, particularly in vehicles with aging brake components (Read more about why brake fluid can disappear without evident leaks). Recognizing this subtle problem early is key to maintaining safe braking performance and preventing costly repairs down the line. So, are you experiencing similar mystery symptoms? If you’ve been scratching your head wondering why your brake fluid keeps dropping, it’s time to dig deeper.
Next, I’ll walk you through the practical steps I took to uncover the truth behind my vehicle’s mysterious fluid loss and what you can do to diagnose and resolve this issue effectively.
,
Inspect Brake Fluid for Internal Absorption
Start with a thorough visual check of brake components
Recall the time I found my brake fluid slightly low without any visible leaks. To diagnose, I first jack up the vehicle and remove the wheels for easy access. I examined the brake calipers, hoses, and master cylinder for any wet spots or cracks. I also looked at the brake pads and rotors for signs of oil or fluid infiltration, which can indicate fluid absorption. Think of this step as inspecting a sponge—if it looks dry on the outside but is soaked internally, you need to go deeper.
Use a Brake Fluid Test Kit
Confirm internal loss with diagnostic tools
Next, I employed a brake fluid test kit to analyze the fluid’s condition. These kits can detect moisture content and contamination that signal internal issues. I drew a small sample from the reservoir with the provided syringe and compared it against the guide. Elevated moisture levels mean the brake fluid has absorbed water or other substances inside the calipers or seals, confirming internal loss. This step is akin to checking a blood sample—small but revealing. For an in-depth understanding of vehicle diagnostics, see decoding vehicle diagnostics.
Dismantle and Examine Brake Components
Identify internal damage or deterioration
To get definitive proof, I removed the brake calipers and pistons, paying close attention to the rubber seals and piston walls. I looked for signs of corrosion, cracks, or swelling—things indicating that fluids had seeped into the seals and cause absorption. Remember, seals deteriorate over time, especially in humid environments, allowing the fluid to penetrate the brake pad material or caliper casting. Think of it like peeling an orange—sometimes, the insides are compromised even if the peel looks fine. If you’re uncomfortable with this step, considering a professional inspection can save you trouble.
Perform a Pressure Test to Confirm Internal Seal Leakage
Simulate brake system pressure to detect leaks
Applying pressure with a brake bleed kit or a pressure tester helps reveal leaks not visible to the naked eye. I connected the device to the master cylinder reservoir and gradually increased pressure, watching for drops in pressure that suggest internal leaks. If the pressure falls, the seals holding the brake fluid are compromised, causing it to escape into the calipers or rotor area. Picture it as inflating a rubber ball; if it deflates over time, the leak is inside the material. Regular pressure testing can prevent dangerous brake failure down the line, ensuring your safety on the road. For more detailed troubleshooting, visit advanced vehicle diagnostics.
Replace or Repair Damaged Components
Address internal seal deterioration effectively
Once you’ve confirmed internal absorption or seal failure, replacing the damaged calipers, seals, or brake pads is essential. In my case, I ordered OEM replacement parts and followed a step-by-step guide to disassemble and reinstall components, ensuring the new seals installed correctly. Use high-quality lubricants and make sure to bleed the brake system thoroughly afterward to remove air pockets. This manual effort can be compared to renovating a pipe—fixing the leaks inside rather than just patching the outside. Remember, proper repair not only stops fluid loss but restores optimal braking performance. For expert tips, check out brake service.
Reverify System Integrity and Prevent Future Loss
Implement ongoing inspection routines to catch early signs
After completing repairs, I reassembled everything and performed a final pressure test. The system held pressure well, confirming my fix. Regularly checking brake fluid levels and inspecting calipers and seals can prevent surprises. Think of this as wellness checkups—staying proactive preserves safety and saves money. Consider scheduling periodic professional diagnostics to catch issues early. For insights on maintaining your vehicle, see auto repair strategies.
Many car owners operate under misconceptions that can lead to costly mistakes. A prevalent myth is that all brake pads wear evenly and need replacement at the same time. In reality, uneven wear is common due to caliper issues or misaligned components, making it crucial to inspect each pad individually rather than relying solely on a mileage estimate. Additionally, a widespread misbelief is that routine oil changes alone guarantee engine longevity, but neglecting other factors like oil quality, filter condition, and engine load can undermine your engine’s health. Regularly consulting comprehensive guides, such as oil change innovations, ensures you’re not falling for oversimplified advice.
Are You Falling for the Biggest Auto Repair Trap? Think Again
One of the most insidious misconceptions involves thinking that diagnostic codes always point directly to the faulty component. While codes are helpful, they don’t tell the whole story, and relying solely on them can mislead even seasoned technicians. For example, a misfire code might stem from spark plug issues, but it could also indicate vacuum leaks or fuel system problems. This is why advanced diagnostics, such as vehicle diagnostics explained, are invaluable. Overlooking nuances like these can cause you to replace parts unnecessarily or miss deeper problems, costing you time and money. Don’t fall into this trap—understanding the nuances of diagnostics is an expert skill that saves you from costly errors. Have you ever fallen into this trap? Let me know in the comments.
Another often-overlooked aspect is the importance of proper torque when tightening fasteners during repairs. Using a wrench without a torque specification might seem harmless, but overtightening can stretch or break components, while under-tightening risks leaks or failures. Advanced technicians use torque wrenches precisely calibrated to vehicle specifications, underscoring the importance of nuance in repair practices. Skipping this step is a rookie mistake that can compromise safety and durability. To learn more about effective repair techniques that prevent costly mistakes, check auto repair hacks.
In summary, genuine expertise involves recognizing complex realities beyond surface-level fixes. Challenging common myths and understanding the little nuances—like how internal seal deterioration mimics leaks or how diagnostic codes can mislead—are key to performing accurate, safe, and cost-effective repairs. Let’s dig deeper into these subtleties to keep your vehicle running smoothly and safely for years to come. Want to explore more such advanced insights? Visit us at contact us for personalized guidance.
Keep Your Car in Top Shape with the Right Equipment
Maintaining a vehicle isn’t just about knowing what to do; it’s about having the precise tools that allow you to diagnose and fix issues efficiently and confidently. Over the years, I’ve refined my toolkit, investing in equipment that saves time, improves accuracy, and extends vehicle lifespan. For example, I swear by a high-quality digital multimeter like the Fluke 117, which offers dependable voltage readings crucial for electrical diagnostics, especially when testing sensors or alternators. When it comes to brake work, a reliable brake caliper piston tool, such as the Mityvac Brake Bleeder Kit, has been invaluable in ensuring proper brake fluid flow and system bleeding without sacrificing quality.
Why I Trust My Diagnostic Computer
One essential piece is my scan tool. I use a professional-grade OBD-II scanner like the BlueDriver Bluetooth Pro, which connects seamlessly to my smartphone. This device not only reads codes but also provides detailed data and live sensor graphs, helping me pinpoint issues rapidly. Because modern cars are increasingly complex, having a diagnostic tool that interprets manufacturer-specific codes accelerates troubleshooting and prevents unnecessary part replacements. If you’re serious about auto maintenance, investing in a reputable scanner can pay for itself quickly, as discussed in decoding vehicle diagnostics.
Smart Techniques for Ongoing Maintenance
An old saying goes, “A stitch in time saves nine,” and that applies to vehicle care. Regularly checking your brake fluid, engine oil, and coolant levels with precise tools ensures early detection of issues. I use a digital refractometer to measure engine coolant concentration, which prevents corrosion and overheating. Similarly, a borescope inspection camera helps me peer into hard-to-access engine internals during routine checks, catching wear before it becomes costly. These tools empower me to perform proactive maintenance, which not only extends component lifespan but also reduces emergency repairs. For detailed strategies, see auto repair hacks.
When It’s Time to Scale Up Your Repairs
For complex projects, especially engine rebuilds or brake system overhauls, I turn to professional-grade equipment like a torque wrench that calibrates to exact specifications—vital for safe and effective repairs. I prefer a digital torque wrench that logs each torque setting, ensuring consistency across fasteners, which reduces the risk of over-tightening or under-tightening. As vehicles become more sophisticated, automakers increasingly specify torque values for safety-critical parts, and using these tools is non-negotiable for durability. Expect the trend to evolve toward wireless diagnostic tools and AI-assisted repair guides that simplify even the most complicated jobs, making professional-level maintenance accessible to hobbyists.
How do I maintain diagnostic tools over time?
Calibration and regular updates are key. I routinely update my scan tool’s firmware to stay compatible with the latest vehicle models and fix bugs. Calibration of my multimeter and torque wrench is scheduled annually using certified standards, preventing measurement drift that could lead to incorrect repairs. Proper storage—keeping devices in protective cases and away from extreme temperatures—also prolongs their lifespan. Investing in quality tools with manufacturer support ensures you’ll have reliable equipment for years to come. Check manufacturer guidelines and review forums like vehicle diagnostics explained for tips on maintaining your gear. Try calibrating your torque wrench this week—the peace of mind it brings during critical repairs is worth the effort!
Throughout this journey into understanding brake fluid mysteries and diagnostics, I’ve uncovered some invaluable lessons that go beyond surface-level fixes. First, never assume that a lack of visible leaks means your brake system is perfectly sealed; internal absorption and seal deterioration can silently compromise safety. Second, investing in quality diagnostic tools isn’t just a convenience—it’s a safeguard that prevents costly mistakes and unforeseen breakdowns. Lastly, embracing proactive maintenance and learning to interpret the subtle signs your vehicle gives you can turn routine checkups into powerful preventive strategies, ensuring longevity and reliability.
The Sneaky Traps That Slow Your Repair Confidence
- Assuming leaks are always visible: I once replaced brake pads thinking a leak was the issue, only to find later that internal seal failure was the culprit—all without any fluid on the ground. Don’t fall into this trap; internal fluid absorption is more common than most realize.
- Relying solely on diagnostic codes: Codes can mislead, especially if you don’t interpret them in context. I learned that a misfire code might not just be the spark plug but could hint at vacuum leaks or internal seal breaches—investigate further before replacing parts.
- Neglecting seal maintenance: Rubber seals degrade over time, and if overlooked, they can cause internal fluid loss. Regular inspection and timely replacement save headaches and money.
Tools and Resources That Make a Difference
- OEM-quality replacement parts: Ensuring you use original or high-quality seals and calipers can dramatically improve repair longevity. I trust OEM parts because they match the specifications perfectly.
- Advanced diagnostic equipment: A reliable OBD-II scanner like BlueDriver has been a game-changer in quickly pinpointing issues and understanding system data deeply. Proper tools turn guesswork into certainty.
- Educational guides and tutorials: Staying informed through trusted sources like vehicle diagnostics explained helps me navigate complex repairs confidently and efficiently.
- Regular preventive checks: Routine inspections, including pressure tests and seal examinations, have saved me from emergency breakdowns. Think of it as health checkups—preempt problems before they escalate.
Fuel Your Repair Drive with a Passion for Learning
Taking charge of your vehicle’s health isn’t just about fixing problems—it’s about cultivating a mindset of continuous learning and curiosity. Remember, the roads are safer when you’re informed, prepared, and proactive. Every repair, every inspection, and every upgrade is a step toward mastering your vehicle and, ultimately, yourself. So gear up, stay curious, and keep pushing the boundaries of what you can maintain and improve in your car’s lifespan. Ready to dive deeper? Explore our personalized guidance and keep your automotive confidence high!
What’s Your Next Challenge? Share Your Story
Have you ever encountered a hidden brake system issue that caught you off guard? How did you resolve it? Let me hear about your experiences below—your story might just help someone else avoid the same pitfalls!
,