
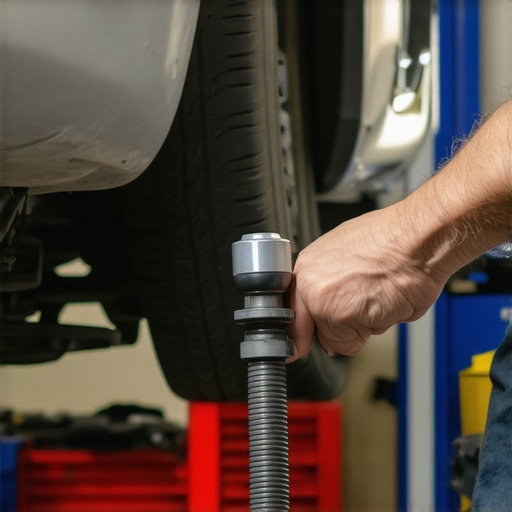
Have you ever been on a drive when your steering suddenly feels off—like the wheel is fighting you or there’s a mysterious looseness? I remember the day my car started to shimmy, and I felt a knot tighten in my stomach. It hit me then—if I didn’t check those ball joints, I might be facing a costly, dangerous repair down the line. That moment was a lightbulb, reminding me how crucial it is to catch issues early, not ignore them until it’s too late.
The Simple Test That Can Save You a Trip to the Shop
Will This Pry Bar Trick Really Spot Bad Ball Joints?
Early on, I made the mistake of assuming a little play in the wheel was normal—until I learned that nothing should wiggle significantly when tested properly. Using a pry bar to check your ball joints is a game-changer. It’s affordable, straightforward, and gives you peace of mind. In this post, I’ll walk you through how to perform this quick check, so you can assess whether your suspension is still solid or if a visit to the mechanic is inevitable.
According to industry experts, failing ball joints can lead to uneven tire wear and even loss of control—making this simple diagnosis an essential part of routine maintenance (auto repair hacks). By mastering this test, you take control of your vehicle’s safety and avoid those surprise breakdowns that always seem to happen at the worst moment.
Is Checking Your Ball Joints with a Pry Bar Worth It?
Some skeptics worry about whether a DIY test like this can truly tell them what’s going on. I get it—many of us fear missing something or causing damage. That’s why I’m honest: a visual inspection is good, but feeling is believing. I once misdiagnosed a suspension issue because I didn’t test thoroughly—leading to unnecessary repairs. Learning from that mistake, I now rely on a simple pry bar check to confirm the health of my ball joints, saving time and money. If you’ve faced steering quirks or uneven tire wear, this technique could help you pinpoint the problem early, before it turns into a crisis. Ready to learn how to do this test properly? Let’s dive into the step-by-step process that’s helped countless DIYers just like you keep their vehicles safe and smooth-running.
Position Your Vehicle Safely and Prepare Your Tools
Park your car on a flat surface, engage the parking brake, and chill out in a well-lit area. You’ll need a pry bar, preferably about 18 inches long, and safety gloves. Think of this as setting up your weapons for a quick, decisive strike against suspension issues—like preparing tools for a barbecue, but for auto diagnostics.
Lift the Vehicle for Better Access
Use a jack to raise the front of your vehicle, and place jack stands under the frame for stability. Never rely solely on the jack—it’s like holding a ladder with one hand while working with the other. Ensure the tires are off the ground and remove the wheels to access the suspension components fully.
Locate the Ball Joints
Find the ball joints connecting the steering knuckles to the control arms. Visual identification is straightforward; they look like rounded pivot points. Reference a repair guide if you’re unsure. Knowing their precise location is like knowing where the heart of the suspension lies—it’s critical for accurate testing.
Perform the Pry Bar Test
Place the end of the pry bar against the ball joint’s socket or the control arm near the ball joint. Gently apply upward and downward pressure. If there’s any noticeable movement or play—more than about 0.1 inches—you might have a worn or failing ball joint. Imagine testing a door hinge—if it wiggles, it’s time for a replacement.
Be Gentle and Precise
Apply controlled force; don’t yank or jerk. Excessive pressure could damage the joint or surrounding components. This is akin to giving a handshake—firm but careful. Remember, a little movement might be okay, but significant play indicates a problem.
Repeat on Both Sides
Conduct the same test on the opposite side for comparison. If one side shows excessive play while the other doesn’t, focus your attention there. Consistency in your testing approach ensures accurate diagnosis, much like calibrating a scale before weighing.
Assess Your Findings
If you detect play, it’s likely time to visit a mechanic or consider replacing the ball joints yourself if you’re comfortable with DIY projects. Regularly performing this test can save you from unpredictable steering issues or tire wear. Remember, this pry bar method is a quick, reliable indicator—think of it as your vehicle’s health checkup between professional inspections (auto repair hacks).
Practice Safety and Keep Learning
Always prioritize safety: wear gloves, eye protection, and use jack stands correctly. Over time, these checks become second nature, empowering you to catch suspension issues early. Keep your vehicle in top shape and enjoy peace of mind on every drive.
 Many car owners believe that DIY repairs and basic diagnostics are simple tasks, but in reality, there’s a lot more nuance involved. One prevalent misconception is that a visual inspection alone suffices to diagnose suspension or brake issues. However, experts emphasize combining visual cues with functional tests—like the pry bar check—to accurately assess component health. Relying solely on appearance risks missing internal wear or latent problems that could cause safety hazards later. This pitfall often leads to incomplete repairs or unnecessary part replacements. Moreover, there’s a widespread myth that newer vehicles require less maintenance. While advancements in technology have extended intervals between services, neglecting regular checks—such as oil changes—can accelerate component wear and compromise safety. Remember, innovations like synthetic oils and diagnostic systems actually demand a good understanding of their proper application to avoid misuse. A common advanced mistake involves misinterpreting diagnostic trouble codes (DTCs). Many assume that reading a code pinpoints the exact issue, but without proper context or additional testing, this can mislead even experienced DIYers. Experts recommend cross-referencing DTCs with factory service information or reputable online guides before proceeding.
What are the dangers of neglecting calibration after component replacement?
Post-repair calibration—like resetting electronic systems or sensor adjustments—is often overlooked, especially by amateurs. Failing to recalibrate can lead to inaccurate readings, reduced fuel efficiency, or even safety system malfunctions. For example, replacing an ABS sensor without proper recalibration may cause warning lights or compromised stopping performance. To avoid these pitfalls, stay informed about your vehicle’s specific calibration needs, especially when working on critical safety or performance components. As highlighted by industry specialists, proper calibration is integral to ensuring that advanced systems function correctly and that repairs last longer. For more insights on avoiding costly mistakes, review our guide on top auto repair tips to extend your vehicle’s lifespan. Don’t forget—always approach repairs with a critical eye and seek professional advice when unsure. Have you ever fallen into this trap? Let me know in the comments.
Investing in Quality Tools for Long-Term Reliability
To maintain your vehicle effectively, having the right tools is crucial. I personally swear by a high-quality digital multimeter because it provides quick, accurate readings of electrical components like sensors and fuses. For example, when diagnosing a mysterious engine light, my multimeter helps pinpoint faulty wiring or sensors, saving me a trip to the shop. Additionally, a reliable torque wrench ensures parts like brake calipers are tightened to manufacturer specifications, preventing premature wear or failure.
Rather than relying on cheap, generic tools, I recommend investing in brands like Snap-on or Craftsman. They offer durability and precision, reducing the risk of damaging vital components during maintenance. For software, OEM-specific diagnostic apps and modules are invaluable, especially when troubleshooting complex issues or resetting systems after repairs. Tools like the Autel Maxidas MS509 have become my go-to devices for interpreting diagnostic trouble codes, providing insights that are often missed with generic scanners.
Embracing Modern Technologies to Enhance Maintenance
Technology in auto repair is evolving rapidly. Incorporating OBD-II diagnostic scanners connected to your smartphone through Bluetooth apps can dramatically streamline troubleshooting. I use the BlueDriver scanner combined with their app, which offers detailed explanations of trouble codes and recommended fixes. This setup enables me to monitor real-time data like engine temperature or oxygen sensor performance, informing maintenance decisions like fluid changes or component replacements.
Looking ahead, AI-driven diagnostic tools are poised to become standard in personal garages. These systems analyze sensor data and predict failures before symptoms appear, ushering in a new era of proactive vehicle care. Staying ahead requires adapting to these innovations, which can ultimately reduce breakdowns and repair costs.
How do I maintain my vehicle’s diagnostics over time?
Routine software updates for your diagnostic tools are vital to ensure compatibility with new vehicle models and firmware. Regularly clearing diagnostic trouble codes after repairs can prevent false alarms or outdated error logs from complicating future diagnostics. Also, periodically testing sensors with a multimeter or specialized software helps confirm they’re functioning correctly. For a comprehensive approach, I follow a schedule documented in automotive industry guides, such as top auto repair tips, which emphasizes scheduled monitoring and preventative maintenance.
Scaling Your Vehicle Care from DIY to Pro-Level
As you gain confidence and gather reliable tools, scaling your maintenance routine becomes feasible. I recommend documenting your procedures and outcomes, which guides future repairs and helps identify recurring issues. When tackling tasks like oil changes, brake inspections, or diagnostics, use platforms like oil change innovations to stay informed about new techniques and equipment that can save time and extend engine life.
Remember, maintaining your vehicle isn’t just about quick fixes—it’s about building a long-term strategy. Incorporate quality tools, stay current with technological advancements, and keep a detailed maintenance log. This approach ensures your vehicle remains reliable, safe, and cost-effective over the years. For example, using a precision torque wrench during brake pad replacement prevents uneven wear, which can lead to costly rotor damage.
Try Out an Advanced Maintenance Tip Today
One simple yet powerful way to enhance your diagnostics is to regularly check sensor voltages with a multimeter. This proactive step allows early detection of sensor degradation, preventing many common issues. Remember, a little investment in the right tools and knowledge today pays off in long-term vehicle health.
Interested in expanding your skills? Visit auto repair hacks for more insights on affordable, effective maintenance strategies that keep your vehicle running smoothly.
What I Wish Someone Told Me About Auto Repairs
Early in my DIY journey, I assumed that surface-level inspections were enough—until I experienced a sudden steering wobble that no visible part could explain. It was a lightbulb moment: truly understanding your vehicle’s inner workings requires digging deeper and embracing the complexities, not shying away from them. The biggest lesson I learned: patience and detailed testing save money and prevent dangerous mishaps.
Another insight I uncovered is that tools are investments, not expenses. Relying on quality diagnostics like a good multimeter or OEM software means fewer guesswork moments and more confident repairs. Don’t underestimate the power of solid resources—learning from trusted sources like industry experts can drastically elevate your repair skills.
Finally, I realized that consistency beats intensity. Regular checks using techniques like the pry bar test or sensor voltage measurements keep surprises at bay. Developing a routine keeps your vehicle healthy and your confidence high, transforming car maintenance from a chore into an empowering hobby.
My Go-To Gear for Car Fixing and Diagnostics
For serious diagnostics, I swear by the Autel Maxidas MS509. Its comprehensive code reading and live data capabilities let me understand complex issues quickly—saving trips to the mechanic. Additionally, a durable precision torque wrench helps me tighten critical components to exact specs, extending their lifespan.
My toolbox wouldn’t be complete without a top-tier digital multimeter. Being able to verify sensor voltages or test electrical circuits means I can confidently tackle issues like poor engine performance or warning lights.
Beyond hardware, I trust industry manuals and online communities for up-to-date information. Resources like top auto repair tips are invaluable for staying ahead of maintenance needs and understanding complex diagnostics.
Seize Control and Keep Your Car Running Smoothly
Taking charge of your vehicle’s health isn’t just about saving money; it’s about safety and peace of mind. Every time you perform a check or a simple repair, you build a better understanding of your car—transforming you from a mere owner to a skilled DIYer. Embrace the challenge, learn from mistakes, and watch your confidence grow.
What’s the next repair or diagnostic step you’re excited to learn? Let me know below and share your experiences—your journey could inspire others to start their own auto maintenance adventure!
.