
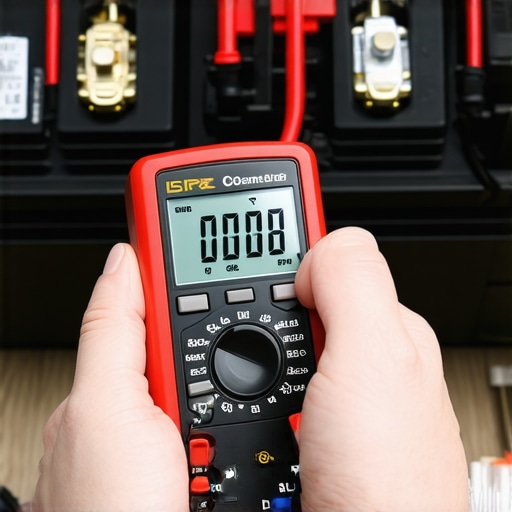
Ever had that sinking feeling when your car refuses to start on a chilly morning, and you wonder if your battery is giving up? I remember the first time it happened to me — standing in my driveway, keys in hand, frustration mounting, realizing I had no idea how to actually check if my battery was still healthy. That lightbulb moment made me realize something: testing your battery doesn’t have to be complicated or costly. In fact, with just a simple tool—a multimeter—you can get a pretty accurate idea of your battery’s health without.service appointments or expensive diagnostics.
The Ultimate DIY Hack for Battery Check-Ups
If you’re tired of guesswork and want to take control of your vehicle’s maintenance, today we’re diving into a straightforward way to test your car battery using a multimeter. This method is quick, inexpensive, and surprisingly reliable once you know what to look for. I’ll share my personal experience, common pitfalls to avoid, and how this little trick can save you time and money in the long run. Whether you’re a seasoned DIYer or a complete newbie, you’ll find this guide approachable and empowering. Ready to hear how I finally mastered this simple test? Let’s get started!
Is Checking Your Battery with a Multimeter Really Worth It?
Initially, I hesitated. I thought, “Is this really necessary?” and almost dismissed it as too technical. Spoiler: the mistake I made early on was assuming that if my car started, the battery was fine. Turns out, a fresh start isn’t always a sign of good health. According to automotive experts, a multimeter can reveal underlying issues before they cause embarrassing breakdowns or costly repairs. It’s a small step that offers big peace of mind.
So, if you’ve ever felt uncertain about the status of your battery or just want to avoid being stranded, let’s walk through the simple process together. By the end of this, you’ll be equipped with a practical skill and a clearer understanding of what your car needs. And if you’ve faced that problem—your car sluggish to start or dim headlights—you’ll want to keep reading. Trust me, this little tool can become your new best friend on your auto care journey.
Before we get into the step-by-step instructions, remember: always follow safety precautions when working with your vehicle’s electrical system. And should you need expert assistance, don’t hesitate to reach out via our contact page.
this straightforward test is a game-changer, especially if you want to be proactive about your car’s health instead of reacting when it’s too late. Now, let’s move into the practical steps so you can start assessing your battery today.
Prepare Your Tools and Vehicle
First, gather a digital multimeter—these are affordable and easy to use—and park your vehicle on a level surface. Turn off the engine, remove the keys, and open the hood. Wear gloves and safety glasses for protection. I remember the first time I did this, I accidentally brushed against the battery terminals and got a small spark—always safety first. Make sure the multimeter is set to measure DC voltage, typically indicated by a ‘V’ with a straight line and dotted line beneath it. These initial preparations set the stage for an accurate reading and personal safety.
Inspect the Battery Visually for Clues
Before testing, look for any obvious signs of trouble: corrosion on terminals, cracks, or leaks. If you see corrosion—white or blueish deposits—it’s like a build-up of plaque in arteries, blocking proper function. Clean it using a mixture of baking soda and water with a wire brush; this improves contact and measurement accuracy. This visual check is quick but vital. I once skipped this step and got a misleading low voltage reading because of corrosion interfering with the multimeter’s probes. Don’t make that mistake—inspect and clean first.
Set Up for Measurement
Set your multimeter to measure DC volts, with a range of at least 20V. Identify the positive (+) and negative (−) terminals on your battery—positive usually has a red cover or cable, negative is black. Connect the red multimeter lead to the positive terminal and the black lead to the negative terminal. It’s straightforward, like connecting a positive and negative wire, but double-check each connection to avoid false readings. I remember the first time I reversed the leads—my reading was off, and I almost thought my multimeter was broken—so take your time.
Take the Voltage Reading
With everything in place, read the voltage displayed on your multimeter. A healthy, fully charged car battery should read around 12.6 volts or slightly higher. If the reading is below 12.4V, your battery might be aging or discharged. During testing, I once got a reading of 11.8V after leaving the lights on overnight—an obvious sign my battery needed replacement. Use this specific value as a benchmark—anything lower indicates potential trouble ahead.
Assess the Voltage and Plan Your Next Step
If your reading is between 12.4V and 12.6V, your battery is likely okay but could benefit from a charge or load testing. Above 13V with the engine running indicates your charging system is functioning properly. If it drops significantly while engine is on—say, under 13V—your alternator could be the culprit, which might require diagnostic checks like vehicle diagnostics to identify the issue. During my own experience, I once saw 13.8V with the engine running, confirming my alternator was working but my battery was just a bit weak.
Final Checks and Safety Tips
When finished, disconnect the multimeter leads in reverse order—black first, then red—to avoid sparks. Reassemble any covers or terminals you removed. Always store your multimeter safely and consider performing this test periodically—like a quick health check—so you can catch issues early. Remember, this process is quick but powerful. Regular testing saves you from being stranded and can extend your vehicle’s lifespan by catching problems before they escalate.
For more insights on vehicle maintenance, explore top auto repair tips that can keep your vehicle running smoothly for years. If you encounter persistent issues, don’t hesitate to contact professional auto repair specialists for a thorough diagnosis.
When considering auto repairs, many assume that basics like brake service or oil changes are straightforward, universally understood tasks—yet, beneath the surface lies a web of nuanced pitfalls and misconceptions. One common myth is that all brake pads wear out at the same rate; in reality, driving habits, vehicle weight, and even climate influence their longevity. Overlooking these factors can lead to unnecessary replacements or, worse, safety risks. Similarly, many drivers believe that frequent oil changes are solely about engine cleanliness, but advanced formulations and treatment intervals have evolved, making less frequent changes viable—if done correctly, as per manufacturer specifications more on this here. An often-ignored nuance is vehicle diagnostics: some assume that when the check engine light turns on, a quick scan will suffice. However, the complexity of onboard diagnostic systems and the potential for false positives mean that a complete understanding requires deep knowledge of sensor interactions and proper interpretation, which professional technicians master explained well in this article.
How do I maintain my vehicle over time? Explore essential tools and routines to ensure your car remains reliable on the road. One standout tool I use personally is a high-quality OBD-II scanner like the OBD-II scanner. Unlike generic code readers, this device offers deep diagnostic insights, enabling me to identify issues like pending sensor failures before they trigger warning lights or cause breakdowns. I prefer models with Bluetooth connectivity and companion apps—these make live data interpretation straightforward and portable, perfect for on-the-go troubleshooting. Predicting future trends, I believe integrated diagnostics and AI-powered monitoring systems will become standard, providing real-time health assessments and maintenance reminders without manual scans.
Maintaining your vehicle’s health isn’t just about a one-time check but ongoing vigilance. Regular auto maintenance routines like oil changes, brake inspections, and fluid level checks form the backbone of longevity. For example, changing your oil with the latest synthetic formulations can extend drain intervals significantly, saving you time and money—details about which are shared in this comprehensive guide. Additionally, investing in quality tools such as a torque wrench ensures fasteners are tightened properly, preventing component wear or safety hazards, especially when replacing brakes or tightening suspension parts. />
What I Wish I Knew When I Started Testing My Car Battery
- Donʼt assume a car that starts is necessarily healthy—initially, I overlooked the nuances of voltage readings, leading to unexpected breakdowns. I learned that understanding the specific voltage ranges can save me hours of troubleshooting.
- Trust your tools—investing in a quality multimeter and knowing how to interpret its readings transformed my approach to car maintenance from guesswork to confidence.
- Visual inspections matter—cleaning corrosion and checking for physical damage can significantly improve measurement accuracy and prolong your battery’s life.
- Regular testing is a game-changer—setting a schedule to check your battery allows early detection of issues, avoiding inconvenient breakdowns.
- The biggest lesson? Proactive care beats reactive repairs—simple tools like a multimeter empower you to stay ahead of potential problems before they escalate.
Tools and Resources That Changed My Maintenance Routine
- Digital Multimeter: Reliable and affordable, itʼs my go-to for accurate voltage readings. I recommend models with auto-ranging features for ease of use.
- Automotive Cleaning Supplies: A wire brush and baking soda mixture are indispensable for removing terminal corrosion, ensuring better contact and measurement accuracy.
- Vehicle Maintenance Guides: Books like “Auto Repair for Dummies” provided foundational knowledge, making DIY checks more understandable and effective.
- Online Tutorials and Forums: Platforms where enthusiasts share tips, troubleshooting guides, and personal experiences—these have been invaluable for practical insights.
Embrace the Journey: Your Car’s Health Is Within Reach
Taking control of your vehicle’s health through simple battery testing is one of the most empowering steps. It’s a small investment of time with huge peace of mind—so why not start today? Remember, proactive auto care doesn’t just save money; it keeps you safely on the road. Ready to become your own mechanic?
Have you ever struggled with diagnosing your car’s battery? Share your experiences below—I’d love to hear your stories!