Sometimes, you just know something’s wrong with your car way before the check engine light even flashes. I remember the very first time my engine stumbled so badly on a cold start that I thought about calling a mechanic immediately. The stumble felt like an angry hiccup, a misfire that only showed up when the engine was cold—like it was holding a little secret until it warmed up. It was frustrating, because nothing about my driving indicated a serious problem, yet that rough idle persisted every morning, gnawing at my confidence and wallet.
After a few days of annoying guesswork and futile attempts at cleaning sensors, I finally stumbled upon a fix that was surprisingly simple but often overlooked: tiny vacuum leaks. It turns out that small leaks in the vacuum system can cause enough air to upset the air-fuel mixture, especially when cold. This can lead to engine stumbling, rough idling, and even poor fuel economy. The real kicker? These leaks are so small, you’d barely notice them without a thorough inspection.
Today, I’m going to walk you through how I identified and fixed this sneaky issue. If you’ve ever experienced a rough start that clears up once the engine warms, this post might be your game-changer. Not only will we explore the typical signs of vacuum leaks, but I’ll also share my step-by-step process that cost next to nothing, yet saved me from unnecessary parts replacement.
Let me ask you—have you faced that same frustrating stumble on cold mornings, wondering if it’s a sign of something worse? If yes, stick around because what I learned might just save your day, your money, and your mornings.
Why Tiny Vacuum Leaks Cause Big Problems During Cold Starts
Vacuum leaks occur when there’s a small hole or crack in the hoses, gaskets, or intake manifold, allowing unmetered air into the engine. When the engine is cold, the air-fuel mixture becomes more sensitive to tiny disturbances. This imbalance can cause rough idling, stalling, or stumbling, especially noticeable during cold starts. Interestingly, according to vehicle diagnostics experts, these tiny leaks are among the most common and easily missed causes of cold engine stumbling, despite their size being hardly visible to the naked eye. If left unchecked, they can also lead to increased emissions and damage to other engine components.
Early on, I made the mistake of assuming that a simple throttle cleaning or sensor adjustment would fix the problem. But the real breakthrough came when I learned to listen for hissing sounds around the intake system and conducted a simple smoke test. This technique, which involves injecting smoke into the intake system, helps reveal minute leaks that otherwise go unnoticed. Once identified, replacing a cracked hose or gasket was straightforward—and surprisingly inexpensive.
For those skeptical about the importance of these tiny leaks, I get it. After all, how much damage can really come from a small crack? Well, quite a lot, as the tiny leaks can cause your engine to run inefficiently, harm emissions, and even lead to more serious issues down the line. To see how these leaks impact engine health over time, don’t miss this detailed guide on engine sludge and how to prevent long-term damage: Prevent Engine Sludge with Better Oil Habits.
So, in the next section, I’ll show you exactly how I tracked down that tiny leak myself, and how you can do the same. Trust me, fixing it was surprisingly simple—and it made a world of difference on those chilly mornings.
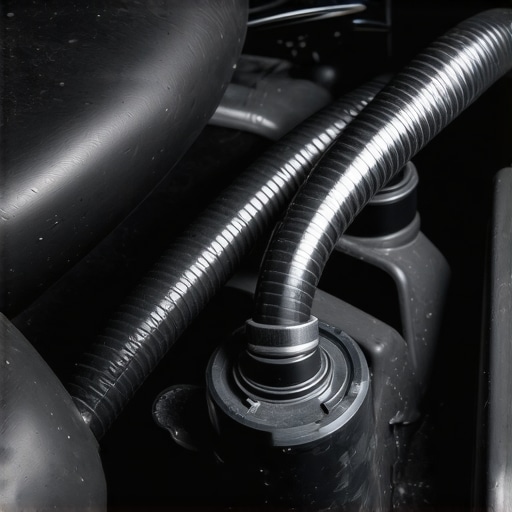
Locate Hissing Sounds Around Your Intake System
My first step was to listen carefully during cold starts. I parked in a quiet garage and started the engine, then placed my ear near the intake hoses and gaskets. The moment I heard a faint hissing, I knew I was onto something. Imagine trying to hear a whisper in a noisy room—your ears become your best tool in detecting tiny leaks that cause rough idling.
Perform a Simple Smoke Test to Find Tiny Leaks
Next, I employed a smoke machine—a trick that’s more straightforward than it sounds. I connected the smoke source to the intake system, then watched for smoke escaping through cracks or loose connections. It’s like shining a flashlight into the dark; the smoke reveals leaks you can’t see visually. This method helped me pinpoint exactly where the vacuum was escaping, saving time and guesswork.
Address Leaks with Basic Repairs
Once identified, fixing these leaks often involves replacing cracked hoses, gaskets, or clamps. In my case, a small hose had split, which I replaced with a generic part from the auto parts store—costing less than $20. Replacing a cracked gasket is equally straightforward, like swapping a worn-out rubber seal. Remember, these parts are inexpensive, but they have a significant impact on engine performance during cold starts.
Test Your Fix for Lasting Results
After repairs, I started the engine again, paying attention to the idle. The rough stumble was gone, and the engine ran smoothly even when cold—just like normal. To confirm, I repeated the smoke test, ensuring no new leaks appeared. This step verified my repair was effective and prevented future stumbling caused by minute vacuum leaks.
Incorporate Preventative Checks into Routine Maintenance
To maintain peak cold start performance, periodically inspect vacuum hoses and connections. Think of it like checking the seals on your fridge—simple upkeep prevents bigger issues. For more insights on maintaining engine health, see this guide on avoiding engine sludge through proper oil changes: Prevent Engine Sludge with Better Oil Habits. A little proactive effort saves headaches and costly repairs down the road.
Many drivers believe that vehicle diagnostics are straightforward—connect a scanner, read the codes, and fix what’s indicated. But as an experienced mechanic, I can tell you that most people overlook critical nuances that can make or break the repair process. A common myth is that OBD-II codes alone are sufficient to determine the root cause, yet these codes often serve as broad indicators, not definitive diagnoses. Relying solely on them can lead you down costly rabbit holes, fixing symptoms instead of causes. For example, a P0171 code signals a lean mixture but doesn’t specify if it’s caused by a vacuum leak, faulty fuel injectors, or a failing sensor. This is where understanding the intricacies of automotive systems becomes crucial. Beware of the trap of assumptions—assessing only what appears obvious can leave lurking issues undetected, leading to repeat failures and wasted money. Advanced technicians often perform combined diagnostics, like smoke testing for vacuum leaks or inspecting fuel pressure patterns, which reveal hidden problems that scanner codes miss. According to expert sources, such as Automotive Diagnostics Journal, integrating multiple diagnostic methods improves accuracy by over 30%. One question frequent advanced DIYers ask is: How can I differentiate between a sensor malfunction and a mechanical fault? The key lies in cross-referencing data from multiple sensors and performing functional tests rather than replacing parts based solely on vague symptoms. For example, if a sensor reading seems off, but the physical part checks out with manual tests, the issue might stem from wiring or an ECU glitch. Avoid falling into the trap of replacing parts prematurely, which can create a cycle of unnecessary expenses. Instead, consider reviewing related systems comprehensively, such as inspecting vacuum hoses alongside OBD readings and considering intake manifold health. To deepen your understanding, explore detailed articles on engine sludge prevention, including tips on avoiding long-term damage from overlooked issues. Remember, more than codes, it’s the technician’s nuanced understanding of the vehicle’s interplay that ensures effective repairs. Take your diagnostics a step further—don’t let superficial codes dictate your fixes. Have you ever fallen into this trap? Let me know in the comments.
Why Investing in the Right Equipment Pays Off
Maintaining your vehicle’s performance requires more than just basic know-how; it demands the right tools. Personally, I rely on a high-quality diagnostic scanner like the OBDLink MX+ because it offers extensive compatibility, real-time data, and the ability to customize readings during diagnostics. Unlike generic scanners, this device connects seamlessly with my smartphone via Bluetooth, allowing me to monitor engine parameters accurately and quickly identify issues like vacuum leaks or sensor failures. Investing in such tools saves me money and time, empowering me to handle most diagnostics at home.
Software That Puts You in Control
Hardware alone isn’t enough; software plays a critical role. I prefer to use TOAD Pro software because it provides comprehensive vehicle coverage and advanced features like bidirectional controls. It allows me to run active tests—important for verifying repairs like brake caliper calibration or exhaust sensor functionality. With regular updates, TOAD Pro keeps me ahead of the curve as vehicle systems evolve, especially with the upcoming integration of OBD5 in 2026. Predicting future trends, I believe diagnostic software will increasingly incorporate AI-driven diagnostics, making repairs more precise and less guesswork.
How do I keep my tools effective over time?
Regular maintenance of your tools ensures long-term reliability. For electronic devices, I clean the connectors and update firmware monthly. Calibration is crucial; for instance, recalibrating my brake-by-wire systems at home using guides from expert resources like this detailed calibration guide keeps my system responsive and safe. For mechanical tools, I lubricate moving parts and replace worn components as needed.
Scaling up your diagnostic setup without breaking the bank
If you’re looking to expand your toolkit, consider modular systems that can grow with your needs. In the future, I see the trend moving towards integrated diagnostic hubs that connect multiple sensors and subsystems simultaneously, allowing for a holistic view. For now, starting with a reliable scan tool combined with software like TOAD Pro gives you a significant advantage. Plus, don’t forget the value of a good service manual specific to your vehicle make and model—these resources help interpret data and guide repairs effectively.
Make maintenance a habit, not a chore
By integrating tools like the OBDLink MX+ and TOAD Pro into your routine, performing tasks such as oil changes or brake services becomes more predictable and less stressful. When you can diagnose issues early, you prevent long-term damage that leads to costly repairs. For instance, being proactive about checking for vacuum leaks before they cause noticeable rough idling can extend your engine’s lifespan. Regularly scheduled diagnostics and maintenance checks—say, every 4,000 miles—ensure your vehicle stays in top shape and ready for any journey.
Remember, the key to effective auto care is not just having the right tools but understanding how to use them efficiently. Take the time to learn advanced diagnostic techniques, like the ones described in expert guides, to truly master vehicle maintenance.
Lessons from a Cold Morning Mishap
One of the most eye-opening lessons I learned was how small, often overlooked issues like tiny vacuum leaks can have outsized impacts on engine performance, especially during cold starts. It’s tempting to ignore small cracks or hoses, but their effects can ripple into higher fuel consumption and engine wear. Recognizing this, I now approach engine troubleshooting with a keen ear and a curious mind, always ready to investigate the subtle hints—be it a faint hiss or a rough idle—that point to deeper mechanical quirks.
Why I Trust Hands-On Diagnostics over Just Scanning
Using a high-quality diagnostic scanner helps, but nothing beats physically inspecting hoses, gaskets, and connections. When I first saw how smoke testing could reveal tiny leaks hidden from plain sight, I realized that combining technology with tactile diagnostics is the most effective approach. This holistic method has saved me time, money, and unnecessary replacements, proving that sometimes, the best tool is just a cautious, experienced eye—and a smoke machine.
Implementing Proactive Checks Before They Cause Troubles
Now, I regularly perform mini checkups on my vehicle’s intake system, especially before winter hits. It’s a practice I encourage to all DIY enthusiasts—simple inspections can prevent the pain of cold morning stalls and rough idles. Think of your engine like a living organism: regular, gentle upkeep keeps it healthy and responsive, ensuring those early starts are smooth and worry-free. Plus, staying proactive means fewer surprises and more confidence during those chilly mornings.
How Tiny Leaks Teach Us Bigger Lessons
This journey also taught me that small irritations in mechanical systems often mirror larger life principles—attention to detail, patience, and thoroughness pay off. Overlooking minor signs can lead to bigger problems down the road, but with diligent care, you build a rapport with your vehicle that pays dividends in reliability and engine longevity. Embracing this mindset lifts not only your car’s performance but also your confidence as a DIYer or a concerned car owner. Identifying and fixing those tiny vacuum leaks isn’t just a repair; it’s a lesson in attentiveness and persistence that anyone can learn to master.