
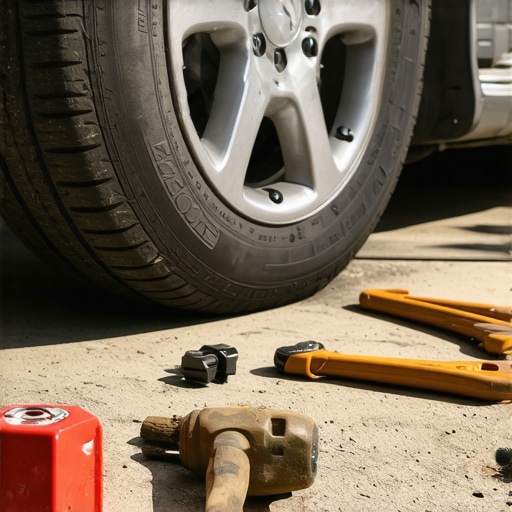
Ever wrestled with a stubborn, rounded-off lug nut when all you wanted was a quick tire change? Let’s face it, there’s nothing quite as frustrating as trying to get a stubborn lug loose, only to realize your tools aren’t doing the trick. I remember one such nightmare during a weekend road trip—my jack and wrench just wouldn’t grip the rusted, rounded lug. That moment of helplessness was a lightbulb for me: there’s got to be a better way, even without heading to a repair shop. Today, I’m sharing real, tested techniques I’ve learned over years of DIY auto projects to help you conquer that stripped lug nut and get back on your way. No fancy gear, no professional help—just practical tips from my own garage to yours.
Why You Should Care About Removing Stripped Lug Nuts
Stripped lug nuts might seem like a minor hassle, but they can become a serious obstacle if you’re not prepared. Whether you’re dealing with rusty wheels from winter salt or a previous poor repair job, these stubborn nuts can delay your plans, turn an easy fix into a headache, or even cause damage to your wheel studs if not handled properly. Plus, if you ignore the problem, it mightlead to even worse damage, costing more in the long run. Addressing this issue promptly not only saves time but also preserves your vehicle’s integrity. Did you know that improper removal techniques can lead to further stripping or even break the lug stud? That’s why understanding the right approach is essential.
Is It Really Worth the Hype? The Truth About DIY Lug Nut Removal
Initially, I made the mistake of thinking I could brute-force my way through a stubborn lug. I used my largest wrench, whaling away with all my might, only to strip the nut further. That simple mistake taught me that patience and the right tools matter more than brute strength. Many folks believe that only professional shops can handle these tricky situations, but I assure you, with some simple techniques and a bit of know-how, you can often fix the problem at home. For more tips on maintaining your vehicle and avoiding costly repairs, check out [Top Auto Repair Tips to Extend Your Vehicle’s Lifespan](https://repairmycarpro.com/top-auto-repair-tips-to-extend-your-vehicles-lifespan). Now, let’s dive into the tried-and-true tricks that have saved me—and can save you—from ending up stranded with a completely rounded lug nut.
Get the Right Tools and Prepare Your Workspace
Before diving into removal, gather essential tools: a breaker bar, penetrating oil, a hammer, and safety gloves. Set up your car on a flat surface, engaging the parking brake for stability. Wearing gloves protects your hands from rust and grime, and a well-lit area ensures you don’t miss any details. Remember, safety and preparation streamline the process, preventing further damage to your wheel components.
Apply Penetrating Oil and Let It Work
Spray penetrating oil, like WD-40 or PB Blaster, generously onto the lug nut threads. Allow at least 10-15 minutes for it to loosen rust and corrosion, especially if the nuts have been exposed to winter salt or moisture. This step is crucial; in my experience, rushing in without lubrication often leads to stripped nuts, turning a straightforward task into a nightmare. If the nut is severely rusted, reapplying the oil and waiting longer can improve your chances of success.
Use the Proper Technique with a Breaker Bar
Attach the breaker bar to your lug wrench, positioning it for maximum leverage—typically, a longer handle yields more torque. Turn slowly and steadily, applying consistent force. I once used a pipe extension to increase leverage, which provided enough torque to crack a stubborn nut without slipping. Avoid sudden jerks or using an impact wrench that might slip, causing further damage. Patience is key: a controlled, steady motion reduces risks and increases effectiveness.
Tap the Lug Nut for Loosening
If the nut refuses to budge, gently tap the side of the lug nut with a hammer while applying torque. This shock can help break rust bonds, especially in tight spots. In a memorable moment, a few light taps combined with penetrating oil finally freed a heavily rusted nut that had me stumped for half an hour. Be cautious—gentle taps prevent damaging the nut or the studs.
Consider Alternative Solutions if the Nut Is Rounded Off
When the edges are stripped, standard tools may not grip effectively. Use a nut extractor set—these have specially designed sockets that grip rounded nuts tightly. Alternatively, try welding a bolt onto the lug nut or using pliers if there’s enough material to grip. I’ve successfully used locking pliers in a pinch, but be careful not to apply excessive force that could shear the stud. For more detailed strategies, see [The Secret to Removing a Rusted Oil Filter Without Dents](https://repairmycarpro.com/the-secret-reason-your-steering-feels-heavy-in-the-morning).
Double-Check and Mount the Wheel Correctly
Once the lug nut is loosened or removed, inspect the threads for damage. Clean the studs with a wire brush and ensure they are straight. Hand-tighten new lug nuts in a crisscross pattern to evenly seat the wheel, then tighten gradually with a torque wrench to manufacturer specifications. Proper tightening prevents future issues and ensures safe driving. Regularly inspecting and maintaining your lug nuts can avoid these tough removals altogether.
Many car owners and even some DIYers fall prey to misconceptions when it comes to routine auto repairs like oil changes, brake services, or diagnostics. Let’s clear up some of the most widespread myths and explore nuances that are often overlooked by the average driver. Understanding these details can save you time, money, and headaches, especially when emergencies strike.
Is Higher Mileage Always Better for Oil Changes? Think Again
It’s a common belief that changing synthetic oil every 3,000 miles is necessary to keep your engine healthy. In reality, modern synthetic oils and advanced engine designs allow for much longer intervals—often up to 7,500 or even 10,000 miles—if your driving habits are normal. The key is understanding your specific vehicle and driving conditions. Relying solely on the old 3,000-mile rule can lead to unnecessary expenses and environmental waste. For more insights on optimizing your oil change schedule, check out [oil change innovations that save your engine](https://repairmycarpro.com/oil-change-innovations-technologies-that-save-your-engine).Maintaining your vehicle’s performance requires the right tools and a disciplined approach. Over the years, I’ve found that investing in high-quality, specialized equipment not only saves time but also prevents costly repairs down the line. For instance, a reliable digital torque wrench ensures that you tighten lug nuts to manufacturer specifications, avoiding both over- and under-tightening, which can lead to uneven wear or safety issues. I personally prefer models like the CDI 1002MFR, known for its precision and durability, especially when working on critical components like brakes or suspension.
Another invaluable tool is a comprehensive automotive scan tool. While generic OBD-II scanners are useful, for in-depth diagnostics, I recommend investing in a professional-grade device such as the Autel MaxiCOM MK808. It allows you to access a vehicle’s ECU, read and clear codes, and even perform actuation tests. This level of insight helps preempt issues before they escalate, aligning with advice from industry experts on the importance of proactive diagnostics [see https://repairmycarpro.com/how-advanced-vehicle-diagnostics-prevent-costly-breakdowns].
For fluid service and leak detection, dye-based leak detectors paired with a UV flashlight are game-changers. They help pinpoint leaks in cooling systems, transmissions, or differentials quickly, saving you hours of guesswork and potential mishandling.
In terms of long-term results, establishing a regular maintenance schedule with these tools can extend your vehicle’s lifespan significantly—as detailed in [Top Auto Repair Tips to Extend Your Vehicle’s Lifespan](https://repairmycarpro.com/top-auto-repair-tips-to-extend-your-vehicles-lifespan). Consistent, precise work not only keeps your car running smoothly but also boosts safety and resale value.
Looking ahead, the trend leans toward smarter tools integrated with mobile apps and even artificial intelligence, enabling real-time diagnostics and predictive maintenance. I predict the next decade will see even more affordable, user-friendly devices accessible to DIYers. For now, focus on integrating a quality torque wrench and a good scan tool into your toolkit.
How do I maintain vehicle diagnostics over time? Regularly updating your scan tool software, staying informed about new vehicle models, and cross-referencing errors with manufacturer resources ensures your diagnostic efforts remain accurate and effective. Remember, being proactive with maintenance tools can prevent breakdowns and save you money—so I encourage you to try out one of these advanced tools today. Your car will thank you for it.
Lessons Hidden Beneath the Nuts You Can’t Loosen
One of the most valuable insights I gained was realizing that patience and the right tools often trump brute force. Jamming a larger wrench or impact gun without prep might seem quicker, but it can cause more harm than good. I once watched a tire shop ruin a wheel stud because they forcefully used an impact wrench on a stubborn nut without applying penetrating oil first. The lesson? Know when to step back, prepare properly, and approach stubborn issues with a strategic mindset. Additionally, I learned that understanding your vehicle’s rust and corrosion patterns can inform your repair approach, saving you from unnecessary damage and expense.
Another lightbulb moment was recognizing the importance of the correct technique, like tapping the side of a rounded nut gently with a hammer while applying torque. It sounds simple, but that shock can be the difference between a solvable problem and a costly replacement. It’s these little tricks and patience that truly empower DIYers and save trips to the repair shop.
My Go-To Arsenal for Auto Repair Success
Over the years, I’ve curated a toolkit that’s saved me countless hours—starting with a high-quality breaker bar, like the essential auto repair tools. A reliable penetrating oil such as PB Blaster has been indispensable for loosening rusted nuts and bolts. For stubborn rounded nuts, a set of nut extractors has become my secret weapon, allowing me to grip and turn with confidence.
An advanced automotive scan tool, like the diagnostics device, not only helps me identify issues early but also prevents the frustration of tackling problems blindly. Combining these tools with methodical approaches ensures that every repair I undertake is safer, faster, and more effective. If you’re looking to expand your toolkit, these resources are where I recommend starting—because good tools lead to good repairs.
Your Garage, Your Power to Keep Moving
Remember, tackling tough auto repairs like removing stubborn lug nuts isn’t just about fixing your vehicle—it’s about building confidence and independence. Every challenge you face head-on sharpens your skills and deepens your understanding of your car’s inner workings. So, don’t shy away from that rusted nut or that tricky diagnosis. Embrace it as an opportunity to learn, grow, and become the master of your own vehicle maintenance journey.
Have you ever faced a stubborn lug nut that refused to budge? What tricks or tools worked best for you? Share your experience below, and let’s help each other become more confident DIY auto repair enthusiasts!