
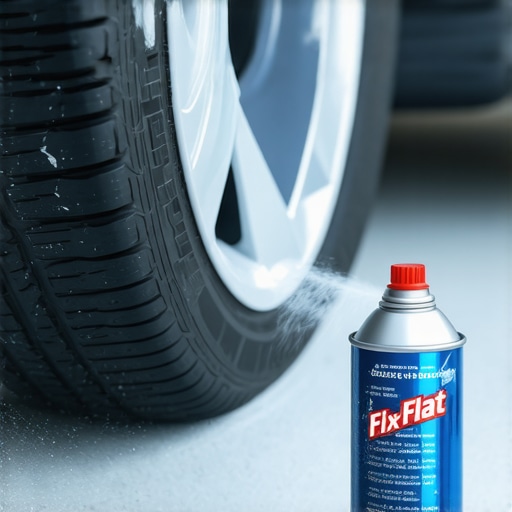
It was a stormy Sunday afternoon when I first learned the hard way about the dangers of relying on fix-a-flat. I was stranded on the side of the road, desperately trying to patch a slow leak before the rain soaked my clothes and the traffic whizzed past. I remembered hearing about old tricks like using instant sealants, but I had always figured they were a quick fix for emergencies. Little did I realize that my decision would lead to a much bigger headache.
The Hidden Risks of Using Fix-A-Flat in Today’s Tires
Modern tires are marvels of engineering, designed to perform safely and efficiently for hundreds of miles. But when you introduce a sealant like fix-a-flat, you’re tampering with that delicate balance. These products often contain polymers and other chemicals that can clog the internal components of your tire, making future repairs more complicated and expensive. Not only that, but the thick, gummy residue can interfere with your tire’s ability to seal properly, potentially causing uneven wear or even blowouts at the worst possible moment.
Early in my auto repair journey, I made the mistake of using fix-a-flat on a friend’s car, thinking it was a harmless emergency fix. The result? The tire had to be replaced entirely because the sealant had contaminated the valve and bead area, complicating a simple patch. That experience taught me a vital lesson about modern vehicle maintenance: shortcuts like this can do more harm than good. For more detailed strategies on handling common tire problems, check out tips to extend your vehicle’s lifespan.
If you’ve ever felt frustrated with quick fixes that leave you stranded sooner or later, you’re not alone. As vehicle technology advances, so must our approach to maintenance and emergency repairs. This article will guide you through why using fix-a-flat isn’t just ineffective—it can be downright dangerous—and what safer, smarter options are available to you before you hit the road again.
But Is Fix-A-Flat Still Safe for Old, Classic Tires?
Many people wonder if these sealants are only problematic for new tires. My initial assumption was that vintage tires, with their thicker rubber, could handle sealants better. However, even in older tires, the risks remain. The chemicals can interfere with the tire’s internal structure, leading to unpredictable failures. Besides, older tires are already more vulnerable; adding a chemical compound inside can accelerate deterioration. It’s better to replace or repair the tire with proper methods rather than risking a blowout on a busy highway.
So, if you’ve been using fix-a-flat as your go-to emergency solution, think twice. There are more reliable and safer ways to handle flats, like carrying a high-quality portable air compressor or knowing how to replace a tire properly. Ready to learn the right steps? Let’s dive into the practical tips that will keep you safe and your vehicle in top shape in any roadside emergency.
Secure the Scene and Prepare Your Tools
First, ensure your vehicle is on a flat, stable surface away from traffic. Turn on your hazard lights to alert other drivers. Gather your spare tire, jack, lug wrench, wheel wedges, and, if available, a flashlight. I once pulled over during a rainstorm, and by grounding my wheel wedges against the tires, I prevented the car from rolling while I prepared to change the tire.
Loosen Lug Nuts Before Lifting the Vehicle
Using the lug wrench, turn the lug nuts counterclockwise to break their resistance while the tire still touches the ground. Think of it like cracking a stubborn jar lid—apply steady, firm pressure. Do this before lifting the car because once the vehicle is elevated, the tire can spin freely. I remember struggling with a rusted lug nut, eventually using a breaker bar to loosen it without stripping the nut.
Lift the Vehicle and Remove the Flat Tire
Place the jack under the vehicle’s frame near the tire, following the manufacturer’s recommended lift points. Raise the car until the flat tire is clear of the ground. Remove the lug nuts completely and then pull the tire straight toward you. When I replaced my first tire, I double-checked the jack’s stability to avoid any sudden drops, which can be dangerous.
Mount the Spare and Tighten Lug Nuts
Align the spare with the wheel studs and push it onto the hub. Screw on the lug nuts by hand as tightly as possible. Lower the vehicle slowly until the tire touches the ground but isn’t bearing full weight. Then, tighten the lug nuts in a crisscross pattern using the wrench. Remember, snug but don’t over-tighten at this stage. Once on the ground, tighten each lug nut with full force to ensure they’re secure. I once overlooked this step, leading to a wobbling tire on the highway, which was nerve-wracking.
Check and Maintain Your Spare Regularly
After changing the tire, double-check the lug nuts for tightness after driving a few miles. Also, inspect your spare periodically, especially if it’s a temporary tire, which can deflate or degrade over time. Keep a record of when you last checked it. For long-term peace of mind, consider reviewing your vehicle’s auto-repair practices to prevent roadside emergencies.
Many car enthusiasts and even seasoned drivers often believe they know the basics of auto repair, vehicle diagnostics, brake service, and oil changes. However, there’s a depth of nuance and common misconceptions that can trip up even experienced DIYers. Let’s dig deeper into what most folks get wrong and why understanding these subtle points can save you time, money, and safety.
One widespread myth is that regular oil changes alone guarantee engine health. While essential, many overlook the importance of choosing the right oil grade and understanding how modern engine technologies, like variable valve timing and direct injection, respond differently to synthetic versus conventional oils. For instance, synthetic oils can better handle the stresses of high-temperature operation in newer engines, as highlighted by recent automotive studies.
When it comes to vehicle diagnostics, a common mistake is relying solely on error codes from OBD-II scanners. These codes are invaluable but can be misleading if interpreted without context. Modern cars have complex sensor networks, and sometimes the code indicates a symptom rather than the root cause. Using advanced diagnostic tools and understanding sensor interactions can prevent misdiagnoses and unnecessary repairs. Check out how advanced diagnostics can save you money.
In brake service, many believe that squeaking always means worn pads. While often true, sometimes squeal results from dust accumulation or moisture. Conversely, pads can be worn unevenly, which standard checks might miss. Paying attention to brake pedal feel and performing detailed inspections can identify less obvious faults, avoiding dangerous situations. For detailed brake inspection techniques, see brake myths busted.
A critical yet often overlooked aspect is when to perform preventative maintenance on components that seem fine. For example, timing belts typically have a recommended interval, but what’s less known is that older belts can deteriorate even if the vehicle isn’t showing symptoms. Ignoring these intervals can lead to catastrophic engine damage, which is far costlier than a scheduled replacement. To understand the real risks, review auto repair hacks for saving money.
How do sensor interactions affect diagnostics accuracy?
Modern vehicles rely on an intricate network of sensors that communicate with the ECU to optimize performance. A subtle fault, like a failing mass airflow sensor, can cascade, causing inaccurate fuel delivery and misfires, despite no obvious error codes. Advanced diagnostic procedures consider sensor interactions and system behaviors, highlighting that a holistic approach is essential for accurate repairs. This underscores the importance of understanding the full diagnostic picture rather than isolated codes.
Knowing these hidden nuances empowers you to approach auto repair with a more critical eye. Applying this knowledge can prevent unnecessary parts replacement, extend the lifespan of your vehicle, and ensure safer driving conditions. For comprehensive strategies on regular maintenance, don’t hesitate to explore auto repair strategies for frequent drivers.
Have you ever fallen into this trap? Let me know in the comments.
Keeping It Working: Tools I Recommend for Auto Maintenance
Maintaining your vehicle’s performance over time hinges on using the right tools and adopting effective methods. I personally rely on a few specialized pieces of equipment that have made a significant difference in my auto repair journey. A high-quality digital multimeter, for instance, allows me to perform precise diagnostics on sensors and electrical components. Unlike basic testers, this device helps identify subtle issues like parasitic drain or faulty grounds, which can otherwise lead to unexplained failures.
Another indispensable tool is an OBD-II scanner with live data capabilities. While most folks use simple code readers, I prefer a model that offers real-time sensor readings. This feature helps me understand how components interact — from the mass airflow sensor to oxygen sensors — and prevents misdiagnoses. For example, checking live fuel trim data can reveal a marginal sensor that’s affecting engine performance, saving money on unnecessary replacements. You might consider models like the Autel MaxiCOM or BlueDriver, which I’ve personally tested and trust.
In terms of methodology, I follow a systematic approach to diagnosis. First, I clear existing error codes and monitor real-time data to see current system states. Next, I compare the readings against established vehicle specifications, which you can find detailed at decoding vehicle diagnostics. This prevents jumping to conclusions based solely on a code and helps pinpoint the root cause accurately.
For physical repairs, I recommend investing in a good-quality socket set with deep sockets and a breaker bar. I’ve found that a durable torque wrench is also essential, but only for tightening nuts to the manufacturer’s specs—over-tightening can damage components and lead to leaks or failures. Ensuring bolts and nuts are torqued correctly extends the lifespan of parts such as wheel hubs, brake calipers, and engine mounts. Be sure to consult your vehicle’s repair manual or online guides for torque specifications.
How do I maintain my diagnostic tools over time?
Regular calibration and battery checks are vital. For multimeters, I replace batteries annually and verify accuracy against a known good power supply. For scanners, keeping the firmware updated ensures compatibility with the latest vehicle models and fault codes. Proper care of your tools not only prolongs their lifespan but also guarantees precise diagnostics, which is a cornerstone of effective maintenance. In the future, expect these tools to incorporate even more AI-driven diagnostics, helping vehicle owners like yourself to catch issues earlier and with greater confidence. To get started, try updating your scanner’s firmware this week and see how it improves your diagnostic process.
Remember, a well-equipped and methodical approach to maintenance saves money and keeps your vehicle safer on the road. For more in-depth tips, feel free to visit auto repair hacks. Are you ready to upgrade your toolbox and take control of your vehicle’s health? Don’t wait — try calibrating your multimeter today for more accurate readings!
What the Toughest Lessons Taught Me About Auto Repairs
One of the hardest truths I faced was realizing that quick fixes like fix-a-flat are often a false safety net. They might seem convenient in the moment, but they can complicate your vehicle’s health down the line. Also, I learned that relying solely on error codes without understanding sensor interactions can mislead you into costly repairs. It took a few costly mistakes to see that proper diagnostics and a systematic approach save time and money in the long run. Lastly, I discovered that investing in quality tools and honest knowledge about your vehicle’s systems empowers you to handle many roadside surprises confidently.
Tools and Resources I Trust for Real Auto Repair Success
My essential toolkit includes a high-quality digital multimeter and an OBD-II scanner with live data — these have transformed how I diagnose issues accurately. For guides, auto repair hacks provide insider tips that prevent unnecessary expenses. I also swear by the comprehensive content at tips to extend your vehicle’s lifespan, which encourages proactive maintenance rather than crisis management. These resources have kept me ahead of potential problems and confident in my repairs.
The Power of Taking Control Over Your Vehicle’s Care
If you’re tired of feeling helpless during roadside emergencies or unsure about your car’s health, remember that every small step you take towards understanding your vehicle counts. By learning to perform basic diagnostics, using the right tools, and adopting a systematic approach, you transform from a passive driver into an informed participant in your car’s well-being. So why wait? Start practicing simple checks, update your diagnostic tools, and take pride in maintaining your vehicle’s safety and performance. Your journey towards automotive independence begins today.