
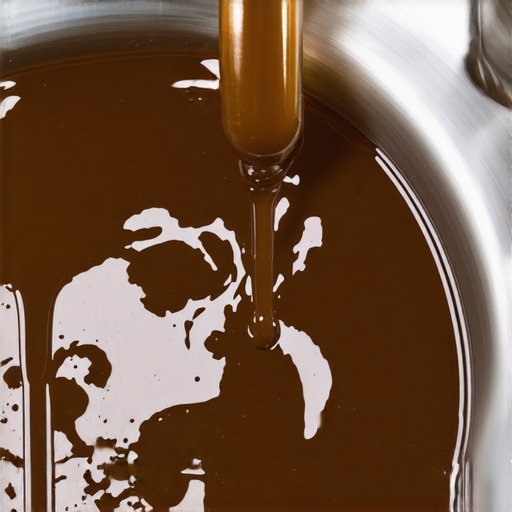
Imagine this: You’re cruising home after a weekend getaway, your car handling smoothly, the road unwinding beneath you. Suddenly, as you brake gently into your driveway, your eyes catch the reservoir—and gasp. The brake fluid inside has turned a murky, coffee-like color. It’s a jarring sight that left me scratching my head the first time I saw it. I wondered if I’d missed some crucial maintenance or if my car was telling me to panic.
Decoding the Coffee-Colored Brake Fluid
That initial shock was a wake-up call. The truth is, brake fluid aging and contamination can cause it to change color, and this isn’t just a cosmetic issue—it’s a safety concern. As brake fluid absorbs moisture over time, it not only darkens but also loses its ability to perform under pressure. This mixture of water and debris creates a sludgy, coffee-like appearance, signaling that it’s time for a brake fluid change.
Having been guilty early on of ignoring that little reservoir, I learned the hard way that neglecting brake fluid maintenance can lead to diminished braking performance, increased wear on components, and even brake failure. It’s a mistake I don’t want you to make. A simple, routine check-up can save you from costly repairs down the road. Curious if your brake fluid is past its prime? Keep reading—I’ll guide you through the warning signs and how to handle them effectively.
Question: Is It Worth Worrying About Your Brake Fluid’s Color?
Honestly, I used to dismiss the color change as just a visual quirk, thinking, “It’s probably fine, right?” That was a mistake. Early in my auto repair journey, I overlooked this indicator and paid the price when brakes started to feel less responsive. Now I know that brake fluid should be clear or slightly golden. If it’s dark, cloudy, or resembles coffee, you’re risking serious issues. According to automotive experts, contaminated brake fluid is one of the leading causes of brake system failure—so don’t ignore that darkening reservoir.
Next, I’ll show you how to assess and replace your brake fluid properly, straight from my own troubleshooting toolbox. Better safe than sorry, especially when it comes to stopping power. Ready to learn the step-by-step process? Let’s get into it and keep your brakes working their best, no matter how long the road trip was.
Gather Your Supplies and Prepare Your Workspace
Start by assembling essential tools: a clean container, a wrench for bleeder valves, a funnel, fresh brake fluid (check your vehicle’s manual for the correct type), and safety gloves. Park your vehicle on a level surface, engage the parking brake, and ensure the engine is cool. It’s like preparing your kitchen before cooking; organization makes the process smooth and prevents spills.
Locate the Brake Fluid Reservoir
Open the hood and find the brake fluid reservoir — usually a translucent plastic container with “Brake Fluid” labeled. Clean around the cap to prevent debris from entering. The reservoir acts as the brain of your braking system, and keeping it clean is vital before servicing. I once skipped this step and ended up with dirt inside the system, causing unnecessary repairs.
Check the Fluid Level and Color
Inspect the fluid level; it should be near the ‘MAX’ line. Observe the color — it should be clear or slightly golden. If it’s dark or resembles coffee, it indicates contamination, and a fluid change is necessary. Think of brake fluid like engine oil; contaminated fluid hampers performance and accelerates wear. Replacing it early ensures safety and optimal braking.
Drain the Old Brake Fluid
Loosen the bleeder valve on each wheel caliper or drum using the correct wrench. Attach a clear tube to the valve and submerge the other end in a container filled with a little brake fluid. Have an assistant gently presses the brake pedal while you open the valve, allowing the old fluid to flow out. Close the valve before release. This process flushes out the degraded fluid, much like replacing dirty water in a car’s cooling system.
Tip:
Start from the wheel farthest from the master cylinder (usually the rear passenger side) and work closer. This ensures complete flushing and prevents air from entering the system.
Refill with New Brake Fluid
Top off the reservoir with fresh brake fluid, ensuring not to overfill. Make sure the master cylinder is filled to the correct level. This step restores the hydraulic pressure necessary for responsive braking. Remember, use only the specified fluid type to prevent chemical incompatibilities.
Bleed the Brake System to Remove Air
Once all old fluid is replaced, bleed the brakes to expel trapped air — which can cause spongy pedal feel. Attach a clear tube to each bleeder valve; have an assistant slowly press the brake pedal, holding it down. Then, open the valve briefly to release air bubbles with the old fluid. Close the valve before releasing the pedal. Repeat until the fluid flows smoothly without bubbles. Proper bleeding maintains braking efficiency, akin to a blood transfusion keeping your system alive.
Check for Leaks and Test Drive
After all wheels are serviced, examine the bleeder valves for leaks and ensure the brake pedal feels firm. Top off the reservoir if needed. Conduct a cautious test drive, applying brakes gently to validate the system’s responsiveness. If the pedal feels soft or brakes are weak, re-bleed the system or consult a professional. This final step seals your work, guaranteeing a safe stop every time.
For comprehensive insights into brake service and myths debunked, visit this guide. Regular maintenance not only extends your vehicle’s lifespan but also ensures safety on every journey.
While many car owners focus on the basics like oil changes or brake pads, there’s a common misconception that these routine services are simple, one-size-fits-all tasks. However, as an automotive enthusiast and technician, I’ve seen how overlooking the subtle nuances can lead to costly repairs down the line. One frequent mistake is assuming that all oils or brake fluids are interchangeable, but in reality, each vehicle requires specific formulations optimized for its engine or braking system, as highlighted in this insight. Using the wrong type can accelerate wear or cause system failures, which many forget or dismiss.
Myth Busting: More Frequent Repairs Equal Better Maintenance
A widespread belief is that changing fluids and parts more often always prevents issues. Yet, over-maintenance can sometimes do more harm than good, especially if it leads to unnecessary part replacements or disturbed lubricants. For example, excessively changing brake fluid without circumstances of contamination can introduce air into the system, leading to spongy pedals or brake fade—a mistake overlooked by many. The key is understanding your vehicle’s specific needs rather than following generic schedules. Dive into this myth-busting guide.
Another trap is neglecting the advanced diagnostics that can reveal hidden issues before they escalate. Modern vehicles are equipped with electronic sensors that monitor everything from tire pressure to transmission health. Ignoring these signals or assuming they’re false alarms can be disastrous. According to auto diagnostics experts, maintaining an active monitoring routine can save thousands by catching problems early, like a failing sensor or subtle injector clog.
How Deep Does Your Knowledge Go on Vehicle Diagnostics?
Advanced diagnostics aren’t just for professional mechanics. With the right tools and understanding, you can interpret error codes or sensor data yourself, possibly avoiding roadside breakdowns. For instance, misreading a warning light without understanding its nuances might cause unnecessary repairs, or worse, overlook a critical issue like a deteriorating fuel pump or coolant leak. This resource offers practical tips on interpreting vehicle signals efficiently.
Remember, every aspect of your vehicle’s maintenance carries these nuanced considerations. It’s not merely about routine replacements but understanding the ‘why’ behind each service. Adopting this mindset ensures you don’t fall victim to common pitfalls and extends your vehicle’s lifespan. Have you ever fallen into this trap? Let me know in the comments. For ongoing insights and expert advice, feel free to reach out. Stay sharp, and keep your ride smooth and safe!
,
How do I keep my vehicle running smoothly over time
Achieving long-term reliability in your vehicle hinges on using the right tools and adopting effective methods. Personally, I rely on a quality digital multimeter like the Fluke 115, which offers precise readings and durability—essential for diagnosing electrical issues accurately. For managing routine inspections, a magnetic phone mount paired with a Bluetooth-enabled OBD-II scanner such as the BlueDriver allows me to quickly run diagnostics and interpret error codes without visiting the shop. This combo empowers me to catch problems early and address them before they escalate, saving time and money.
When it comes to maintenance schedules, sticking to a proactive plan based on your car’s specific needs—guided by your vehicle’s manual and supported by diagnostic tools—is crucial. For example, regular brake fluid tests with a dedicated tester can reveal moisture content, helping you determine when a fluid change is due, rather than relying solely on mileage or time intervals. Such an approach helps maintain optimal brake performance, as detailed in this resource.
In terms of software, I recommend investing in a reputable OBD-II diagnostic app like OBDLink, which pairs seamlessly with scanners and provides comprehensive insights into your vehicle’s systems. These apps often include live data streams, allowing me to monitor parameters like coolant temperature and fuel trim in real time—crucial for diagnosing issues before they become serious.
Looking ahead, I believe the integration of advanced diagnostics with AI-driven analysis will become more prevalent. Imagine getting instant insights into your car’s health through your smartphone, predicting failures before symptoms even appear. This trend will make DIY maintenance more reliable and accessible, leading to improved safety and extended vehicle lifespans.
Make Your Vehicle Last Longer by Prioritizing Diagnostics
One actionable step I often recommend is conducting a diagnostic check before every oil change or brake service. Utilizing a scan tool like BlueDriver enables you to catch pending issues early—such as minor sensor faults—that can be addressed promptly. Regular diagnostics have proven to me that understanding your vehicle’s health in real-time is the cornerstone of effective maintenance, and it aligns perfectly with the insights found here.
Don’t hesitate to try this advanced tip: connect your OBD-II scanner yourself and familiarize yourself with the live data dashboard. It’s a game changer for maintaining vehicle health on your terms. For personalized advice or troubleshooting, feel free to reach out. Taking control of diagnostics today will ensure your ride remains dependable tomorrow.
Lessons That Changed My Perspective on Preventive Maintenance
One of the most profound lessons I learned is that not all contaminants in brake fluid are visible, and relying solely on color can be misleading. I once ignored a slightly darker reservoir, thinking it was normal, only to experience reduced braking efficiency later. This taught me to trust regular testing kits over visual cues alone. Additionally, I realized that routine diagnostic scans can reveal tiny issues—like a sluggish sensor—that, if addressed early, save a lot of time and money. The biggest insight? Consistent, proactive maintenance beats reactive repairs every time, and understanding the nuances of your vehicle’s indicators makes all the difference.
My Go-To Tools and Resources for Smarter Auto Care
For anyone serious about vehicle diagnostics, I swear by the BlueDriver OBD-II scanner paired with their user-friendly app. It gives me instant insights into potential issues without the need to visit a mechanic immediately. The book Auto Repair Hacks has been a game-changer, teaching me how to perform safe and effective DIY repairs. I also trust the detailed guides on brake service and oil innovations for staying updated with the latest techniques and technologies. These resources keep my skills sharp and give me confidence in maintaining my vehicle’s health.
Your Next Step: Embrace the Power of Diagnostics
The road ahead is about taking control and embracing diagnostic tools as an integral part of vehicle maintenance. Regularly scanning your car before or after driving, especially when noticing odd behaviors like a soft brake pedal or unusual smells, can prevent costly breakdowns. Remember, your vehicle communicates with you—if you learn to read its signals, you set yourself up for safer, smoother rides. Don’t wait for a warning light—invest in a quality scan tool, stay curious, and treat your car like a trusted partner on every journey. Your vehicle’s longevity and safety depend on it. How do you currently monitor your vehicle’s health? Share your practices below and let’s learn together!