
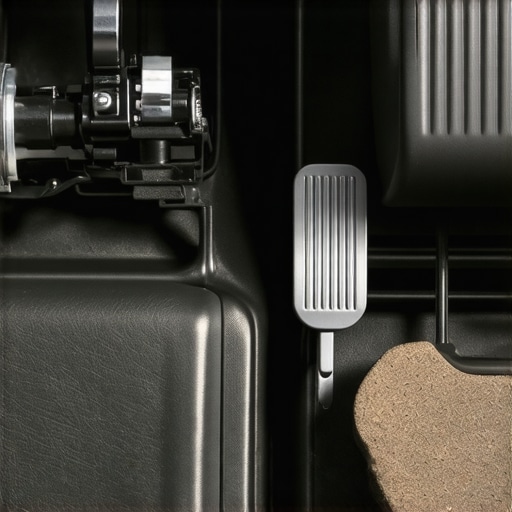
I remember the first time I changed my brake pads, feeling pretty confident about the job. But when I pressed the brake pedal afterward, it felt spongy, almost like I was pressing on a marshmallow. That lightbulb moment hit me hard — I’d rushed through some steps, and now my braking was compromised. Turns out, a soft brake pedal after a pad replacement isn’t uncommon, and it can be downright nerve-wracking, especially if you rely on your car daily. But here’s the good news: understanding what causes this and how to fix it can save you a lot of stress and money.
Why Does Your Brake Pedal Feel Soft After a Pad Change?
When you change your brake pads, you’re not just swapping out worn-out parts. You’re also disturbing the brake system’s intricate balance. A common culprit behind a soft pedal is air trapped in the brake lines. Think of it like bubbles in a soda — they compress and expand, making your brake pedal feel spongy and unresponsive. If you didn’t properly bleed the brakes after installing new pads, that air can linger, compromising braking performance.
Another possible reason is low or contaminated brake fluid. Brake fluid is designed to be incompressible, transferring your foot’s force to the brake pads. If the fluid is old, dirty, or has absorbed moisture, it loses effectiveness, leading to softer brakes. This is why many experienced mechanics recommend flushing and replacing brake fluid regularly.
Sometimes, the issue isn’t just about air or fluid but a misalignment of components. For example, if you haven’t properly seated the pads or if the caliper pistons haven’t retracted correctly, you might experience uneven brake feel, which can mimic a soft pedal.
My early mistakes involved rushing through the bleeding process, thinking I could skip some steps to save time. Bad idea! That oversight led me to diagnose and fix a persistent sponginess, undoubtedly saving me money in the long run. For more on common mistakes to avoid, you might want to check out our guide on brake service myths and safety tips.
Understanding these causes is crucial because ignoring a soft brake pedal can lead to reduced stopping power, increased stopping distances, and, in the worst cases, accidents. So, before you hit the road again, let’s explore how to troubleshoot and fix this issue effectively. Whether you’re a seasoned DIYer or just trying to save some bucks, I’ve got some practical steps to get your brakes back to 100%.
Have you experienced a soft brake pedal after a repair? Share your stories, and let’s troubleshoot this together!
Bleed Your Brakes to Remove Air Bubbles
When your brake pedal feels spongy after pad replacement, trapped air is often the culprit. To fix this, you need to bleed your brake system, which involves pushing out the air through the brake lines. I once had a DIY session where I used a clear tube connecting the brake bleeder screw to a jar of brake fluid. Loosened the screw, pressed the brake pedal slowly, then tightened the screw before releasing the pedal. Repeating this process until the fluid ran clear and free of bubbles significantly improved pedal firmness. Remember, always keep the reservoir topped up to prevent more air ingress.
Ensure Proper Seating of Brake Pads
Incorrectly installed or unseated brake pads can cause uneven contact, leading to a soft pedal feel. To seat new pads properly, after installation, gradually apply steady pressure on the brake pedal several times—this helps mold the pads against the rotor surface. In my experience, a careful bed-in process with a series of gentle stops at around 30 mph helped the pads settle correctly, restoring normal pedal firmness. Check the pad positioning and make sure it’s fully seated against the rotor before testing driveability.
Flush and Replace Brake Fluid
Old or contaminated brake fluid can absorb moisture, reducing braking effectiveness. To address this, drain the old fluid from the master cylinder and bleed the brakes to replace it with fresh fluid. I once followed a simple step-by-step guide where I used a brake fluid pump to siphon out old fluid and then refilled with manufacturer-recommended brake fluid. This process not only improved pedal response but also prolonged the lifespan of your braking components. Regularly flushing your brake fluid, about every two years, is good practice to maintain optimal performance. Learn more about brake maintenance at this safety-focused guide.
Inspect Brake Components and Make Adjustments
Sometimes, misaligned or improperly installed calipers or pads can cause a soft pedal. Inspect the calipers, ensuring pistons retract smoothly and are correctly seated. When I once noticed uneven brake pad wear, I retracted the caliper pistons using the proper tool and realigned the calipers, which restored proper pedal feel. Confirm that all hardware is tight, and no components are bent or damaged. Correcting these issues can resolve persistent pedal softness and improve braking response.
Test and Fine-Tune Your Brakes
After performing these steps, test your brakes in a safe, open area. Gently press the brake pedal to ensure it feels firm and responsive. If it remains soft, repeat bleeding or fluid replacement. I advise starting with slow, controlled stops, gradually increasing pressure to confirm braking power. Make sure your ABS warning light is off and no unusual noises occur. Properly finishing this process ensures your vehicle’s brakes are safe and functional, giving you peace of mind on the road.
Many car enthusiasts and even seasoned mechanics often cling to popular myths about vehicle maintenance, but the truth is more nuanced. For example, in the realm of vehicle diagnostics, it’s a common misconception that a check engine light always indicates a major problem. In reality, modern cars often display warning lights for minor issues, and understanding the details can save you from unnecessary repairs. Overlooking these subtleties can lead to costly replacements or neglecting real issues, so developing a keen eye for diagnostic cues is vital for any serious car owner.
Why is resetting a dashboard light not enough?
Many assume that simply disconnecting the battery or resetting the code will resolve underlying problems, but this approach often masks deeper issues. Professional diagnostics reveal the root causes rather than just hiding warning signals. For instance, some drivers attempt quick fixes for things like auto repair problems without understanding the technical nuances, which can lead to recurring faults. Getting familiar with these advanced nuances and regularly consulting detailed guides can prevent repeated missteps and extend your vehicle’s lifespan. For a deep dive into how diagnostics work, visit this article.
Another common trap involves misjudging the importance of routine services like oil changes. Many believe that as long as the oil appears clean, the service isn’t urgent. However, oil can break down chemically well before it looks dirty, and neglecting timely changes accelerates engine wear. Recognizing the fine distinctions in oil quality and breakdown signs, as well as understanding the latest auto repair tips, can help you make more informed decisions and avoid costly engine repairs.
What advanced mistakes can blindside even experienced DIYers?
One overlooked nuance involves the proper assessment of vehicle diagnostics before attempting repairs. For example, a misinterpreted sensor reading may lead to unnecessary part replacements. A common pitfall I’ve encountered is neglecting to perform thorough component inspections or disregarding subtle signs like irregular vibrations or unusual noises that hint at deeper issues. The key is to practice educated troubleshooting rather than relying solely on generic repair steps. Check out auto repair hacks that emphasize understanding your vehicle’s unique signals.
To avoid falling into these traps, proactive education and paying close attention to the detailed symptoms your car exhibits are crucial. Remember, each vehicle has its own quirks, and mastering the nuances can significantly extend its lifespan while saving money. Have you ever fallen into this trap? Let me know in the comments.
Keeping Your Vehicle in Peak Condition: Tools I Recommend
When it comes to maintaining your vehicle’s health over time, having the right tools can make all the difference. I personally swear by a high-quality digital diagnostic scanner, like the Bluedriver. Unlike generic code readers, this device interfaces directly with your car’s OBD-II port, providing detailed live data and fault codes. It allows me to understand sensor readings better, especially when diagnosing issues through vehicle diagnostics. This precision helps me target repairs efficiently, saving time and money.
For brake servicing, I rely on a professional-grade brake caliper piston tool. This ensures I can retract pistons smoothly without damaging components. Investing in quality tools rather than cheap alternatives has consistently paid off, preventing the need for costly repairs down the line. Remember, proper tools facilitate proper work; for example, using the correct bleeder screw wrench prevents stripping threads and ensures a thorough bleed process.
In addition, a digital multimeter equipped with high-precision probes is indispensable. This allows me to test electrical connections, check sensor voltages, and verify continuity, critical steps when troubleshooting complex issues. Combining these with an advanced oil testing kit helps me monitor engine health over the long term, ensuring that lubricants are performing correctly and extending both engine longevity and performance.
Anticipating Future Trends in Vehicle Maintenance
Looking ahead, I predict that integrated diagnostic platforms will become more sophisticated, blending AI-driven insights with real-time vehicle data. This evolution will make proactive maintenance feasible, catching issues before they affect safety or performance. Companies like Tesla are already leading this charge by deploying remote diagnostics, so expect more automakers to follow suit. Embracing these tools will allow DIY enthusiasts and professionals alike to maintain vehicles more efficiently, harnessing data-driven insights that were previously the domain of dealers.
Making Maintenance Stick, Year After Year
To keep your vehicle running smoothly over time, establish a routine using reliable tools and keep records of diagnostics, repairs, and fluid changes. Regularly schedule preventive maintenance steps like flushing brake fluid and checking sensor calibration. The key is consistency—use your diagnostic scanner monthly to monitor for new trouble codes, and verify fluid levels and electrical connections every few months. This proactive approach minimizes unexpected breakdowns and keeps your car performing optimally long-term.
Why not try out a top-tier diagnostic tool and see what hidden issues your vehicle might be telling you? Addressing small problems early can save you a lot of hassle and expense later. For more expert tips on maintaining your vehicle efficiently, visit our contact page and ask about recommended maintenance schedules tailored for your car model.
What I Didn’t Expect About Brake System Bleeding
One of the toughest lessons I encountered was how crucial it is to bleed the brakes thoroughly after replacing pads. Rushing through this step can leave air bubbles in the system, causing that unsettling spongy pedal. Now, I take my time with careful bleeding, knowing it guarantees safer, more reliable braking performance. This experience taught me that patience during brake repairs directly correlates with safety and peace of mind.
My Unexpected Reality About Brake Fluid Aging
I used to think that brake fluid could last forever as long as there were no leaks. The reality is quite different—moisture absorption and breakdown over time diminish its effectiveness. Regularly replacing brake fluid has transformed my approach; I see it as a vital investment in my vehicle’s safety. Learning about fluid aging reminded me to stay proactive rather than reactive when it comes to brake health.
The Hidden Danger of Skipping Proper Pad Seating
Initially, I underestimated how critical bedding-in new brake pads is. Failing to do so left me with uneven braking and premature pad wear. Now, I dedicate time to properly seat the pads, ensuring optimal contact and longevity. That simple change has made a significant impact, underscoring that attention to detail saves money and enhances safety in the long run.
My Go-To Resources for Auto Repair Confidence
Over time, I’ve found that trusted tools and guides are game-changers. The vehicle diagnostics guide helped me decode warning lights accurately, preventing unnecessary repairs. A quality auto repair hacks book boosted my confidence in DIY tasks. And investing in a reliable diagnostic scanner became my secret weapon for timely maintenance. These resources have empowered me to troubleshoot more effectively and avoid costly mistakes.
Embrace the Journey: Your Vehicle Deserves Care
Maintaining your vehicle, especially the brake system, is an ongoing journey filled with learning and small victories. Every repair, guided by curiosity and proper tools, brings you closer to safe, confident driving. Don’t hesitate to start that brake check or fluid flush today—the effort pays off with a more reliable, longer-lasting car. Your commitment to learning and proactive care ensures you’ll enjoy smoother, safer journeys ahead.