
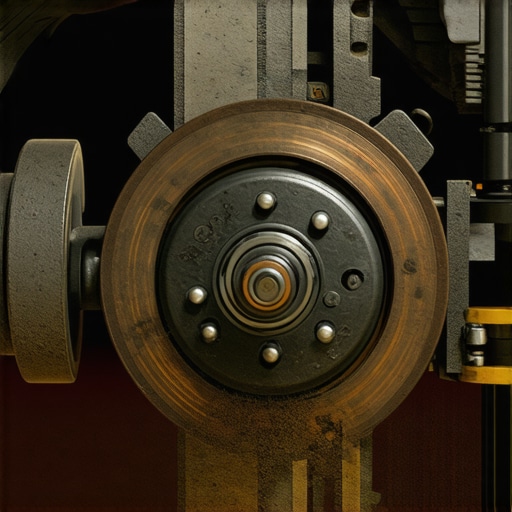
It was late in the evening when I first encountered that unsettling sensation—pressing the brake pedal and feeling it pulsate beneath my foot, even though I recently replaced the rotors myself. That lightbulb moment hit hard: sometimes, even new parts can lead to old problems if overlooked details are ignored. If you’ve ever pressed your brake pedal and experienced a rhythmic pulse, you know how unnerving it can be, especially when everything appears to be brand new.
Today, we’re going to uncover why this common frustration happens and, more importantly, what you can do about it. No need to throw in the towel or assume your mechanic missed something. With a little knowledge, you’ll be able to diagnose and fix the issue confidently.
Understanding the Real Cause Behind Pulsating Brakes
Many folks, myself included early in my auto repair journey, assume that new rotors should automatically eliminate pulsation problems. The logic? Fresh parts, fresh brakes, problem solved. However, that’s not always the case. A significant number of pulsating brakes originate from issues that have nothing to do with the rotors themselves, such as caliper problems, uneven pad wear, or even mounting surface irregularities.
This problem can sometimes be tricky because the symptoms mimic underlying rotor warping, but in reality, the explanation may be rooted in subtle yet impactful causes like pad deposits or uneven torque during installation. In fact, neglecting proper bed-in procedures after installing new rotors can cause uneven rotor surfaces over time, leading to that pulsating feeling.
Interestingly, a study on brake system reliability points out that improper installation techniques and lack of proper rotor surface preparation contribute significantly to early brake vibrations. So, even if you’ve recently swapped out your rotors, that doesn’t automatically mean the root of your pulsation is solved.
Are you tired of feeling that pulsating brake pedal every time you hit the brakes? Before you start doubting your new rotors, let’s explore what might be truly causing this issue—and how you can address it efficiently. For more insights on brake maintenance and avoiding common pitfalls, check out [The Ultimate Guide to Brake Service for Safety and Performance](https://repairmycarpro.com/the-ultimate-guide-to-brake-service-for-safety-and-performance).
Now, let me share a mistake I made early on, which could help you avoid the same frustration. I once skipped proper caliper inspection after replacing rotors and ended up with uneven brake wear months later, which caused pulsation again. Learning from that saved me from unnecessary parts replacement and cost. So, are you ready to get to the bottom of your brake pulsation? Let’s dive into the practical steps that will save you time and money.
Inspect the Brake Calipers and Pads
Start by removing the wheels to access the brake components. Check each caliper for smooth movement—if a caliper is sticking or seized, it will cause uneven pressure, leading to pulsation. Also, examine the brake pads for uneven wear; uneven pads can create inconsistent contact with the rotor. I once had a stubborn caliper that refused to slide freely, which I fixed by cleaning and lubricating the guide pins with high-temperature brake lubricant. After reassembling everything, the pulsation diminished significantly.
Evaluate the Rotor Surface for Warping or Deposits
Use a dial indicator to measure rotor runout; more than 0.005 inches indicates warping. Sometimes, surface contamination or uneven glaze causes pulsation even on new rotors. To address this, machine the rotors if they are thick enough, or clean them with a brake cleaner and resurface if they are unevenly glazed. I learned the hard way that skipping proper rotor surface cleaning led to persistent pulsation, despite the rotors being brand new.
Resurface or Replace as Necessary
If the rotors are warped beyond spec, either have them resurfaced professionally or replace them entirely. Always ensure the mounting surface is clean and free of rust or debris before installing new rotors, to prevent uneven surfaces that can cause vibrations. Remember to torque the lug nuts in a crisscross pattern to the manufacturer’s specifications for proper seating. Once I followed this step meticulously, my brakes felt smooth and responsive again.
Perform Proper Bed-In Procedure
New rotors and pads require a bedding process to establish a uniform transfer layer, ensuring even surface contact. To bed the brakes, accelerate to around 40 mph and apply firm, steady pressure to bring the vehicle to a gentle stop without locking up the wheels. Repeat this process 10-15 times, allowing the components to cool between stops. This process helps remove any residual oil or contaminants and ensures the pads and rotors mate properly. Skipping this step often leads to pulsation issues shortly after installation, which I discovered after rushing through a quick bed-in.
Check and Re-torque Wheel Lug Nuts
Improper lug nut torque can cause the wheel to sit unevenly, transmitting vibrations through the brake system. Use a torque wrench to tighten lug nuts to the vehicle’s specified torque, usually about 80-100 ft-lb, depending on your vehicle. Tighten in a star pattern to distribute pressure evenly. I overlooked this at first and noticed the pulsation returned; after re-torquing, it disappeared. This simple step often gets overlooked but can make a significant difference.
Assess Brake Fluid and Hydraulic Components
Contaminated or old brake fluid can cause inconsistent caliper operation. Check the fluid level and condition; if it’s dark or has debris, perform a complete brake fluid flush. Also, inspect brake lines for leaks or swelling, which can affect pedal feel and cause pulsation. I replaced a swollen rubber hose that was causing inconsistent pressure, which improved pedal firmness and eliminated vibrations. Regularly maintaining the hydraulic system prevents this recurring problem.
Many car owners assume that sticking to popular advice guarantees a flawless repair, but seasoned mechanics understand there’s more nuance involved. A prevalent myth is that regular oil changes alone will keep your engine in perfect condition; in reality, using the right oil type, following proper drain intervals, and considering your vehicle’s specific needs are crucial for optimal performance. Relying solely on generic intervals without understanding your car’s unique demands can lead to unnecessary wear or even engine damage; detailed insights on this topic can be found in [oil change innovations and technologies that save your engine](https://repairmycarpro.com/oil-change-innovations-technologies-that-save-your-engine).
Maintaining your vehicle’s health over time isn’t just about replacing parts—it’s about using the right tools and adopting effective routines that ensure longevity and safety. As someone who’s spent years immersed in auto repair, I can attest that investing in quality equipment and embracing systematic maintenance makes all the difference. Today, I’ll share exactly what tools I rely on and how they help me keep vehicles running smoothly, along with where this trend is heading in vehicle care.
Personal Tools That Keep My Workshop Efficient
First and foremost, a reliable digital torque wrench is indispensable. Unlike traditional models, digital torque wrenches provide precise readings, ensuring lug nuts and fasteners are tightened accurately—preventing issues like uneven tire wear or warped rotors. I personally use the GearWrench Electronic Torque Wrench because of its consistent calibration and user-friendly interface. Regularly checking and re-calibrating my tools guarantees consistent results, which is crucial for safety-critical components.
Next, I swear by a stethoscope-style mechanic’s probe for diagnosing mysterious engine noises or misfires. This simple but effective device helps me listen closely to specific components, narrowing down problems without unnecessary disassembly. Paired with a comprehensive maintenance routine, this approach minimizes guesswork, saving me time and money.
Employing Advanced Diagnostics for Long-Term Benefits
Gone are the days of relying solely on basic OBD-II scanners. Modern advanced vehicle diagnostic tools, like the Autel MaxiSys, allow for deep subsystem analysis—checking sensor health, module interactions, and real-time data streams. I recommend investing in one if you’re serious about long-term vehicle health, as it helps catch issues before they escalate. For example, by analyzing data logs, I can detect early signs of fuel injector degradation or declining oxygen sensor performance, preventing costly repairs down the line.
Moreover, maintaining a detailed service log, coupled with these tools, helps track wear patterns and plan proactive interventions. Regular diagnostics aligned with a systematic schedule extend your vehicle’s lifespan significantly, as emphasized in auto repair best practices.
Predicting the Future of Vehicle Maintenance
The trend leans heavily towards smart diagnostics, machine learning, and remote monitoring. Automotive tech companies are developing AI-powered systems that predict component failure before symptoms even appear, revolutionizing how we approach vehicle longevity. As these innovations become more accessible, DIY enthusiasts and professionals alike will benefit from even more precise maintenance schedules and troubleshooting capabilities.
How can I maintain vehicle diagnostics over time?
Consistently update your diagnostic software, calibrate your tools regularly, and stay informed about emerging technologies that improve diagnostics. Incorporating telematics and data analytics into your routine can prevent breakdowns and optimize maintenance costs, turning vehicle care into a proactive rather than reactive process. Remember, leveraging the right tools isn’t just about fixing problems—it’s about preventing them altogether. So, consider trying out a comprehensive diagnostic kit if you haven’t already; it might just be the upgrade your vehicle needs to stay reliable for years to come.
Lessons That Changed My Approach to Brake Repairs
One of the most eye-opening lessons I learned was that installing new rotors isn’t a guaranteed fix for pulsating brakes. Sometimes, the root cause lies elsewhere, like caliper issues or uneven pad wear—details that can be overlooked in DIY repairs. Realizing this shifted my focus toward thorough inspection and surface preparation, which saved me time and money in the long run.
Another insight was the importance of proper bed-in procedures. Rushing through this step can lead to uneven rotor surfaces, causing vibrations despite new parts. Making it a routine part of my process ensured smoother braking for myself and my customers, reaffirming that meticulous steps make all the difference.
I’ve also found that torque consistency is vital. An improper lug nut tightening sequence or torque can cause wheel imbalance, transmitting vibrations back to the brake system. Paying attention to this detail significantly improved vehicle stability and brake feel—proof that small adjustments can lead to big improvements.
Tools and Resources That Keep My Brake Work Sharp
Investing in a high-quality digital torque wrench, like the GearWrench Electronic Torque Wrench, has become indispensable for ensuring precise bolt torque, especially when re-torquing wheels or calipers. Such accuracy prevents uneven stress and prolongs component life.
My trusted brake inspection kit includes a dial indicator for measuring rotor runout and a brake cleaner with a wire brush to eliminate deposits. Regularly using these tools helps me catch early signs of wear or contamination that could lead to pulsation, emphasizing preventive care over reactive fixes.
Keeping up with automotive diagnostics news through websites like Vehicle Diagnostics Explained has been a game-changer. Advanced tools and updated techniques allow me to diagnose issues quickly, saving time and maintaining high safety standards.
Your Turn to Take Charge of Brake Health
Understanding the nuances of brake pulsation and vehicle diagnostics empowers you to approach repairs with confidence. Remember, successful auto repair isn’t just about changing parts but about understanding what truly causes issues and addressing those foundational problems. Embrace the detailed process, use the right tools, and stay informed—your vehicle’s safety depends on it. Ready to explore more ways to optimize your vehicle maintenance? Dive into the ultimate guide to brake service for comprehensive insights.