
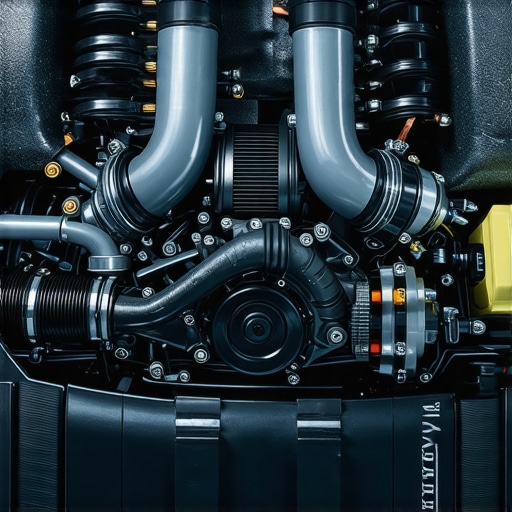
Ever been startled when starting your car, only to hear a loud, gut-wrenching roar that quickly subsides? I remember the first time it happened to me. I thought I was about to face a major engine overhaul, but it turned out to be something far simpler—and fixable. That initial blast of noise was not only alarming but also confusing. Why does your engine make such a racket only during startup, and then settle down? If you’ve experienced this, you’re not alone. Many drivers overlook this common issue, but understanding what’s behind the roar can save you time, money, and unnecessary stress.
Decoding the Morning Roar: What’s Really Going on When Your Car Starts Loud
This aggressive sound is often a signal that something needs attention, but the good news is, it’s usually a minor fix. It could be related to the engine’s cold start process or a sign that parts like the exhaust system, belts, or valves need a quick inspection. From personal experience and countless auto repair sessions, I’ve learned that these noises, while unsettling, often point to straightforward issues—the kind of problems you can sometimes diagnose yourself before heading to the shop.
Is the Noise Only When Cold? Don’t Worry, It’s Usually Normal
One common misconception I had early on was assuming all loud startups meant serious trouble. In reality, numerous factors contribute to that initial roar, such as thicker oil in the engine or thermal expansion of metals. Over time, I discovered that replacing old engine oils with newer, more advanced formulations could significantly reduce this noise. Curious about how to optimize your oil changes? Check out oil change innovations that help your engine start quieter and last longer.
But before jumping to conclusions or unnecessary repairs, it’s worth knowing what to look for and when. In the following sections, I’ll guide you through practical steps to identify the root cause of that roaring engine, so you can restore peace during your morning start and keep your vehicle running smoothly. If this sounds familiar, keep reading—your engine’s quiet next start might be just a fix away.
,
Inspect the Engine Oil First
Start by checking your engine oil level and condition. Thick or dirty oil can cause increased friction during cold starts, resulting in noise. I once found my oil was several months overdue for a change, and after replacing it with a high-quality synthetic, the startup roar diminished significantly. To do this, turn off the engine, pull out the dipstick, wipe it clean, reinsert it, and check the oil level and clarity. If low or dirty, plan an oil change as outlined in this guide for optimal engine performance.
Examine the Belts and Pulleys
Next, focus on the accessory drive belts and pulleys. Worn or loose belts can slip during startup, creating a screech or groan that may sound alarming. Describe a moment I had where I noticed a squealing noise only during cold starts; a quick inspection revealed a worn serpentine belt. To assess yours, open the hood when the engine is cold, and look for cracks, fraying, or glazing on the belts. Gently press on the belt; if it deflects more than half an inch, it might need tightening or replacement. For a step-by-step process, see this comprehensive guide.
Check the Exhaust System
Sometimes, the noise stems from exhaust leaks or issues with the muffler. Rusted or cracked exhaust components can produce loud roars when starting the engine cold. I once patched a tiny hole in my exhaust pipe with a clamp—immediately, the noise reduced, and I avoided costly repairs. To locate leaks, listen near the exhaust pipe while the engine is idling cold; hissing or loud noises indicate a problem. Fixes may involve sealing small leaks or replacing sections of piping. For troubleshooting exhaust issues, review vehicle diagnostics basics.
Investigate Valves and Spark Plugs
Valve train components can also cause startup noises if worn or misadjusted. Spark plugs that are old or improperly gapped can miss-fire during cold starts, creating knocking sounds. Remove a spark plug (reference auto repair hacks for tips) and inspect for wear or deposits. Replacing spark plugs with fresh, properly gapped ones often quiets the engine. Similarly, valve clearances may need adjustment, especially after a significant mileage. Recognize these symptoms early to avoid further damage.
Assess the Exhaust Gas Recirculation System
Garages often overlook the EGR valve, which controls exhaust gases recirculated into the engine. A clogged EGR valve can cause rough or loud startups as the engine struggles to regulate airflow. To test it, remove the valve and clean it with suitable cleaners. If cleaning doesn’t help, consider replacing it. Proper EGR function ensures smoother, quieter starts—check advanced diagnostics for more insights.
When to Seek Professional Help
If the noise persists after these steps, it may be time to consult a mechanic. Persistent or worsening sounds could indicate deeper issues like timing chain tensioner problems or problems with the cylinder head. Before doing so, review auto repair strategies to understand your vehicle’s needs and prepare for diagnostics. Often, a comprehensive check with specialized tools can pinpoint elusive causes, saving you money and preventing breakdowns.
While common advice emphasizes basic maintenance like regular oil changes and brake inspections, many car owners overlook subtle nuances that can make a significant difference in diagnosing and repairing their vehicles effectively. One misconception is that vehicle diagnostics are foolproof when, in reality, relying solely on generic scan tools can lead to misinterpretations. Modern vehicles are equipped with advanced sensors and computer systems; however, these systems require nuanced understanding to interpret their signals accurately. For instance, a rough idling suspect might be caused by a misfiring spark plug, a clogged EGR valve, or even a subtle vacuum leak—each requiring different diagnostic approaches, as detailed in auto repair hacks.
A prevalent myth is that brake service is just about replacing worn pads. But true safety relies on understanding the underlying causes of brake noise or vibration, which often involve issues like warped rotors or caliper problems. Addressing only the surface symptoms without diagnosing the root causes can lead to costly repeat repairs. For example, a pulsating brake pedal might be mistaken for rotor thickness variations, but it could also stem from uneven pad deposits or a caliper sticking, as explained in brake service essentials. Additionally, many drivers assume that an oil change is just about replacing dirty oil when, in fact, selecting the optimal oil formulation can influence engine performance, fuel economy, and longevity.
Misunderstanding these nuances often traps vehicle owners into a cycle of superficial fixes. The oops moment occurs when replacing parts without considering how adjustments or complementary repairs might be necessary—neglecting, for example, that new spark plugs may need proper gapping or that timing adjustments could be required after certain replacements.
Advanced diagnostics have made huge strides, but their effectiveness depends on the technician’s knowledge. A study by the Society of Automotive Engineers underscores that proper interpretation of diagnostic trouble codes (DTCs) is critical since many codes are generic and require context-specific analysis source. For the everyday car owner, understanding that a check engine light is just a symptom and not a diagnosis is vital, emphasizing the importance of professional evaluation rather than jumping to conclusions or DIY fixes.
How can a DIYer distinguish between a sensor glitch and a real mechanical issue?
Let’s dig deeper into this question. Sensor-related problems often produce inconsistent symptoms, like sporadic warning lights or fluctuating engine performance, which can be fake alarms or false readings. Cross-referencing error codes with real-world symptoms and understanding the diagnostic landscape, as shown in vehicle diagnostics explained, can prevent costly misdiagnoses. Remember, a thorough understanding of these subtleties distinguishes an experienced mechanic from a novice in troubleshooting complex issues. Have you ever fallen into this trap? Let me know in the comments.
Investing in Precision Tools for Auto Care
My go-to equipment for vehicle diagnostics and repairs includes a high-quality OBD-II scanner like the Innova 3160g, which I personally rely on for quick fault code readings and live data analysis. This device allows me to interpret complex sensors and gauge outputs with clarity, saving hours of guesswork. For advanced troubleshooting, I employ a digital multimeter such as the Fluke 115, renowned for its accuracy in testing electrical circuits and detecting issues in the vehicle’s wiring harness or sensors. Regularly verifying battery, alternator, and starter circuits with such a multimeter ensures long-term reliability and prevents unexpected breakdowns.
When it comes to maintenance, I prefer using a Torque wrench with a micrometer adjustment—specifically, the Tekton 3/8 inch Drive Click Torque Wrench. Proper torque application during brake Caliper or wheel hub assembly protects critical components from over- or under-tightening, which can cause long-term damage. Investing in quality hand tools like these fosters proper repair practices that hold up over time.
Software Solutions that Keep Repairs on Track
Beyond hardware, I utilize specialized software that streamlines diagnostics and planning. For example, the Mitchell 1 Ultimate software platform offers vehicle-specific repair information and wiring diagrams, which I reference during complex repairs such as timing belt replacements or EGR valve cleaning. These resources reduce guesswork, ensure correct procedures, and shorten repair times. Additionally, I use repair tracking apps like Car Scanner ELM OBD2, which syncs with my scanner to document each diagnostic session and help track recurring issues, aiding in long-term vehicle health management.
Proactive Maintenance Over the Long Run
One key philosophy I adhere to is conducting regular inspections with a flashlight and mirror to identify early signs of wear, especially in problem-prone areas like brake pads, rotors, and suspension components. Coupling these visual checks with diagnostic scans helps spot anomalies before they escalate. For instance, monitoring the engine’s cooling system with infrared thermometers during routine checks can reveal hotspots indicating coolant flow issues or failing thermostats, preventing costly failures down the line.
How do I maintain vehicle health over time?
Consistent maintenance routines, including timely oil changes using advanced formulations like those discussed in this guide, regular brake inspections, and software diagnostics, are essential for longevity. I schedule these checks every 5,000 to 7,500 miles and keep detailed records. Moreover, embracing modern tools and software means I can diagnose issues early and plan repairs efficiently, avoiding service delays and unexpected failures. For anyone seeking to optimize their vehicle’s performance, I recommend integrating a professional-grade OBD-II scanner and an app like Car Scanner to get real-time insights and maintain optimal health for your car.
Lessons That Transformed My Approach to Auto Care
- One of the toughest lessons I learned was never to rely solely on generic diagnostic codes; always combine them with real-world inspection because sensors can give false alarms, leading me astray and causing unnecessary repairs.
- Understanding that routine maintenance, like oil changes, isn’t just about freshness but choosing the right formulation for your engine tiptoed into my routine and saved me from costly engine trouble down the line.
- It took a misadventure inspecting brake rotors to realize that a seemingly minor vibration could be rooted in caliper sticking or warped discs—diagnosing the root makes all the difference.
- Discovering the significance of proper torque during repairs prevented years of issues caused by over-tightened or loose components—precise tools and knowledge are your best friends.
Tools and Resources That Elevate Auto Maintenance
- My trusted OBD-II scanner, the Innova 3160g, has been a game-changer—its ability to interpret live data helps me catch issues early before they turn into breakdowns, bridging the gap between guessing and knowing.
- The Fluke 115 multimeter ensures my electrical diagnostics are accurate, especially when testing sensors or wiring—reliable tools that prevent a lot of headaches.
- Using the Tekton 3/8 inch Drive Click Torque Wrench ensures every bolt and nut is tightened to specification, safeguarding my repairs’ integrity—precision matters in auto care.
- For comprehensive repair info, the Mitchell 1 software platform provides detailed wiring diagrams and vehicle-specific data, accelerating complex repairs like timing belt replacements and reducing guesswork.
Your Next Step Toward Confident Vehicle Care
Armed with real-world experience, reliable tools, and a curiosity to learn, you can elevate your auto care game beyond basic fixes. Embrace the nuances of diagnosing and repairing your vehicle—each successful fix builds your confidence and extends your car’s lifespan. Remember, every expert was once a beginner, and the journey towards mastery starts with small, informed steps. Ready to take your vehicle diagnostics or brake service skills to the next level? Keep exploring, practicing, and sharing your experiences—your car will thank you for it!