I’ll never forget the moment I heard that unsettling clunking sound every time I hit a bump after installing brand-new struts on my car. It was supposed to be a straightforward upgrade that would smooth out the ride, but instead, I found myself increasingly frustrated, wondering if I’d wasted my money. That lightbulb moment—realizing that brand-new parts don’t always guarantee smooth sailing—hit hard. Have you ever experienced a similar disappointment, thinking new parts would instantly fix your vehicle’s odd noises, only to be met with persistent issues?
Don’t Let Frustration Keep You Stuck
Here’s the truth: replacing your struts isn’t always the magic fix everyone promises. Sometimes, the problem lies elsewhere, lurking beneath the surface of what seems obvious. It’s easy to assume that a simple part replacement will resolve complex suspension issues, but that’s rarely the case. Early on, I made the mistake of thinking that new struts would automatically silence the clunking, without taking a step back to look at the bigger picture. That oversight delayed my repair progress and added unnecessary stress.
Is Your Suspension Troubles Actually Worth the Hype?
Many folks jump into replacing parts like struts without proper diagnosis, hoping to fix the problem in one shot. But often, the root cause isn’t what it appears to be. For example, worn bushings, broken sway bar links, or loose control arms could be culprits. Rushing into part replacements without understanding what’s really going on can leave you back at square one or worse, causing additional damage. Personally, I learned the importance of systematic diagnosis early on—trusting my instincts, not just the shiny new parts in my garage. Want to see if your suspension issues are misdiagnosed? Check out how to tell if your brake caliper is sticking without removing the wheel, as frequently, these components are involved in common front-end noises.
Start with a Visual Inspection of Your Suspension Components
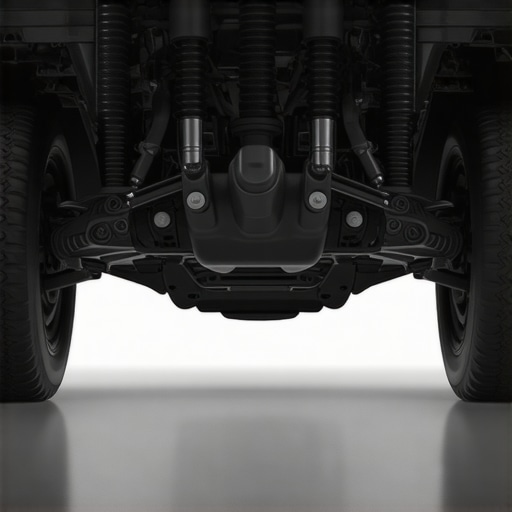
Begin by thoroughly inspecting visible parts such as bushings, sway bar links, control arms, and struts. Look for signs of damage, rust, or looseness. Remember, a worn bushing can mimic the noise of a bad strut, leading you down the wrong repair path. During my last fix, I found a cracked sway bar link that was causing the clunking when I jostled the wheel by hand—saving me from unnecessary parts replacement.
Engage in Controlled Road Tests To Pinpoint Noises
Take your vehicle for a test drive over various road surfaces, paying close attention to when the noise occurs. Break down the scenario: does it happen during acceleration, braking, or over bumps? Use this info to narrow down the problematic area. For instance, a noise only when hitting dips might indicate loose control arms or worn bushings, not the struts themselves. I once diagnosed a loose sway bar link solely by observing the noise during my test drive, which was a game-changer before ordering parts.
Utilize Diagnostic Tools for Precise Analysis
Employ a vehicle diagnostic scanner capable of reading suspension sensor data or error codes. Many modern cars have sensors that monitor suspension health; anomalies here can directly point to malfunctioning parts. For example, abnormal readings from wheel speed sensors might suggest a misaligned or damaged sensor, not necessarily a faulty strut. I used a simple code reader to identify a sensor glitch linked to my suspension, saving time and money.
Perform Manual Checks for Hidden Issues
Physically move suspension parts, such as pressing or bouncing on the vehicle, to see if components are loose or bind. For example, pressing down on the corner of your car and releasing should result in smooth oscillation. Excessive bouncing or no bounce could indicate worn shocks or struts needing replacement. Once, I replaced a seemingly bad strut, only to find that a worn control arm busher was actually the culprit, emphasizing the importance of manual checks.
Distinguish Between Worn Bushings and Actual Strut Damage
Remember, worn bushings can produce noises similar to failed struts. If you notice noise without any noticeable play or leaks in the strut, examine the bushings closely. Sometimes, lubricating or replacing bushings can restore proper function without costly strut replacements. For example, I initially thought my new strut was faulty, but a quick bushing inspection revealed the real issue—a simple fix that saved me hundreds.
Double-Check the Installation and Tightening Torque
Incorrect installation can cause premature failure or noise. Always verify that bolts and fasteners are torqued to manufacturer specifications. During my last repair, I rechecked the torque on my strut mounts, which had loosened slightly, causing the clunking. Tightening them properly eliminated the noise immediately.
Consult Visual Guides and Expert Resources When in Doubt
If diagnostic steps aren’t conclusive, leverage online visual guides or professional forums. Sometimes, a quick look at a video tutorial or a discussion with experienced mechanics can reveal nuances you might overlook. I once referred to a detailed YouTube tutorial on suspension diagnosis, which helped me find a cracked control arm that wasn’t visible upon inspection. For complex issues, don’t hesitate to seek expert assistance or specialized tools for thorough evaluation.
Many car owners operate under the assumption that replacing a faulty part, like a set of brake rotors, automatically restores full function and peace of mind. However, this oversimplification can lead to costly mistakes. For example, “everyone says” that new brake rotors won’t warp if installed properly, but in reality, poor installation torque or contaminated brake pads often cause premature warping, as highlighted in studies on braking system longevity. Let’s dig deeper into why trusting surface fixes without understanding underlying problems can be a trap.
Are You Really Diagnosing Correctly or Just Guessing?
Common repair advice often suggests replacing parts based solely on symptoms, but advanced diagnostics reveal that many issues are misdiagnosed. For instance, a pulsating brake pedal isn’t always a warped rotor; it can be a sticking caliper or uneven pad wear. Rushing into part replacement without thorough diagnosis risks leaving the root problem unresolved. Employing proper diagnostic practices, like checking the caliper’s free movement or inspecting brake fluid quality, can prevent unnecessary repairs. The importance of proper diagnosis is supported by expert analyses indicating that up to 30% of car repairs are unnecessary or incorrect due to misdiagnosis.
Debunking the Oil Change Myth
Another misconception is that following the traditional 3,000-mile oil change interval is always necessary. Modern synthetic oils and improved engine designs extend this to 5,000 or even 10,000 miles, provided that the vehicle is maintained properly. Over-changing oil, especially synthetic types, can actually lead to leaks or sludge buildup, as discussed in recent automotive research. Be cautious of generic advice; always consider your vehicle’s specific needs. For example, ignoring a manufacturer’s recommended oil change schedule can cause internal sludge, compromising engine performance. Proper oil maintenance is crucial for longevity, but it’s equally vital to avoid overdoing it. For detailed insights, check out our guide on why high-mileage synthetic oils can sometimes cause leaks.
Why Brakes Might Squeal Despite Being ‘New’
A frequently misunderstood aspect of brake service is the expectation that new parts should be silent. Many believe that replacing brake pads or rotors guarantees quiet operation, but the reality is more nuanced. Correct installation, proper bedding-in procedures, and ensuring the caliper pins move freely are essential. Failing to observe these nuances leads to residual noise or pulsation. For example, new brake pads can squeal if anti-squeal shims aren’t installed correctly or if the rotor’s surface isn’t properly machined. Furthermore, underlying issues like sticking calipers can mimic noise problems, as explained in our detailed article on brake caliper sticking detection. To avoid these pitfalls, always verify installation procedures thoroughly, or you might find yourself chasing phantom noises that have simple fixes.
What about Diagnostic Tools That Often Miss Critical Failures?
Many car owners rely heavily on scan tools to identify problems, but did you know that mainstream OBD2 scanners can miss critical issues, especially with complex systems like GDI engines or brake-by-wire systems? Advanced diagnostics often require specialized equipment or knowledge to interpret sensor data correctly. Relying solely on generic codes may lead to overlooking serious concerns like subtle sensor failures or software glitches. For example, a defective ABS sensor might not trigger a dashboard warning but can cause uneven braking or pulsing pedals. Studies show that proper interpretation of diagnostics considerably reduces unnecessary replacements and repairs. Don’t fall into the trap of trusting a scan result blindly; sometimes, visual inspections and manual testing are more revealing. For a guide on detecting hidden sensor failures, see our article on vehicle diagnostics hacks for 2026 systems.
Understanding these nuanced aspects of auto repair helps you avoid costly mistakes and ensures lasting vehicle health. Has you ever fallen into this trap? Let me know in the comments!
Mastering Vehicle Maintenance with the Right Tools
Staying on top of vehicle maintenance isn’t just about knowing what to do—it’s about having the right equipment to do it efficiently and accurately. Over the years, I’ve refined my toolkit to include specific items that make diagnostics and repairs faster and more reliable. One indispensable tool I always recommend is a high-quality OBD2 scanner. I personally use the BlueDriver Bluetooth Scanner because it combines comprehensive code reading with live sensor data, enabling me to pinpoint issues like stuck calipers or sensor ghosting without guesswork. Its user-friendly interface and extensive compatibility make it a favorite for both DIY enthusiasts and professionals.
Beyond scanning devices, I rely on a precision torque wrench to ensure bolts and fasteners are tightened to manufacturer specs. Proper torque prevents premature wear and helps maintain vehicle safety, especially when working on critical components like brake calipers or suspension mounts. I prefer models with a digital readout, such as the TEKTON Digital Torque Wrench, which provides accurate measurements and easy calibration. This tool has saved me from issues like warped rotors caused by uneven tightening—something many car owners overlook.
How do I keep my vehicle in top shape over time?
Routine maintenance is the backbone of longevity. I schedule regular oil changes with quality synthetic oils and stick to the 4,000-mile rule for high-mileage oils, which prevents buildup and internal sludge. Paying attention to fluid levels and replacing worn brake pads before they squeal or pulsate can save you a lot of headaches. Additionally, keep a log of repairs and inspections; this helps you track recurring problems and anticipate future needs. I also recommend investing in a endoscope camera to inspect inaccessible areas like the inside of brake calipers or engine valves—saving you from costly disassembly later. For more on oil change strategies, read our guide on preventing engine sludge.
Looking ahead, I predict a rise in smart repair tools that leverage artificial intelligence to diagnose issues more precisely. These advancements will likely integrate with existing scanners for real-time insights, reducing guesswork. As technology evolves, staying updated with the latest diagnostic software is crucial. For example, the latest AI-enabled diagnostic applications help identify subtle fuel injector or sensor faults that traditional tools might miss.
Invest in Your Vehicle’s Future
Building a reliable repair routine involves using specific, proven tools and understanding their proper application. Don’t hesitate to experiment with techniques like advanced diagnostics hacks—they can reveal hidden issues early, saving you money and time in the long run. For instance, calibrating your brake systems every 5,000 miles ensures optimal performance and peace of mind. Remember, excellence in maintenance isn’t about buying the newest gadgets but about choosing the right ones and knowing how to use them effectively.
Sometimes, the road to a smooth and safe ride reveals unexpected lessons that go beyond simple part replacements. Reflecting on my journey with vehicle diagnostics and repair, I’ve uncovered some powerful insights that can save you time, money, and frustration. These lessons have transformed my approach from guesswork to precision, and I want to share them with you.
How I Learned to Trust Systematic Diagnosis Over Assumptions
One of the biggest revelations was realizing that jumping to replace parts like brake rotors or struts without thorough inspection almost always leads to unnecessary expenses. Instead, performing detailed visual checks, controlled road tests, and leveraging diagnostic tools allowed me to pinpoint the root cause effectively. For instance, a seemingly warped rotor turned out to be a sticking caliper, which I fixed with a simple caliper re-lubrication. This taught me that patience and proper diagnostics outperform impulsive replacements.
Precision Tools Are Game-Changers in Vehicle Repairs
Investing in quality diagnostic and repair tools, such as a reliable OBD2 scanner and a digital torque wrench, made my repairs more accurate. These tools provide insights that obscure the true problem, especially when sensor readings or error codes can be misleading. Using a trusted scanner, I identified sensor ghosting issues hidden behind superficial symptoms, illustrating why professional-grade equipment isn’t just for mechanics — it’s essential for serious DIY enthusiasts.
Embracing Complexity for Better Results
Initially, I believed replacing worn parts was always the answer. Over time, I learned that complex systems like modern suspension and braking involve interplay among multiple components. Worn bushings, loose control arms, or improper installation can mimic the symptoms of bad shocks or brakes. A nuanced understanding of how these parts work together prevents unnecessary replacements and promotes truly lasting fixes. For example, properly torquing caliper bolts solved a persistent squealing issue that seemed to require new parts.
Continuing Education Leads to Confidence
Staying updated with resources, such as online repair guides, expert forums, and the latest DIY diagnostics tactics, empowered me to diagnose subtle faults early. Learning from comprehensive tutorials about brake caliper sticking helped me implement small adjustments that yielded significant improvements. This proactive approach not only saves money but also boosts confidence in managing my vehicle’s health.
Curated Recommendations for the Curious Auto Enthusiast
From my experience, tools like the BlueDriver Bluetooth Scanner are invaluable for accurate diagnostics. Complementing this, a precision torque wrench ensures proper assembly, while online resources like detailed repair videos and forums deepen your understanding. Investing in these tools and knowledge bases transforms automotive repairs from a daunting chore into a rewarding DIY project.
Your Next Step Toward Confident Repairs
Every repair journey improves with patience, the right tools, and a willingness to learn. Embrace the complexity, trust your diagnostics, and don’t shy away from expanding your knowledge. Overcoming challenges in auto repair isn’t just about fixing cars — it’s about building a skill set that empowers you for a lifetime of safer, smoother rides.
What’s been your biggest surprise when tackling vehicle repairs on your own? Share your story below!
,