Have you ever been stranded on the side of the road, wondering why your car suddenly refused to start or why it stalls without warning? That sinking feeling when your vehicle fails just when you need it the most is maddening. I remember the moment vividly—trying to leave for an important appointment, only for my car to refuse to respond, despite the engine turning over. It was a lightbulb moment that led me down a rabbit hole of diagnostics and stubborn mystery parts. That frustrating experience revealed a sneaky culprit lurking behind the scenes—a hidden fuse responsible for killing the fuel pump signal without any obvious signs.
Spotting the Silent Saboteur: Why Your Fuel Pump Might Be Getting the Short End of the Stick
In my early days of auto repair troubleshooting, I made the mistake of assuming that stubborn fuel pump failures were always related to the pump itself or the relay. Turns out, a tiny, often overlooked fuse can be the real villain, cutting off power silently and leaving no trace, until it’s too late. This fuse acts as a switch, controlling the electrical pathway to your fuel pump, but it’s vulnerable to heat, vibrations, and corrosion. When it blows or suffers a partial failure, your fuel pump loses power, and your engine stalls or refuses to start.
Understanding this is crucial. It’s a common mistake to assume your fuel pump is bad without checking the fuse first. Early on, I replaced the fuel pump only to find the problem persisted. That was an eye-opener. Had I checked the fuse, I could have saved time and money. This experience taught me to always inspect the fuse box thoroughly when diagnosing fuel delivery issues. For a comprehensive look at similar hidden causes, check out [this guide on common ground wires mimicking failing starters](https://repairmycarpro.com/the-common-ground-wire-that-mimics-a-failing-starter). It’s surprising how often a simple fuse problem masquerades as a more complex issue.
But why is this fuse such a sneaky troublemaker? The answer lies in the fact that these fuses can deteriorate gradually, causing intermittent issues before failing completely. Plus, many car owners overlook their fuse boxes, considering them a last resort instead of a first step in diagnosis.
So, if you’re tired of spending on guesswork, understanding this hidden fuse and how it can kill your fuel pump signal is essential. It’s a small component with a big impact—one that can save you a lot of headaches if checked early. Next, I’ll walk you through how to identify and test this fuse, so you can diagnose your vehicle like a pro and avoid getting stranded again.
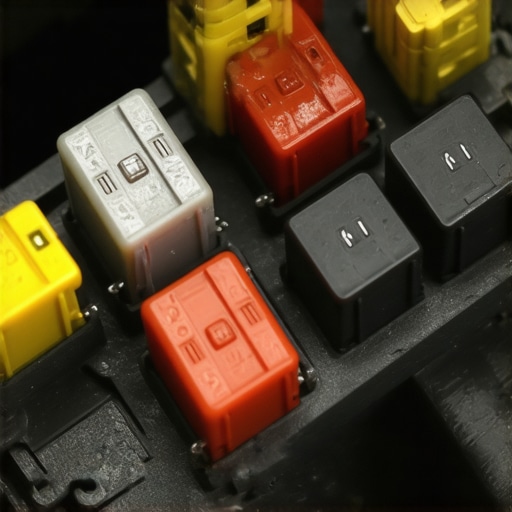
Locate the Fuse Box and Identify the Fuel Pump Fuse
Start by consulting your vehicle’s owner manual to find the exact location of the fuse box—commonly under the dashboard or engine bay. Once located, identify the fuse responsible for the fuel pump circuit, often labeled as “Fuel Pump” or similar. Use a fuse diagram if available for accuracy. Remember, fuses are small and can be overlooked, so handle with care.
Inspect the Fuse for Damage
Remove the identified fuse using fuse pullers or pliers. Examine it closely for visible signs of failure: discoloration, a broken filament, or blackening. Even if the fuse looks intact, it might have deteriorated internally. For a definitive assessment, testing with a multimeter is recommended.
Test the Fuse with a Multimeter
Set your multimeter to continuity mode or the lowest resistance setting. Place the probes on the fuse terminals; a beep or a reading close to zero ohms indicates the fuse is good. No beep or an infinite reading signifies a blown fuse that needs replacement. If you don’t have a multimeter, a simple test light can suffice—connect it across the fuse terminals and verify if it lights up when the ignition is turned on.
Replace Faulty Fuses Carefully
If the fuse is blown, replace it with a new one of the exact amperage rating—this information is printed on the fuse or vehicle guide. Install the new fuse firmly into the socket, ensuring good contact. Remember, using a fuse with a higher rating can be dangerous as it may not blow during overloads, risking electrical damage or fire.
Test the System After Replacement
Start your vehicle and check if the fuel pump operates normally. Listen for the pump’s hum or hear a slight whirring sound when turning the ignition to the “on” position. If the fuel pump now runs, the fuse was likely the issue. However, if the fuse blows again, further investigation is needed—involving wiring and relay checks, which might be more complex.
Be Cautious of Common Mistakes
One common mistake is replacing the fuse without inspecting the cause of its failure. Blown fuses can be symptomatic of other electrical issues like short circuits or relay failures. To avoid recurring problems, consider inspecting related components or consulting [this guide on common ground wires that mimic failing starters](https://repairmycarpro.com/the-common-ground-wire-that-mimics-a-failing-starter). Besides, always handle fuses with dry hands to prevent static discharge or accidental shorts.
Additional Tip: Check Your Wiring Harness
If fuse failures happen repeatedly, inspect the wiring harness connected to the fuel pump. Frayed wires or corrosion can cause short circuits, blowing the fuse. Use a flashlight and magnifying glass if necessary. Repair damaged wiring promptly using proper connectors or soldering to prevent future fuse blowouts.
Concluding the Diagnosis
By systematically inspecting and testing the fuse, you can efficiently determine if a blown fuse is the root cause of your fuel pump issues. This process is straightforward and saves money, but always remember to look beyond the fuse to eliminate underlying electrical faults that may cause it to blow again. Regularly checking your fuse box can prevent unexpected stalls and keep your vehicle running smoothly.
Many car owners approach vehicle diagnostics and routine services with assumptions that can lead to costly mistakes. A common misconception is that a smoothly running engine after an oil change means everything is fine—yet, in reality, synthetic oils can sludge up quickly if not changed at proper intervals, compromising engine health. As discussed in [this article](https://repairmycarpro.com/the-real-reason-your-new-synthetic-oil-is-already-sludging-up), understanding the nuances of oil compatibility and degradation helps prevent premature engine wear.
Another widespread myth is that brake squeal always indicates worn pads. However, cheap or improperly installed brake pads often cause noise without actual brake failure. Regular inspection of brake calipers, as explained [here](https://repairmycarpro.com/how-to-tell-if-your-brake-caliper-is-sticking-without-taking-the-wheel-off), is crucial, because sticking calipers can lead to uneven brake pad wear and increased rotor damage.
When it comes to auto diagnostics, many rely solely on check engine lights and ignore underlying sensor issues. Modern vehicles contain sensors that fail silently or trigger ghost readings, which confuses even experienced technicians. For advanced diagnostics, techniques outlined [here](https://repairmycarpro.com/fix-2026-sensor-ghosting-5-diy-vehicle-diagnostics-tactics) can reveal hidden faults, saving time and money.
Never underestimate the importance of proper handling during routine repairs. For instance, replacing a power steering pump without considering system leaks or sensor faults can result in repeated failures. An often overlooked detail is the risk of using improper replacement parts; opting for cheap filters or brake components compromises safety and can lead to more expensive repairs down the line. Dive into [this guide](https://repairmycarpro.com/why-your-new-brake-rotors-warped-in-less-than-5000-miles) to understand why quality parts matter immensely.
**How can you reliably distinguish between a true sensor malfunction and a ghost fault?** This question probes into the sophistication of modern diagnostics. Expert insights from [this study](https://repairmycarpro.com/why-your-check-engine-light-keeps-coming-back-after-a-reset) emphasize the importance of comprehensive testing—using both optical scan tools and manual inspection—to correctly identify faulty sensors versus ghost readings.
In essence, a superficial approach to vehicle maintenance often leads to overlooked issues and recurring problems. Before dismissing a warning light or opting for quick fixes, consider the nuanced details discussed. Remember, mastering these subtleties can extend your vehicle’s lifespan and save you significant money. Have you ever fallen into this trap? Let me know in the comments.
Prioritize Precision with Diagnostic Tools
Investing in a quality scan tool like the Autel MaxiCOM or Launch X431 can revolutionize your maintenance routine. These devices provide comprehensive data on sensor health, engine parameters, and fault codes, enabling you to catch issues before they escalate. Personally, I rely on the Innova 3160RS because its user-friendly interface and extensive diagnostic coverage save me hours during troubleshooting, especially when dealing with ghost sensor errors. Regular use of such tools ensures that your vehicle remains in optimal condition, and you can spot the early signs of component wear—like a failing wheel bearing—that might otherwise lead to costly repairs. For more on interpreting sensor data and avoiding false positives, check out this diagnostics tactics guide.
Implement Routine Maintenance Schedules
Adopting a disciplined maintenance schedule extends your vehicle’s life exponentially. This means changing synthetic oils before the sludge builds up, which research shows can happen surprisingly fast—sometimes within just 500 miles if the wrong oil is used—highlighted here. Also, regularly inspecting brake calipers and considering a suite of preventative actions can stave off unexpected failures. Using diagnostic scanners periodically to monitor sensor health and fluid conditions allows you to act proactively. Remember, a well-maintained vehicle not only runs smoother but also reduces the risk of sudden breakdowns, especially in critical systems like brakes and steering.
Long-Term Results Depend on Consistency
Consistency is key. For example, routinely confirming that your coolant levels are maintained and that hoses are free of cracks prevents overheating and engine damage. Likewise, keeping tabs on filter quality—opting for high-grade aftermarket ones—can prevent contaminant buildup that accelerates wear, including engine oil and air filters. My personal approach involves setting reminders to perform these checks, which has helped avoid the typical pitfalls of neglect. Over time, this diligent attitude results in fewer repairs and longer intervals between significant fixes, making your vehicle more reliable and cost-effective.
How do I maintain vehicle diagnostics over time?
To keep your diagnostics accurate, regularly update your scanner’s firmware and software, and calibrate or replace aging sensors proactively. Supplement these efforts with advanced techniques like checking for vacuum leaks using soapy water—an inexpensive yet precise method that can reveal leaks that cause rough idling or poor fuel economy. This proactive approach aligns with industry recommendations, such as those detailed here. Making a habit of these practices ensures your vehicle’s systems communicate effectively, leading to dependable performance for years to come.
Lessons From the Trenches: What My Ignorance Taught Me About Car Troubleshooting
Never assume that a blown fuse isn’t the cause of your vehicle’s issues; I learned this the hard way after replacing multiple fuel pumps without inspecting the fuse first. That lightbulb moment reminded me that sometimes, the tiniest component has the biggest impact, a lesson that reshaped my entire approach to auto diagnostics.
I’ve discovered that consistent fuses blowing are often symptoms of deeper electrical problems—like wiring shorts or failing relays—that demand more than just a quick replacement. Patience and thorough inspection can save both your time and money.
Understanding that a simple fuse can silently kill your fuel pump signal opened my eyes to the importance of routine checks before jumping into costly repairs. Now, I always examine my fuse box first—it’s become an invaluable step in troubleshooting.
And finally, never overlook the wiring harness connected to critical components. Corrosion or frayed wires can cause repeated fuse blowouts, which might seem like a minor inconvenience but are actually early warning signs of more significant electrical issues. Regularly inspecting these connections can prevent roadside breakdowns and keep your vehicle running smoothly.
My Toolkit for Smarter Vehicle Repairs
- Multimeter: I trust a good multimeter for accurate fuse testing, helping me quickly identify blown fuses and intermittent faults. The diagnostics tactics guide has been instrumental in improving my diagnostic skills.
- Quality Fuse Pullers: Using proper tools makes handling small components easier and safer, reducing the risk of damaging delicate fuse sockets.
- Wiring Inspection Kit: A set of tools and a magnifying glass allows me to catch corrosion or frayed wires early, saving me from future fuse blowouts and electrical failures.
Empower Your Diagnostic Journey
Your vehicle’s health is a journey, not a one-time check. Staying proactive with routine fuse inspections, wiring checks, and using reliable diagnostic tools can help you catch issues before they leave you stranded. Remember, mastering these subtle signs turns you from a DIY enthusiast into an automotive detective, saving time, money, and frustration.
What unexpected electrical issue caught you off guard in your auto repair adventures? Share your stories below—I’d love to hear your experiences and insights!