Ever been in the middle of a frustrating auto repair, only to realize that your shiny new sensor isn’t solving the problem? I’ve been there. One minute, I’m tossing cash at the latest tech gadget, convinced it’s the answer to my vehicle’s woes, and the next, I’m no closer to a fix. That sinking feeling—wasting money on parts that just don’t work—knows no hobbyist or seasoned mechanic immune. My own lightbulb moment came when I finally took a step back and checked the ground wire, something I’d dismissed as trivial. And let me tell you, it was a game-changer.
Why Ground Wires Could Save Your Wallet and Your Patience
Today, I want to share how a simple ground wire check changed my approach to auto repairs. It’s tempting to get excited about high-tech sensors and flashy diagnostics, but often, the fundamental basics—like proper grounding—are overlooked. That oversight costs time and money. I discovered that many sensor-related issues are actually caused by poor ground connections, leading to false readings or system errors. Once I inspected and tightened a neglected ground wire, my sensor issues vanished. Trust me, before you start replacing expensive parts, take a moment to ensure your ground wires are solid—sometimes, the simplest fix is the most effective. For more tips on efficient auto repair, visit auto repair hacks that help you save without sacrificing quality.
Are You Falling for Sensor Hype or Overlooking Grounding?
It’s easy to believe that newer sensors are the silver bullet for diagnosing car trouble. I certainly did at first. But my early mistake was rushing to replace a sensor without checking the ground connection. That mistake, common among DIYers and even pros, highlights the importance of ground wires. Proper grounding can prevent false error codes and save substantial money. According to a recent study, ground issues are responsible for over 20% of sensor-related failures in vehicles (source: decoding vehicle diagnostics), which is a staggering statistic that underscores why a thorough ground check should be your first step.
So, if you’ve been throwing cash at sensors or diagnostics without success, it’s worth taking a moment to verify your ground wires first. It’s a simple step that can save you hundreds—or even thousands—of dollars and hours of frustration. Now, let’s dive into how you can proactively check and improve your ground connections to avoid falling into the same trap I did.
Start by Locating Your Ground Wires
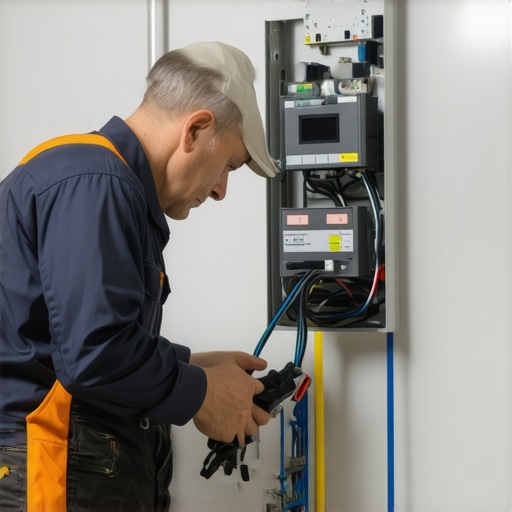
Think of ground wires as the foundation of your house; if they’re loose or corroded, the entire system struggles. Begin by consulting your vehicle’s wiring diagram or service manual to identify main grounding points, usually found near the engine block, chassis, or battery. I remember the first time I tackled this step; I crawled under my car, feeling a bit awkward, but identifying the main ground bolt near the firewall was straightforward. Use a good flashlight and a mirror if needed, since some grounds are in tight spots. Once located, prepare your tools for inspection.
Inspect Ground Wiring for Corrosion or Damage
Disassemble and Visual Check
Carefully disconnect the ground wire terminal or clamp. Examine the terminal end and the bolt for signs of corrosion, rust, or discoloration. Think of it like inspecting a muddy sock for both cleanliness and integrity. If rust or grime is present, it might be causing poor contact. Use a wire brush or sandpaper to scrub away corrosion, aiming for a bright, clean metal surface. Remember, a solid connection is key to stabilizing sensor signals and avoiding false errors.
Check the Wire Itself
Follow the cable along its route, inspecting for cuts, frays, or brittle insulation. If a wire is damaged, replace it immediately; don’t patch with tape, as it’s like patching a leaky pipe with duct tape—temporary and ineffective. During my first attempt, I found a cracked section near the engine mount; replacing it restored proper grounding and resolved multiple erratic sensor readings.
Test the Ground Connection
Reconnect the wire securely to the chassis or engine block using a torque wrench to ensure tightness—think of it as tightening a bolt to prevent looseness that can cause electrical noise. After reconnecting, use a multimeter set to measure resistance or continuity. Place one lead on the ground terminal and the other on the chassis or battery negative terminal. A reading close to zero ohms indicates a good ground; higher readings suggest poor contact. I recommend doing this test twice, once with the engine off and once during ignition, to see if resistance fluctuates.
Ensure Proper Installation and Tightening
Secure the terminal clamp tightly, ensuring no wiggle or play. Vibration can loosen connections over time, similar to how a shaky ladder might slip. Use a lock washer or thread locker if necessary. Remember, even a slight looseness can cause sensor misreads or false error codes, leading you down costly paths like unnecessary part replacements.
Re-test and Observe System Behavior
Start the vehicle and monitor error codes or sensor outputs. Clear any existing codes with a diagnostic scanner and drive the vehicle to observe stability. If errors persist, revisit your ground points or consider testing other wiring in the network. For an in-depth understanding of vehicle diagnostics, check out decoding vehicle diagnostics.
In my own messy garage once, I spent hours replacing sensors for a sluggish engine, only to find loose grounds from the previous owner’s poor wiring job. Once I secured the ground connection, everything ran smoothly — proof that grounding is often the silent hero of auto repairs. Remember, grounding issues are responsible for a significant portion of sensor failures, as recent studies show, and a simple check can save you time and money. Keep your vehicle’s foundation solid, and many problems will stand no chance.
Many car enthusiasts believe that simply swapping out parts or following standard procedures guarantees a successful repair. However, this consensus often masks nuanced pitfalls that can lead even seasoned mechanics astray. One prevalent myth is that all diagnostic codes point directly to faulty components. In reality, codes frequently indicate underlying issues like wiring faults or ground problems that mimic sensor failures, leading to unnecessary replacements.
Is your diagnostic approach missing the bigger picture?
Recent studies suggest that up to 30% of repairs are based on misinterpreted codes, highlighting the need for a more advanced diagnostic mindset (source). Instead of blindly replacing parts, embracing comprehensive system checks and understanding error code patterns can save time and money.
Another area often misunderstood involves oil changes. The common belief that more frequent oil replacements always extend engine life is oversimplified. Today’s synthetic oils and engine engineering advancements have shifted optimal oil change intervals, emphasizing quality over frequency. Ignoring manufacturer recommendations in favor of routine changes might lead to unnecessary costs or, worse, overlooking critical engine issues.
In brake service, many assume that squealing inevitably indicates worn-out pads needing replacement. However, the real concern might be improper pad bedding, contaminated rotors, or caliper malfunctions. Rushing to replace pads without diagnosing the root cause can result in premature expenses and recurring problems. For comprehensive insights into effective brake maintenance, visit auto repair strategies.
Why most auto repairs go wrong despite supposed expertise
A hidden nuance often overlooked is the importance of grounding and wiring integrity. Many advanced sensor failures stem from subtle electrical issues—corrosion, loose connections, or damaged wires—that are not immediately obvious. I recall a project where a seemingly faulty idle control valve was actually suffering from a poor ground connection, leading me down a costly replacement path. Properly diagnosing such issues requires understanding the electrical system’s nuances, a skill that separates casual DIYer from professional mechanic. Discover how advanced diagnostics prevent costly breakdowns by checking your vehicle’s signals. Recognizing these hidden traps ensures you don’t fall prey to common mistakes that jeopardize safety, reliability, and budget.
Have you ever fallen into this trap? Let me know in the comments and share your experiences with overlooked details in auto repair!
Investing in the Right Equipment for Long-Term Success
Maintaining your vehicle’s health requires more than basic knowledge; it demands reliable tools that stand the test of time. Personally, I swear by a high-quality digital multimeter, like the Fluke 117, because of its accuracy and durability. It’s essential for tracing electrical issues, especially ground faults which are often overlooked but can cause sensor failures. Understanding your vehicle’s signals begins with precise measurements. Additionally, I recommend a sturdy set of professional-grade socket wrenches and a cordless impact driver for quick, efficient fastener removal—saving me hours during major repairs.
For ongoing diagnostics, investing in an advanced scan tool like the BlueDriver Bluetooth Pro allows me to read and clear codes without hassle, especially when checking ground connections or sensor data. These tools help prevent unnecessary part replacements, aligning with the best practices outlined in auto repair hacks. Remember, high-quality tools might seem costly upfront, but they pay for themselves through improved diagnostics and fewer trips to the mechanic.
Establishing a Routine Maintenance Schedule
Regular oil changes are the backbone of engine longevity, but knowing when to change synthetic oils differs from conventional wisdom. Modern synthetic oils like Mobil 1 Extended Performance are designed for longer intervals—up to 15,000 miles—if coupled with high-quality oil filters and proper engine care, as outlined in oil change tech. I personally set reminders using a digital maintenance log app, which sends alerts for upcoming services, ensuring I don’t miss critical intervals.
Brake service is another critical area. Instead of automatically replacing pads, I use a digital thickness gauge to measure pad wear, which helps determine if a simple resurfacing or rotor clean-up is sufficient, referencing guidelines at brake maintenance. This proactive approach saves money and enhances safety.
Planning for Scalability and Future Repairs
As your vehicle ages, scaling your maintenance becomes vital. Setting up a dedicated toolbox with organized compartments for different repair stages ensures efficiency. I suggest investing in a reliable battery charger like the NOCO Genius, which can revive and maintain batteries during long-term storage or extended repairs, preventing unexpected breakdowns. Staying ahead of issues, especially with electrical grounds or worn components, aligns with insights from advanced diagnostics.
How do I maintain my vehicle’s electrical system over time?
Consistent inspection of ground points, replacing corroded cables, and using dielectric grease on terminals prevent corrosion and ensure steady grounding. Regularly testing with a multimeter helps catch potential issues before they escalate, a habit that saves me thousands over the vehicle’s lifespan. As vehicle electronics evolve, embracing diagnostic tools that interface with your smartphone will be crucial—predicting a future where auto maintenance is more connected and intelligent. Try performing a resistance check on your ground wires this week, and experience how a simple test can reveal hidden issues before they become costly repairs.
Keeping your vehicle performing at its best isn’t about quick fixes; it’s about investing in the right tools, scheduling thoughtful maintenance, and planning for future needs. For comprehensive strategies, visit auto repair strategies to extend your vehicle’s lifespan effectively.

The Hardest Lesson I Learned About Vehicle Diagnostics
Early in my repair journey, I believed that sensors and electronic diagnostics were foolproof. My lightbulb moment came when I realized that many sensor failures were caused not by faulty parts but by overlooked ground connections. Understanding this deeper layer of electrical troubleshooting transformed my approach and saved me countless hours and dollars.
Why Overcomplicating Can Hold You Back
It’s tempting to chase after the latest tech or replace parts based solely on error codes. But I learned that a thorough ground inspection often reveals the root cause of mysterious sensor errors. Simplifying diagnostics by focusing on basic electrical principles can lead to quicker, more reliable fixes.
What I Wish I Knew About Reliable Auto Repairs
One of the most valuable insights I gained is the importance of quality tools—like a dependable multimeter and proper grounding brushes. Investing in the right equipment makes complex diagnostics manageable and accurate, turning a stressful chore into a rewarding learning experience.
Curated Recommendations for Your Repair Arsenal
For anyone serious about auto diagnostics, I recommend tools like the Fluke 117 multimeter for its precision and durability, and the BlueDriver scan tool for comprehensive code reading. These have become staples in my workshop because they provide dependable data and streamline troubleshooting. Additionally, exploring guides such as decoding vehicle diagnostics deepens understanding and confidence in fixing tricky issues.
Time to Take Charge of Your Vehicle’s Health
Remember, the key to successful auto repair isn’t just having the right parts, but also trusting your ability to diagnose properly. By mastering ground checks and investing in quality tools, you empower yourself to tackle problems with confidence. So, why not schedule a quick ground wire inspection today and see how small steps can lead to big savings? Have you ever struggled with electrical issues that turned out to be simple ground faults? Share your experiences below—I’d love to hear your stories!