
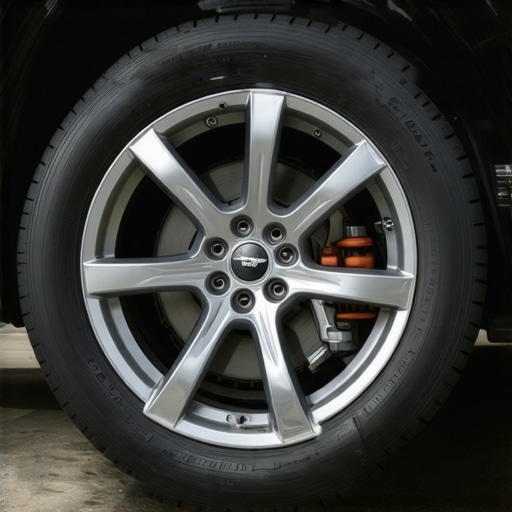
It was a cold spring morning when I first felt that unsettling wobble through the steering wheel. I’d just finished a quick oil change and was eager to hit the road, but instead, I was met with a strange vibration that got worse the faster I drove. At first, I thought maybe it was a wheel imbalance or a wheel lug nut loose, but as I drove on, I realized something was off—something I didn’t want to ignore. That was a real lightbulb moment for me, realizing how crucial it is to recognize the signs of a bad CV joint before small issues turn into big, costly repairs.
Why Ignoring Vibration Signals Could Cost You Thousands
Knowing how to identify a bad CV joint by the type of vibration is not just for gearheads or seasoned mechanics. It’s a vital skill every driver should have, especially because the consequences of neglecting a bad joint can be severe—ranging from dangerous handling to complete joint failure. During my early auto repairs, I made the mistake of dismissing the warning signs, thinking a little vibration was normal or inevitable with aging parts. Big mistake. I learned the hard way that catching these issues early can save you a lot of money and inconvenience.
Understanding what to look for can make the difference between a quick, affordable fix and a roadside breakdown. According to automotive experts, CV joints are critical for steering and driveability. They allow your wheels to turn and move with the suspension, adapting to the road. When they fail, the symptoms are often unmistakable—vibrations, clicking sounds, or even shuddering during acceleration. If you’re experiencing these signs, don’t wait too long. Check out some easy diagnostic tips [here](https://repairmycarpro.com/vehicle-diagnostics-explained-easy-checks-before-your-road-trip).
But how can you tell if those vibrations are due to a bad CV joint? Well, that’s what we’re about to explore. First, let me share one common mistake I made early on—I wiped the grease off my joint thinking it was just dirt. Big mistake. That grease film is a protector, often hiding the severity of wear or cracks. Recognizing the subtle signs—like a feeling of looseness or a clicking sound during turns—can be your best defense.
Ready to get your hands dirty? Let’s dive into how to identify a bad CV joint by vibration, so you can keep yourself safe and avoid costly repairs.
Start with a Road Test and Feel for Vibration
Take your vehicle for a short drive on a smooth, flat road and pay close attention to any vibrations or shudders through the steering wheel or seat. I remember a time I noticed a steady, rhythmic vibration at around 40 mph that worsened with acceleration. That sensation was my first clue to inspect the drivetrain components and spot a worn CV joint. If you experience similar, it’s time to move to a closer inspection.
Inspect the CV Boot for Damage or Grease Leakage
Park the vehicle safely, lift it with a jack, and secure it with jack stands. Locate the CV joint, which is usually covered by a rubber boot protecting it from dirt and debris. Look for tears, cracks, or grease splatters—these signs indicate the boot is compromised, risking joint failure. In my case, a torn boot revealed a greasy mess during my roadside inspection, confirming the need for a new joint or boot replacement.
Check for Torn or Cracked Boot and Grease Leakage
If you find grease splattered around the boot or on nearby suspension parts, that’s a telltale sign the joint is losing its lubricant and beginning to wear. Replace the boot immediately to prevent more extensive damage. For a step-by-step guide on a common repair, visit this tutorial.
Perform a Manual Test for Play or Movement
Grab the exposed joint carefully and try to move or wiggle it in different directions. Excessive or looseness indicates internal wear. Alternatively, with the wheel on the ground, have someone gently turn the steering wheel back and forth; listening for clicking sounds or feeling for vibrations during turns can also reveal issues. During my inspection, I noticed a slight clunk as I moved the joint, which prompted a further diagnosis.
Utilize an Assistant to Detect Clicking and Shaking During Turns
Ask a friend or partner to turn the steering wheel left and right while you observe the CV joint for any clicking noises or unusual movement. If a click or clunk occurs—especially during full lock turns—that’s a classic sign of a failing CV joint. This method is simple but effective in identifying deteriorating joints, often before more severe symptoms emerge.
Test Drive with Focus on Acceleration and Turning
Accelerate gently from a stop and turn the steering wheel sharply at low or moderate speeds. Pay close attention to vibrations, shuddering, or clicking sounds during these maneuvers. I recall doing this test in my driveway, and as I turned sharply, a rhythmic clicking underscored the need to replace that CV joint promptly. It’s a simple step that provides clear diagnostic clues without special tools.
The Power of Diagnostics Tools
For a thorough diagnosis, consider using a vehicle diagnostic scanner that can detect error codes related to drivetrain misfires or sensor issues. While a bad CV joint typically doesn’t trigger a check engine light, advanced diagnostics can rule out other causes of vibrations. Learn more about how vehicle diagnostics can preempt costly repairs.
Remember, safety is paramount. If you’re unsure or uncomfortable performing these checks yourself, consult a professional mechanic. Addressing a failing CV joint early not only saves money but also ensures your safety on the road.
Many drivers approach auto repair with misconceptions rooted in outdated advice or superficial understandings. One prevalent myth is that all brake pads should be replaced at the same time, but in reality, front and rear brakes often wear at different rates, and replacing them selectively—based on actual wear—can save money and extend component life. Another misconception is that an oil change every 3,000 miles is universally necessary; however, modern synthetic oils and engine technologies allow for longer intervals, as supported by recent industry studies.
A common trap is neglecting vehicle diagnostics, thinking cheap visual inspections suffices. But, as outlined in [vehicle diagnostics essentials](https://repairmycarpro.com/vehicle-diagnostics-explained-easy-checks-before-your-road-trip), advanced diagnostic tools can uncover hidden issues before symptoms appear, preventing costly breakdowns.
Advanced errors often involve misjudging the significance of warning signs. For example, a subtle vibration might be dismissed as tire imbalance, but it could indicate a worn CV joint or suspension component—that’s why understanding the nuance between normal vibrations and signals of impending failure is critical.
Most car owners underestimate the importance of proper brake service. They may believe squealing pads need only a quick pad change, but as discussed in [brake service myths busted](https://repairmycarpro.com/brake-service-myths-busted-what-really-matters-for-safety), neglecting rotor condition or hydraulic fluid can lead to unsafe braking or complete failure.
Furthermore, many overlook the benefit of consistent vehicle maintenance records and diagnostic history. Keeping track and understanding patterns can preempt failures and optimize repairs. Working with a trusted mechanic and leveraging reliable information sources ensures sustainable vehicle performance.
Have you ever fallen into this trap? Let me know in the comments. Remember, efficiency in auto repair isn’t just about fixing what’s broken but understanding the intricate nuances that prevent issues from happening in the first place.Keeping your vehicle running smoothly over the long haul requires more than just basic knowledge—it demands the right tools, consistent maintenance, and strategic planning. One of my personal favorites is the use of a diagnostic scan tool like the BlueDriver Bluetooth Professional OBD2 Scanner. I rely on it because it connects seamlessly with my smartphone, providing real-time data and error codes at a glance, which is invaluable for early diagnostics without needing to visit the shop. Regularly scanning your vehicle can help you catch issues like misfires or sensor faults before they escalate, saving you money and preventing unexpected breakdowns. Looking ahead, I predict that vehicle diagnostics will become even more integrated with AI, enabling predictive maintenance that can foretell failures before symptoms appear, thanks to advancements in onboard sensors and machine learning algorithms. To maintain your car’s health over time, schedule periodic checks—especially after rough drives or extreme weather conditions—and always keep a detailed maintenance log. This record helps identify patterns and plan proactive repairs, extending your vehicle’s lifespan. When it comes to long-term results, investing in quality parts and tools pays off. For example, replacing worn suspension bushings with high-quality aftermarket options can restore comfort and handling, avoiding costly re-repairs later. If you’re interested in detailed repair strategies and how to optimize your maintenance routine, I recommend visiting our page for top auto repair tips to extend your vehicle’s lifespan. Remember, consistency is key—set reminders for oil changes, brake inspections, and tire rotations to keep everything in check. Also, don’t forget to check your vehicle’s diagnostic codes periodically; it’s quick, cheap, and a proactive way to stay ahead of potential issues. Curious about the latest in vehicle sensor technology? Explore how decoding your vehicle’s diagnostic data can reveal hidden signs of trouble before visual symptoms emerge, as explained here. For those ready to take their vehicle care to the next level, I suggest trying out an advanced diagnostic scan and learning how to interpret the results yourself—it empowers you to address minor issues early and saves a trip to the mechanic. If you’d like personalized advice or assistance, feel free to contact us through our contact page. Keep your car in peak condition and enjoy a safer, smoother ride for miles to come! 
Throughout my years of driving and auto repair, I’ve discovered that recognizing early warning signs of a bad CV joint can truly be a game-changer. Those subtle vibrations or strange noises are more than just nuisances—they’re signals tipping you off about impending danger and costly repairs. My most memorable lesson was realizing that ignoring a clicking during turns could lead to a roadside breakdown, or worse, a dangerous loss of control. Taking the time to understand these signs has empowered me to keep my vehicle safe and reliable, and I hope it does the same for you.
What Unspoken Lessons I Learned About CV Joint Failures
- Appreciating the Power of Early Detection: Missing early symptoms often results in expensive driveshaft repairs. Recognizing a vibrating steering wheel at moderate speeds was my wake-up call that a CV joint was failing.
- The Myth of Normal Wear: I once believed that all vibrations were just part of aging parts—until I learned that timely inspections and understanding common failure patterns could save thousands.
- Beware of the Sneaky Grease: I thought a little grease splatter was harmless, but I realized it was a warning sign of a torn boot and imminent joint failure. Protect your joints by inspecting boots regularly.
- Know When to Consult Experts: Even with DIY knowledge, some signs warrant professional diagnosis. Using diagnostic tools can reveal issues lurking beneath the surface that we might miss.
- Trust Your Gut and Your Test Drive: Sharp turns and acceleration tests have saved me from emergency repairs—listening to your car’s signals is invaluable.
Tools and Resources I Rely On for Auto Health
- Multiple Diagnostic Scanners: Devices like the BlueDriver scanner offer real-time insights and help catch issues early. I trust them because they simplify complex error codes into understandable data.
- Trusted Repair Guides: Websites such as vehicle diagnostics guides provide step-by-step instructions that save me time and money during repairs.
- Quality Replacement Parts: Investing in OEM or high-quality boots and joints ensures longevity and safe driving. Quality parts, though perhaps pricier upfront, are worth every penny.
- Community and Expert Advice: Connecting with experienced mechanics on forums or asking professionals via contact us helps clarify doubts and guides better maintenance practices.
Fuel Your Drive with Confidence and Awareness
Remember, the road to safe driving involves understanding your vehicle’s language. Detecting a bad CV joint early can mean the difference between a smooth ride and a dangerous situation. As you gain confidence in recognizing these signs, you’ll not only save money but also enhance your safety and peace of mind. Imagine conquering each journey knowing you’ve empowered yourself with knowledge—your vehicle’s silent language now speaks volumes about its health. Whether it’s a subtle vibration or a telltale click, each warning sign is a call to action. Keep learning, stay alert, and don’t hesitate to consult experts when needed—your safety depends on it.
Your Turn to Take Action
Have you ever struggled with diagnosing the early signs of CV joint trouble? What steps did you take to confirm the issue? Share your experiences below and let’s help each other drive smarter and safer!
**Note:** Remember, detailed knowledge and proactive care are your best tools for maintaining a reliable vehicle. Regular inspections, combined with proper diagnostics, can make all the difference in preventing roadside surprises.