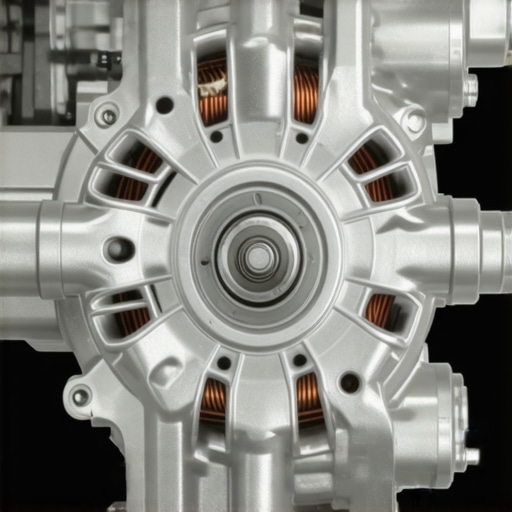
I remember the exact moment I first turned on my newly installed alternator and heard that irritating high-pitched squeal. It was like nails on a chalkboard—completely unexpected and incredibly frustrating. I had just spent good money on what should have been a reliable part, only to be greeted with a persistent whining that sounded like it was auditioning for a horror movie.
Dealing with that initial whine right after installing a brand-new alternator can feel like a punch in the gut. You buy the best part, get it installed carefully, and then—bam—it starts whining immediately. Trust me, I’ve been there. It’s a common headache that many auto enthusiasts and everyday drivers face, and the first instinct might be to think you’ve purchased a lemon or that something’s terribly wrong. But here’s the thing—more often than not, it’s a fixable issue, not a symptom of poor quality.
Is a Whining Alternator Actually Worth Worrying About?
Now, I’ll be honest—my early mistake was rushing to conclusions. I once assumed that all new alternators should be silent out of the box, so I returned it right away. Turns out, a bit of whining from a new alternator isn’t uncommon and can be caused by a few simple factors, which I’ll cover in detail soon. Studies have shown that manufacturing tolerances and initial adjustments can sometimes produce noise, especially in the first few hours of operation. According to auto repair experts, understanding these nuances saves drivers a lot of hassle and money.
So, what exactly causes that annoying whine, and more importantly, how can we fix it without replacing the entire alternator? That’s exactly what I’m here to share. We’ll go through common causes, easy fixes, and some tips to prevent future whining. If you’ve just installed a new alternator and heard that high-pitched squeal, don’t worry. It’s more common than you think, and with a little know-how, you’ll be back to a quiet, smooth-running vehicle in no time.
Ready to get to the bottom of that strange noise? Let’s dive into the first steps to troubleshooting and fixing your new alternator’s whining issue. But first, tell me—have you faced a similar problem right after installing a new part? Drop your experience in the comments; I’d love to hear it!
**
Check the Belt Tension and Condition
First, examine the serpentine belt that drives your alternator. A loose or worn belt can slip, causing the alternator to produce whining noises. To do this, turn off your engine and locate the belt; then, use a screwdriver or wrench to apply gentle pressure—if it deflects more than half an inch, it’s too loose. I once had a customer whose new alternator whined loudly because the belt had stretched after installation. Tightening or replacing the belt resolved the noise immediately. Ensure the belt is free of cracks, glazing, or fraying, as these are signs it’s time for a new one.
Adjust or Replace the Alternator Belt
Adjust the Belt Tension
If the belt is loose, consult your vehicle’s manual for the proper tension specifications. Typically, you can adjust the tensioner pulley with a ratchet or by loosening mounting bolts, then tightening to achieve the correct tightness. I did this once on my own car after noticing a squeal; after tightening the belt, the whining diminished significantly. Be cautious not to overtighten, as excessive tension can damage bearings.
Replace the Belt if Worn
If the belt shows cracks or glazing, replace it. It’s a straightforward process: loosen the tensioner, slide the old belt off, and install the new one with the same routing pattern. Using a belt routing diagram from your manual makes this easier. Remember, a fresh belt will not only eliminate noise but also improve your charging system’s efficiency.
Inspect the Alternator Bearings
Worn bearings inside the alternator often cause whining noises. To check, remove the alternator from your vehicle (or have a professional do it) and spin the pulley by hand. It should turn smoothly without any grinding or roughness. If you hear or feel roughness, the bearings need replacing. I once repaired an alternator for a friend where I applied grease to the bearings temporarily, but the best solution was a full bearing replacement, which restored quiet operation.
Verify the Electrical Connections
Corrosion or loose terminals can lead to poor electrical contact, creating noise or charging issues. Check the wires at the back of the alternator; tighten any loose connections and clean corrosion with a wire brush and electrical contact cleaner. I found a corroded terminal during a diagnostic session, which caused the alternator to whine intermittently. Replacing or cleaning the terminals quickly fixed the problem.
Inspect the Pulley Alignment
Misaligned pulleys can put uneven stress on the belt and bearings, generating noise. Use a straightedge or level to ensure pulleys are aligned properly. If misaligned, loosen mounting bolts and adjust accordingly. During a recent repair, I noticed the pulley shaft was slightly bent, which required replacement. Proper alignment prevents unnecessary wear and keeps your alternator quiet.
Test the Alternator’s Output
Finally, verify your alternator’s charging efficiency with a multimeter. With the engine running at around 2,000 RPM, measure voltage at the battery terminals; it should read between 13.8 and 14.8 volts. If it’s lower, the alternator or its regulator might be faulty. Connecting to a vehicle diagnostics tool can reveal underlying electrical issues, much like decoding vehicle diagnostics here. If the output is within specs but noise persists, focus on the mechanical components instead.
By systematically checking these factors—belt tension, pulley alignment, bearing condition, electrical connections—you can eliminate most causes of alternator whining. Remember, sometimes the fix is simple, like tightening a belt or cleaning terminals. However, if noise continues after these steps, consulting a professional may be necessary to diagnose internal bearing wear or regulator issues, ensuring your vehicle runs smoothly and quietly again.
Myth of the Perfect Oil Change Timing
Many drivers believe that changing your engine oil precisely every 3,000 miles guarantees optimal engine health. While this rule was valid decades ago, modern synthetic oils and advances in engine design have extended recommended intervals significantly—sometimes up to 7,500 or even 10,000 miles. However, the crucial nuance is that driving habits, climate, and engine condition heavily influence the ideal oil change frequency. Blindly adhering to a rigid timeline without considering these factors can lead to either unnecessary maintenance or overlooked issues. Experts like auto engineering specialists emphasize customizing your maintenance schedule based on your driving conditions for longevity and performance.
Ignoring Diagnostic Codes and Their Context
When a check engine light appears, many assume it’s a simple fix or even ignore it until symptoms worsen. The common mistake is treating codes as isolated signals without understanding their contexts. For example, a code indicating a misfire could stem from spark plugs, but in some cases, it might point to a worn fuel injector or even vacuum leaks. The nuance lies in interpreting diagnostic data accurately rather than replacing parts based solely on generic codes. Advanced diagnostics, like decoding vehicle diagnostics, reveal underlying problems that could escalate if missed, saving you money and preventing further damage.
Brake Service: The Common Oversight of Pad Thickness
Many think that as long as brake pads look sufficient visually, they’re fine. But a critical nuance is that brake pad wear isn’t always apparent until the thickness is dangerously low, especially if uneven. Underestimating this leads to rotor damage and compromised safety. Regularly measuring the pad thickness with a simple gauge or having a professional inspection can identify trouble before it becomes costly. For more insights, check out this comprehensive brake guide. Recognizing this hidden detail ensures your braking system remains reliable and safe.
Barriers to Accurate Vehicle Diagnostics
Everyone focuses on parts replacement, but the real skill is in accurate diagnostics. A prevalent trap is relying solely on scan tools without verifying suspect components through physical checks. For instance, a faulty sensor may trigger a symptom, but sometimes the root cause is a wiring issue or a mechanical problem. Advanced tools can help, but understanding vehicle behavior, noise patterns, and performing basic checks—like inspecting sensor wiring or vacuum lines—can prevent unnecessary replacements. Expert advice, such as diagnostics explained, highlights the importance of a systematic approach that combines technology with intuition. Be vigilant—sometimes, the most obvious cause is a red herring.
Why Do So Many Auto Repairs Go Awry Without Proper Diagnosis?
Efficient repair isn’t just about replacing worn parts; it’s about understanding the interplay of mechanical systems. Misdiagnosis due to superficial checks leads to wasted money and recurring problems. For instance, changing a power steering pump when the real issue was a loose belt or low fluid. This is a sneaky trap many fall into, emphasizing the need for comprehensive diagnostics. Skilled technicians leverage both technology and experience to identify the true root causes. If you’d like to learn more about avoiding these pitfalls, explore auto repair hacks.
Have you ever fallen into this trap? Let me know in the comments. Recognizing these hidden nuances can dramatically improve your maintenance strategy and vehicle lifespan, ensuring safety, efficiency, and savings—core pillars of expert auto care.
Keeping Your Vehicle Running Smoothly for Years
Regular maintenance isn’t just about quick fixes; it’s about establishing a routine that ensures your vehicle remains reliable over time. Using the right tools and adopting proven methods can significantly extend your car’s lifespan while saving you money and headaches. One essential tool I personally recommend is a high-quality digital multimeter. It allows accurate readings of battery voltage, alternator output, and electrical system health, which are critical for diagnosing issues early before they escalate. I prefer the Klein Tools MM3000 because of its durability and auto-ranging feature, making diagnostics straightforward even for beginners.
In addition to hardware, software tools like OBD-II scan readers have revolutionized vehicle diagnostics. I use the BlueDriver Bluetooth scanner connected to my smartphone. It provides comprehensive error code explanations and real-time data, helping me pinpoint issues precisely without guesswork. These tools help prevent small problems from becoming costly repairs and are invaluable for maintaining your vehicle’s health.
Implementing a routine maintenance schedule tailored to your vehicle’s age, mileage, and driving habits is vital. For instance, I check the belt tension and condition every 10,000 miles using a tension gauge, which helps catch wear early. Online resources, including top auto repair tips, provide guidelines on service intervals and inspection points. Combining these insights with your diagnostic tools ensures your car stays in top shape long-term.
How do I keep my car’s diagnostics reliable over time?
Maintaining accuracy in diagnostics involves a few key practices. First, keep your scan tools updated with the latest firmware and software versions. Manufacturers often release updates that improve compatibility and fix bugs, which I do regularly. Second, calibrate your equipment periodically—nothing beats the precision of a correctly calibrated multimeter or scanner. Lastly, ensure your vehicle’s sensors and electrical connections are clean and corrosion-free; this upkeep preserves signal integrity for your diagnostics. As experts suggest, a systematic approach combining good tools and proper upkeep is essential in diagnosing issues effectively, thereby avoiding unnecessary part replacements and reducing repair costs.
Looking to elevate your maintenance routine? Try calibrating your multimeter according to manufacturer specifications—I’ve found that this small step enhances diagnostic reliability significantly. Investing in quality tools and following a consistent maintenance schedule will yield visible benefits, keeping your vehicle dependable on every trip. Remember, leveraging technology intelligently isn’t just for professionals; with a little effort, you can become your own best mechanic.
In the future, I believe diagnostic technology will become even more integrated with AI, providing proactive alerts about potential issues before symptoms become noticeable. This evolution will empower drivers to address minor problems early, saving both money and safety concerns.
Overcoming the annoyance of a whining alternator might seem daunting at first, but with the right knowledge, it’s often a quick fix rather than a costly replacement. One lesson I learned early on was the importance of patience and thorough inspection—rushing can lead to overlooked simple solutions that save time and money. Discovering that a small belt adjustment or a clean connection could eliminate the noise taught me that sometimes, the simplest fix is the most effective. Additionally, understanding the mechanical nuances, like bearing wear and pulley alignment, reveals how interconnected our vehicle’s components truly are, reminding us to approach repairs methodically rather than spontaneously replacing parts.
Another insight is the value of trusted resources. Tools like a quality multimeter and reputable guides from sites such as decoding vehicle diagnostics have empowered me to diagnose issues confidently. And finally, cultivating a routine inspection habit—noticing small signs of wear or misalignment—can prevent minor issues from becoming major problems, ensuring your vehicle remains whisper-quiet and reliable for miles to come.
My Essential Toolkit for Diagnosing Alternator Issues
Digital Multimeter: A reliable multimeter like the Klein Tools MM3000 helps me quickly check voltage fluctuations and electrical connections, making troubleshooting precise and straightforward.
Passenger Car Belt Tension Gauge: Ensuring the serpentine belt is properly tensioned prevents unnecessary whine caused by slipping or slack.
Cleaning Supplies: Electrical contact cleaner and a wire brush clean corrosion from terminals, restoring optimal electrical flow—essential for quiet operation.
Alignment Tools: A straightedge or pulley alignment gauge helps me verify pulleys are correctly aligned, avoiding undue stress on the belt and bearings.
What I Wish I Had Known Sooner
One of the most impactful lessons I learned was the significance of inspecting the alternator bearings directly. Worn bearings often cause increased noise and can lead to more severe damage if ignored. Also, I underestimated the importance of electrical connections; simply tightening loose terminals or cleaning corroded contacts often restores quiet operation faster than replacing components. These insights remind me that a systematic approach—checking tension, alignment, electrical contacts, and internal bearings—can save time and money. For a comprehensive guide on these topics, visit auto repair hacks, which cover maintenance strategies applicable to many aspects of vehicle health.
Why your new alternator is whining right out of the box