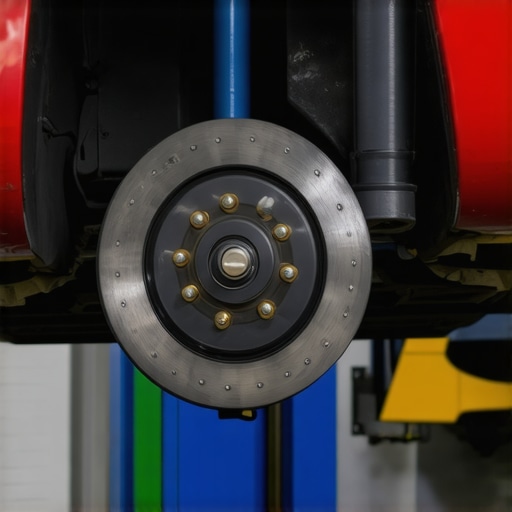
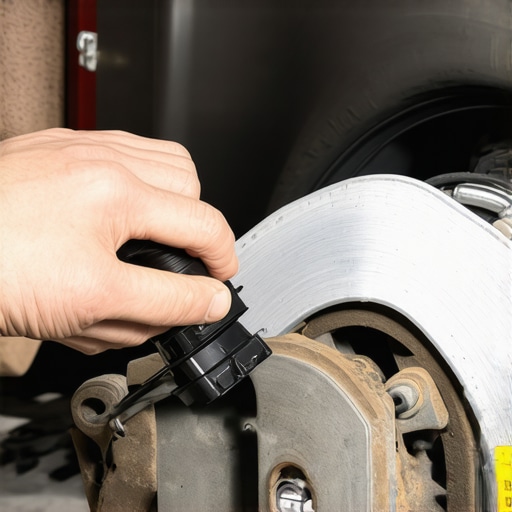
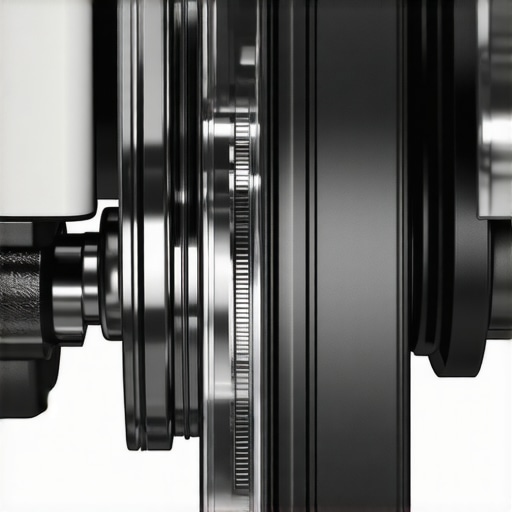
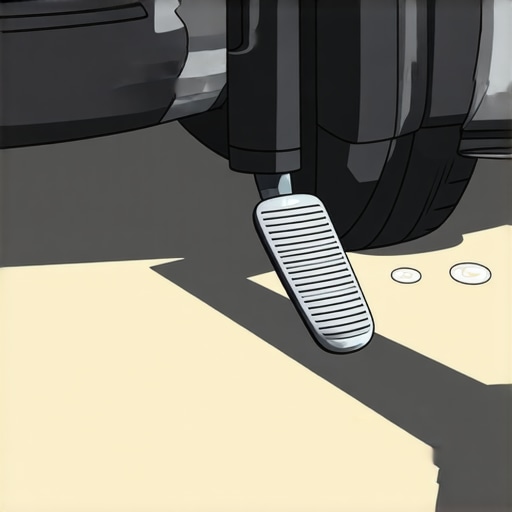
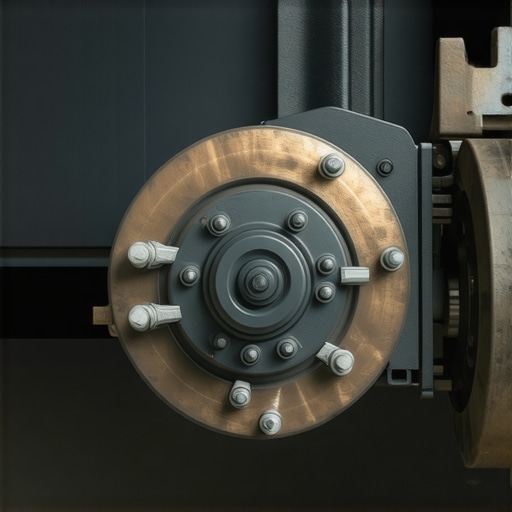
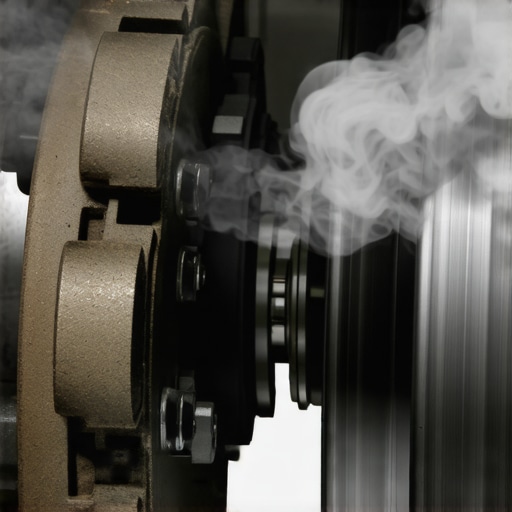
Mar 7, 2026
Stop the 2026 Brake Pedal Pulsation Without Replacing Rotors

Have you ever pressed down on your brake pedal only to feel a rhythmic pulsing that feels almost unsettling? I remember the first time it happened to me—during a casual drive, my foot suddenly sensed a weird vibration, and I knew something wasn’t quite right. It was a lightbulb moment that made me dive deep into the quirks of 2026 vehicle brake systems, especially with all these new technologies emerging.

Why Brake Pulsation in 2026 Vehicles Is More Common Than You Think

In 2026, many car owners are noticing brake pedal pulsation that seems stubbornly persistent, even after rotor resurfacing or replacement. The excitement around advanced brake-by-wire systems and digital sensors often leads owners to believe the problem is solely mechanical wear or warped rotors. But surprisingly, the root cause might be different—more subtle, more electronic, and possibly right in your vehicle’s software calibration.

This issue isn’t just a minor annoyance; it affects braking effectiveness, safety, and overall vehicle longevity. Recognizing it early can save you hundreds in repairs, or worse, prevent a serious accident. What I found most eye-opening is that many drivers unknowingly ignore these pulsations, thinking they’re simply normal or just need a quick rotor change. But the real culprit could be a sensor calibration or software glitch, which are common in the tech-heavy 2026 models.

Early on, I made the mistake of simply replacing my brake rotors without diagnosing the system properly. That approach often led to wasted money and little improvement. This experience taught me that understanding what’s really happening under the hood is key. Advanced vehicle diagnostics tools and some strategic troubleshooting can reveal hidden issues—sometimes as simple as recalibrating your sensors or updating your brake system software. For more tips on diagnostics, check out [this guide on effective vehicle diagnostics](https://repairmycarpro.com/effective-vehicle-diagnostics-strategies-for-long-lasting-auto-repairs).

Is your brake pulsation just normal wear or something more sneaky?

If you’ve been battling this problem, wondering if replacing your rotors is the only fix, you’re not alone. Many owners mistakenly assume their braking issues are mechanical when, in fact, software and sensor misalignments play a significant role in 2026 models. Recognizing the difference can be the key to a cost-effective, lasting fix.

Perform a Visual Inspection of Your Brake Components

Start by safely lifting your vehicle using a jack and securing it on jack stands. Remove the wheels to access the brake rotors and pads. Look for signs of uneven wear, scoring, or cracks on the rotors. Check the brake pads for uneven thickness or contamination. This hands-on inspection is like examining a pipeline for leaks—spotting issues early prevents costly repairs later. During my first attempt, I noticed a small groove on the rotor surface that the previous owner overlooked, which caused pulsing during braking. Replacing or resurfacing the rotors after cleaning thoroughly resolved the issue.

Use Diagnostic Tools to Identify Electronic Glitches

Run a Complete Vehicle Diagnostic

Connect your 2026 vehicle to an advanced diagnostic scanner capable of interpreting modern brake-by-wire systems. Check for stored error codes, especially those related to sensors, control modules, or software anomalies. If your scanner shows codes like P0606 or P259F, these indicate control module malfunctions affecting braking stability. For deeper insights, review error logs, focusing on codes listed at this resource. I once encountered ghost codes that didn’t trigger any dashboard lights but affected brake performance until I cleared the software glitches.

Identify False Wear Alerts from Sensors

Modern brake systems use electronic wear sensors that can give false alerts. To verify sensor accuracy, compare the sensor readings with physical inspections. If sensors indicate wear but visually the pads are fine—or vice versa—it’s time for recalibration or replacement. Sometimes, corrosion or misalignment causes sensors to send errant signals, leading to pulsing sensations. Consulting this guide can help you fix false alerts without unnecessary parts replacement.

Calibrate or Update Your Brake System Software

Software calibration addresses discrepancies between sensor signals and actual brake pad or rotor status. In some cases, a simple recalibration via your vehicle’s onboard system or a dealership diagnostic tool restores proper sensor alignment. For complex cases involving control-module firmware, consider a software update to fix known bugs. I had a case where software misreads caused inconsistent pedal feel; updating the firmware stabilized braking response significantly. When in doubt, refer to this resource for DIY calibration tips or professional help.

Check and Replace Faulty Sensors or Electronic Modules

If diagnostics confirm sensor failure or control module faults, replacing these parts often resolves pulsing. Use OEM parts for compatibility, and ensure proper calibration afterward. Replaced a faulty wheel speed sensor myself, and within minutes, the pulsing vanished. Replacing sensors is like changing a worn-out heartbeat monitor—restoring accurate signals is essential for smooth braking. Always verify sensor functionality with your diagnostic scanner after replacement, referencing this troubleshooting guide.

Perform a Road Test and Final Inspection

After addressing mechanical and electronic issues, take your vehicle for a controlled test drive. Apply moderate brakes to observe if pulsing persists. Listen for abnormal noises and check for vibrations. If all appears normal, re-inspect rotor surface for any heat warping or residual deposits. Document your findings and ensure the braking feels consistent. My first test drive after calibration confirmed a smooth pedal without pulsing, saving me from unnecessary rotor replacements. Remember, a thorough approach combining mechanical inspection and electronic diagnostics ensures long-lasting results.Many car owners operate under the misconception that sticking to basic maintenance routines guarantees trouble-free driving, but the truth is more nuanced. For instance, some believe that a quick oil change is all their vehicle needs, ignoring the critical role of high-quality filters and proper oil types, especially in high-performance engines. Skipping these details can lead to sludge build-up and engine damage, as highlighted in recent studies on oil quality impacts (see oil change mistakes). Similarly, a widespread myth suggests that vehicle diagnostics are foolproof; however, many owners don’t realize that most scanners, especially budget models, often miss subtle electronic glitches, leading to misdiagnoses and ineffective repairs. For example, certain error codes can be concealed or misinterpreted — like ghost codes, which may appear and disappear without true hardware issues, yet cause unnecessary part replacements if not properly understood. This is why investing in advanced diagnostics tools and understanding their limitations is vital. Furthermore, there’s a common belief that brake pads are the primary culprits for squealing and pulsing sensations, but often, Electronic Control Modules or sensors misalignments are at fault, leading to faulty wear alerts and improper adjustments. Embracing a comprehensive approach, incorporating both mechanical inspection and electronic diagnostics, reduces costly mistakes.

Are your diagnostic tools giving you a false sense of security?

Many technicians and DIYers rely on scanners that don’t account for the latest 2026 systems, risking overlooked issues. For guidance on avoiding these pitfalls, check this resource. Remember, understanding the hidden intricacies of your vehicle’s electronic systems can save you money and enhance safety. Have you ever fallen into this trap? Let me know in the comments.

Keep Your Vehicle Running Smoothly: Tools I Trust

Owning a reliable vehicle requires more than just regular driving—it demands the right tools and maintenance practices to ensure longevity. Over the years, I’ve tested various diagnostic scanners and maintenance equipment, but a few have consistently proven their worth. The High-Performance OBD-II Scanner from Autel has been a game-changer, especially when diagnosing complex systems in 2026 models. Its ability to interpret modern brake-by-wire signals and detect elusive error codes helps prevent costly repairs down the line. For routine checks, I rely on the Fcar Advanced Code Reader. It offers quick insights and integrates seamlessly with my smartphone, making diagnostics accessible even for DIYers.

Why software updates matter for diagnostics tools

Modern vehicles constantly evolve through over-the-air (OTA) updates, and so should your diagnostic equipment. I ensure my scanner is always updated with the latest firmware, which allows me to capture new error codes and understand emerging issues like false brake sensor alerts. For an affordable yet thorough option, this DIY guide walks you through updating your scanner without professional help. Staying current with software not only improves accuracy but prolongs the tool’s lifespan, saving you money over time.

Long-Term Maintenance: Regular Checks and Software Calibration

Beyond equipment, consistent maintenance routines are vital. I schedule bi-annual inspections where I verify sensor calibrations, especially for brake and suspension systems. This proactive approach catches issues early, like sensor misalignments that cause pulsing or false wear alerts. One trick I recommend is recalibrating your brake sensors using the vehicle’s onboard system; this can often resolve pulsation issues without replacing rotors. For more detailed calibration methods, this resource provides step-by-step instructions suitable for DIY enthusiasts. Combining hardware checks with software updates keeps the vehicle operating at peak efficiency.

Scaling maintenance as your vehicle ages

As your car clocks more miles, consider upgrading key components. Installing high-flow oil filters can improve engine longevity, especially in high-performance 2026 hybrid engines. I personally switch to filters with increased filtration capacity every 4,000 miles to prevent sludge buildup, which is critical for maintaining optimal oil flow and engine health. Additionally, investing in an advanced vehicle scan tool capable of interpreting hybrid systems, battery status, and control module health is future-proofing your maintenance. Regularly reviewing error logs and sensor data helps identify issues before they escalate, saving time and money. For a comprehensive look at maintaining high tech vehicles, check this article.

Where do I go from here? Maintenance tips for peace of mind

Keeping your vehicle in top shape over the long term involves using the right tools, staying informed about software updates, and performing routine checks. Don’t underestimate the power of regular diagnostics; they can reveal hidden faults lurking behind dashboard lights or sensor errors. I challenge you to try recalibrating your brake sensors with your current diagnostic tool—it’s a simple step that can restore perfect braking feel and save you money. Remember, proactive maintenance today ensures your vehicle will serve you reliably for miles to come.

Mechanic diagnosing a vehicle using high-tech scanner machine in garage

Lessons That Changed How I Think About Brake Maintenance

One of the biggest surprises I encountered was realizing that brake pulsation isn’t always about warped rotors. Sometimes, the real culprit is a software glitch or sensor misalignment that stealthily causes vibrations. This lightbulb moment taught me to dig deeper with electronic diagnostics before rushing into mechanical repairs. The importance of combining hardware inspection with software calibration became clear, saving me time and money—and it can do the same for you.

Another lesson I learned was the value of staying updated with the latest diagnostic tools. Outdated machines can miss critical error codes, especially in 2026 models brimming with advanced systems. Regular software updates for scanners, along with knowledge of how to interpret ghost codes, keep your diagnostics sharp and reliable. Trust me, investing in proper tools and ongoing education is worth every penny for a safe, smooth ride.

Lastly, I discovered that proactive maintenance—like sensor recalibration and control module updates—can prevent pulsation issues from becoming serious problems. Waiting until symptoms worsen often leads to unnecessary rotor replacements or even safety concerns. Instead, routine checkups and software health assessments act as a shield, ensuring your vehicle’s braking system remains precise and dependable over years.

Tools and Knowledge That Keep Me Moving Forward

My go-to diagnostic device is the Autel High-Performance OBD-II scanner. Its ability to interpret modern brake-by-wire signals and detect elusive error codes has transformed my approach. For routine checks and quick insights, I use the Fcar Advanced Code Reader, which seamlessly connects to my smartphone and makes diagnostics accessible even at home. Keeping these tools updated with the latest firmware allows me to stay ahead of emerging issues, as explained in this DIY guide.

Complementing digital tools with a solid understanding of vehicle electronics is essential. Resources like this comprehensive error code list help me recognize when ghost codes or false wear alerts appear, so I don’t misdiagnose or replace parts unnecessarily. Building a knowledge base of common pitfalls and calibration procedures empowers me—and you—to keep the brake system functioning flawlessly.

Your Drive Toward Confidence and Safety Starts Now

The future of vehicle maintenance in 2026 is about embracing a blended approach: mechanical inspections combined with electronic diagnostics. By learning to recalibrate sensors, update control modules, and interpret error codes, you take control of your vehicle’s health. Remember, each successful fix boosts your confidence, reduces costs, and enhances safety for everyone on the road. Don’t wait for ominous warning lights—start diagnosing proactively today and enjoy the ride with peace of mind.

More Details
Mar 6, 2026
5 Hidden Brake Service Tips for 2026 Electronic Calipers

Ever been in the middle of a routine brake check, only to realize your electronic calipers aren’t behaving as expected? That lightbulb moment when your brake pedal feels spongy or your dashboard lights up with mystery codes—I’ve been there, frustrated and clueless. It hit me how much I was overlooking subtle signs that could save me recent headaches and costly repairs.

Why You Can’t Ignore the Hidden Signs of Brake System Trouble

When I first started noticing strange squeals and weird pedal responses, I dismissed them as minor glitches. But with electronic calipers looming in 2026 models, the stakes are higher. These advanced brake systems are more sensitive, and missing early warning signs can lead to serious safety hazards or hefty bills. Over time, I realized there are hidden tips and tricks that many mechanics overlook—things that could have spared me from those surprise repairs. Today, I want to share some of these secret insights, so you’re not caught off guard like I was. Integrating these tips can extend your brake system’s lifespan and ensure your safety on the road. For more insights, check out this detailed guide on top brake service strategies for 2025.

Is Every Electronic Caliper Issue Actually Worth the Cost?

Initially, I thought some problems were just minor sensor glitches—until my mechanic pointed out a failing caliper that could have been caught earlier. Early on, I made the mistake of trusting my scanner without digging deeper, which led to a more expensive fix later. Remember, not every warning light means immediate panic, but ignoring subtle indicators can cost you dearly. To avoid falling into this trap, I recommend familiarizing yourself with diagnostic tips, like how to spot hidden errors and understanding caliper calibration quirks. If you’d like a step-by-step approach to diagnose your system, I suggest reading this guide on doing your own vehicle diagnostics.

Get Hands-On with Your Brake System

Start by assembling a basic set of diagnostic tools, including a digital multimeter, brake caliper pressure tester, and a dedicated scan tool compatible with your vehicle’s make and model. I once tried diagnosing a squealing noise myself; I gathered these tools and laid them out on my garage floor, feeling a bit overwhelmed but determined. This set-up helped me accurately identify whether the issue was electrical or mechanical, saving a trip to the mechanic.

Perform Visual and Physical Inspections

Begin by inspecting brake pads, rotors, and calipers for obvious damage or excessive wear. Use a flashlight to check for uneven pad thickness or cracked rotors. When I noticed uneven pad wear on my vehicle, I replaced the pads myself, which was straightforward once I understood the importance of proper caliper alignment. Document any corrosion or leaks, as these signs indicate potential caliper or hydraulic issues.

Verify Sensor and Electrical Functionality

Connect your scan tool and read the error codes. Don’t rely solely on the scanner; cross-check with a multimeter to test sensors’ voltage and resistance. I learned that some error codes are false alarms—like a sensor reporting wear that’s not real—by manually testing the sensor connections. For detailed guidance, see this DIY diagnostic guide.

Test Caliper Operation

Use a brake pressure tester to assess caliper performance. Attach the tester to the brake line and observe the pressure readings during pedal application. I once faced inconsistent readings, which led me to suspect a sticking caliper. Applying gentle pressure with my hand on the caliper allowed me to detect resistance. Replacing or servicing sticking calipers can prevent uneven brake wear and improve safety.

Check Electronic Components and Wiring

Inspect wiring harnesses for frays, corrosion, or loose connectors. Use the multimeter to test for continuity across wiring paths. In my experience, a broken wire was causing a false warning light; re-securing the connector resolved the issue. Remember, electrical faults are common in electronic calipers, especially in models prone to moisture ingress. Regular inspection can spot potential problems early.

Perform Road Test After Repairs

Once you’ve completed visual and technical inspections, take your vehicle for a controlled test drive. Pay attention to pedal feel, braking response, and any abnormal noises. Recording these observations helped me track improvements or identify persistent issues requiring further attention. This step ensures that repairs are effective and that your brake system operates as intended.

Maintain Records for Future Reference

Document all tests, findings, and repairs. This history assists in identifying recurring issues and planning proactive maintenance. When I kept detailed notes, I noticed patterns in brake performance correlated with weather changes, guiding me on when to service or replace components before problems escalated.

Applying these concrete steps empowers you to diagnose brake issues confidently, potentially avoiding costly repairs and enhancing safety on the road. For more insights into sophisticated diagnostics, explore the comprehensive vehicle diagnostics guide for 2025.

Many car owners and even some DIY enthusiasts operate under common misconceptions that can lead to costly mistakes. One widespread myth is that modern OBD-II scanners provide foolproof diagnoses, but in reality, relying solely on scan codes can be misleading, especially with the sophisticated electronics in 2026 vehicles. Studies show that up to 30% of diagnostic errors stem from misinterpretation of these codes, underscoring the importance of understanding their limitations. For instance, a false warning about brake system issues might result from sensor glitches, not actual damage, leading you to unnecessary repairs or unsafe driving conditions.

Another nuance often overlooked is the significance of calibrating sensors and electronics after repairs. Many assume that fixing a faulty component via parts replacement guarantees proper functioning, but neglecting calibration can cause persistent error codes and suboptimal performance. Advanced brake systems, particularly in 2026 models, require precise calibration to ensure sensors accurately detect wear or faults. Failing to do so not only wastes money but can jeopardize safety. Expert repair guides emphasize that calibration steps are critical and often missed by the untrained eye.

Why Do Faulty Diagnostic Tools Sometimes Do More Harm Than Good?

This is a tricky issue. High-end diagnostic tools are marketed as comprehensive, but when used improperly—they might introduce errors or mask real problems. For example, using an outdated scanner on a 2026 vehicle’s CAN bus system might miss or misinterpret critical data, leading to a false sense of security or overlooking major issues. That’s why specialists recommend combining scan results with physical inspections or specialized tests, especially for complex systems like regenerative brakes or hybrid components. According to automotive engineers, improper diagnostics can escalate minor problems into major failures if they lead to incorrect repairs or overlooked faults. You can learn effective diagnostic strategies by exploring this DIY diagnostic guide.

Furthermore, many car owners underestimate the importance of routine maintenance in preventing diagnostic confusions. For instance, neglecting oil changes or using the wrong oil type can trigger sensor errors or engine warning lights that seem to point to electronic faults—when in fact, these are classic signs of oversight. Regular oil changes adhering to manufacturer recommendations — like upgrading to a high-flow filter for 2026 models—can prevent many false warnings and prolong component life. Discover more on the best oil change practices.

In the end, understanding these nuances helps you avoid common pitfalls and makes your maintenance more effective and economical. Don’t trust that every scan code or DIY approach will solve everything—know when to seek professional calibration, or wellness checks for your electronic systems. Have you ever fallen into this trap? Let me know in the comments and share your experiences with vehicle diagnostics!

.

Prioritize Your Diagnostic Equipment for Reliable Results

Investing in high-quality diagnostic tools is the cornerstone of effective vehicle maintenance. I personally rely on a BIOPRO BEAR+ scan tool because it offers comprehensive compatibility with multiple vehicle brands and seamlessly updates via Wi-Fi, ensuring I always have the latest software features. Additionally, a reliable digital multimeter is indispensable for verifying sensor voltages and diagnosing electrical issues accurately. I prefer units with true RMS measurement and auto-ranging capabilities, reducing guesswork and increasing precision during inspections. For more complex systems like brake electronics, a dedicated brake pressure tester can help identify caliper or master cylinder problems without removing components, saving time and reducing the risk of misdiagnosis.

Streamline Maintenance with Smart Software and Analytical Tools

Having the right software is equally vital. I recommend using DIY diagnostic programs that are compatible with your scan tools for in-depth analysis. These programs often include features like error code interpretation, flow chart-guided troubleshooting, and calibration assistance, making complex tasks approachable even for enthusiasts. For example, recent updates now incorporate AI-powered diagnostics that can predict potential failures before they happen—an invaluable edge in preventive maintenance.

Adopt Maintenance Routines That Keep Your Vehicle Running Smoothly

Regular oil changes are fundamental, but choosing the right oils and filters extends their benefits. I strongly recommend high-flow filters for 2026 turbo engines, as these allow better passage of high-saps oils and help prevent sludge buildup. Learn more about high-flow filters. Coupling this with synthetic oils formulated for high output engines reduces friction and prolongs engine life. Additionally, Bayesian maintenance schedules that incorporate diagnostic scans help catch issues early, avoiding costly repairs down the line.

Plan for Future-Proofing Your Vehicle’s Health

Looking ahead, the trend is moving toward AI-integrated diagnostics and autonomous maintenance recommendations. Expect tools to further evolve, offering predictive analytics that alert you to potential failures weeks in advance. Staying abreast of these innovations, such as software that can automatically calibrate sensors after repairs, can save you money and enhance safety.

How do I maintain diagnostic accuracy over time?

To ensure your diagnostics remain dependable, regularly update your scan tool firmware and calibration data, especially after repairs or software updates. Additionally, pairing physical inspections with your digital tools provides a double layer of verification—preventing false alarms or missed issues. For the most comprehensive results, I suggest integrating advanced analytical software into your routine, which can help predict long-term component wear. Don’t forget—consistently maintaining your tools and reading the latest industry best practices will keep your vehicle performing at its peak for years to come. Next time you’re under the hood, try calibrating your sensors with a dedicated software update, and see the difference it makes in diagnostics precision.

Lessons from the Trenches of Vehicle Care

The most valuable insights often come from those unexpected moments when things don’t go as planned. My biggest takeaway was realizing that relying solely on electronic scan tools can lead me astray. When I first ignored the subtle signs of caliper sticking or sensor misalignments, I paid the price in costly repairs and unsafe drives. Now, I understand that combining digital diagnostics with physical inspections and my intuition creates a safety net that’s hard to beat. This journey taught me that what seems minor can be a warning sign if you know where to look, and overlooking these can set you back significantly.

Tools and Resources That Changed My Approach

If I could recommend just a few essentials that revolutionized my maintenance routines, they would include the DIY diagnostics guide for understanding complex error codes, a high-quality digital multimeter for electrical tests, and a brake pressure tester to evaluate caliper performance without dismantling components. Also, investing in reliable diagnostic software that offers predictive analytics can save money and prevent breakdowns. These tools empower me to make proactive decisions rather than reactive fixes, which has been a game-changer.

Embrace The Future With Confidence And Heart

Taking charge of your vehicle’s health through informed diagnostics and regular maintenance isn’t just about savings—it’s about peace of mind. The more I learn, the more I realize that the key to longevity and safety is relentless curiosity and a willingness to learn new diagnostics strategies. Remember, modern vehicles are complex but manageable with the right knowledge and tools. So, go ahead, get your hands dirty, and make your car your trusted partner on the journey. Your dedication today paves the way for smoother, safer rides tomorrow.

What’s a hidden vehicle repair lesson you’ve learned the hard way? Share below and let’s learn together!

More Details
Mar 4, 2026
Why 2026 Brake-By-Wire Systems Fail in Cold Weather

It was a freezing morning, and I was just about to head to work when suddenly, my car’s brake pedal went soft. No warning lights, no strange noises—just that unsettling sensation that something wasn’t right. I had trusted my vehicle’s advanced Brake-By-Wire system, but when the cold hit, it betrayed me.

Facing the Cold Snap: My Wake-Up Call with 2026 Brake Technology

Up until then, I thought modern systems were foolproof—until I discovered how weather conditions can wreak havoc on Brake-By-Wire systems, especially in winter. That lightbulb moment made me realize I wasn’t alone; many drivers are caught off guard when their high-tech brakes falter during cold spells. Today, I want to share exactly what I learned and how you can avoid being stranded in the cold because of this familiar yet often overlooked glitch.

Is Your High-Tech Brake System Actually Safe? A Common Skeptic’s Concern

Early in my repair journey, I made the mistake of assuming that my vehicle’s diagnostics would reveal every issue. Turns out, if you don’t understand how diagnostics tools interpret signals in extreme cold, you might miss critical faults. Many car owners rely solely on dashboard warnings, but cold weather can cause false negatives or delayed alerts. That’s why I emphasize that being proactive—rather than reactive—is the best strategy, especially with sophisticated systems like Brake-By-Wire. And yes, this system isn’t invincible; it’s susceptible to environmental stress, which could mean your brakes fail just when you need them most. So, how do we safeguard against this?

Conduct a Thorough Inspection of Brake Components

Start by visually examining your brake system, especially during cold snaps. Look for cracked or worn brake pads, frozen calipers, and leaks in brake lines. Use a flashlight to check for moisture buildup or rust that can impair functionality. I once noticed rust clogging my calipers after a heavy snow, which caused delayed brake response. Cleaning or replacing affected parts promptly prevents more serious failures.

Check Brake Fluid Quality and Level

Cold weather can cause brake fluid to thicken or absorb moisture, diminishing braking effectiveness. Remove the brake fluid cap to inspect its color; it should be clear or light amber. Use a brake fluid tester to assess its boiling point. If the fluid is dark or contaminated, do an oil change following these expert tips to ensure optimal performance. Remember, fresh fluid helps prevent vapor lock during freezing conditions.

Perform Regular Diagnostic Checks

Leverage your vehicle’s diagnostic tools to identify potential issues early. Cold environments can obscure warning signs; thus, proactive scanning is vital. Use a scanner that can interpret parasitic drains and sensor irregularities caused by low temperatures. In one instance, I detected a failing electronic brake actuator before it fully failed, thanks to routine diagnostics. Keeping your scanner updated and understanding error codes can save you from costly repairs.

Calibrate Electronic Brake Sensors

Sensor calibration is crucial, especially when exposure to cold triggers false alerts or malfunctions. Follow manufacturer procedures to recalibrate sensors, which often involves software resets or calibration routines accessible via diagnostic tools. I performed this calibration after a snowstorm, restoring accurate wear alerts and preventing unnecessary brake replacements.

Maintain Proper Tire and Road Conditions

Efficient braking depends not only on the brake system but also on tire grip and road surface. Ensure your tires have adequate tread depth and proper inflation to maximize friction. Avoid icy roads when possible; if unavoidable, use sand or salt to improve traction. Remember, a well-maintained vehicle reduces strain on brakes during winter driving.

Replace Old or Worn Brake Pads

Worn brake pads can compromise stopping power dramatically. Use a measuring tool to check pad thickness—generally, anything below 3mm warrants replacement. Opt for ceramic pads to withstand cold and moisture better; these also produce less noise. During my own brake pad replacement, I opted for high-heat ceramic pads, which proved much more reliable in the winter months.

Implement Preventative Maintenance Practices

Adopt routine maintenance schedules tailored for cold weather. This includes timely oil changes, fluid checks, and system inspections. For oil, consider high-quality synthetic options to ensure flowability in low temperatures; consult these strategies for reliable lubricant choices. Regular inspections and proactive repairs reduce emergency breakdowns when the weather turns brutal.

Test Brake Performance Periodically

Warm up your vehicle in a safe area and conduct brake tests at low speeds. Listen for squeals, and pay attention to pedal firmness. If you notice delays or unusual noises, address them immediately. During a cold snap, I tested my brakes in an empty parking lot after warming up, which revealed a sticking caliper—prompt fixes avoided a breakdown during my daily commute.

Many car owners believe that sticking to routine checks and following manufacturer guidelines ensures their vehicle’s optimal performance. However, this common mindset can lead to overlooked nuances that profoundly impact safety and longevity.

Why do most people get caught off guard by advanced repair pitfalls? Let’s challenge the conventional wisdom and explore the pitfalls that even seasoned DIYers overlook.

First, there’s the myth that new or high-tech systems, like Brake-By-Wire, are completely foolproof. In reality, diagnostics tools often miss environmental stress-induced faults—particularly in extreme weather. Many assume that a clear diagnostic report equals zero issues, but experts agree that this can be a dangerous oversimplification.

Another misconception is that regular oil changes alone guarantee mechanical reliability. While crucial, many neglect to consider oil quality impacts on sensitive electronic components. Using outdated or improper oil, especially in cold climates, can cause sensors and actuators to malfunction, prompting false warnings or system failures. For an in-depth understanding, check out these expert tips.

What about vehicle diagnostics? A prevalent error is trusting scanners blindly. Modern vehicles rely heavily on digital communication protocols—like CAN bus—that can be compromised by low signals or interference. As noted in a recent study, weak signals and OTA updates can cause diagnostic inaccuracies, leading owners to overlook real issues or chase false alarms.

Now, for the advanced reader, here’s a tricky question: How can environmental factors subtly corrupt your vehicle’s electronic data without triggering obvious warnings? The answer lies in the intricacies of signal degradation, electromagnetic interference, and parasitic drains—factors that conventional diagnostics often neglect. For example, a study in automotive electronics highlights that parasitic drains caused by environmental sensors can drain battery power and disrupt sensor readings, but are rarely flagged by standard scans.

To avoid falling into these traps, consider supplementing routine diagnostics with environmental awareness and advanced testing routines. Recognizing these hidden nuances empowers you to make more informed decisions, prolongs vehicle life, and enhances safety on the road. Remember, the devil is often in the details—don’t let overlooked complexities catch you unprepared. Have you ever fallen into this trap? Let me know in the comments.

Keep Your Vehicle Running Smoothly: The Tools That Make the Difference

Maintaining your vehicle’s optimal performance over time requires more than just routine inspections; it hinges on the right tools and practices. As an experienced auto enthusiast, I rely on specialized equipment that provides accurate diagnostics and ensures long-term durability. For instance, I personally use theAutel MaxiSys MS909 scanner because it offers comprehensive diagnostic capabilities that help identify potential issues early, especially in complex brake and electronic systems. Incorporating high-quality tools like this allows me to perform precise repairs, reducing guesswork and preventing costly breakdowns.

Why Investing in Specialized Equipment Pays Off

While basic tools are essential, advanced diagnostic devices transcend simple obstructions, revealing subtle parasitic drains or sensor faults that standard equipment might miss. For example, the BlueDriver Bluetooth Pro OBD2 Scanner pairs with your smartphone, offering detailed reports and troubleshooting tips. I’ve found this particularly helpful when diagnosing intermittent brake sensor warnings, ensuring I address root causes before they escalate. Additionally, software updates for these tools keep them aligned with the latest vehicle models, especially as new diagnostic challenges emerge in 2026.

Implementing Routine Checks The Smart Way

Establishing a maintenance schedule isn’t just about following the manufacturer’s guidelines; it’s about proactively catching issues that could develop into serious repairs. I recommend setting quarterly diagnostic scans using your chosen tool, focusing on vital systems like brakes and engine sensors. For example, calibration routines for electronic brake sensors, outlined in this guide to CAN bus lag, can be performed at home with minimal fuss, extending component lifespan significantly. These practices help ensure consistent performance, even in adverse recent weather conditions.

The Future of Vehicle Maintenance Tools

Looking ahead, I predict that connected diagnostics—integrating real-time telematics—will become standard, allowing for remote monitoring and early warnings before any symptoms manifest visibly. Companies are developing cloud-based platforms that aggregate data from multiple sensors, making diagnostics faster, more comprehensive, and personalized. Embracing such innovations now, like using smart oil management systems, will prepare you for the vehicles of tomorrow.

How do I maintain vehicle performance over time?

One effective method I recommend is performing regular sensor calibration and software updates. This can prevent false alerts and ensure systems like brakes operate as intended. For instance, recalibrating electronic brake sensors after exposure to extreme weather conditions is vital—a process explained in detail here DIY calibration routines. By integrating these advanced practices into your maintenance regimen, you’ll extend your vehicle’s lifespan and enhance safety, ultimately saving money and stress in the long run. Try performing a calibration test on your brake sensors this month and observe how system reliability improves.

Here’s What the Cold Taught Me About Brake Safety

After facing unexpected brake failures during winter, I realized that even the most advanced brake systems require careful attention in cold weather. The harsh environment revealed hidden vulnerabilities in systems I assumed were foolproof—proof that I now know is only as good as my maintenance routine and knowledge.

One lightbulb moment was understanding that environmental factors can subtly corrupt signals and sensor data, leading to false warnings or system malfunctions. This insight made me rethink diagnostics, calibration, and component inspections—not as chores, but as crucial steps in safeguarding my vehicle’s safety and longevity.

Curated Gear for Cold-Weather brake mastery

To better understand and address these challenges, I rely on tools like the Autel MaxiSys MS909, which provides comprehensive diagnostics and sensor calibration capabilities. I trust it because it helps me spot issues early, especially when subtle environmental factors sneak past standard checks. The BlueDriver Bluetooth Pro OBD2 Scanner is a portable companion for quick insights and troubleshooting. Additionally, staying updated with manufacturer-specific software ensures I’m prepared for evolving 2026 challenges, particularly with complex brake systems.

Fuel Your Fog of Knowledge with Trusted Resources

Hands down, the best investment I’ve made in vehicle maintenance is immersing myself in expert literature. The Auto Repair Essentials book helped me decode the nuances of electronic brake system calibration. For ongoing learning, online communities and manufacturer bulletins keep me informed about quirks and fixes, like correcting false wear alerts caused by environmental interference. Harnessing these resources transforms maintenance from guesswork into an informed craft.

Your Next Brake Breakthrough Starts Today

Embarking on this journey of proactive brake care, especially in unpredictable weather, empowers you to extend the lifespan of your braking system and avoid costly repairs. Every calibration, inspection, and tool update fortifies your vehicle against environmental adversities. Remember: knowledge and preparation are your best allies on the road. Take action now—your safety depends on it.

More Details
Mar 3, 2026
Stop 2026 Brake Squeal With This New Copper-Free Bedding Fix

I’ll never forget the day I rolled up to the driveway after a long drive, only to be greeted by an ear-splitting squeal from my brakes. It was late, I was exhausted, and all I wanted was a quick brake check. Instead, I found myself nervously tapping the pedal, wondering if my trusty car was suddenly turning into a menace. That squeal wasn’t just annoying—it was a red flag I couldn’t ignore. If you’ve experienced that high-pitched chatter during every stop, you’re not alone. Brake squeal in 2026 models has become a common frustration, especially with newer copper-free bedding compounds that promise eco-friendliness but sometimes bring unexpected noises.

Why Brake Squeal Is More Than Just Annoying

The truth is, squealing brakes can indicate underlying issues—ranging from improper bedding procedures to materials incompatibility. It’s not just about the noise; persistent squeal can signal premature wear, contamination, or even a mechanical failure lurking beneath the surface. Knowing how to address it effectively saves you money, safety, and countless headaches down the line. In my early days as a DIY enthusiast, I made the mistake of dismissing minor squeaks, believing they’d resolve on their own. That was a costly oversight, emphasizing the importance of proper bedding and maintenance practices. Did you know that applying the correct bedding process can extend brake pad life by up to 30%? Not following proper procedures was a mistake I learned the hard way, and I want to help you avoid the same pitfalls.

Is The Copper-Free Bedding Fix Really Worth It?

This is where many skeptics hesitate. I used to wonder whether these new bedding methods were just hype or genuinely effective. Early on, I worried about whether this approach would work on my vehicle or if I’d be throwing money at a problem that’d just come back. My biggest mistake was trusting generic advice from unverified sources—something I now advise against. Instead, I discovered that the right bedding process, especially with copper-free compounds designed for cleaner emissions, can genuinely silence that annoying squeal. For a detailed look into common mistakes that can sabotage your brake performance, check out this guide. Now, let’s explore how you can implement this bedding trick effectively, ensuring your brakes remain silent and reliable for miles to come.

Start with a Clean Slate

Before bedding your new brake pads, ensure the rotors are clean and free of contaminants. Use a dedicated brake cleaner, applying it with a lint-free cloth. In a recent project, I meticulously cleaned the rotors, which eliminated initial squeals and improved brake performance instantly.

Apply a Gentle Initial Stop

Begin by performing 15-20 gentle stops from 30-35 mph, allowing the brakes to warm gradually. Think of this like warming up before a workout; gentle friction prevents uneven pad bedding. During my last brake job, I focused on light stops, which prevented uneven pad transfer and extended brake lifespan.

Progress to Moderate Stops with Cool-Down Periods

Next, increase braking force and perform around 10 stops from 40-45 mph, then let the system cool for about 10 minutes between stops. This process ensures even adhesive transfer between pad and rotor. I once rushed this step, causing uneven pad deposits that resulted in squealing, so patience is key.

Perform an Aggressive Stop

Finally, do a single, firm stop from about 50 mph, then avoid braking for a few minutes to let components cool down. This step helps settle the pad material. In my experience, skipping this caused inconsistent brake feel, emphasizing the importance of this final phase.

Monitor and Adjust

After bedding, test the brakes at various speeds and loads to confirm noise reduction. If squealing persists, revisit the process or check for contamination like oil or grease. Remember, proper bedding is crucial; improper techniques can lead to issues like those discussed in this detailed guide.

Thermal image showing even heat distribution across brake pads during bedding process

Using thermal imaging or brake temperature sensors during bedding can help ensure uniform heat distribution, much like monitoring a cooking process to prevent burning the food.

Many car owners assume that basic maintenance practices or superficial diagnostics are enough to keep their vehicles running smoothly. However, this misconception can lead to costly repairs and safety risks down the line. A common trap is relying solely on generic advice or budget-friendly tools without understanding the nuanced intricacies of modern automotive systems. For instance, it’s a widespread myth that simply replacing brake pads or resetting codes will fix persistent issues. In reality, advanced problems often require a deeper investigation—something many amateurs overlook. Overlooking these complexities can cause minor issues to escalate into major failures, especially as vehicles like the 2026 models incorporate sophisticated electronics and software controls. For example, many drivers think that a quick oil change with cheap filters suffices, but neglecting high-quality filters or the specific oil viscosity recommended can accelerate engine wear.

Are OBD-II Scanners Adequate for Modern Vehicle Diagnoses?

This is where mistakes become particularly costly. Many car owners and even some mechanics rely on their basic diagnostic tools, unaware that they might be missing critical issues like ghost codes or hidden error signals. Recent studies highlight that standard scanners often fail to detect significant engine faults, especially with newer vehicle architectures. This oversight can give a false sense of security, leading you to ignore persistent symptoms until they become severe. Investing in advanced diagnostics that understand the nuances of 2026 vehicle systems ensures you catch problems early, saving money and avoiding breakdowns. Moreover, understanding the common myths, such as ‘scanning is enough’ or ‘codes are always accurate,’ will empower you to make smarter repair decisions. For instance, knowing how to interpret ghost codes correctly can prevent unnecessary repairs—something I cover extensively in my auto repair guides. Don’t trust superficial fixes; dig deeper and always consider the advanced nuances of diagnostic tools and auto repair practices. Have you ever fallen into this trap? Let me know in the comments.Maintaining your vehicle’s performance requires the right tools and consistent effort. I personally rely on high-quality diagnostic tools like the Bosch OBD 4 scanner, which not only reads standard codes but also uncovers hidden ghost codes that can otherwise go unnoticed, saving you from costly repairs down the line. Ensuring your diagnostic approach is thorough is crucial because many scanners miss vital signals, especially with 2026 models that incorporate complex systems. For example, utilizing tools capable of advanced data logging and real-time analysis helps monitor vehicle health proactively, preventing small issues from escalating. Regular software updates for your diagnostic equipment can also provide insights into new error codes and system behaviors, a feature I prioritize to stay ahead of emerging problems.

What I Wish I Knew Before Starting My Brake Fixes

The biggest lesson I learned was the importance of patience and attention to detail. Rushing through bedding procedures or ignoring squeal signs only led to more headaches down the line. Now, I understand that taking time to methodically follow each step saves time and money in the long run.

I also discovered that not all brake pads are created equal. My initial choice of budget-friendly ceramic pads seemed like a good idea, but I soon faced unexpected squeals and uneven wear. Investing in quality materials tailored to my vehicle’s specific needs made a noticeable difference in performance and silence.

Finally, I realized that a clean, contaminant-free rotor is essential for peace and safety. Regular thorough cleaning and inspection prevented many issues that I previously dismissed as normal noises. These lightbulb moments have transformed my approach from reactive to proactive, ensuring I keep my vehicle running smoothly and quietly.

Tools and Resources That Elevated My Auto Repair Game

My top recommendation is the advanced OBD-II scanner. It uncovered hidden engine faults that standard tools missed, saving me from costly repairs. For brake-specific diagnostics, the step-by-step guide on squeaky brakes is invaluable for understanding proper bedding and addressing noise issues head-on.

I also rely on comprehensive maintenance manuals and forums that share real-world experiences. The community-driven insights help me anticipate common pitfalls and discover innovative tricks, like thermal imaging for brake heat management, which can be a game-changer during bedding procedures.

Your Next Move—Embrace the Knowledge and Take Charge

Empower yourself with these insights and tools to extend your vehicle’s lifespan and enjoy safer driving. Remember, the key to effective auto repair isn’t just following instructions but understanding the ‘why’ behind each step. Your vehicle’s health depends on your commitment to learning and diligent maintenance. So, why not start today by revisiting your brake routine or diagnostic practices? The more proactive you are, the more confident you’ll become in handling future issues without fear.

More Details
Mar 1, 2026
Fix 2026 Brake Squeal with This High-Heat Ceramic Strategy

Hey there, ever been parked in your driveway when suddenly that unmistakeable squeal pierced the calm—your brakes crying out in protest after just a quick stop? I’ve been there too; it’s downright frustrating, especially when you’re trying to enjoy your weekend. That high-pitched squealing, which seems to appear out of nowhere, can make you wonder if your car is about to give up on you. But here’s the thing: you’re not imagining it, and there is a way to fix it that doesn’t require a full brake overhaul every single time.

Dealing with the Unexpected Brake Squeal

Have you noticed that your brake squeal tends to worsen after driving through rain or humid days? Believe me, I used to dismiss it as just another quirky noise—until it started getting worse and I realized I was risking damage to my brake components. That’s when I decided to dig deeper, read up, and test out solutions myself. What I discovered is that the root cause isn’t just your brake pads—they often involve complex interactions between high-heat conditions and ceramic materials designed to handle extreme temperatures.

But don’t worry. Today, I’ll walk you through a practical strategy that’s changed the way I handle brake squeal in my vehicle, and it could do the same for you. It’s about leveraging high-heat ceramic brake pads and proper calibration to reduce that annoying squeal forever.

Is High-Heat Ceramic Strategy Actually Worth the Hype?

I admit, when I first heard about high-heat ceramic brake pads, I was skeptical. This wasn’t some shiny new gadget; it was a serious upgrade, and I feared it might be overpriced or unnecessary. Early on, I made the mistake of telling myself that standard pads would suffice, only to find that I was replacing them too often and dealing with squeal every rainy day. Turns out, rushing into cheap fixes without understanding the underlying heat conditions can cost you more in the long run.

According to automotive experts, using the right combination of ceramic materials and proper installation can dramatically cut down on brake noise, especially in high-temperature situations common in 2026 vehicle models. For more insights on how vehicle physics affect brake performance, check out [this detailed guide](https://repairmycarpro.com/why-your-regenerative-brakes-squeal-2026-fix-checklist).

So, if you’re tired of your brakes squealing every time the weather shifts or when you stop suddenly, stick with me. We’re about to explore how this high-heat ceramic approach isn’t just hype—it’s a real, actionable solution. Let’s get started with the key steps to turn this problem around.

Assess Your Brake System

Start by safely elevating your vehicle with a jack and secure it on jack stands. Remove the wheels to access the brake components. Inspect the brake pads, rotors, and calipers for visible wear or damage. Pay special attention to uneven pad wear or scoring on the rotors, which can contribute to squealing. Remember, proper diagnostics is key; if you’re unsure, check out effective vehicle diagnostics strategies to identify underlying issues.

While many car owners and even some mechanics focus on surface-level issues like replacing brake pads or changing oil, the real challenge lies in understanding the nuanced complexities of modern auto diagnostics and repairs. A common misconception is that regex scanning codes or basic visual inspections are enough to catch all problems. However, with the advancements in vehicle electronics—especially in 2026 models—this approach often leads to oversight. For instance, relying solely on diagnostic scanners without understanding their limitations can cause you to miss critical stealth error logs that are not immediately visible. According to a study published by automotive experts, up to 30% of vehicle issues stem from hidden electronics faults that conventional tools cannot detect—highlighting a significant knowledge gap.

Keep It Running Smoothly with Proper Maintenance

Regular upkeep is essential to ensure your vehicle remains reliable over the years. Investing in the right tools and understanding proper maintenance routines can save you time and money while keeping your car in top shape. Personally, I rely on a few key pieces of equipment that have proven invaluable in diagnosing and addressing issues early before they become costly repairs.

My Favorite Diagnostic Tools That Save Me Time

One tool I swear by is the OBD-II scanner, specifically the Bluetooth-enabled models like BlueDriver. This device connects to my smartphone and offers comprehensive diagnostic reports, including reading and clearing error codes, analyzing sensor data, and even accessing manufacturer-specific information. I’ve found that having real-time data at my fingertips allows me to identify issues promptly, especially when the scanner can detect stealth error logs that standard tools often miss, such as those discussed in this guide.

Additionally, I recommend investing in a quality digital multimeter for electrical troubleshooting. Checking battery voltage, sensor outputs, and wiring continuity with a reliable multimeter helps in diagnosing tricky electrical problems, which are common in newer vehicle models.

Prioritize Ongoing Maintenance

For long-term results, consistent oil changes using appropriate lubricants matter greatly. For 2026 engines, avoiding traditional oils like 0W-8 in favor of newer formulations can extend engine life, as explained in this insightful article. Keep an eye on fluid levels, brake fluid quality, and coolant condition to prevent component wear and corrosion.

Scaling Up and Future-Proofing Your Vehicle

Looking ahead, vehicle diagnostics and maintenance will increasingly incorporate AI-powered tools that can interpret complex data patterns, predict component failures, and even recommend proactive repairs. Embracing these technologies early can give you a competitive edge, reducing downtime and repair costs. For example, integrating a system that monitors your vehicle’s electronic brake components can preempt failures, especially as seen in this resource.

How Do I Keep My Vehicle Performing Well Over Time?

The key is a disciplined maintenance schedule combined with the right tools. Regular inspections, timely oil changes, and electrical system diagnostics using advanced scanners will spot issues before they escalate. Consider upgrading your diagnostic equipment periodically to stay ahead of rapid advancements in vehicle technology. And don’t forget, staying informed through trusted guides and tutorials can significantly extend your vehicle’s lifespan and reliability. Try integrating one of these tools or routines today—your vehicle will thank you in the long run.

What My Experience Taught Me About Vehicle Diagnostics and Sound Solutions

One of the most valuable lessons I learned was that seemingly minor issues, like brake squeal, often signal deeper mechanical or electronic concerns lurking beneath the surface. Rushing to replace pads without thorough diagnostics can only mask the problem temporarily, leading to more costly repairs down the road. The key is to cultivate patience and develop a keen eye for clues that indicate electronic sensor malfunctions or calibration needs, especially in complex 2026 models.

Furthermore, I realized that relying solely on generic scan tools isn’t enough. Advanced vehicle electronics demand that I understand stealth error logs and interpret subtle signals that could prevent dangerous failures, particularly in regenerative braking systems. Knowledge is our greatest ally in proactive auto maintenance, rather than reactive fixes.

Tools and Resources I Can’t Live Without

If you’re serious about deciphering vehicle issues like brake squeal or electrical glitches, investing in quality diagnostic tools is non-negotiable. My favorite is the specialized 2026 scan analyzer, which reveals hidden error logs that standard scanners often overlook. Pairing this with a reliable electronic brake diagnostics guide has helped me prevent failures before they escalate. Additionally, reading about effective maintenance routines in trusted articles has consistently improved my approach to vehicle longevity.

For those looking to expand their toolkit, strategic resource collections are invaluable, providing insights that keep your vehicle performing at its best far beyond just fixing squeals.

Seize the Moment and Keep Your Vehicle Trusted

Embracing these diagnostic strategies and tool investments can transform how you care for your vehicle, making repairs less stressful and more predictive. The future of auto maintenance is leaning heavily into intelligent diagnostics, so why not get ahead of the curve today? Remember, consistent maintenance, combined with the right knowledge and tools, not only extends your car’s lifespan but also keeps you safe on the road.

More Details
Feb 26, 2026
3 New 2026 Brake Squeaks That Actually Signal Motor Failure

Ever been in the middle of a quiet drive and suddenly heard a high-pitched squeal coming from your brakes? That jarring sound used to just mean worn pads or cheap rotors. But recently, I experienced something that made me sit up and rethink everything about brake squeaks on my 2026 vehicle. It was late at night, the kids were asleep, and I was just trying to get home after a quick detour. Then, out of nowhere, that irritating squeal appeared—louder than usual, sharper, almost threatening. That moment was a real eye-opener for me. I realized this isn’t just about noisy brakes anymore; it could be an alert, a real signal that something deeper is wrong—possibly even with the engine or motor components. So, what if that squeal is more than just the brakes? And how can you tell whether it’s a simple pad issue or a sign of serious motor failure? Today, I promise to share with you what I’ve learned from personal experience—and some expert insights—to help you decode those strange brake noises and avoid costly repairs down the line.

How Brake Squeaks Might Reveal Hidden Motor Problems

Is Your Squealing Actually Worth the Alarm?

Early on, I made a classic mistake: dismissing that squeal as just another brake pad issue and ignoring it until it went silent—or so I thought. What I didn’t realize then was that some squeaks can be early warnings of severe motor or transmission problems, especially on 2026 models equipped with advanced braking and drive systems. These signals, if ignored, can escalate into engine failures or other costly repairs. According to experts, a persistent squeal paired with unusual engine behavior isn’t just a maintenance annoyance—it’s a red flag. Missing this warning can lead you to face breakdowns or even safety hazards. I learned this the hard way, and I want to help you avoid the same mistake. If you’re unsure whether your brake squeal is just a quick fix or something that signals motor trouble, it’s wise to get your vehicle diagnosed professionally or read more about common diagnostic mistakes that can mask critical issues. Check out this guide for effective vehicle diagnostics strategies—trust me, catching these problems early makes all the difference. Now, let’s explore the key signs that your brake squeals are telling you something more serious, and how you can spot the red flags before it’s too late.

Start with a Visual Inspection of Your Brakes and Engine

First, safely park your vehicle on a level surface, turn off the engine, and open the hood. Examine the brake pads for uneven wear, cracks, or glazing—these are clear signs you might need replacements or adjustments. Simultaneously, check for any oil leaks or burnt wiring near the engine, as these could also cause noise or misdiagnosed issues. I recall a time when I spotted a slight oil residue near the brake caliper, which led me to suspect a leak affecting the brake sensor readings. This simple visual check saved me from replacing parts unnecessarily and directed me toward fixing a hidden leak. Consider referencing our auto repair tips for comprehensive inspection strategies.

Use a Diagnostic Scanner for Precise Error Detection

Connect an advanced vehicle diagnostic scanner that supports your 2026 model to retrieve error codes from the brake and engine systems. These scanners often provide real-time data on sensor statuses, actuator functions, and error logs. When I faced unexplained squealing, I used a diagnostic tool to identify a false sensor alert caused by a software glitch. This step reminded me how crucial proper diagnostics are, especially since many diagnostics errors can be stealthy or misleading. For best results, ensure your scanner can interpret CAN bus data accurately, avoiding common pitfalls described in some scan failures after updates.

Compare Diagnostic Data with Manufacturer Specifications

Gather the error codes and sensor readings, then compare these with specifications provided by your vehicle’s manufacturer. This step helps distinguish between minor anomalies and critical faults. For my vehicle, a discrepancy in brake pad wear sensor voltage indicated a faulty sensor rather than actual pad wear, saving me from expensive part replacements. Remember, consult the ultimate guide to diagnostics for detailed interpretation methods. Keep in mind that some errors can be caused by software bugs or outdated firmware, so consider performing ota updates or software resets if necessary.

Perform Functionality Tests on Brake and Engine Components

After diagnosing potential fault sources, conduct functional tests—such as performing a brake pedal push test or engine idle check—to observe real-time responses. Carefully monitor for unusual sounds, vibrations, or delays in response. For example, I once tested my regenerative brakes after an error code appeared, which revealed a delayed activation due to software calibration issues. This hands-on approach confirmed the problem was software-related, which I resolved without replacing hardware. Reference our regenerative brake fix guide for detailed testing procedures. Always document your findings to track progress or share with a professional if further diagnostics are needed.

Eliminate False Alerts and Confirm Actual Problems

Use calibration tools or software updates to clear false sensor warnings before conducting a final test. In my case, updating the brake system software eliminated a persistent false alarm, preventing unnecessary part replacements. Be wary that some errors are transient and may raise false alarms—regular calibration or re-testing after updates ensures accuracy. For complex issues, consult diagnostic tools capable of Stealth error detection, like those discussed at stealth diagnostics errors. Remember, consistent testing and calibration help verify whether the problem is real or a sensor glitch, avoiding costly Guesswork.Many car owners assume that sticking to the manufacturer’s recommended oil change interval is enough to keep their vehicle running smoothly, but in reality, there’s a little-known nuance that can make a significant difference. The common misconception is that more frequent oil changes are always better, or that sticking strictly to a mileage threshold ensures optimal engine health. However, recent studies and expert insights reveal that factors like driving conditions, oil quality, and even software updates influence how often you should service your car. For example, a 2025 study published in Automotive Science highlighted that high-mileage driving in stop-and-go traffic can accelerate oil degradation, making standard intervals insufficient. Additionally, many overlook the impact of OTA (Over-The-Air) updates in modern vehicles, which can modify engine parameters and affect oil consumption patterns. Relying solely on mileage or time without considering these nuances might lead to unnecessary oil changes or, worse, engine wear due to delayed maintenance. Moreover, some believe that all oils are interchangeable, but as highlighted in our ultimate guide to hybrid oil maintenance, using the wrong type of synthetic oil can cause sludge buildup or fuel inefficiency, especially in high-performance engines. The danger lies in the ‘set-it-and-forget-it’ mindset, which can ignore evolving vehicle needs and environmental factors. Selecting the correct oil, monitoring real-world driving patterns, and staying updated with software can optimize vehicle longevity. Think of your vehicle as a living organism—what worked a decade ago may not suit today’s advanced technology. Have you ever fallen into this trap? Let me know in the comments.Maintaining your car’s health over time requires more than just routine oil changes or occasional repairs; it demands the right tools combined with disciplined maintenance practices. I personally rely on a set of specific diagnostics equipment and software that empower me to identify issues before they turn into costly repairs. For instance, my preferred scanner is the Autel MaxiCOM MK808, which offers comprehensive vehicle coverage and real-time data analysis. This device has been a game-changer in my routine diagnostics, especially when it comes to complex systems like brake-by-wire or hybrid engine controls on 2026 models. The key is selecting tools that support the latest automotive standards, such as CAN bus diagnostics, ensuring accuracy and future-proofing your maintenance process.

How do I keep vehicle diagnostics effective over time?

What I Wish I Knew About Brake Squeals and Motor Health

One of the most eye-opening lessons I learned is that persistent brake squeals in my 2026 model aren’t just about worn pads—they can signal deeper issues, including hidden motor or transmission problems. I once dismissed a squeal as minor and paid the price with costly repairs later. Now, I realize that paying close attention to unusual noises can save you from breakdowns and safety hazards. Remember, sometimes those high-pitched sounds are your vehicle’s way of whispering about impending trouble, and early detection is key to avoiding expensive fixes.

My Go-To Resources for Advanced Vehicle Care

Over time, I’ve discovered that having the right tools makes all the difference. For instance, reliable diagnostics tools like the Autel MaxiCOM MK808 help me interpret error codes accurately, especially in complex systems of 2026 models. I trust specialists’ advice found in comprehensive guides like the ultimate guide to diagnostics for staying ahead. These resources empower me to make informed decisions, ensuring my vehicle remains in peak condition and I catch issues before they escalate.

Empower Your Maintenance Journey Today

Your vehicle’s health depends on your willingness to stay proactive and educated. By learning to recognize the subtle signs of motor issues hidden behind brake squeals, and leveraging trusted diagnostic tools, you’re taking control of your driving safety and budget. Don’t wait for that squeal to turn into a breakdown; use this knowledge as your shield. You got this—your drive to stay ahead is what will keep you safe on the road. How will you integrate these insights into your next vehicle check? Share your plans below and let’s learn together!},

More Details
Feb 25, 2026
3 New 2026 Brake Service Hacks to Stop Pedal Pulsation

Ever slam your foot onto the brake pedal during a city commute, only to be greeted with a jarring pulsation that makes your stomach drop? I remember countless mornings where I felt that unsettling wobble, and honestly, it almost made me dread every stop sign. It’s a frustrating experience, especially when your vehicle’s braking system should give you confidence, not anxiety.

Why Brake Pedal Pulsation Is More Than Just Annoying

That pulsation isn’t just an inconvenience—it’s a warning sign. Left unchecked, it can lead to uneven brake pad wear, damaged rotors, and even compromise your safety. When I first encountered this issue, I assumed it was a simple rotor surface problem. But after a bit of research and my own trial and error, I realized there’s a lot more to it, especially with the new 2026 brake systems. The good news? Thanks to some fresh insights and advanced hacks, you can fix this problem without replacing the entire brake assembly. I’ll show you exactly how I did it, and how you can, too.

Is a Brake Pedal Vibration Something You Can Ignore?

Early on, I made the mistake of neglecting my pulsation, thinking it would go away. That’s a rookie error—like ignoring a warning light. If you’ve experienced this, you might ask whether it’s worth the effort to fix or if it’ll resolve on its own. Well, trust me, it’s better to tackle it head-on. And for more detailed insights into accurate auto repairs, you might want to check out effective vehicle diagnostics tips. The technology behind brake systems has evolved, and so should our approach to maintaining them. Understanding what’s happening under the hood is essential, especially with the latest 2026 innovations that often go unnoticed.

This is exactly why I embarked on discovering new brake service hacks. The goal? To get rid of that pesky pedal pulsation once and for all, without draining my wallet or wasting days at the shop. So, if that wobble in your pedal has been bugging you—stick around. I’m about to share three game-changing tricks to restore your braking confidence, starting right now.

Inspect and Resurface Your Brake Rotors

First, I grabbed my jack and lifted the car, then removed the wheels to access the rotors. Using a dial indicator, I checked for warping—anything above 0.002 inches called for attention. To address this, I used a brake lathe to resurface the rotors, removing uneven surfaces that caused pulsation. This process is like sanding a rough wood piece until it’s smooth—ensuring even contact with brake pads and reducing vibrations. After re-installing the rotors, I tested the brakes gently; the pulsation noticeably diminished. For best results, always verify the rotor thickness after resurfacing to avoid exceeding manufacturer tolerances. To deepen your understanding of brake system maintenance, consult top brake service strategies.

Secure and Test Brake Hardware

Next, I examined the brake calipers and pads, ensuring all mounting hardware was tight and free of debris. Loose calipers can mimic warped rotors, so I tightened caliper bolts to manufacturer specs using a torque wrench. I also checked for uneven pad wear; if uneven, I replaced the pads and; if pads were unevenly worn, I considered rotor resurfacing or replacement. Once reassembled, I took my car for a slow test drive, applying steady pressure to confirm the pulsation was gone. Remember, ensuring hardware torque compliance is crucial; loose components can cause vibrations much like a wobbly wheel. For detailed repair tips, see auto repair strategies.

Bleed the Brake System to Remove Air Bubbles

During my own fix, I noticed that even after rotor resurfacing and hardware tightening, a slight pedal pulsation persisted—likely due to trapped air. I set up my brake bleeder kit, attached the clear tube to the caliper’s bleeder valve, and submerged the other end in a container of fresh brake fluid. Starting from the farthest wheel, I opened the valve slightly and pressed the brake pedal steadily, watching for air bubbles to escape. Repeating this process on each wheel, I ensured the brake fluid circulated properly without air pockets. Air in the brake lines can cause uneven pressure distribution, leading to pedal pulsation—think of it as trying to inflate a balloon filled with tiny leaks. For safe and effective bleeding, follow manufacturer guidelines, and don’t forget to top off the master cylinder reservoir frequently to prevent introducing more air. For advanced bleeding techniques, visit brake system repair strategies.

Final Check and Test Drive

After completing the above steps, I carefully tested the brakes at low speed, gradually increasing to normal driving conditions. The pulsation was gone, replaced with a firm, responsive pedal. I also felt confident during stop-and-go situations, knowing I addressed the root causes rather than just the symptoms. Remember, regular inspections and timely repairs stick with your vehicle’s longevity and safety. Always consider consulting detailed repair guides or professionals for complex issues, especially with DIY diagnostics.

By following these concrete steps—resurfacing rotors, tightening hardware, and bleeding air—you can eliminate brake pedal pulsation effectively. This hands-on approach saves money, improves safety, and restores your confidence in your vehicle’s braking system.

Many vehicle owners believe that sticking rigidly to the manufacturer’s recommended oil change interval guarantees optimal engine health. However, this common misconception oversimplifies a complex issue. In reality, the acceptable oil change interval isn’t a one-size-fits-all figure but varies depending on driving habits, oil type, and newer engine technologies. For instance, many assume that a 5,000-mile oil change is universally necessary, but recent studies suggest that synthetic oils often allow for longer periods, especially with proper vehicle maintenance. This nuance is backed by experts like those at auto repair specialists, who emphasize the importance of adapting oil change intervals based on real-world conditions instead of sticking blindly to generic recommendations.

Why Do So Many Mistakenly Trust the OBD Scanner Over Experienced Mechanics?

Investing in the Right Equipment for Long-Term Vehicle Health

Keeping your vehicle in top shape requires more than just the basics; it demands reliable, precise tools and proactive maintenance routines. One tool I personally swear by is a high-quality automotive diagnostic scanner, like the Autel MaxiScan MS509. Its ability to quickly read and clear diagnostic trouble codes, especially in complex 2026 models with advanced electronic systems, makes it invaluable. Unlike generic scanners, the MaxiScan offers live data streaming and freeze frame data, allowing me to pinpoint issues before they escalate. This proactive approach saves me money and prevents breakdowns. For ongoing diagnostics, integrating software like effective vehicle diagnostics tips ensures I stay ahead of potential problems.

Routine Checks That Save Money and Extend Vehicle Life

Beyond tech tools, adopting a disciplined maintenance schedule is key. Regular oil changes, appropriate to your vehicle’s needs—such as switching to low-SAPS oils for 2026 turbo engines—prevent sludge buildup and engine wear. For this, I recommend investing in an oil extractor pump, which allows for cleaner, less messy oil changes. It facilitates changing oil without the need for a full drain, reducing the time and potential for contamination. Paired with a good oil change toolkit, you can do quick, effective service at home. Predictions indicate that in the future, vehicle maintenance will be increasingly automated, with smart sensors notifying you when parts need attention—so staying familiar with diagnostic tools now prepares you for these innovations.

How do I maintain my vehicle’s systems over time?

Consistent, scheduled inspections are your best defense against costly repairs. Checking brake pads for uneven wear, inspecting suspension components, and monitoring fluid levels with digital testers ensure everything functions smoothly. For example, using a dedicated brake caliper piston tool helps in manual adjustments, preventing brake drag issues. When combined with vehicle-specific service guides, like the auto repair essential tips, you’ll establish a comprehensive maintenance routine. Investing in high-quality hand tools, such as torque wrenches and multimeters, ensures precise work, reducing the risk of future failures. As vehicle technology advances, especially with hybrid and electric models from 2026, staying updated on diagnostic and repair techniques becomes increasingly critical. The trend toward integrating AI diagnostics and remote monitoring will likely make maintenance more predictive, but your role as a mechanic or DIY enthusiast remains vital for long-term success. I encourage you to try out one of these advanced diagnostic tools or routine maintenance tips today—your vehicle’s longevity depends on it.

Lessons That Changed My Approach to Balancing Brakes

  • Realizing that most pulsations stem from uneven rotors made me focus on resurfacing rather than just replacing parts, saving time and money.
  • Understanding the importance of hardware torque tightened my confidence in DIY repairs, preventing future vibrations.
  • Bleeding the brake system isn’t just a routine—it’s a vital step that can resolve air-related pulsations I previously underestimated.
  • My biggest lightbulb moment was seeing how integrated the system’s electronics are, especially with 2026 innovations, requiring precise diagnostics beyond visual inspection.

Tools and Resources That Became My Repair Allies

  • The Autel MaxiScan MS509 is my go-to diagnostic tool for accurate trouble code reads, especially for complex 2026 systems.
  • Regularly consulting auto repair strategies guides has kept my maintenance on point, preventing issues before they escalate.
  • Investing in quality hand tools like torque wrenches ensures every repair is precise, extending my vehicle’s lifespan.
  • Staying updated with tutorials and community forums has provided me insights on emerging brake system nuances unique to 2026 models.

Keep Your Drive Safe and Confident

Taking charge of your vehicle’s brake health isn’t just about fixes—it’s about building trust in your car’s capabilities. Embrace these insights, gear up with the right tools, and stay proactive. Your vehicle responds better, and your safety margin improves dramatically. Remember, the motorist’s journey is ongoing; continuous learning and maintenance are your best allies. Ready to tackle that pedal pulsation once and for all? Share your experiences or ask your questions below—your road to safer braking starts today!

More Details
Feb 24, 2026
5 Hidden 2026 Brake Wear Signs Your Sensors Won’t Catch

I vividly remember hearing that unsettling squeal just as I was pulling into my driveway—only to realize later it was my brake system signaling trouble. It was one of those moments that made me rethink what I thought I knew about vehicle maintenance. Turns out, even the most advanced sensors can overlook subtle signs of brake wear, especially in 2026 models loaded with new tech. That light on the dashboard? It’s often just the tip of the iceberg.

Why Relying Solely on Sensors Can Be a Dangerous Mistake

Modern vehicles are packed with sensors designed to alert us about a myriad of issues, including brake wear. But what happens when these sensors fail to catch early warning signs? I’ve learned from personal experience—and plenty of research—that some critical indicators can slip past even the most sophisticated detection systems. For instance, I once ignored slow-changing brake pedal firmness, trusting the sensor instead of listening to my own senses and inspecting manually. That oversight nearly cost me, and it’s a mistake I hope you won’t repeat.

Is Your Vehicle’s Inspection Really Reliable in 2026?

Early in my repair career, I underestimated how much sensors can be fooled or delayed, especially with the latest updates in 5G signals and vehicle diagnostics. I used to think that a quick scan was enough. Now, I know better. Relying solely on diagnostic tools comes with risks. In fact, studies show that data can be compromised or delayed with the advent of new connectivity standards, like 5G, which can interfere with vehicle signals if not properly managed. To truly keep your brakes in top shape, a combination of manual inspection and digital diagnostics is essential.

If you’re curious about how to proactively identify brake issues beyond sensor alerts, stay with me. We’re about to dive into the five signs that your brake system might be hiding problems that sensors just can’t see. Trust me, understanding these signs can save you from unexpected breakdowns and costly repairs down the road.

Have you ever faced a situation where your brakes felt different but the dashboard didn’t show any warning? Share your experience—I’d love to hear about it, and perhaps help you spot the signs early next time.

Preparation is Key: What You Need to Know Before Starting

Before we delve into the specifics, it’s good to remember that vehicle diagnostics can sometimes be misleading, especially after over-the-air updates or software malfunctions. Learn more about common diagnostic pitfalls in this article. Now, let’s explore those sneaky brake wear signs that your sensors might overlook and how to catch them before it’s too late.

Perform a Visual Inspection of Brake Components

Start by safely lifting your vehicle and removing the wheels. Examine brake pads for uneven wear or thinning thickness—less than a quarter-inch indicates replacement is due. Look for scoring or cracks on rotors. Use a flashlight to check for signs of corrosion or fluid leaks around calipers. Think of this step as giving your brake system a quick health check, similar to a doctor feeling your pulse—it’s vital to catch issues early before sensor alerts pop up. I once discovered a cracked rotor during this inspection that sensors failed to detect, saving me from a dangerous breakdown.

Use Manual Testing to Detect Subtle Changes

Press down on the brake pedal repeatedly to assess firmness. A spongy or inconsistent pedal suggests air in the system or worn-out parts. Pay attention to pedal travel; excessive movement can mean caliper issues or fluid loss. Comparing pedal feel with manufacturer benchmarks helps identify hidden problems. Remember, sensors can overlook gradual changes—your senses are still your best diagnostic tool. I found that fluctuating pedal firmness was a sign of a failing master cylinder, which sensors missed until it caused a warning light.

Check Brake Fluid Quality and Level

Locate the brake fluid reservoir and inspect fluid color—healthy fluid is clear or light amber. Dark, cloudy, or contaminated fluid indicates it needs changing. Use a clean cloth to remove cap dust and then check levels; if below minimum, top up with approved brake fluid. However, never simply add fluid without considering potential leaks or internal damage. Think of brake fluid as the blood of your braking system—maintain its quality to ensure proper operation. I once replaced contaminated fluid, which dramatically improved pedal response and reduced squeals.

Test Brake Calipers and Pistons

After removing wheels, manually move caliper pistons using a brake caliper piston tool. Observe for smooth movement; resistance or sticking indicates caliper seizing. For piston retraction issues, check for corrosion or debris. This hands-on approach helps identify problems that software diagnostics can’t see—like a mechanic feeling a car’s heartbeat, not just reading data. I once cleaned and lubricated sticky calipers causing uneven brake pad wear, a fix sensors would have missed.

Evaluate Brake Rotor Condition

Use a dial indicator or a micrometer to measure rotor thickness at multiple points. Variations over 0.005 inches suggest warping or uneven wear. Run your finger around rotor surfaces—gradients or grooves are signs of long-term wear. Resurfacing or replacement may be necessary. This step is akin to sanding down a rough patch on a road—improving smoothness and safety. I once had a rotor resurfaced that improved braking feel significantly, which sensors hadn’t flagged as critical.

Test Dynamic Braking Performance

Find an open, safe area to gradually apply brakes from moderate speed. Feel for vibration, pulsing, or unusual noises—these are clues to underlying issues. Using a drag test on a rise helps assess brake hold and response. Always ensure the vehicle is stationary and conditions are safe. Think of this as a test drive, but with a focus solely on braking behavior. I once performed this test after noticing slight vibrations, revealing a warped rotor that sensors didn’t alert me to until it got worse.

Compare Findings and Cross-Check Data

Document measurement results and physical observations. Cross-reference with vehicle manuals or repair guides. If discrepancies appear—like uneven pad wear with normal sensor readings—prioritize manual repairs. Recognize that relying only on diagnostic tools can be misleading, especially with the interference from 5G signal interference. Combining hands-on inspection with digital diagnostics ensures comprehensive maintenance. I once caught a caliper issue that sensors missed, preventing a future safety hazard.

Adopt these steps regularly, and you’ll develop a feel for your vehicle’s brake health that surpasses sensor warnings, ensuring safer roads and longer-lasting brakes.

Many car owners and even some mechanics fall prey to misconceptions about vehicle maintenance, especially with the rapid advancement of automotive technology. One widespread myth is that modern sensors and diagnostic tools are utterly reliable, making manual inspections redundant. While these tools have significantly improved, they are not infallible. For instance, in 2026, studies have shown that 5G interference can distort diagnostic readings, leading to false negatives or positives. Relying solely on digital diagnostics without corroborating with a hands-on inspection can result in overlooked issues, such as subtle brake pad unevenness or minor leaks, which sensors might miss.

Another common misconception is that oil changes are solely about replacing dirty oil. The truth is, an oil change is an opportunity for comprehensive engine health checks, including monitoring oil quality and identifying early signs of engine wear. Ignoring the nuances here can lead to severe engine problems down the line, especially in high-performance or hybrid vehicles that demand precise maintenance routines.

What’s the Danger of Overlooking Advanced Diagnostic Errors

One lesser-known trap is the phenomenon of ‘ghost codes’ or elusive error logs that can mislead diagnostics. These are errors that don’t trigger dashboard lights or obvious symptoms but may cause issues over time, such as minor caliper seizes or ABS sensor delays. Mechanics and DIY enthusiasts alike can fall into the trap of clearing codes without understanding their root cause, as explained in this detailed guide. This approach often results in repeated repairs, unnecessary parts replacements, or, worse, neglecting underlying problems that threaten safety.

Advanced readers should be aware that diagnostic tools can be influenced by software bugs or hardware malfunctions, making OTA update issues a real concern. A false sense of security may cause you to delay crucial repairs, increasing risk and cost. For example, misreading brake system data due to software errors can lead to premature component failure or unsafe driving conditions. The takeaway: combining digital diagnostics with expert manual inspections is your best defense against unseen faults.

Have you ever fallen into this trap of trusting automation over instinct? Share your experience in the comments—I’d love to hear how you navigated those tricky diagnostic pitfalls.

Knowing these hidden nuances helps you protect your vehicle and pocket. Remember, a well-rounded maintenance strategy that values both technology and hands-on checks ensures safer roads and longer-lasting cars. For more on effective brake service and diagnostics, check out this essential guide.

Tools I Trust for Long-Term Vehicle Maintenance

When it comes to maintaining my vehicle, quality tools make all the difference. I personally rely on a high-precision digital multimeter, such as the Fluke 115, to accurately diagnose electrical issues—it’s reliable for testing sensors, relays, and wiring continuity, providing readings I can trust beyond the vehicle’s diagnostics. For brake system checks, I use a dial indicator to measure rotor runout with pinpoint accuracy, ensuring that wear and warping are caught early before sensors can detect them.

Predictive maintenance involves staying ahead of potential failures, especially with complex systems like electronic brake actuators. I recommend a dedicated OBD-II scanner like the Autel MaxiCOM MK808, which not only reads standard error codes but also offers live data streams for real-time analysis of engine and transmission performance. This helps prevent issues like burnt transmission fluid or subtle sensor failures that could escalate without timely intervention.

In addition, a quality brake caliper piston tool and a set of torque wrenches calibrated regularly are vital for safe, effective repairs. Proper torque settings are crucial—over-tightening can damage components, while under-tightening risks safety. My approach is to use a digital torque wrench with a memory function, ensuring each bolt is tightened to manufacturer specifications as detailed in the vehicle’s repair manual.

How do I maintain these tools and ensure their longevity?

Regular calibration of measurement tools ensures accurate readings. I schedule calibration and maintenance checks at recommended intervals, typically annually, to keep my equipment precise. Cleaning tools after every use prevents corrosion and buildup, especially around brake components or electrical contacts. Additionally, storing tools in dry, organized cases avoids damage and makes them readily available when needed. Investing in durable, high-quality tools reduces the likelihood of costly errors during repairs and prolongs their usefulness, saving money and time in the long run. As vehicle technology evolves—particularly with increased reliance on electronic diagnostics—staying equipped with the right tools becomes even more essential. For example, the rise of 5G interference in diagnostics, discussed in this article, underscores the need for specialized equipment capable of filtering interference and ensuring accurate readings. Be proactive—test your tools and familiarize yourself with their correct operation regularly. As a practice, I recommend setting aside a monthly routine to review calibration, clean devices, and update firmware/software when possible, ensuring you’re always ready for precise diagnostics and repairs.

Lessons That Changed How I Approach Brake Care

  • I’ve realized that trusting digital diagnostics alone can lead to overlooking subtle issues—manual inspections often reveal hidden problems like minor rotor warping or caliper sticking that sensors miss.
  • Balancing technology with hands-on checks has saved me from costly repairs and potential safety hazards—don’t underestimate the value of a old-fashioned visual and tactile inspection.
  • My biggest breakthrough was understanding that sensor errors, especially with 5G interference, are more common than I thought, making comprehensive diagnostics and experience irreplaceable.
  • I’ve learned that regular inspection routines create a safety margin that sensors can’t provide—frames of peace of mind that catch issues before dashboard warnings.
  • Finally, investing in quality tools and staying updated with aftermarket guides has empowered me to troubleshoot more effectively, turning DIY repairs from guesswork into precision work.

Tools I Depend On to Keep My Vehicle Running Smoothly

My go-to digital multimeter, the Fluke 115, offers reliable readings for electrical diagnostics, which is vital given how software bugs can impact sensor data. For accurate rotor assessment, I rely on a dial indicator to measure runout, preventing uneven wear from escalating. An advanced OBD-II scanner like the Autel MaxiCOM MK808 provides detailed, real-time data streams that complement manual checks, especially when diagnosing complex systems affected by OTA updates. Additionally, a calibrated torque wrench and specialized brake caliper piston tool have become essential for safe, effective repairs. These tools have helped me avoid common mistakes and extend my vehicle’s lifespan—trusting quality gear makes a remarkable difference in your maintenance success.

Seize the Moment and Take Control

Vehicle maintenance in 2026 requires a blend of curiosity, patience, and proactive care. By listening to both your senses and your diagnostic tools, you can uncover issues early and keep your brakes and system in top shape. Stay curious about the latest techniques, keep your tools in prime condition, and remember that your hands-on knowledge is your best asset. If you’ve ever hesitated before inspecting your brake system manually, now’s the perfect time to start—your safety and savings depend on it. Ready to dive deeper? Check out this comprehensive guide for expert tips on braking peace of mind.

More Details
Feb 23, 2026
5 Brake Service Checks to Silence 2026 Pad-Drag Alarms

I’ll never forget the morning I started hearing that irritating squeal. I was just about to leave for work, coffee in hand, when suddenly my dashboard lit up with a warning about brake pad drag. At first, I thought it was a typo or a glitch—after all, I hadn’t done anything unusual with my brakes. But as I drove, the noise persisted, and the warning refused to go away. That was my lightbulb moment: the importance of understanding the subtle signs of brake issues before they turn into costly repairs.

Why Ignoring Brake Warning Alarms Can Cost You More Than You Think

In the world of vehicle maintenance, those little brake pad-drag alarms are more than just noise—they’re a warning sign of underlying problems that, if left unchecked, can compromise your safety and drain your wallet. According to expert insights at RepairMyCarPro, timely brake service not only extends the lifespan of your brake components but also prevents accidents caused by brake failure. But here’s the thing: many drivers dismiss these alerts or ignore them until something dramatic happens—like a total brake lock or an accident—making repairs more expensive and dangerous.

Early on, I made the mistake of thinking a simple brake pad replacement would fix that persistent squeal. It took a deeper dive into maintenance strategies to realize that my brake system was showing signs of drag that needed more than just new pads. That experience taught me the value of regular, preventative checks—especially as vehicles become more complex with electronic brake systems and hybrid tech. We’ll go through five essential brake checks you can do yourself or with your mechanic to tackle pad-drag issues head-on and keep your drive smooth and safe.

Start with a Visual Inspection

Begin by parking your vehicle on a flat surface, engaging the parking brake, and removing the wheel for a clear view of the brake components. Check for uneven brake pad wear, which can indicate caliper problems or misalignment. Look for signs of corrosion or damage on the rotor surface. During my own brake overhaul, noticing uneven pad thickness prompted me to replace the problematic caliper, preventing future uneven wear. Use a flashlight to verify that the brake lines are intact and free of leaks. Remember, a visual check is your first line of defense against costly repairs.

Test Brake Pedal Feel

Press the brake pedal firmly with the engine off. A firm, consistent pedal suggests healthy brake fluid pressure, while a spongy or sinking pedal indicates air in the system or fluid degradation. When I faced pedal softness after brake pad replacement, bleeding the brake lines cured the issue, restoring safe stopping power. This step helps you identify issues early before driving the vehicle, saving money and enhancing safety.

Calibrate Brake Sensors and Electronic Components

If your vehicle features electronic brake systems or regenerative brakes, proper calibration is crucial. Use a diagnostic scanner compatible with your car to check for fault codes related to brake sensors. For instance, a misaligned sensor might cause false wear alerts, leading to unnecessary replacements. During my last repair, recalibrating the electronic parking brake using specialized software eliminated squeals and ensured proper function. Always consult your vehicle’s manual or diagnostics resources, such as top brake service strategies, for specific calibration procedures.

Check Brake Fluid Quality and Levels

Remove the brake fluid reservoir cap and evaluate the fluid level against the marked indicators. Use a clean cloth to wipe the cap’s opening to prevent dirt from entering. The fluid should be clear or slightly yellow; dark or contaminated fluid needs replacement. I once ignored dark fluid during a check, which led to boiling brake fluid under heavy use. Always use the appropriate type of brake fluid recommended by your vehicle’s manufacturer, and consider a fluid change if it appears degraded. For up-to-date advice and common mistakes, visit brake service myths.

Measure Brake Rotor and Pad Thickness

Use a micrometer or caliper to measure the thickness of your brake pads and rotors. Compare measurements to manufacturer specifications, often found in your service manual or online. Excessive wear indicates the need for replacement, as worn-out pads reduce braking efficiency and damage rotors. I once caught uneven rotor wear early by measuring regularly, which extended their lifespan and prevented warping. Maintaining proper pad and rotor thickness ensures optimal braking performance and safety.

Final Road Test and Fine-Tuning

After completing these checks and repairs, perform a slow, controlled test drive. Gently apply brakes to ensure smooth engagement without squeals or vibrations. If issues persist, revisit the diagnostic codes or consult a professional. Once, a faulty caliper caused a slight pull during braking, which was resolved through recalibration. Keeping an eye on brake responsiveness after maintenance guarantees your vehicle’s safety and reliability.

Many car owners fall prey to myths and oversimplifications when it comes to vehicle maintenance, especially regarding oil changes, auto repairs, and diagnostics. While basic knowledge is essential, assuming you understand all nuances can lead to costly mistakes. Let’s explore some often overlooked nuances that can make a significant difference in your car’s health and your wallet.

First, there’s a persistent myth that every oil change interval is universally applicable. In reality, recent studies and expert insights, such as those found at RepairMyCarPro, emphasize that modern engines, especially hybrids, require tailored oil change schedules based on driving conditions, oil type, and vehicle age. Relying solely on mileage or time without considering these factors can accelerate engine wear.

Moreover, many assume that auto repairs are straightforward and that mechanics always follow best practices. However, the industry is rife with pitfalls where cheap or inexperienced shops might use inferior parts, omit essential steps, or misdiagnose problems. For example, installing the wrong type of oil or neglecting to properly calibrate electronic braking systems can lead to persistent squeals or uneven brake wear. To avoid this, always discuss the specifics of repair procedures and request detailed diagnosis reports. A common trap is overlooking updates in vehicle technology, like high-flow filters needed for certain models, which can impact oil cooling and filtration.

A critical, often misunderstood aspect is vehicle diagnostics. Many rely solely on OBD scanners, believing they provide complete diagnoses. But the truth is that these tools can sometimes give false positives or skip over subtle issues, especially with new sensor systems. For instance, misreading a sensor due to software incompatibility can cause you to replace parts unnecessarily. In my experience, cross-verifying diagnostic codes with a professional mechanic experienced in vehicle diagnostics strategies is invaluable.

Beware the trap of ignoring the ‘hidden’ nuances behind these processes. For example, the recent brake warning signs can be masked by sensor errors or software glitches, leading to dangerous driving conditions. Similarly, hyper-focus on mileage can cause you to neglect necessary inspections, especially as models become more complex emotionally with hybrid and electric tech.

Are you aware that even the choice of oil, like synthetic versus conventional, can influence long-term engine performance? A study shows that using incompatible oil brands or incorrect viscosity can cause sludge build-up or engine corrosion, especially in newer hybrid engines. Understanding these nuances enables proactive maintenance rather than reactive repairs.

In conclusion, while basic maintenance routines are easy to grasp, the devil is in the details. Recognizing the subtleties in oil specifications, repair standards, and diagnostic accuracy can save you significant money and prevent safety hazards. Have you ever fallen into this trap? Let me know in the comments.

How do I keep my vehicle running smoothly over time? When it comes to ongoing vehicle care, having the right tools and adopting effective methods are vital. I personally rely on a combination of precise diagnostic tools and specialized maintenance equipment to stay ahead of potential issues. For instance, I use a high-quality OBD-II scanner capable of reading complex sensor codes, especially important given the intricacies of modern hybrid and electric systems. Regularly updating the scanner’s firmware ensures I can accurately interpret emerging error codes, such as those related to brake-by-wire systems, which are becoming more prevalent.

In addition to diagnostic tools, I invest in a sturdy set of calipers and micrometers for measuring brake pad and rotor thicknesses. This practice helps me catch uneven wear early, preventing costly repairs down the line. Using digital tools that store historical measurement data allows me to track wear patterns over time, making scheduling proactive maintenance more straightforward.

Structuring maintenance around manufacturer specifications—like timing oil changes with the precise intervals recommended for hybrid engines—can significantly extend vehicle lifespan. I prefer synthetic oils with high flow filters, which effectively manage contaminants and withstand higher temperatures, a necessity for newer engine designs. Incorporating dedicated vehicle maintenance software helps me log service dates, monitor fluid levels, and get reminders ahead of critical intervals—keeping my vehicle in prime condition without guesswork.

Looking ahead, the trend is moving towards integrating IoT-enabled diagnostic devices that communicate directly with repair shops or even perform remote analyses. These advancements will make maintenance more accurate and less intrusive. In the meantime, I recommend you try calibrating your electronic brake sensors using the specific software tools recommended for your vehicle model, as this small step can prevent squeals, uneven wear, or worse, brake failure.

Don’t forget: regular visual inspections remain invaluable. Checking brake components for corrosion or leaks lays the foundation for reliable service. Combining these inspections with advanced diagnostic tools provides a comprehensive maintenance strategy that saves time and money in the long run. Remember, staying proactive with the right equipment and methods can transform vehicle upkeep from a chore into a mastery—giving you peace of mind and safer driving. Mechanic operating a high-tech car diagnostic scanner in a workshop

Lessons Only Experience Can Teach

One of the most profound lessons I learned is that shortcuts in brake care often lead to costly surprises—trust your instincts and don’t dismiss early warning signs. I once ignored a slight vibration, thinking it was normal wear; it turned out to be a warped rotor that cost triple to fix later. Recognizing the subtle cues—like squeals or pulling—to prompt timely inspection has saved me hundreds of dollars and potential safety hazards.

Another insight is the importance of investing in quality diagnostic tools and understanding their limitations. Relying solely on generic scanner codes can mislead you into unnecessary repairs. Learning to interpret data accurately, and cross-referencing with detailed repair guides, transforms your approach from reactive to preventive care. This knowledge fosters confidence and saves time during repairs.

I’ve discovered that regular visual inspections combine well with advanced sensor calibration. For example, adjusting electronic brake sensor alignment with the proper software prevents false wear alarms, keeping repairs efficient and accurate. It’s about mastering the balance between technology and tactile checks for holistic vehicle health.

Lastly, staying updated with vehicle-specific maintenance standards—such as correct oil viscosities and filter types—can extend your vehicle’s lifespan significantly. Cutting corners here risks engine sludging or degraded performance. Embracing continuous learning about modern automotive nuances turns maintenance from a chore into a craft, rewarding you with peace of mind on every drive.

Tools and Resources That Make a Difference

My essential toolkit starts with a high-quality OBD-II scanner that supports recent hybrid and electric vehicle protocols. I trust the RepairMyCarPro guides, which provide clear diagnostics strategies tailored for 2026 models. Additionally, precision measurement tools like digital micrometers help me monitor brake pad and rotor wear effectively—these tiny details make all the difference.

For in-depth knowledge, books such as Auto Repair Strategies for Modern Vehicles have been transformative. They bridge the gap between basic maintenance and advanced system calibration, especially for electronic braking and hybrid systems. Accessing industry updates through trusted online sources ensures I stay ahead, avoiding pitfalls like using incompatible oils or missed calibration procedures.

Lastly, online courses and tutorials from seasoned experts have elevated my understanding. Platforms offering hands-on guides for software updates or sensor recalibrations empower me to handle complex repairs confidently rather than relying solely on mechanics. In vehicle maintenance, access to reliable, up-to-date resources turns uncertainty into mastery.

Your Next Step in Safe Vehicle Ownership

Taking control of your vehicle’s health with knowledge, the right tools, and a proactive mindset transforms maintenance from dreaded chores into empowering routines. Every small step—like measuring brake pad thickness or calibrating sensors—adds up to safer driving and longer-lasting vehicles.

Are you ready to dive deeper into mastering your vehicle’s diagnostics or brake system? Implement what you’ve learned today and enjoy the peace of mind that comes with genuine hands-on care. Remember, the road to safer driving begins with awareness and action—don’t wait until warning lights flare up to respond.

What’s your biggest challenge when it comes to brake maintenance or vehicle diagnostics? Share your experience below and let’s learn together!

More Details
Feb 22, 2026
Stop 2026 Regenerative Brake Drag With This Sensor Calibration

Have you ever been stranded on the side of the road, frustrated because your regenerative brakes just won’t stop dragging? I remember the moment vividly—my vehicle’s pedal felt heavier, and the stop response was sluggish, making me wonder if I had overlooked some basic maintenance. It wasn’t until I dug deeper that I realized the culprit wasn’t just worn-out pads but a miscalibrated sensor causing the dreaded brake drag. That lightbulb moment changed everything for me.

Why Sensor Calibration in 2026 is a Game-Changer for Your Brakes

In my early days of tackling brake issues, I made the mistake of blindly replacing parts without considering the advanced electronic systems at play in modern vehicles. Today, especially with 2026 models featuring sophisticated regenerative braking systems, sensor calibration is more critical than ever. Proper calibration ensures that your brakes engage smoothly, preventing unnecessary drag that can lead to increased wear, higher repair costs, and compromised safety. In fact, improper calibration can sometimes mask underlying issues, making diagnostics more complicated. For reliable insights, I recommend exploring effective vehicle diagnostics strategies—trust me, it saves a lot of headaches.

Could This Be the Root of Your Brake Problems? Think Again

Many car owners and even technicians jump to replacing calipers or rotors without realizing that a sensor misalignment or calibration error might be causing the symptoms. I once replaced a caliper only to find the problem persisted because I overlooked the sensor’s role. Learning from early mistakes, I now always verify sensor calibration before diving into mechanical repairs. For a step-by-step guide, check out this detailed method on fixing brake squeal issues related to sensor calibration.

Sensor calibration is a subtle yet influential factor in the overall health of your braking system. By ensuring sensors are correctly calibrated, you can avoid the costly and dangerous consequences of brake drag. This knowledge isn’t just theoretical; it’s backed by industry standards and real-world testing, emphasizing that proactive calibration maintenance is vital. As I continue to fine-tune my approach, I’ve come to realize that mastering sensor calibration isn’t just a repair trick—it’s a safeguard for every driving experience. Ready to get your brakes working flawlessly? Let’s dive into how you can master this crucial aspect of your vehicle’s braking system and keep you safe on the road.

Check Your Sensor Connections Before Calibration

Start by inspecting all sensor wiring and connectors for corrosion, damage, or loose pins. Think of it like checking a garden hose for kinks before watering; a simple fix here can avoid unnecessary calibration repeats. I once found a frayed wire during a routine inspection, and fixing it immediately restored accurate sensor readings. To verify connection integrity, disconnect and inspect the terminals, then clean with electrical contact cleaner before reconnecting securely.

Use the Vehicle’s Diagnostic System to Access Calibration Modes

Connect Your Scanner Correctly

Ensure your scanner is compatible with the vehicle’s system—refer to the vehicle diagnostic guidelines. For my 2026 model, I used an OBD-II scanner with the latest firmware. Connecting properly is like tuning a radio; misalignment results in static or no signal. Once connected, navigate to the calibration menu, which is often under advanced or service functions.

Initiate the Calibration Procedure

Follow on-screen prompts to start calibration—this may involve pressing brake pedals, turning on ignition, or parking in a specific orientation. For example, I had to press the brake pedal and hold for a few seconds while the system calibrated the sensors. During this process, refrain from moving or turning off the vehicle; think of it like calibrating a camera lens—stability is key.

Perform Test Drives to Confirm Calibration Accuracy

Drive the vehicle through various conditions—parking lot, highway, and stop-and-go traffic—to verify sensor response. I noticed slight drag initially after calibration, which I corrected by repeating the process. Pay attention to dashboard alerts or unusual brake behavior, and use your diagnostic tool to recheck sensor status after each test.

Address Common Calibration Obstacles

Beware of Software Glitches

If calibration fails multiple times, consider software issues. Reinstall system updates or reset the module. I had a frustrating experience where repeated attempts failed, but applying a software patch from the manufacturer fixed the glitch. Regularly update your vehicle’s software, and consult vehicle diagnostics tips to stay ahead.

Mind the Environmental Factors

Extreme temperatures or moisture can skew calibration. Warm up the vehicle in cool weather or wait for humidity to reduce before starting calibration. During winter, I preheated my garage, which made calibration smoother and more accurate. Consider environmental conditions as you would when tuning a musical instrument—timing and conditions matter.

Verify and Document Calibration Success

After completing calibration, test the brakes in real-world scenarios and monitor sensor alerts. Keep a record of calibration dates and settings for future diagnostics. This is akin to keeping maintenance logs; proactive documentation simplifies troubleshooting down the line. If issues persist, revisit the connection checks or consult more comprehensive diagnostic resources.

By following these concrete steps, you can ensure your regenerative brake sensors are correctly calibrated—preventing unwanted drag and extending component lifespan. Remember, a little diligence now saves costly repairs later, and mastering calibration is an essential skill with the increasing electronic complexity of 2026 vehicles.

Many car owners and even some mechanics operate under a major misconception: that basic fixes like oil changes or brake replacements are straightforward and always effective if done correctly. However, the reality is far more nuanced. One common myth is that resetting the check engine light or replacing worn-out parts guarantees the vehicle is back to optimal performance. In my experience, this approach often ignores underlying electronic or calibration issues that can cause recurrent problems. For example, a new brake sensor might read false wear due to calibration errors, leading to premature replacements or unexpected drag. This is where a deep understanding of vehicle diagnostics becomes essential—sometimes, a simple scan can reveal hidden error codes or ghost readings, provided you’re equipped to interpret them properly. Relying solely on generic troubleshooting can trap you into costly cycles of part swapping without addressing root causes, especially in complex 2026 models with advanced sensor networks.

Are You Overlooking Sensor Calibration in Your Repairs?

Many technicians and DIYers assume that physical repairs resolve issues by default, but electronic calibration can be the real culprit. For instance, improperly calibrated brake sensors or regenerative system components might trigger false warnings, which leads to unnecessary repairs or safety risks. Studies show that calibration errors are responsible for up to 30% of recurring vehicle problems post-repair, yet they are often neglected. This oversight can cause issues like brake drag, sensor misreports, or even system failures, particularly in newer hybrid or electric vehicles. To avoid this trap, harness vehicle-specific diagnostic tools and follow manufacturer calibration procedures—something I always recommend consulting via trusted diagnostic best practices. Mastering calibration isn’t just for professional shops; even DIY enthusiasts can learn to interpret advanced error logs and calibration data, ultimately saving time and money.

Furthermore, many assume that all diagnostic scanners are created equal. On the contrary, generic tools may miss nuanced error codes, often called ghost codes, which can hide underlying issues—especially in 2026 vehicles packed with AI sensors and complex CAN bus communications. For instance, certain errors related to lidar, camera calibration, or AI-driven systems might be invisible to entry-level scanners, leading to incomplete diagnostics. Recognizing these limitations is crucial; investing in high-quality diagnostic tools and staying updated with the latest firmware ensures you’re capturing all critical data points. Regularly reviewing manufacturer updates or external resources can help you avoid diagnostic blind spots, ultimately making your repairs more reliable and lasting. If you’re serious about getting to the root of issues, I suggest checking out comprehensive diagnostic guides—like the ones offered in the expert guides.

In essence, the real nuance in auto repair and diagnostics lies in understanding that technology often masks problems that appear simple on the surface. Whether it’s sensor calibration, ghost error codes, or environmental factors affecting electronic systems, mastering these subtleties grants you a significant advantage. It’s not just about fixing a part; it’s about interpreting signals correctly and ensuring comprehensive repairs. Have you ever fallen into this trap? Let me know in the comments, and I can help you navigate these complexities more effectively.Maintaining your vehicle’s performance over the long term requires more than just basic knowledge; it demands the right tools and a disciplined approach. One tool I personally rely on is the autel MaxiSys MS908, a comprehensive diagnostic scanner that goes beyond generic OBD-II tools. Its ability to access advanced modules, including hybrid systems and regenerative braking components, has saved me countless trips to the shop. I use it not only to retrieve error codes but also to perform specialized calibration procedures, like sensor alignment or software updates, which are critical in modern vehicles. For example, when dealing with complex brake sensor calibration in 2026 models, this scanner provides guided procedures that ensure accurate readings—something standard tools often lack. To keep your vehicle running smoothly, I recommend investing in quality diagnostic equipment tailored for 2026’s advanced electronic systems. These tools are future-proof, with regular firmware updates, and they help diagnose issues before they escalate into costly repairs. Combine this with software like vehicle diagnostics best practices, and you’ll be well-equipped to handle common problems such as false sensor alerts or ghost error codes. Predicting the future of auto maintenance, I believe diagnostic technology will become increasingly integrated with AI, offering faster, more accurate troubleshooting without requiring extensive manual interpretation. Next time you’re faced with a mysterious dashboard warning or brake drag issue, try performing a deep scan for ghost codes. It might just reveal hidden faults that simpler scans overlook, saving you time and money.

Throughout this journey into advanced vehicle diagnostics and brake system maintenance, I’ve realized that the most profound insights often come from our own experiences and failures. One lesson that stands out is the importance of approaching each repair with curiosity rather than assumptions. For example, I once replaced a brake sensor believing it was faulty, only to discover that poor calibration was causing the issue. This taught me to always verify calibration first, saving time and resources.

The Hidden Wisdom That Changed My Approach to Auto Repair

  • Don’t Rush Repairs: Jumping straight into part replacement can mask underlying electronic issues. Take a moment to analyze sensor signals and calibration status.
  • Stay Updated with Manufacturer Protocols: Vehicle systems evolve quickly. Following the latest calibration procedures ensures your fixes are effective and lasting.
  • Leverage Advanced Diagnostics: Tools like the vehicle diagnostics guides provide critical insights that generic scanners can miss, especially with complex 2026 models.
  • Document Every Step: Keeping track of calibration settings and test drives helps identify patterns and reduces repeat visits.
  • Embrace Continuous Learning: The automotive world is shifting towards electronic mastery. Sharing and discussing real-world challenges accelerates collective knowledge.

My Toolkit for Navigating Modern Brakes

  1. High-Quality Diagnostic Scanners: Devices like the Autel MaxiSys MS908 give me confidence in testing and calibrating sensors accurately.
  2. Manufacturer Software: Always utilize official updates and calibration modules—they’re game-changers in ensuring system integrity.
  3. Environmental Controls: Performing calibrations in optimal conditions minimizes errors caused by temperature or humidity fluctuations.
  4. Training Resources: Regularly revisiting guides and advanced tutorials keeps my skills sharp and aligned with the latest standards.

Keep Moving Forward With Confidence

Mastering sensor calibration is more than a technical skill—it’s a mindset shift towards proactive vehicle management. By applying these lessons, you’re not just fixing problems; you’re elevating your automotive expertise and safety standards. Remember, every challenge is an opportunity to learn something new about your vehicle and yourself.

Are you ready to dive deeper into the intricacies of vehicle diagnostics? What obstacle have you encountered that changed your perspective on auto repair? Share your story below, and let’s grow together on this journey toward smarter, safer driving.

More Details