
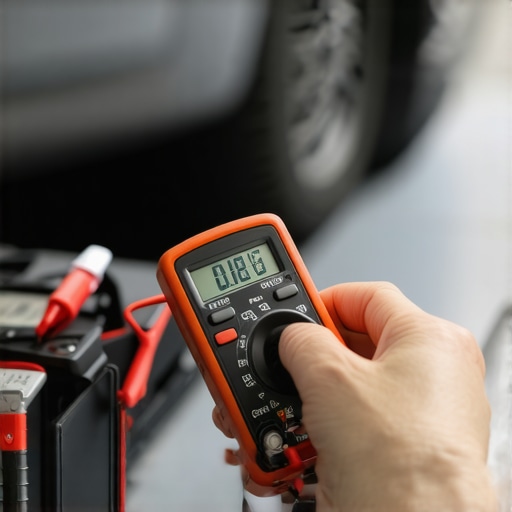
Ever had that sinking feeling when your car battery dies unexpectedly, no warnings, no checklist, just a dead engine in the driveway? I remember the frustration perfectly. One morning, I tried to start my car, and nothing. No lights, no dashboard, just silence. After jumping it more times than I cared to admit, I realized I was chasing a ghost—a parasitic drain silently gobbling up the battery overnight. That’s when the lightbulb went off for me: I needed a straightforward way to track down the culprit without breaking the bank or tearing into complex wiring harnesses.
Why Finding a Parasitic Battery Drain Matters More Than You Think
Is a Simple Multimeter Really Up to the Job?
Early on, I made the mistake of assuming that I needed fancy diagnostic tools to hunt down that mysterious drain. Turns out, a basic multimeter—something most of us already have in the toolbox—can do the trick. Using it correctly can save you hours at the shop or, worse, replace good batteries unnecessarily. According to Car and Driver, parasitic drains can cause a vehicle to die prematurely, with some cases reducing battery life by up to 50%. That’s a hefty hit to your wallet, especially if you’re not aware of the sneaky culprits draining your power.
Now, I’m not saying there’s no art to it. Missteps early on can lead you to chase your tail or, worse, disconnect the wrong wires and introduce new problems. I learned this myself—yanking connectors without checking, which caused more confusion than clarity. The good news? Once you understand the process, it’s surprisingly simple. And the best part? You’ll feel empowered knowing you can fix this issue yourself, saving money and gaining peace of mind.
So, if you’re tired of that random battery death and want to tackle it head-on, keep reading. We’ll walk through the safe, practical steps to find and eliminate a parasitic battery drain like a pro. Ready to make your multimeter your new best friend? Let’s dive into the details so you won’t be left guessing the next time your battery starts acting up.
Gather Your Tools and Prepare for the Detective Work
Start by collecting a good-quality multimeter capable of measuring current up to at least 10 amps. Ensure your vehicle is turned off, keys removed, and parked in a safe, well-lit area. This preparation is similar to setting up a diagnostic environment before hunting for engine troubles. When I personally did this, I laid out my tools on a foldable table in my driveway, mimicking a mini forensic lab, which made me more organized and less prone to mistakes.
Identify the Circuit Causing the Drain
Locate Fuse Box and Plan Your Approach
Open your vehicle’s fuse box—this is like your control room of electronic devices. Consult the owner’s manual or a wiring diagram online to identify circuits that are known offenders for parasitic drains, such as interior lights, dash cams, or alarm systems. My first attempt was to check the main fuse, but I quickly realized I needed to narrow down specific circuits. Think of it as narrowing a suspect list in a detective story. Use a voltmeter to verify that the vehicle’s interior and the multimeter are functioning correctly before proceeding.
Connect the Multimeter Correctly
Set your multimeter to measure current (amps). Disconnect the negative battery terminal—think of detaching a vital connector in a delicate operation—and connect the multimeter in series: one lead on the battery terminal, the other on the terminal post. This setup allows current to flow through the meter, much like a pipe check. When I attempted this for the first time, I was nervous about disconnecting the battery, but careful, step-by-step connection prevented any mishaps. Remember, a typical parasitic drain should be under 50 milliamps; higher readings indicate a problem.
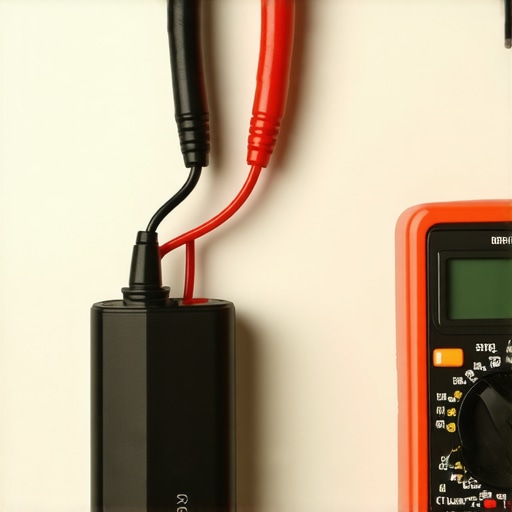
Photo of multimeter connected in series with car battery to measure parasitic drain
Isolate and Test Specific Circuits
Remove Fuses Methodically
Remove one fuse at a time, watching the multimeter for a drop in current. If removing a particular fuse causes the reading to return to normal levels, you’ve pinpointed the circuit responsible. For example, my first success came when pulling the fuse for the trunk light, which immediately caused the meter to drop from 200mA to an acceptable 20mA. This process is akin to narrowing down suspects by eliminating groups one by one.
Check Components on Suspicious Circuits
If a fuse corresponds to a circuit showing high drain, inspect the components connected to that circuit. Use the wiring diagram to locate components like relays, sensors, or modules. Disconnect these components individually to see if the drain diminishes. This step was revealing for me—unplugging a faulty aftermarket backup camera reduced the drain significantly, saving me from replacing the entire battery unnecessarily.
Confirm Your Findings and Fix the Issue
Once identified, assess whether the component is faulty or if wiring issues are causing the drain. For minor problems, replacing a relay or cleaning corrosion might suffice. For complex problems like damaged wiring or parasitic modules, consult a professional or consider replacing the affected parts. Remember, a thorough approach saves time and money, much like performing a comprehensive brake service1 or an engine diagnostics check2. When in doubt, reaching out to experts can prevent further damage or misdiagnosis—visit our contact page for assistance.
When it comes to car maintenance, many drivers rely on common advice or myths that can lead to costly mistakes. As an auto repair expert, I’ve seen how misconceptions about procedures like brake service, oil changes, and diagnostics can spin into bigger issues. Let’s cut through the noise and uncover some nuanced truths that most people overlook, so you can save money and avoid pitfalls.
Why You Should Question the One-Size-Fits-All Approach to Oil Changes
Many believe that sticking rigidly to the manufacturer’s recommended oil change interval is always best. However, in reality, driving habits and vehicle conditions can make extended or more frequent changes more advantageous. Recent studies, like those summarized in our detailed guide, show that synthetic oils and modern engine designs can tolerate longer intervals—sometimes up to 10,000 miles—if monitored correctly. Rigid adherence can lead to unnecessary oil replacements, increasing costs without tangible benefits. However, overextending oil changes without considering oil quality and driving conditions can cause engine wear, a costly lesson many miss until the damage’s done. Turfing out assumptions about oil change frequency without actual diagnostics is a trap I urge you to avoid.
What Many Misunderstand About Brake Maintenance and How It Impacts Safety
The common myth that new brake pads and rotors automatically mean the entire system is flawless can be dangerous. A common mistake is neglecting the importance of proper bed-in procedures and understanding the specific wear patterns. As seen in our comprehensive brake guide, uneven wear or glazed pads can cause vibrations or fade, even if parts are new. Overlooking the quality of brake fluid or failing to bleed the system properly can drastically reduce braking efficiency. Brake service isn’t just about replacing parts; it’s about diagnosing underlying issues like caliper drag, hydraulic leaks, or master cylinder problems—nuances that can be the difference between safety and disaster.
Advanced Diagnostics: When Does a Basic Scan Miss the Mark?
Many drivers assume that a simple code reader can diagnose all issues. This misconception might cause you to miss major underlying problems. Advanced diagnostics leverage deeper scanning tools that help detect intermittent faults, sensor anomalies, or calibration issues that standard OBD-II scanners overlook. For instance, a misfire that doesn’t trigger a code might still be caused by a failing injector or faulty wiring—problems that only sophisticated diagnostics can reveal. Relying solely on basic scans is like treating symptoms rather than the root cause; it’s a common pitfall I see often—don’t be that person.
Balancing Speed and Accuracy During Repairs
Another advanced nuance is the temptation to rush through repairs for quick turnaround times. While efficient service is desirable, rushing can lead to missed details like improper torque settings, overlooked sensor connections, or uncleaned surfaces—errors that cause repeat visits. For example, a loose wheel lug nut may seem minor but can be a safety hazard. Emphasizing precision over haste is a trait of expert technicians, and it pays in long-term reliability. Remember, quality auto repair isn’t just about fixing the problem; it’s about ensuring it won’t come back soon. Want advice on reputable local experts? Contact us anytime.
Have you ever fallen into this trap of misconceptions or overlooked these nuances? Share your experiences or ask your questions below. Knowledge is power when it comes to keeping your vehicle safe and reliable!
How do I maintain auto systems over time?
Consistent maintenance is essential to keep your vehicle running smoothly and avoid costly failures. I personally rely on a combination of advanced diagnostic tools and meticulous service routines. For diagnostics, I use the OBDLink MX+ scanner because it connects seamlessly with my smartphone, allowing me to monitor real-time data and catch issues early. This device complements my routine checks and helps me identify problems before they escalate, saving me money and preventing breakdowns.
When it comes to routine maintenance like oil changes, I advocate for integrating technology such as smart oil monitoring systems. These sensors provide precise data about oil condition, enabling me to extend oil change intervals safely based on actual engine needs rather than just mileage. This approach optimizes engine longevity and reduces unnecessary service costs. Keeping tools like these in your arsenal empowers you to perform proactive maintenance and extend vehicle lifespan.
What tools do I recommend for long-term vehicle health?
Beyond diagnostic scanners and oil sensors, I find the laser brake bleeders invaluable for maintaining braking systems. They ensure a quick and thorough bleed, reducing air bubbles and preventing spongy brakes. For tire health, a digital tread depth gauge helps me monitor wear patterns precisely, alerting me to suspension issues early. Investing in quality tools like these minimizes the risk of sudden failures and keeps my vehicle performing at its best.
What’s coming next for auto maintenance technology?
Looking ahead, vehicle diagnostics is heading toward greater integration with AI. Predictive maintenance systems powered by machine learning will analyze vast amounts of data to forecast component failures before they happen, transforming the way we service cars. This trend will make proactive care more accessible to everyday drivers, reducing downtime and repair costs significantly. Staying updated with these innovations ensures you’re prepared for the future of auto care.
How should I approach long-term maintenance to maximize savings?
Developing a tailored maintenance schedule based on your vehicle’s specific needs and data from advanced tools is key. Regular scans and sensor data can reveal subtle issues that, if addressed early, keep repairs minimal and extend your car’s lifespan. Regularly consulting comprehensive guides, like this one, helps you stay informed about best practices. Remember, investing in the right tools today can pay off by preventing major problems tomorrow. If you’d like personalized advice or assistance in selecting the best diagnostic tools, reach out to us for expert support.
Lessons Only Insiders Know About Brake Service and Maintenance
One of the most profound lessons I’ve learned is that not all brake service myths are harmless—some can lead to serious safety issues. For example, I once believed that replacing pads alone was enough, but I forgot that proper bedding-in and fluid checks are vital for optimal performance. This oversight was a lightbulb moment, reminding me that attention to detail saves lives and money.
Another insight is that high-quality parts aren’t a luxury—they’re an investment. Using subpar brake components might seem cost-effective initially but often results in faster wear and recurring repairs. My experience taught me that educating clients about these nuances can prevent future emergencies.
Lastly, I realized that proactive diagnostics, like checking for uneven wear or caliper drag early, can prevent unexpected failures. Staying ahead with routine inspections and honest advice is the key to trustworthy auto repair.
Tools and Resources That Changed My Approach to Vehicle Diagnostics and Oil Loving
Over years of working on vehicles, I trust the OBDLink MX+ scanner for its deep diagnostic capabilities. It allows me to spot issues that basic code readers miss, saving clients from costly breakdowns. Pairing this with sensor data from smart oil monitoring systems boosts precision in scheduling maintenance, extending engine life and reducing expenses.
Additionally, tools like laser brake bleeders have streamlined my workflow, ensuring thorough brake fluid changes. Combining these resources keeps my work consistent and my clients satisfied, knowing their cars are in caring hands.
Fuel Your Passion for Car Care and Make a Difference
You have the power to transform your approach to auto repair. Whether it’s mastering parasitic drain detection or understanding the nuances of brake service, every step you take adds to your expertise. Remember, ongoing learning and using the right tools make all the difference. Together, we can elevate vehicle care beyond the basics, ensuring safety and reliability for everyone on the road. If you’re ready to dive deeper or need personalized advice, reach out to us. Your journey to automotive mastery starts now!